
1. Introduction
This manual provides essential information for the proper installation, operation, and maintenance of your Cutex Needle Plate, Part Number B2402-771-000. This needle plate is specifically designed for compatibility with various Juki Industrial Button Holer Sewing Machine models. Please read these instructions carefully before attempting any installation or maintenance to ensure safe and correct usage.
Compatible Juki Models: LBH-770 Series, LBH-771, LBH-772, LBH-773, LBH-780 Series, LBH-781, LBH-782, LBH-783, LBH-784.
2. Setup and Installation
Follow these steps to correctly install the Cutex Needle Plate on your Juki industrial button holer machine.
Safety Precautions:
- Always turn off and unplug the sewing machine from the power source before performing any installation, maintenance, or adjustments.
- Use appropriate tools to avoid damage to the machine or injury.
- Keep small parts away from children.
Installation Steps:
- Prepare the Machine: Ensure the sewing machine is powered off and unplugged. Raise the presser foot and remove the needle.
- Remove Existing Needle Plate: Locate the screws holding the current needle plate in place. Typically, there are two screws. Use a suitable screwdriver to carefully loosen and remove these screws. Lift the old needle plate away from the machine bed.
- Clean the Area: Use a small brush or compressed air to remove any lint, dust, or debris from the feed dog area and the needle plate mounting surface. A clean surface ensures proper seating of the new plate.
- Position the New Needle Plate: Carefully place the Cutex Needle Plate (Part #B2402-771-000) onto the machine bed, aligning the screw holes and ensuring the feed dogs pass through the plate's slots correctly.
- Secure the Needle Plate: Insert the screws into their respective holes and gently tighten them. Do not overtighten, as this can strip the threads or crack the plate. Ensure the plate is flush with the machine bed and does not wobble.
- Verify Alignment: Manually turn the handwheel to lower the needle. Ensure the needle passes cleanly through the needle hole in the plate without striking any edges. Adjust the plate slightly if necessary before final tightening.
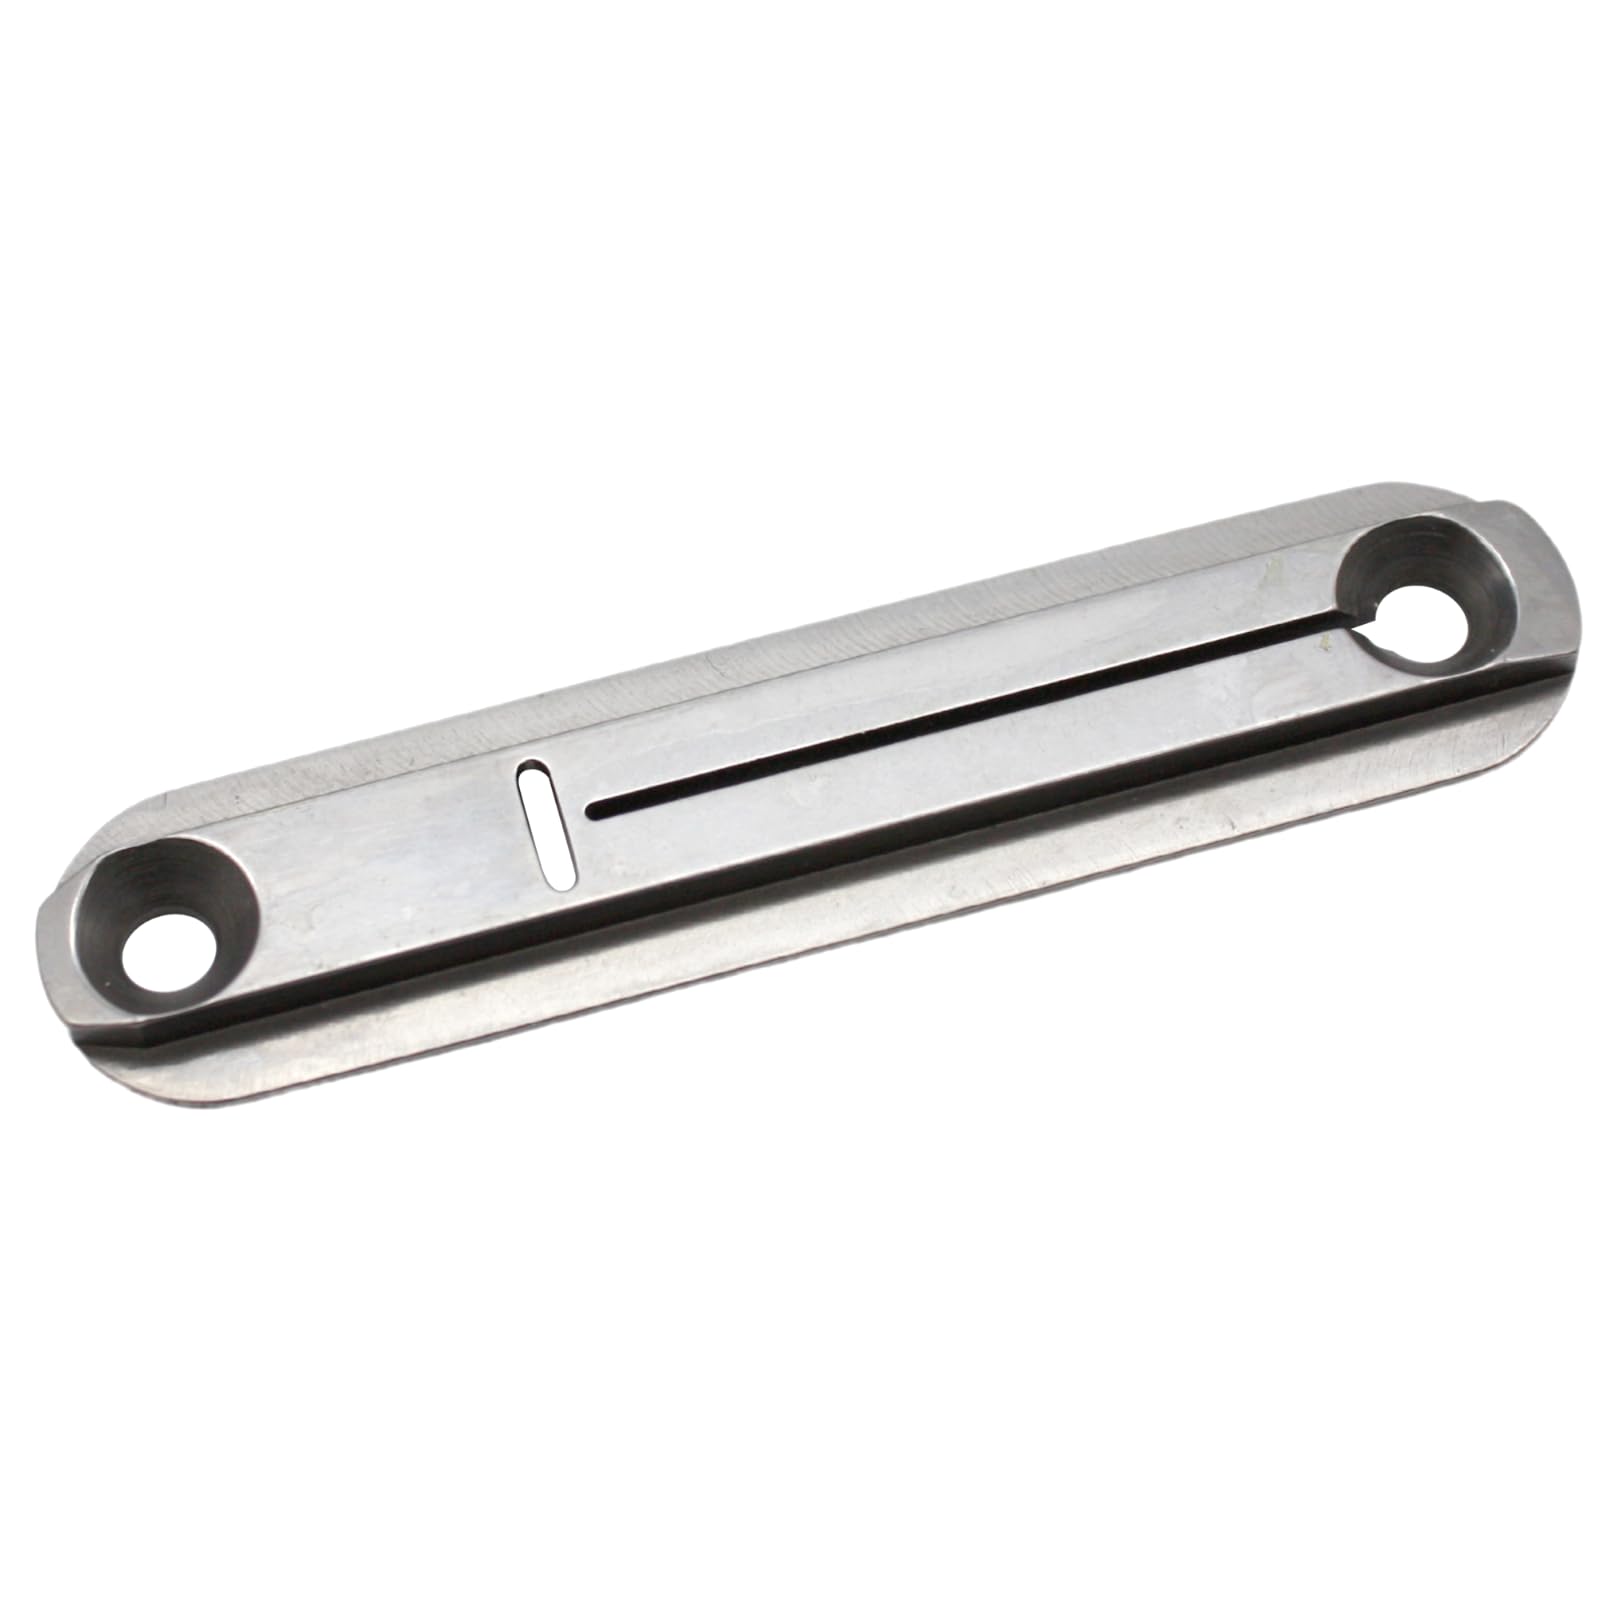
Figure 1: Overview of the Cutex Needle Plate B2402-771-000. This image shows the top view of the needle plate, highlighting its shape, screw holes, and the needle opening, which are crucial for proper alignment and function on Juki industrial button holer machines.
3. Operating Verification
After installation, it is important to verify that the needle plate is functioning correctly before resuming normal sewing operations.
- Needle Clearance: With the machine still unplugged, manually turn the handwheel to cycle the needle through its full range of motion. Confirm that the needle passes through the needle hole without touching the plate.
- Feed Dog Movement: Observe the feed dogs as you turn the handwheel. They should move freely through the slots in the needle plate without obstruction.
- Test Stitching: Plug in the machine and perform a few test stitches on a scrap piece of fabric. Check for smooth fabric feeding, consistent stitch formation, and absence of skipped stitches or needle breakage.
4. Maintenance
Regular maintenance of your needle plate will ensure optimal performance and extend its lifespan.
- Cleaning: Periodically remove the needle plate (following the installation steps in reverse) and clean any accumulated lint, thread, or debris from underneath and around the feed dogs. Use a soft brush or vacuum cleaner.
- Inspection: Regularly inspect the needle plate for signs of wear, such as burrs around the needle hole, scratches, or deformation. A worn needle plate can cause skipped stitches, thread breakage, or damage to fabric. Replace the plate if significant wear is observed.
- Storage: If removing the needle plate for an extended period, store it in a clean, dry place to prevent corrosion or damage.
5. Troubleshooting
If you encounter issues after installing the needle plate, consider the following common problems and solutions:
| Problem | Possible Cause | Solution |
|---|---|---|
| Needle breakage | Needle striking the needle plate; bent needle; incorrect needle size. | Re-align needle plate; replace bent needle; ensure correct needle type for machine and fabric. |
| Skipped stitches | Worn needle plate; incorrect needle insertion; burrs around needle hole. | Inspect and replace needle plate if worn; re-insert needle correctly; smooth out burrs if minor. |
| Fabric not feeding smoothly | Lint or debris under needle plate; feed dogs obstructed; needle plate not seated correctly. | Clean under needle plate; ensure feed dogs move freely; re-install needle plate. |
| Unusual noise during operation | Loose needle plate screws; foreign object under plate. | Tighten screws (do not overtighten); remove needle plate and inspect for debris. |
6. Specifications
- Part Number: B2402-771-000 (B2402771000)
- Item Model Number: CTX-B2402-771-000
- Brand: Cutex
- Compatibility: Juki Industrial Button Holer Sewing Machines LBH-770 Series, LBH-771, LBH-772, LBH-773, LBH-780 Series, LBH-781, LBH-782, LBH-783, LBH-784
- Material: Industrial-grade metal alloy
7. Warranty and Support
For warranty information or technical support regarding your Cutex Needle Plate, please contact Cutex Sewing Supplies directly through their official website or authorized distributors. Keep your purchase receipt as proof of purchase.
Contact Information: Please refer to the packaging or the official Cutex Sewing Supplies website for the most current contact details.