
1. Product Overview
The Jectse Digital Binoculars with Camera combine the functionality of binoculars with a digital camera, allowing users to observe distant objects and capture high-resolution photos and videos. This device features an 8X digital zoom, a 2.4-inch color display, and supports up to 48MP images and 1080P videos.

Image 1.1: Front view of the Jectse Digital Binoculars with Camera, showcasing its compact design and integrated screen.
2. Package Contents
Please verify that all items are present in the package:
- 1 x Jectse Digital Binoculars Camera
- 1 x USB Cable (Type C)
- 1 x Instruction Manual
3. Setup
3.1. Battery Installation
- Locate the battery compartment on the device.
- Open the battery compartment cover.
- Insert four (4) AA batteries (not included), ensuring correct polarity (+/-).
- Close the battery compartment cover securely.
3.2. Memory Card Installation
A memory card is required to save photos and videos.
- Locate the memory card slot, typically near the USB-C port.
- Insert a small memory card or mini storage card (up to 32GB, not included) into the slot until it clicks into place.
- To remove, gently push the card in until it springs out.

Image 3.1: Rear view of the binoculars, highlighting the Type-C interface and the 1/4 inch screw interface for tripod mounting.
3.3. Attaching to a Tripod (Optional)
The binoculars feature a 1/4 inch screw interface for stable positioning on desktop stands, tripods, and other filming equipment.
- Locate the 1/4 inch screw interface on the bottom of the device.
- Align the binoculars with the tripod's mounting screw.
- Rotate the binoculars clockwise until securely fastened to the tripod.

Image 3.2: The digital binoculars mounted on a tripod, demonstrating its compatibility with universal mounts for stable observation and shooting.
4. Operating Instructions
4.1. Power On/Off
- To power on: Press and hold the power button (usually marked with a power symbol) until the screen illuminates.
- To power off: Press and hold the power button again until the screen turns off.
4.2. Viewing and Zoom
- Look through the eyepiece or view the image on the 2.4-inch color display screen.
- Use the zoom buttons (often marked with '+' and '-') to adjust the 8X digital zoom level for detailed observations.

Image 4.1: A child using the Jectse Digital Binoculars with Camera for outdoor activities like bird watching, demonstrating its user-friendly design.
4.3. Taking Photos
- Ensure a memory card is inserted.
- Navigate to photo mode using the mode button (if available).
- Frame your subject on the screen.
- Press the shutter button (usually a dedicated button or the 'OK' button) to capture a 48MP image.
4.4. Recording Videos
- Ensure a memory card is inserted.
- Navigate to video mode using the mode button.
- Press the record button (often marked with a red dot or video camera icon) to start recording 1080P video.
- Press the record button again to stop recording.
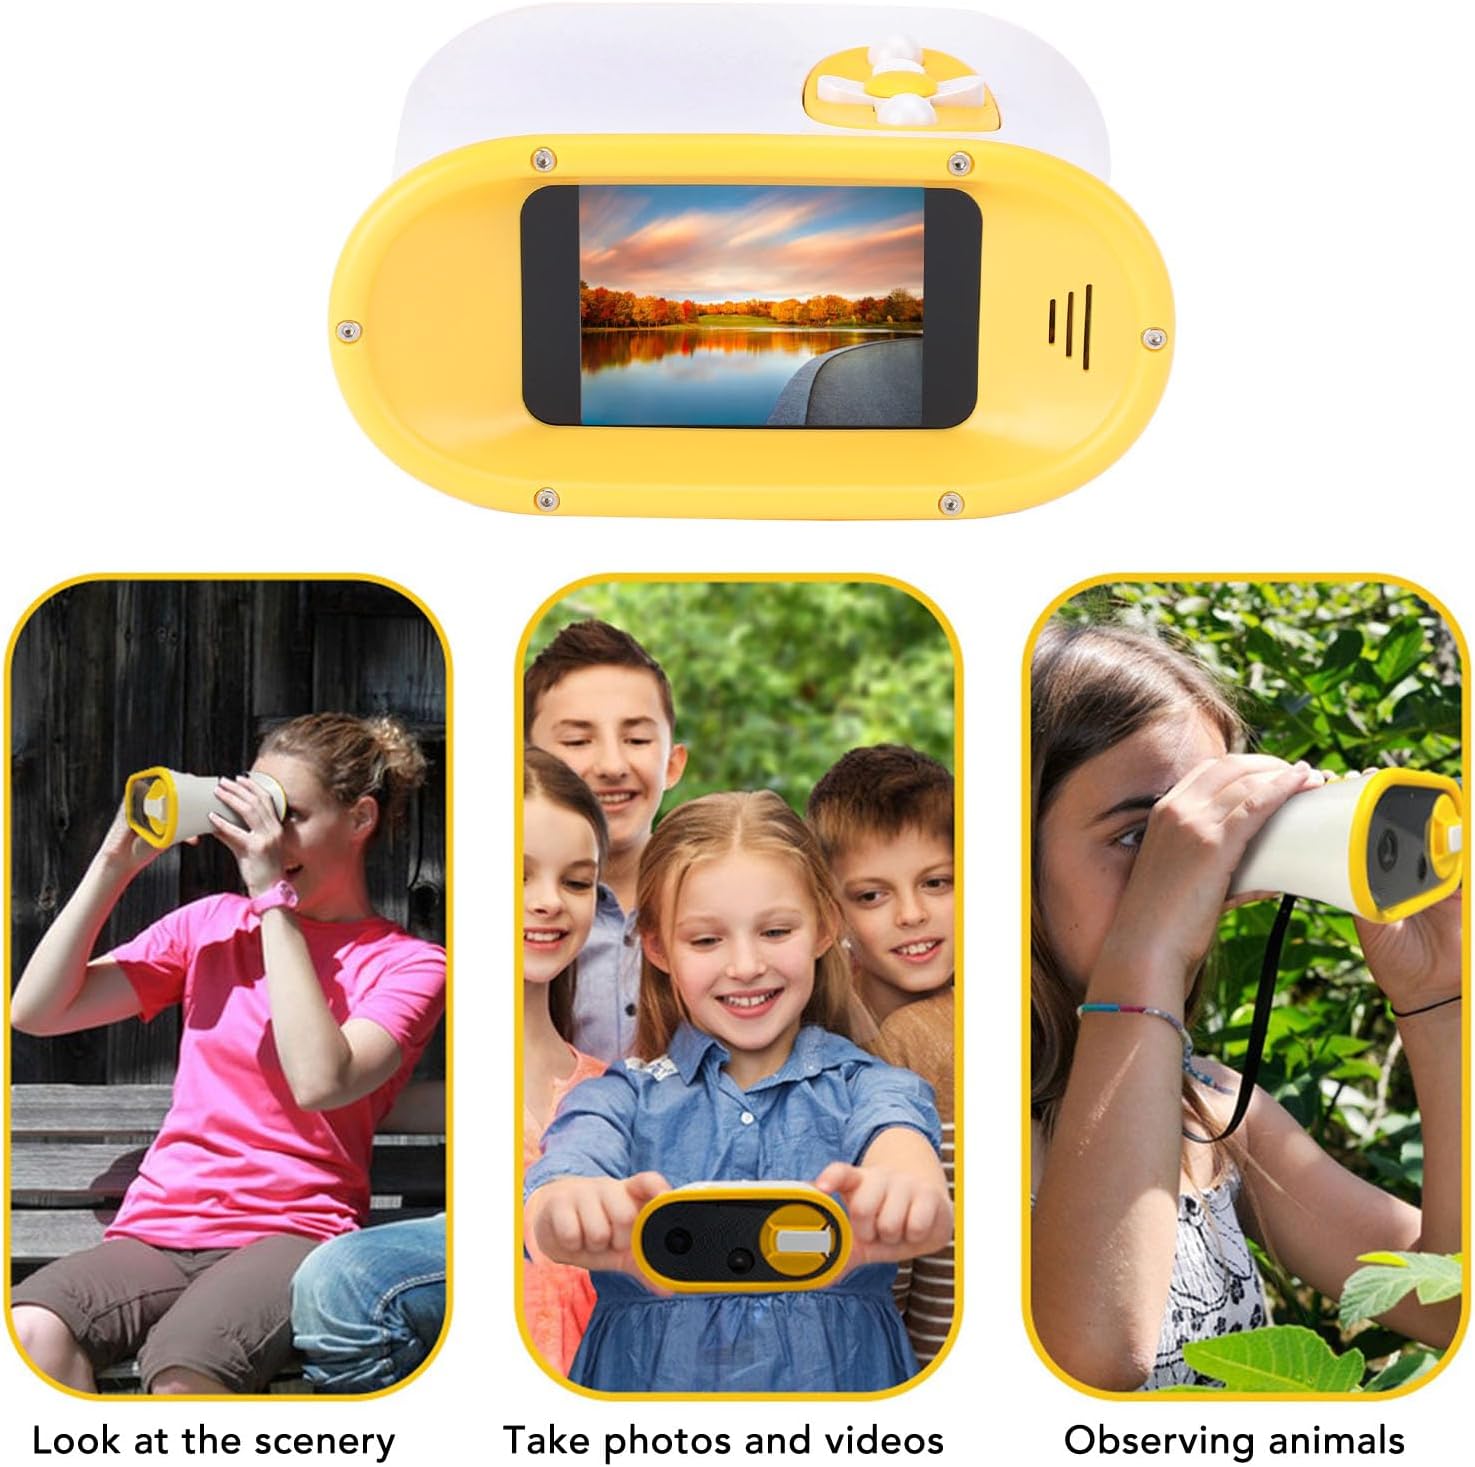
Image 4.2: Illustrates the versatile applications of the binoculars, including observing scenery, capturing photos and videos, and watching animals.
4.5. Date and Time Stamping
The device allows for adding date and time stamps to photos and videos.
- Access the settings menu (refer to the on-screen interface for navigation).
- Locate the 'Date/Time' or 'Stamp' option.
- Enable or disable the date and time stamp feature as desired.

Image 4.3: Top view of the binoculars, displaying the intuitive control buttons for easy operation.
5. Maintenance
5.1. Cleaning
- Use a soft, dry cloth to clean the exterior of the binoculars.
- For the lens and screen, use a specialized lens cleaning cloth and solution to avoid scratches.
- Do not use abrasive cleaners or solvents.
5.2. Storage
- Store the device in a cool, dry place away from direct sunlight and extreme temperatures.
- Remove batteries if the device will not be used for an extended period to prevent leakage.
6. Troubleshooting
6.1. Device Not Powering On
- Solution: Check if the AA batteries are correctly inserted and have sufficient charge. Replace with new batteries if necessary.
6.2. Cannot Take Photos or Record Videos
- Solution: Ensure a compatible memory card (up to 32GB) is inserted and has available storage space. Format the memory card if it's new or causing issues (this will erase all data).
6.3. Poor Image/Video Quality
- Solution: Ensure the lens is clean. Adjust the focus if available. Ensure adequate lighting conditions.
7. Specifications
| Item | Specification |
| Model Number | Jectseyhd7rfvm1c-11 |
| Display | 2.4 Inch Color Screen |
| Digital Zoom | 8X |
| Maximum Image Resolution | 48 Megapixels |
| Image Format | JPG |
| Maximum Video Resolution | 1080P |
| Video Format | AVI |
| Battery Type | 4x AA Battery (Not Included) |
| Storage Card Support | Small Memory Card or Mini Storage Card, up to 32GB (Not Included) |
| Interface | Type C |
| Mounting Option | 1/4 inch screw interface (for tripods) |
| Dimensions | 5.51 x 4.72 x 3.15 inches |
| Item Weight | 8.8 ounces |
| Manufacturer | Jectse |
8. Warranty and Support
For warranty information, technical support, or service inquiries, please refer to the official Jectse website or contact your retailer. Keep your purchase receipt for warranty claims.
You can visit the Jectse store for more information: Jectse Store