
1. Introduction
Thank you for choosing the Electrolux LX15003 Portable Handheld Garment Steamer. This device is designed to efficiently remove wrinkles and refresh various fabrics, providing a convenient alternative to traditional ironing. Please read this manual thoroughly before use to ensure safe and optimal performance.
2. Important Safety Instructions
- Always unplug the steamer from the electrical outlet immediately after use and before cleaning.
- Do not operate the steamer with a damaged cord or plug, or if the appliance malfunctions or has been dropped or damaged.
- To reduce the risk of electric shock, do not immerse the steamer in water or other liquids.
- Do not direct steam at people, animals, or electrical appliances. Steam is hot and can cause burns.
- Use only distilled water in the water tank to prevent mineral buildup and extend the life of the appliance.
- Keep the steamer out of reach of children.
- Ensure the water tank is securely attached before operating.
3. Product Overview
The Electrolux LX15003 is a compact and powerful handheld garment steamer designed for ease of use and effective wrinkle removal. It features a ceramic soleplate, a removable water tank, and comes with essential accessories.
Components:
- Handheld Steamer Unit with Ceramic Soleplate
- 10 oz Removable Water Tank
- Fabric Brush Attachment
- Lint Remover Attachment
- Extra Long 12 ft. Power Cord

Figure 3.1: Electrolux LX15003 Portable Handheld Steamer with key features highlighted.
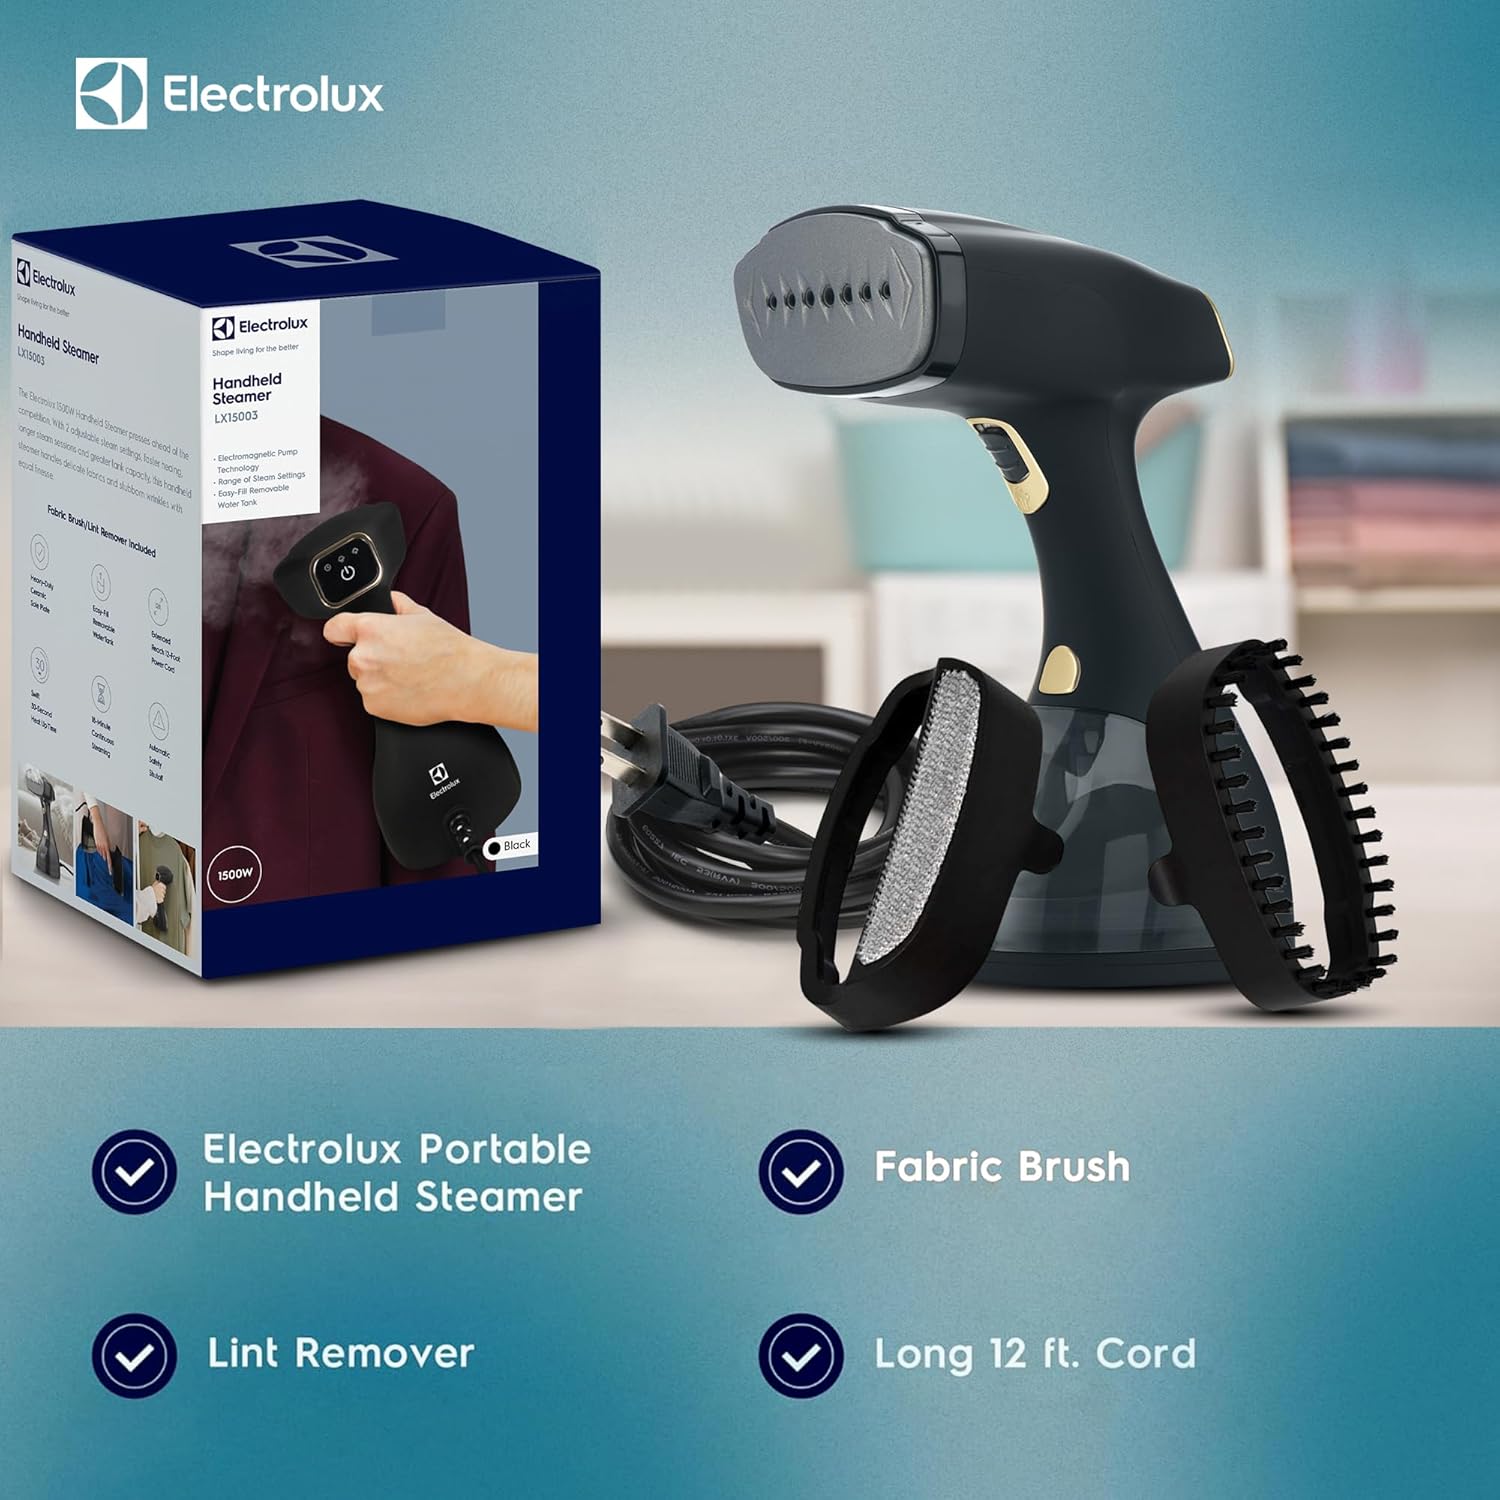
Figure 3.2: The Electrolux LX15003 steamer shown with its included accessories: the fabric brush, lint remover, and the extra-long power cord.
4. Setup
4.1 Filling the Water Tank
- Ensure the steamer is unplugged from the power outlet.
- Press the release button to detach the 10 oz removable water tank from the main unit.
- Open the rubber stopper on the water tank.
- Fill the tank with distilled water up to the MAX fill line. Do not overfill.
- Close the rubber stopper securely and reattach the water tank to the steamer unit until it clicks into place.

Figure 4.1: The 10oz removable water tank, indicating fill levels.
4.2 Attaching Accessories
The steamer comes with a fabric brush and a lint remover. To attach an accessory, align it with the steamer head and press firmly until it snaps into place. To remove, gently pull it off.
Video 4.1: This video demonstrates the Electrolux 15003 Steamer for Clothes, including how to attach and detach the water tank and accessories, and general handling of the device.
5. Operating Instructions
5.1 Powering On and Heat-Up
- Plug the steamer into a 120V electrical outlet. The power indicator light will illuminate.
- Press the power button. The steamer will begin to heat up, which takes approximately 29 seconds. The indicator light will change to green when ready for use.

Figure 5.1: The steamer's rapid heat-up feature, ready in approximately 30 seconds.
5.2 Steam Settings and Usage
The steamer offers adjustable steam levels to suit various fabric types. Press the steam setting button to cycle through the available options (e.g., low, medium, high). The steamer is designed for continuous steam output, and a steam push lock allows for hands-free steaming.
- Delicate Fabrics: Use a lower steam setting for materials like silk or synthetics.
- Heavy Fabrics: Use a higher steam setting for materials like cotton, wool, or denim.
- Steaming Technique: Hold the steamer head close to the fabric and move it in an up-and-down motion. For best results, gently pull the fabric taut with your free hand.
- The 360° anti-spill design ensures no leaking or spilling, whether used vertically or horizontally.

Figure 5.2: The steamer's powerful 1500-watt steam generation and adjustable settings for various fabrics.
Video 5.1: This video showcases the steamer's three steam settings and its 10oz/380ml water tank capacity, demonstrating its versatility for different steaming needs.
Video 5.2: A demonstration of the Electrolux handheld garment steamer effectively removing wrinkles from clothing.
6. Maintenance
6.1 Cleaning the Steamer
- Always ensure the steamer is unplugged and completely cooled down before cleaning.
- Wipe the exterior of the steamer with a soft, damp cloth. Do not use abrasive cleaners or solvents.
- Empty any remaining water from the tank after each use to prevent mineral buildup.
- The ceramic soleplate features convenient self-cleaning technology. For general cleaning, wipe the soleplate with a damp cloth.

Figure 6.1: The ceramic soleplate with self-cleaning technology for easy maintenance.
6.2 Descaling (if necessary)
If you notice reduced steam output or mineral residue, descaling may be required. Mix a solution of 50% white vinegar and 50% distilled water. Fill the water tank with this solution and run the steamer until the tank is empty. Repeat with fresh distilled water to rinse. Perform this process in a well-ventilated area.
7. Troubleshooting
| Problem | Possible Cause | Solution |
|---|---|---|
| No steam or low steam output | Water tank empty; Steamer not heated sufficiently; Mineral buildup. | Refill water tank; Wait for indicator light to turn green; Perform descaling procedure. |
| Water spitting from steamer head | Steamer not fully heated; Overfilled water tank. | Allow steamer to fully heat up; Do not overfill water tank. |
| Steamer not turning on | Not plugged in; Power outlet issue. | Ensure plug is fully inserted; Test outlet with another appliance. |
8. Specifications
| Feature | Detail |
|---|---|
| Model Number | LX15003-BK |
| Power | 1500 Watts |
| Voltage | 120 Volts |
| Heat Time | Approx. 29 Seconds |
| Water Tank Capacity | 10 Fluid Ounces (approx. 300 ml) |
| Continuous Steam Time | Approx. 18.5 Minutes |
| Cord Length | 12 Feet |
| Item Weight | 2.12 Pounds |
| Product Dimensions (L x W x H) | 5.75" x 4.25" x 9.75" |
| Included Accessories | Fabric Brush, Lint Remover |
9. Warranty and Support
Electrolux products are manufactured to high-quality standards. For warranty information, product registration, or technical support, please refer to the documentation included with your purchase or visit the official Electrolux website. Keep your proof of purchase for warranty claims.
For further assistance, please contact Electrolux Customer Service.
