1. Important Safety Instructions
When using electrical appliances, basic safety precautions should be followed, including the following:
- Read all instructions before using the appliance.
- Do not operate the microwave if the door is damaged, or if the seals are broken.
- Do not heat liquids or other foods in sealed containers as they are liable to explode.
- Only allow children to use the oven without supervision when adequate instructions have been given so that the child is able to use the oven in a safe way and understands the hazards of improper use.
- Use only utensils that are suitable for use in microwave ovens.
- The microwave oven is intended for heating food and beverages. Drying of food or clothing and heating of warming pads, slippers, sponges, damp cloth and similar may lead to risk of injury, ignition or fire.
- If smoke is observed, switch off or unplug the appliance and keep the door closed in order to stifle any flames.
- Regularly clean the oven and remove any food deposits.
- Failure to maintain the oven in a clean condition could lead to deterioration of the surface that could adversely affect the life of the appliance and possibly result in a hazardous situation.
2. Product Overview
The Cecotec Mechanical Microwave with Grill is designed for efficient heating, cooking, and grilling. It features a 20-liter capacity, 700W microwave power, and an 800W grill function, all controlled by intuitive mechanical dials.

Figure 2.1: Front view of the Cecotec Mechanical Microwave with Grill. This image shows the appliance's overall design, including the door handle and control panel with two rotary dials.
Components:
- Oven Cavity: 20-liter capacity, stainless steel interior.
- Glass Turntable: Ensures even cooking.
- Turntable Ring: Supports the glass turntable.
- Door with Handle: For opening and closing the oven.
- Control Panel: Features two mechanical rotary dials for time and power/function selection.
- Grill Rack: For use during grill cooking.
- Interior Light: Allows monitoring of the cooking process.
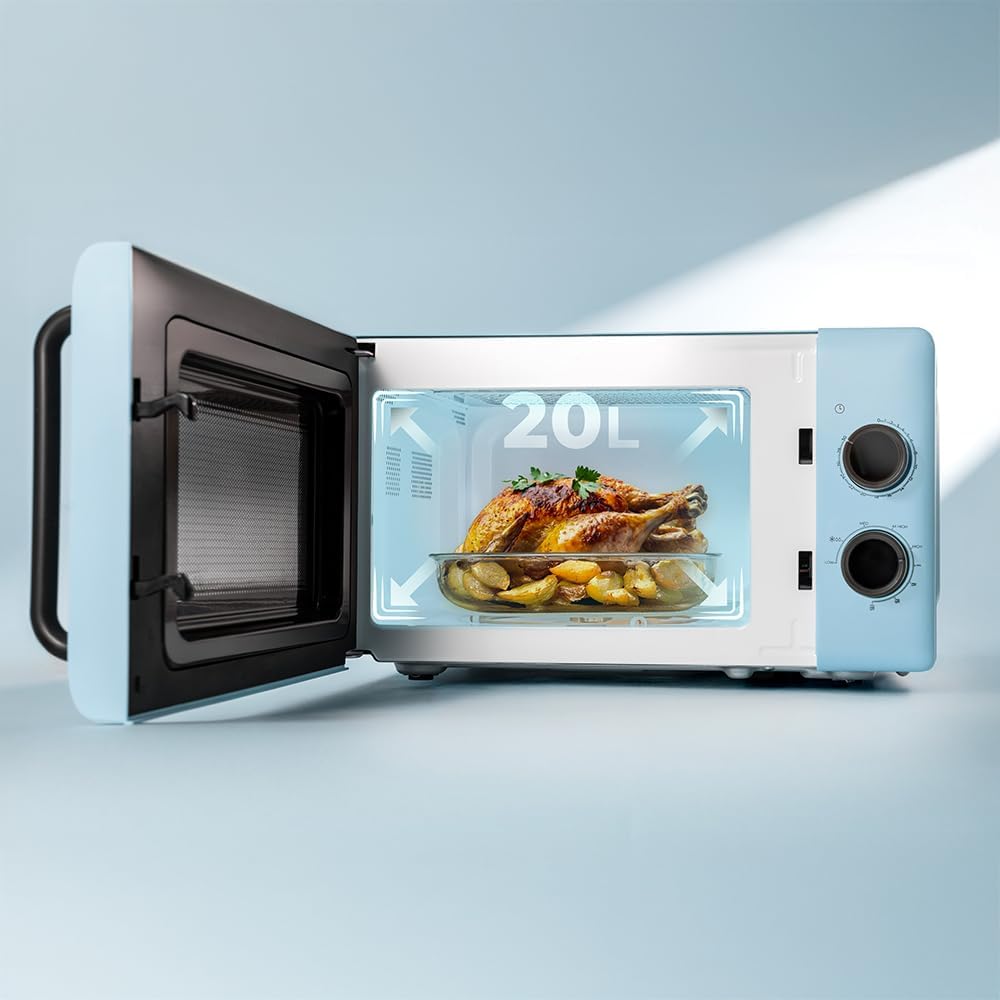
Figure 2.2: Interior view of the microwave, highlighting its 20-liter capacity. A roasted chicken is shown inside, demonstrating the usable space.
3. Setup
3.1 Unpacking
- Carefully remove the microwave oven and all materials from the carton.
- Check the oven for any damage, such as dents or a misaligned door. Do not operate the oven if it is damaged.
- Remove all protective film from the surface of the oven.
3.2 Placement
- Place the oven on a flat, stable surface that can support its weight and the heaviest food likely to be cooked in the oven.
- Ensure adequate ventilation: leave a minimum of 20 cm space above the oven, 10 cm at the rear, and 5 cm on both sides.
- Do not block air vents.
- Do not place the oven near heat sources or in a damp environment.
3.3 Electrical Connection
- Plug the power cord into a standard 230V AC electrical outlet.
- Ensure the outlet is properly grounded.
4. Operating Instructions
The microwave features two mechanical rotary dials for easy operation: one for power/function selection and one for the timer.
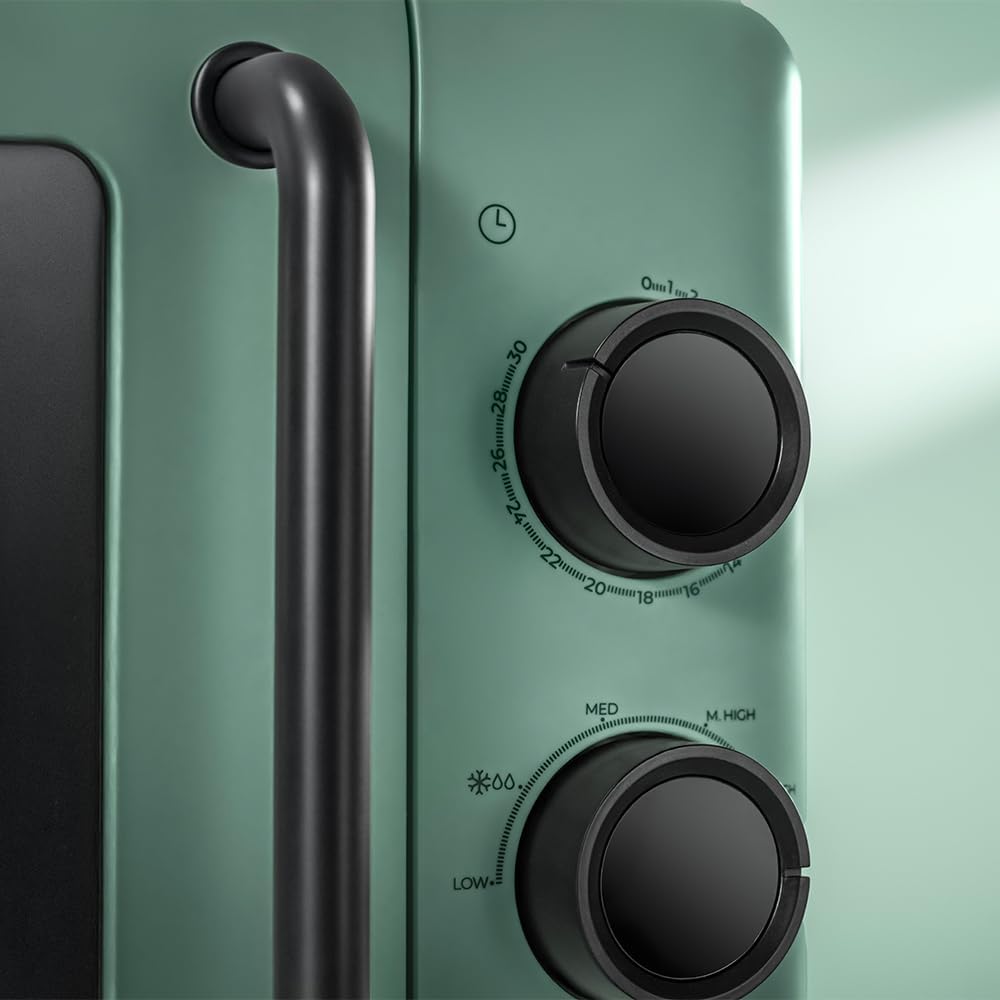
Figure 4.1: Close-up view of the control panel, showing the two mechanical dials for setting time and power/function.
4.1 Microwave Cooking
- Place food in a microwave-safe container on the glass turntable.
- Close the oven door securely.
- Turn the lower dial to select the desired microwave power level (e.g., Low, Med, M. High, High). The microwave offers 6 power levels.
- Turn the upper dial to set the cooking time, up to 30 minutes. The oven will start automatically.
- The interior light will illuminate during operation, allowing you to monitor the food.
- When the set time expires, the oven will emit an end-of-cooking signal and automatically switch off.
4.2 Grill Cooking
- Place food on the grill rack, then place the rack on the glass turntable.
- Close the oven door securely.
- Turn the lower dial to the 'Grill' setting (often indicated by a grill icon).
- Turn the upper dial to set the grilling time, up to 30 minutes.
- Monitor food closely to prevent overcooking or burning.
- The oven will signal when the time is up.
4.3 Defrosting
- Place frozen food on the glass turntable.
- Close the oven door.
- Turn the lower dial to the 'Defrost' setting (often indicated by a snowflake icon).
- Turn the upper dial to set the defrosting time. Defrosting time varies based on food type and weight.
- Periodically check the food and turn it over for even defrosting.
- The oven will signal when the time is up.
4.4 Timer Function
The upper dial functions as a 30-minute mechanical timer for all cooking modes. Simply rotate it clockwise to the desired cooking duration. The oven will begin operation immediately upon setting the timer and will stop when the timer returns to zero, accompanied by an audible signal.
5. Maintenance and Cleaning
Regular cleaning helps maintain the performance and longevity of your microwave oven.
5.1 Exterior Cleaning
- Wipe the exterior surface with a damp cloth and mild detergent.
- Avoid abrasive cleaners or scouring pads.
5.2 Interior Cleaning
- Clean the oven cavity after each use with a damp cloth.
- For stubborn food residue, place a bowl of water with lemon juice inside and microwave for 2-3 minutes. The steam will loosen the residue, making it easier to wipe away.
- Ensure the interior is dry before closing the door.
5.3 Turntable and Grill Rack
- The glass turntable and turntable ring can be removed and washed in warm soapy water or in a dishwasher.
- Clean the grill rack with warm soapy water.
- Ensure all parts are completely dry before returning them to the oven.
6. Troubleshooting
If you encounter any issues, please refer to the following table before contacting customer support.
| Problem | Possible Cause | Solution |
|---|---|---|
| Oven does not start | Power cord not plugged in; Door not closed properly; Timer not set. | Ensure plug is secure; Close door firmly; Set the timer dial. |
| Food not heating | Power level too low; Cooking time too short; Incorrect utensil used. | Increase power level or time; Use microwave-safe dishes. |
| Sparking inside oven | Metal or foil in oven; Food residue on cavity walls. | Remove metal objects; Clean oven interior thoroughly. |
| Turntable not rotating | Turntable not correctly placed on ring; Obstruction under turntable. | Reposition turntable; Clean under turntable. |
7. Specifications
| Feature | Specification |
|---|---|
| Brand | Cecotec |
| Model Number | A01_EU01_101128 |
| Capacity | 20 Liters |
| Microwave Power | 700 W |
| Grill Power | 800 W |
| Power Levels | 6 |
| Timer | Up to 30 minutes (Mechanical) |
| Voltage | 230V AC |
| Installation Type | Freestanding |
| Interior Material | Stainless Steel |
| Special Features | Grill function, Defrost mode, End-of-cooking signal, Interior light |
| Included Components | Turntable ring, Grill rack |
| Item Weight | 11.6 kg |
8. Warranty and Support
8.1 Warranty Information
This Cecotec microwave oven comes with a standard manufacturer's warranty. Please refer to the warranty card included in your product packaging for specific terms, conditions, and duration. Keep your proof of purchase for warranty claims.
8.2 Customer Support
For technical assistance, troubleshooting beyond this manual, or warranty service, please contact Cecotec customer support. Contact details can typically be found on the official Cecotec website or on the product packaging.


