1. Safety Information
Read and understand this entire manual before operating the generator. Failure to follow instructions can result in serious injury or death.
Carbon Monoxide (CO) Hazard
- Generators produce carbon monoxide, a colorless, odorless, poisonous gas.
- NEVER operate the generator indoors, in a garage, basement, crawlspace, or any other enclosed or partially enclosed area.
- Always operate the generator outdoors in a well-ventilated area, far from windows, doors, and vents.
- The Pulsar PGL9000BCO is equipped with a CO Sentry™ system that automatically shuts down the engine if dangerous levels of carbon monoxide are detected. Do not bypass or disable this safety feature.
Fire Hazard
- Gasoline and propane are highly flammable and explosive.
- Refuel only in a well-ventilated area with the engine off and cool.
- Keep fuel away from sparks, open flames, pilot lights, heat, and other ignition sources.
- Do not overfill the fuel tank.
Electrical Shock Hazard
- Never operate the generator in wet conditions.
- Ensure the generator is properly grounded before use.
- Do not connect the generator directly to a building's electrical system without a transfer switch installed by a qualified electrician.
2. Package Contents
Verify that all items are present and undamaged upon unpacking.
- Pulsar PGL9000BCO Dual-Fuel Generator
- Wheel Kit (wheels, axles, hardware)
- Handle Kit (handle, hardware)
- Propane Hose with Regulator
- 12V Battery
- Spark Plug Wrench
- Oil Funnel
- Owner's Manual
3. Product Overview
Familiarize yourself with the components of your generator.
Generator Components


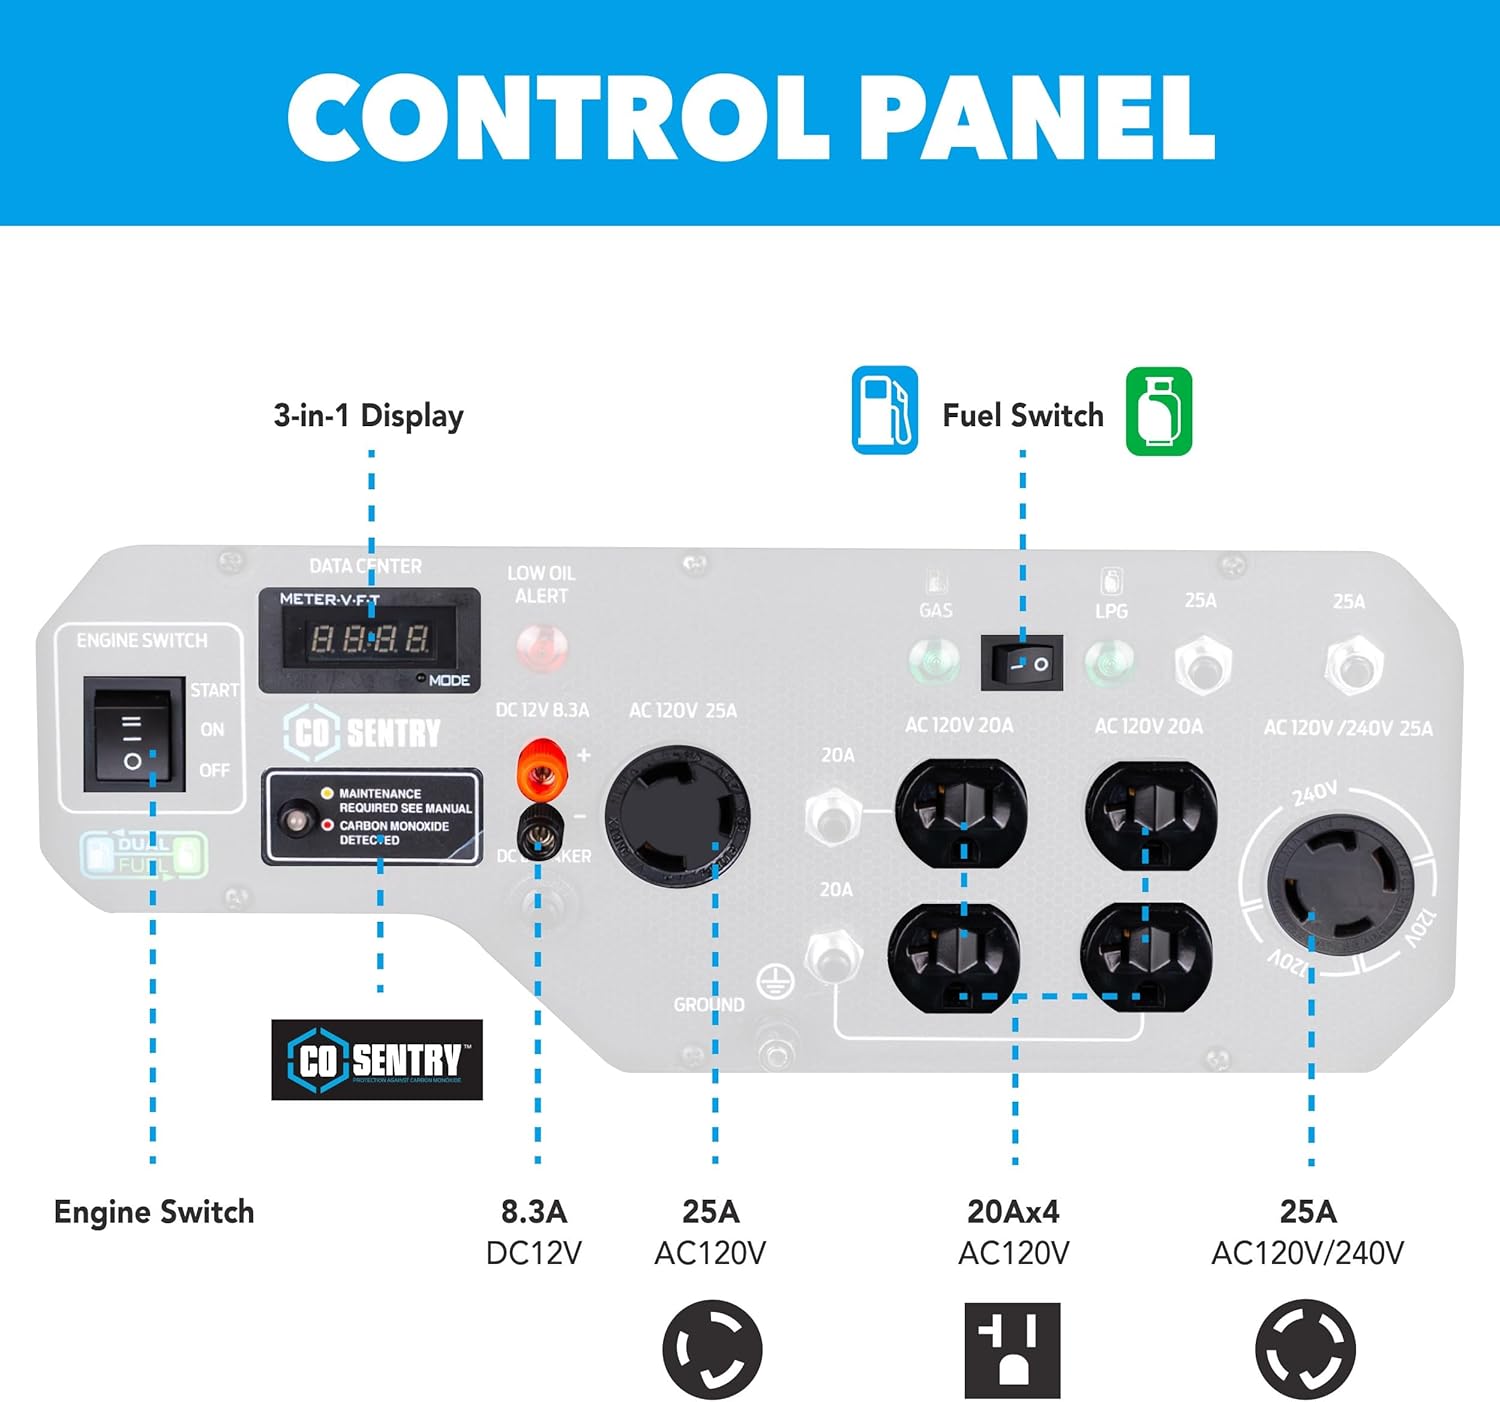
Control Panel

- 3-in-1 Data Center Display: Shows Volts, Frequency, and Hours of operation.
- Engine Switch: Controls engine start and stop.
- Fuel Switch: Selects between Gasoline and LPG (Propane) operation.
- CO Sentry™: Carbon Monoxide detection system with indicator lights.
- Low Oil Alert: Indicator light for low engine oil level.
- AC Outlets:
- Four 120V AC 20A outlets (5-20R)
- One 120V AC 25A Twist-Lock outlet (L5-30R)
- One 120V/240V AC 25A Twist-Lock outlet (L14-30R)
- DC 12V 8.3A Output: For charging 12V batteries.
- Circuit Breakers: Protect outlets from overload.
- Ground Terminal: For connecting an external ground wire.
4. Setup
4.1 Assembly
- Attach Wheels: Securely fasten the wheels to the generator frame using the provided axles and hardware.
- Install Handle: Attach the handle to the frame. Ensure it is firmly in place for safe transport.
4.2 Add Engine Oil
The generator is shipped without engine oil. Always check the oil level before each use.
- Place the generator on a level surface.
- Remove the oil fill cap/dipstick.
- Using the provided oil funnel, slowly add the recommended engine oil (SAE 10W-30) until the oil level reaches the upper mark on the dipstick. Do not overfill.
- Replace the oil fill cap/dipstick.
4.3 Connect Battery
The 12V battery for electric start may be disconnected for shipping.
- Locate the battery compartment.
- Connect the positive (+) red cable to the positive (+) battery terminal.
- Connect the negative (-) black cable to the negative (-) battery terminal.
- Ensure connections are secure.
4.4 Fueling the Generator
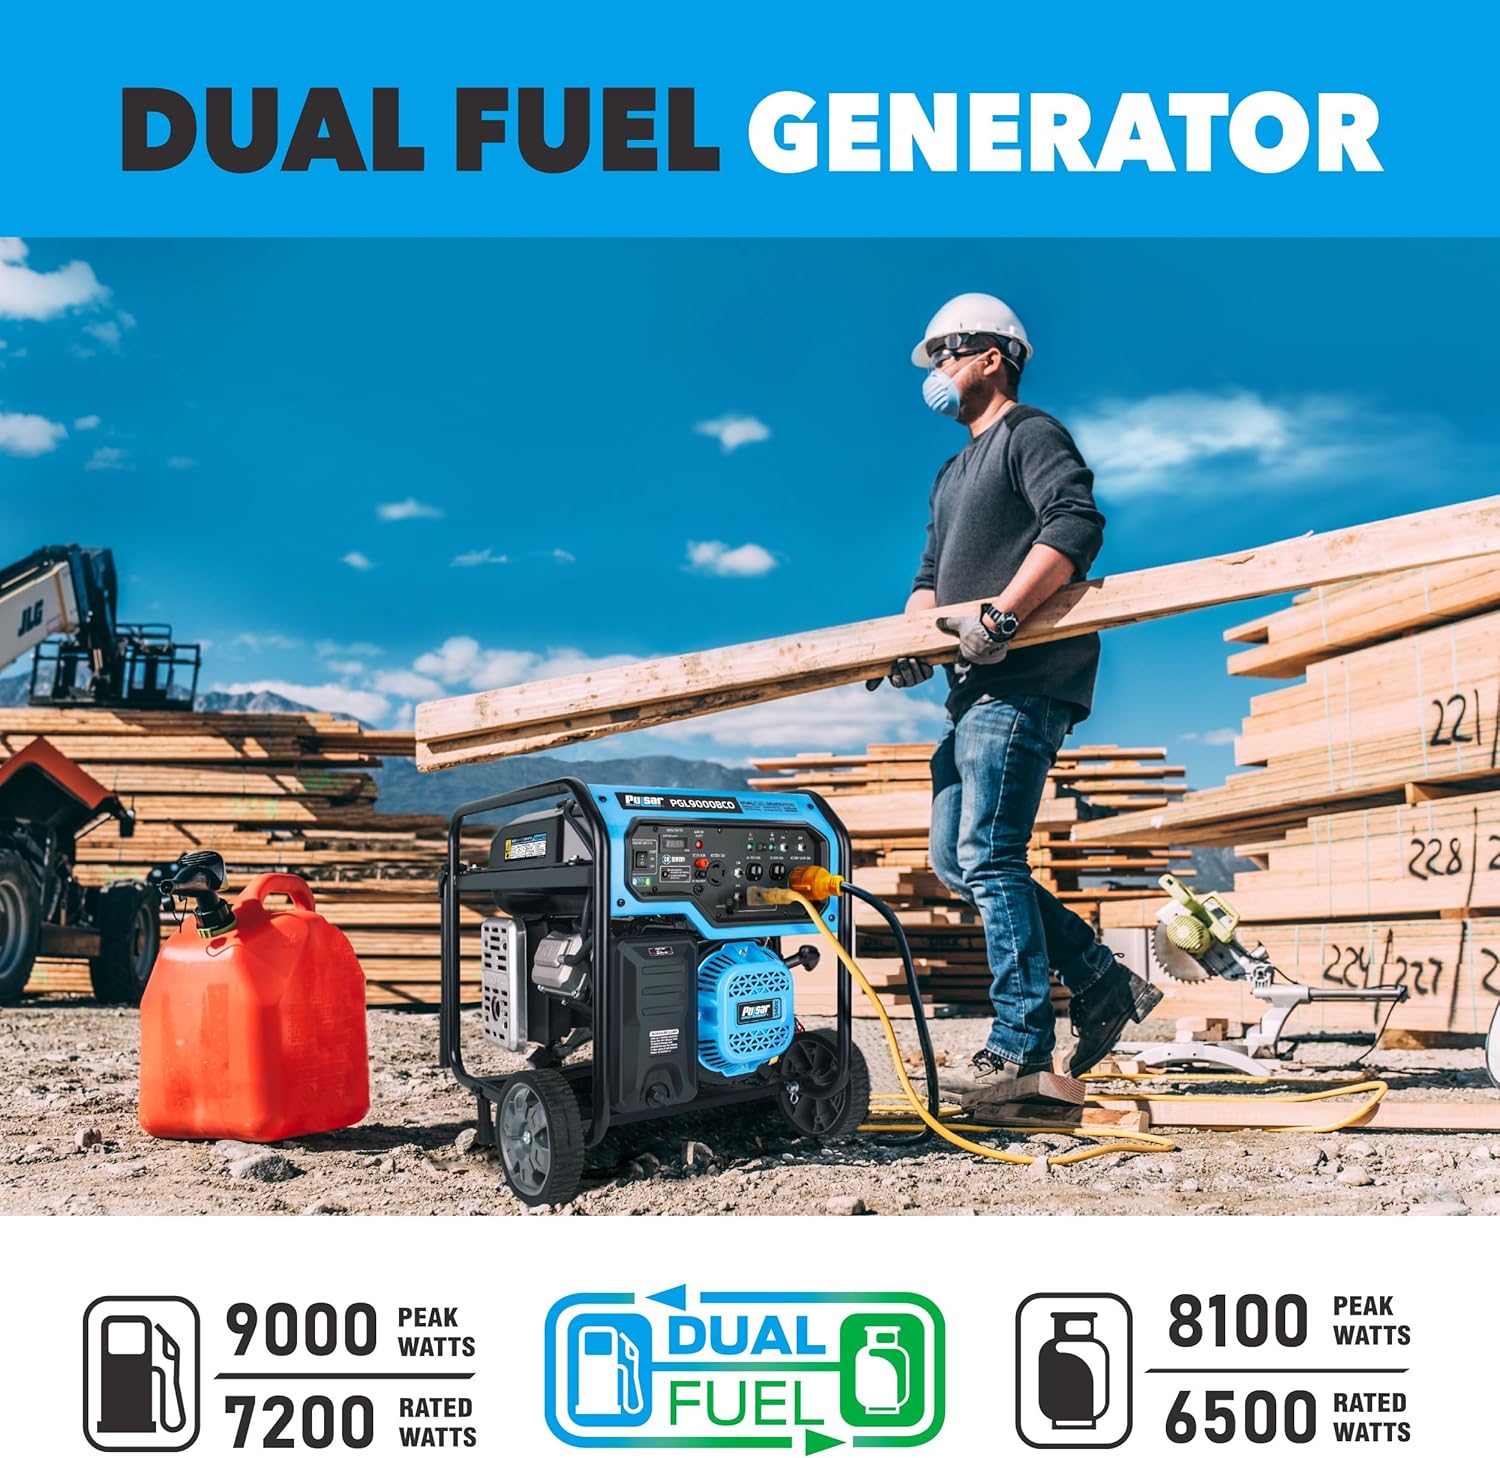
The PGL9000BCO operates on either gasoline or propane.
For Gasoline:
- Use only regular unleaded gasoline with an octane rating of 87 or higher.
- Ensure the engine is off and cool before adding fuel.
- Fill the 7-gallon fuel tank, leaving some space for expansion. Do not overfill.
For Propane (LPG):
- Connect the provided propane hose and regulator to a standard propane tank.
- Connect the other end of the hose to the LPG inlet on the generator's control panel.
- Ensure all connections are tight and leak-free.
5. Operation
5.1 Starting the Generator
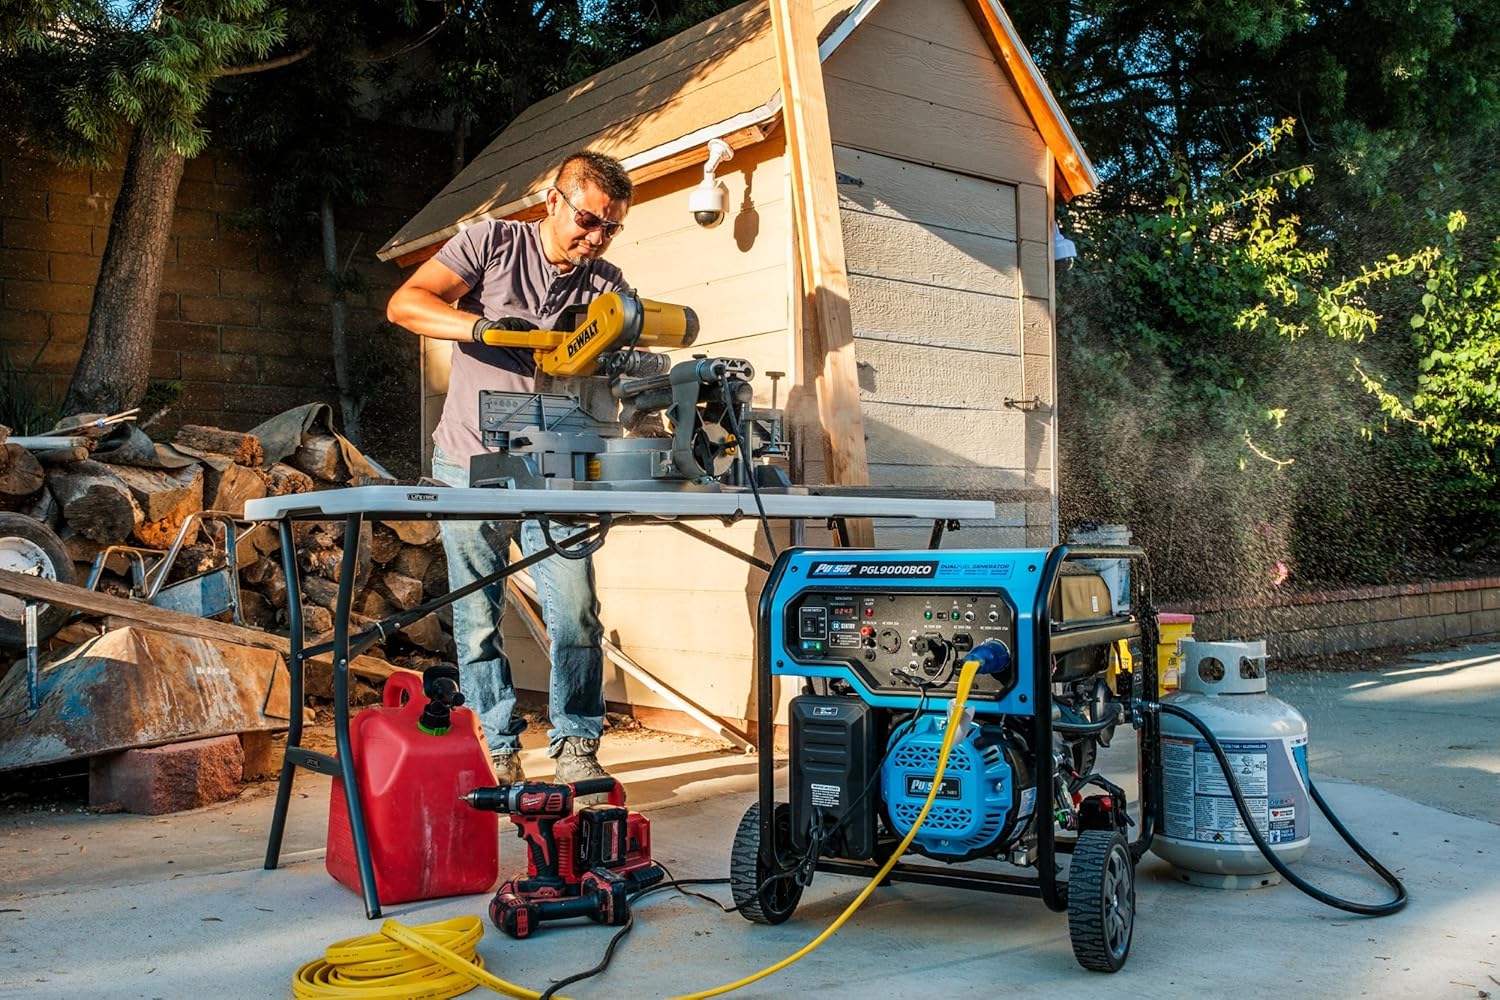
Ensure the generator is placed outdoors in a well-ventilated area.
- Check engine oil level.
- Ensure the fuel tank is filled with gasoline or a propane tank is connected.
- Turn the fuel valve to the "ON" position (for gasoline). If using propane, open the valve on the propane tank.
- Select the desired fuel type (Gas or LPG) using the fuel switch on the control panel.
- Move the choke lever to the "CHOKE" position (if starting a cold engine).
- For Electric Start: Turn the engine switch to "START" and hold until the engine starts. Release the switch once the engine is running.
- For Recoil Start: Firmly pull the recoil starter handle until the engine starts.
- Once the engine starts, slowly move the choke lever to the "RUN" position.
- Allow the generator to run for a few minutes to warm up before connecting electrical devices.
5.2 Connecting Electrical Devices
- Ensure the generator is running smoothly.
- Plug in your electrical devices one at a time, starting with the highest wattage device.
- Do not exceed the generator's rated wattage. Monitor the 3-in-1 display for load information.


5.3 Fuel Switching (Switch & Go Technology)
The Pulsar PGL9000BCO features Switch & Go technology, allowing seamless transition between fuel types while the generator is running.
To switch fuel sources:
- Ensure the generator is running.
- If switching from gasoline to propane: Close the gasoline fuel valve. Allow the engine to run until it consumes the remaining gasoline in the carburetor and stalls. Then, open the propane tank valve and select "LPG" on the fuel switch. Restart the generator.
- If switching from propane to gasoline: Close the propane tank valve. Select "Gas" on the fuel switch. Open the gasoline fuel valve. Restart the generator.
5.4 Shutting Down the Generator
- Disconnect all electrical devices from the generator.
- Turn the engine switch to the "OFF" position.
- Close the fuel valve (for gasoline) or the propane tank valve (for LPG).
6. Maintenance
Regular maintenance ensures optimal performance and longevity of your generator.
- Engine Oil: Check oil level before each use. Change oil after the first 20 hours of operation, then every 100 hours or annually.
- Air Filter: Clean or replace the air filter every 50 hours or more frequently in dusty conditions.
- Spark Plug: Inspect and clean the spark plug every 100 hours. Replace if necessary.
- Fuel Filter: Inspect periodically and replace if clogged.
- General Cleaning: Keep the generator clean and free of debris.
7. Troubleshooting
Refer to this section for common issues and their solutions.
| Problem | Possible Cause | Solution |
|---|---|---|
| Engine will not start | No fuel, low oil, choke not set, spark plug issue, battery dead (electric start) | Add fuel, add oil, adjust choke, check/replace spark plug, charge/check battery. |
| No power output | Circuit breaker tripped, overloaded, faulty connection | Reset circuit breaker, reduce load, check connections. |
| Engine runs rough | Stale fuel, dirty air filter, dirty spark plug | Drain and replace fuel, clean/replace air filter, clean/replace spark plug. |
| CO Sentry™ shutdown | High carbon monoxide levels detected | Move generator to a well-ventilated outdoor area. Allow to cool before restarting. |
8. Specifications
| Feature | Detail |
|---|---|
| Model | PGL9000BCO |
| Engine Type | 340cc OHV, 4-Stroke |
| Max Engine Power | 11.5 Horsepower |
| Fuel Type | Gasoline, Liquefied Petroleum Gas (LPG) |
| Gasoline Peak Watts | 9000W |
| Gasoline Running Watts | 7200W |
| LPG Peak Watts | 8100W |
| LPG Running Watts | 6500W |
| Fuel Tank Capacity | 7 Gallons |
| Run Time (Half Load) | Up to 9.5 hours |
| Voltage | 120V / 240V |
| Total Power Outlets | 5 (4x 120V 20A, 1x 120V L5-30R, 1x 120/240V L14-30R, 1x 12V DC) |
| Starting System | Electric Start, Recoil Start |
| Safety Features | CO Sentry™, Low Oil Shutdown, Circuit Breakers |
| Dimensions (L x W x H) | 24.7" x 24.7" x 21.6" |
| Item Weight | 140 Pounds |
| Material | Steel (Powder-coated frame) |
| UPC | 814726028824 |
9. Warranty and Support
Pulsar products are backed by a manufacturer's warranty. For specific warranty details, registration, or technical support, please refer to the warranty card included with your product or visit the official Pulsar website.
For customer service and technical assistance, please contact Pulsar support directly.


