
1. Introduction
Thank you for choosing the Soundmaster DAB900 Digital Radio. This device combines DAB+ and FM/FM radio reception with Bluetooth connectivity and a versatile alarm clock function. Its compact design and clear color display make it suitable for various environments. This manual will guide you through the setup, operation, and maintenance of your new radio.
Package Contents:
- Soundmaster DAB900 Digital Radio
- Power Adapter
- User Manual
2. Safety Information
- Power Source: Use only the provided power adapter. Ensure the voltage matches the requirements of your region.
- Water and Moisture: Do not expose the device to rain, moisture, or liquids. Avoid placing objects filled with liquids, such as vases, on or near the device.
- Ventilation: Ensure adequate ventilation. Do not block ventilation openings.
- Heat: Keep the device away from heat sources such as radiators, heat registers, stoves, or other heat-producing appliances.
- Cleaning: Disconnect the power before cleaning. Use a soft, dry cloth. Do not use liquid cleaners or aerosol cleaners.
- Servicing: Do not attempt to service this product yourself. Refer all servicing to qualified service personnel.
3. Product Overview
Familiarize yourself with the controls and features of your Soundmaster DAB900 Digital Radio.
Front Panel Controls and Display:
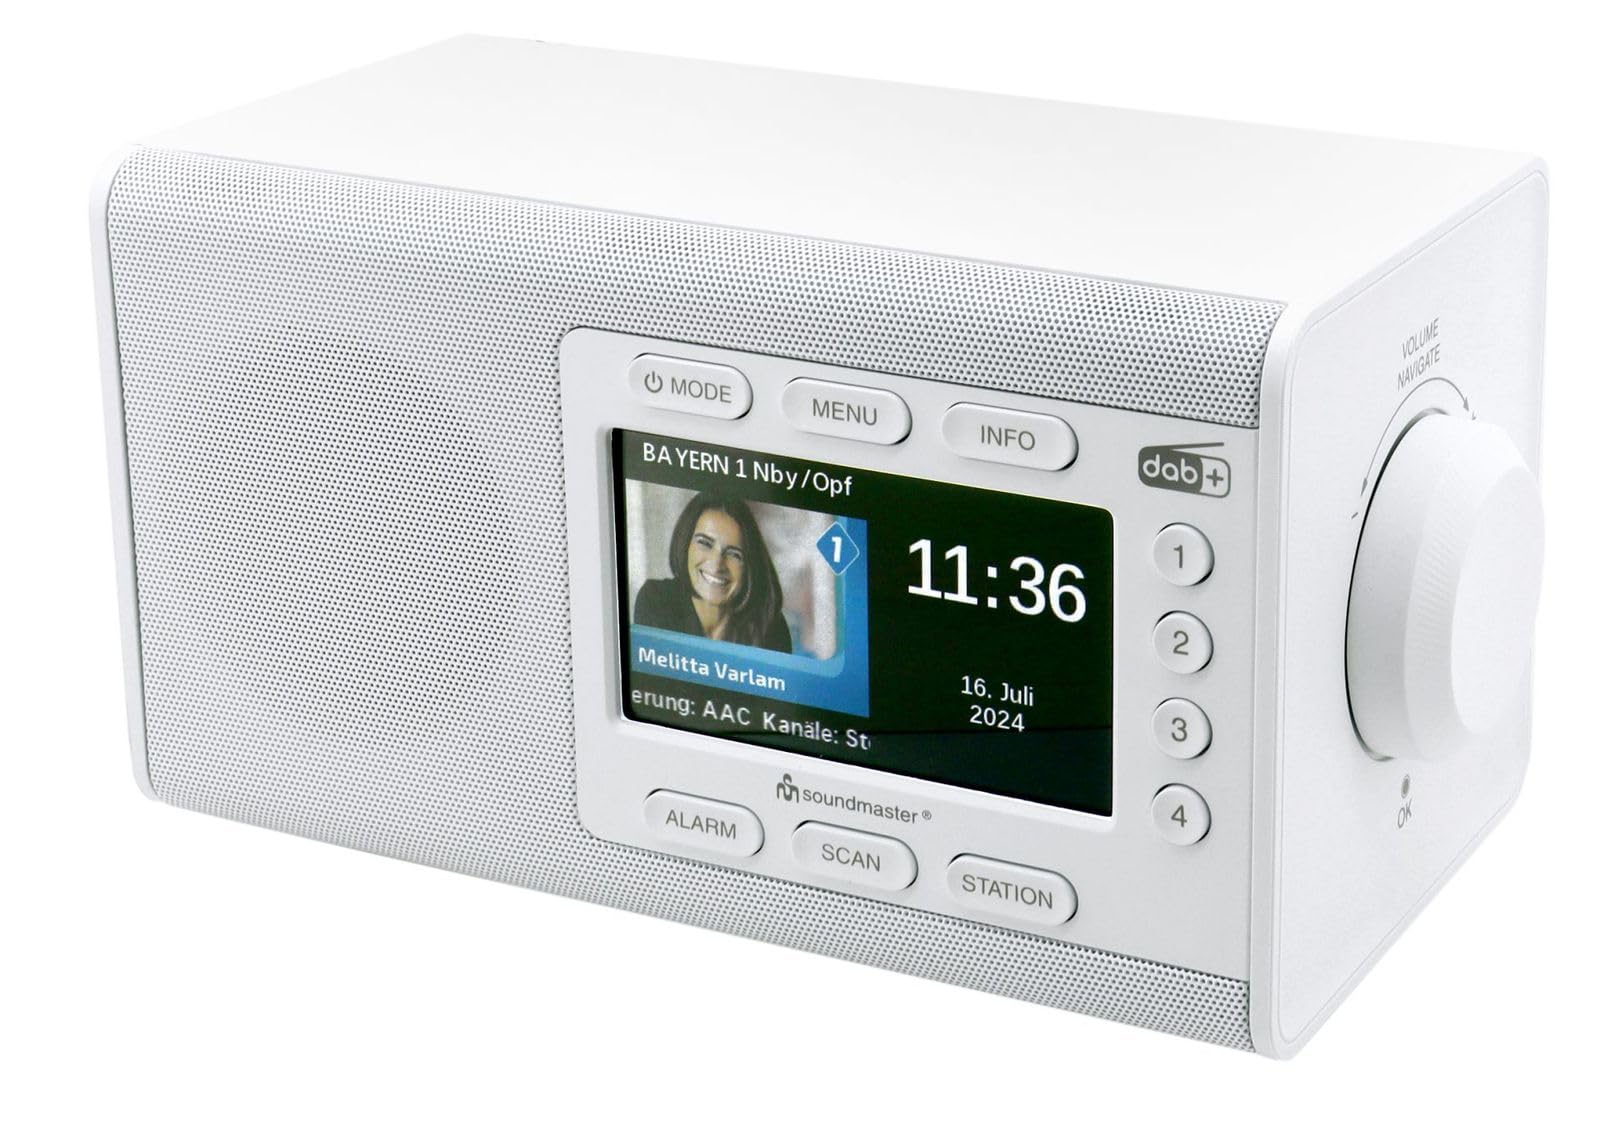
Image: Front view of the Soundmaster DAB900 Digital Radio. The large color display shows the current time (09:13) and date (16. Juli 2024). Above the display are buttons for 'MODE', 'MENU', and 'INFO'. To the right are numbered preset buttons (1-4). Below the display are buttons for 'ALARM', 'SCAN', and 'STATION'. The 'DAB+' logo is visible on the top right.
- MODE Button: Switches between DAB+, FM, and Bluetooth modes.
- MENU Button: Accesses the menu for current operating mode.
- INFO Button: Displays additional information (e.g., station details, signal strength).
- Preset Buttons (1-4): Quick access to your favorite radio stations.
- ALARM Button: Configures alarm settings.
- SCAN Button: Initiates a scan for available radio stations.
- STATION Button: Navigates through available stations or presets.
- Navigation/OK/Volume Knob (Right Side): Rotate to navigate menus or adjust volume. Press to confirm selections.
Rear Panel Connections:

Image: Rear view of the Soundmaster DAB900 Digital Radio. Visible connections include 'DC IN' for power, 'LINE OUT' for external speakers, 'PHONES' for headphones, and 'UPDATE' (USB-C) for software updates. A telescopic antenna is extended at the top.
- DC IN: Power input for the included adapter.
- LINE OUT: 3.5mm audio output for connecting to external speakers or amplifiers.
- PHONES: 3.5mm headphone jack for private listening.
- UPDATE (USB-C): USB-C port for software updates only.
- Telescopic Antenna: For DAB+ and FM radio reception.
4. Setup
4.1 Connecting Power
- Insert the DC plug of the power adapter into the 'DC IN' socket on the rear of the radio.
- Plug the power adapter into a standard wall outlet.
4.2 Antenna Adjustment
For optimal DAB+ and FM reception, fully extend the telescopic antenna located on the rear of the unit. Adjust its position for the best signal quality.
4.3 First Power On and Initial Scan
- Press the 'MODE' button to power on the radio.
- Upon first use, the radio will typically enter DAB+ mode and automatically perform a full scan for available stations. This process may take a few minutes.
- Once the scan is complete, the radio will display a list of found stations.
5. Operating Instructions
5.1 Basic Controls
- Power On/Off: Press the 'MODE' button to turn the radio on or off.
- Volume Adjustment: Rotate the Navigation/OK/Volume knob on the right side to increase or decrease the volume.
- Mode Selection: Press the 'MODE' button repeatedly to cycle through DAB+, FM, and Bluetooth modes.
5.2 DAB+ Radio Operation

Image: Front view of the Soundmaster DAB900 Digital Radio in DAB+ mode. The display shows 'Natalie Imbruglia - Torn' and 'Jetzt läuft' (Now playing), along with station information 'BAYERN 1 - Gehört ins Leben'. The current time is 09:18.
- Press 'MODE' until 'DAB+' mode is selected.
- If no stations are found or you wish to rescan, press the 'SCAN' button to perform a full scan.
- Rotate the Navigation/OK/Volume knob to browse through the available DAB+ stations. Press the knob to select a station.
- Storing Presets: To store a station, tune to the desired station, then press and hold one of the preset buttons (1-4) until the display confirms the station is saved.
- Recalling Presets: Briefly press one of the preset buttons (1-4) to recall a stored station.
- INFO Button: Press 'INFO' repeatedly to cycle through various information displays, such as program type, signal strength, and bit rate.
5.3 FM Radio Operation
- Press 'MODE' until 'FM' mode is selected.
- Auto Scan: Press the 'SCAN' button to automatically search for and store available FM stations.
- Manual Tuning: Rotate the Navigation/OK/Volume knob to manually tune to a frequency. Press the knob to confirm.
- Storing Presets: Tune to the desired FM station, then press and hold one of the preset buttons (1-4) until the display confirms the station is saved.
- Recalling Presets: Briefly press one of the preset buttons (1-4) to recall a stored station.
5.4 Bluetooth Operation
The Soundmaster DAB900 allows wireless audio streaming from compatible devices such as smartphones, tablets, or laptops.
- Press 'MODE' until 'Bluetooth' mode is selected. The display will show a pairing message, indicating the radio is ready to connect.
- On your Bluetooth-enabled device, enable Bluetooth and search for available devices.
- Select 'Soundmaster DAB900' from the list of devices.
- Once paired, the radio will confirm the connection. You can now play audio from your device through the radio.
- Control playback (play/pause, skip tracks) directly from your connected device or using the radio's navigation controls if supported.
5.5 Alarm Clock Function
The radio features two adjustable alarm times with snooze and weekend functions.
- Press the 'ALARM' button to access alarm settings.
- Rotate the Navigation/OK/Volume knob to select Alarm 1 or Alarm 2, then press to confirm.
- Follow the on-screen prompts to set the alarm time, alarm source (DAB, FM, or Buzzer), alarm volume, and alarm frequency (daily, weekdays, weekends, once).
- To activate/deactivate an alarm, select the alarm and toggle its status.
- Snooze Function: When the alarm sounds, press any button (except power) to activate snooze. The alarm will sound again after a set interval.
- Stop Alarm: To stop the alarm completely, press the 'MODE' button.
5.6 Display and System Settings
- Press the 'MENU' button to access system settings.
- Rotate the Navigation/OK/Volume knob to navigate through options such as:
- Brightness: Adjust the display brightness from 01% to 100%.
- Language: Select your preferred language.
- Time Format: Set 12-hour or 24-hour format.
- Auto Power Off: The device features automatic shutdown after 15 minutes of inactivity. This can usually be configured or disabled in the system settings.
- Press the Navigation/OK/Volume knob to confirm selections.
5.7 External Audio Connections
- Headphone Output: Connect 3.5mm headphones to the 'PHONES' jack on the rear panel for private listening. The internal speaker will be muted.
- Line Out: Connect the 'LINE OUT' jack to an external amplifier or powered speakers using a 3.5mm audio cable (not included) to enhance audio output.
6. Maintenance
6.1 Cleaning
To clean the radio, first disconnect it from the power outlet. Use a soft, dry, lint-free cloth to wipe the surfaces. Do not use abrasive cleaners, waxes, or solvents as they may damage the finish.
6.2 Software Updates
The USB-C port labeled 'UPDATE' on the rear panel is exclusively for software updates. Refer to the Soundmaster website or support documentation for instructions on how to perform software updates, if available.
7. Troubleshooting
If you encounter issues with your Soundmaster DAB900, please refer to the following common problems and solutions:
| Problem | Possible Cause | Solution |
|---|---|---|
| No power | Power adapter not connected or faulty outlet. | Ensure the power adapter is securely connected to both the radio and a working wall outlet. |
| No sound | Volume too low; headphones connected; incorrect mode. | Increase volume. Disconnect headphones. Ensure correct mode (DAB+, FM, Bluetooth) is selected. |
| Poor radio reception | Antenna not extended or poor signal area. | Fully extend and adjust the telescopic antenna. Try repositioning the radio. Perform a new station scan. |
| Bluetooth not connecting | Radio not in Bluetooth mode; device not in pairing mode; device too far. | Ensure the radio is in Bluetooth mode. Make sure your device's Bluetooth is on and in pairing mode. Move your device closer to the radio. |
| Alarm not sounding | Alarm not activated; volume too low; incorrect alarm settings. | Check alarm settings to ensure it is enabled, set to the correct time, and volume is adequate. |
8. Specifications

Image: Front view of the Soundmaster DAB900 Digital Radio with key dimensions indicated. The length is 25 cm, width is 14.2 cm, and height is 13.5 cm.
| Feature | Specification |
|---|---|
| Model Number | DAB900WE |
| Brand | Soundmaster |
| Color | White |
| Tuner Technology | DAB Plus |
| Supported Radio Bands | DAB+, FM |
| Connectivity Technology | Bluetooth |
| Bluetooth Version | Bluetooth 5 |
| Display Type | LCD |
| Special Features | Built-in clock, Alarm function, 4 Preset buttons |
| Power Source | Electric Corded |
| Product Dimensions (L x W x H) | 25 cm x 14.2 cm x 13.5 cm |
| Compatible Devices | Laptop, Smartphone, Tablet |
9. Warranty and Support
For warranty information, technical support, or service inquiries, please contact Soundmaster customer support directly. Refer to the contact information provided with your product packaging or visit the official Soundmaster website for assistance.


