
1. Introduction
Thank you for choosing the Aitek All-in-One PC, model AIO-2475. This manual provides essential information for setting up, operating, maintaining, and troubleshooting your new computer. Please read this manual thoroughly before using the product to ensure proper function and safety.
2. Safety Information
- Power Supply: Use only the provided power adapter. Ensure the power outlet matches the voltage requirements.
- Ventilation: Do not block ventilation openings. Ensure adequate airflow around the device to prevent overheating.
- Liquid Exposure: Keep the device away from liquids. Do not operate with wet hands.
- Cleaning: Disconnect power before cleaning. Use a soft, dry cloth. Avoid harsh chemicals.
- Placement: Place the computer on a stable, flat surface. Avoid direct sunlight, extreme temperatures, and high humidity.
- Servicing: Do not attempt to repair the device yourself. Refer all servicing to qualified personnel.
3. Package Contents
Verify that all items are present in the package:
- 1 x Aitek All-in-One PC (Model AIO-2475)
- 1 x Power Adapter
- 1 x User Manual

Image 3.1: Included power adapter and cable for the Aitek All-in-One PC.
4. Product Overview
Familiarize yourself with the components and ports of your Aitek All-in-One PC.
4.1 Front and Side Views

Image 4.1: Front view of the Aitek All-in-One PC, showcasing its slim design and display.
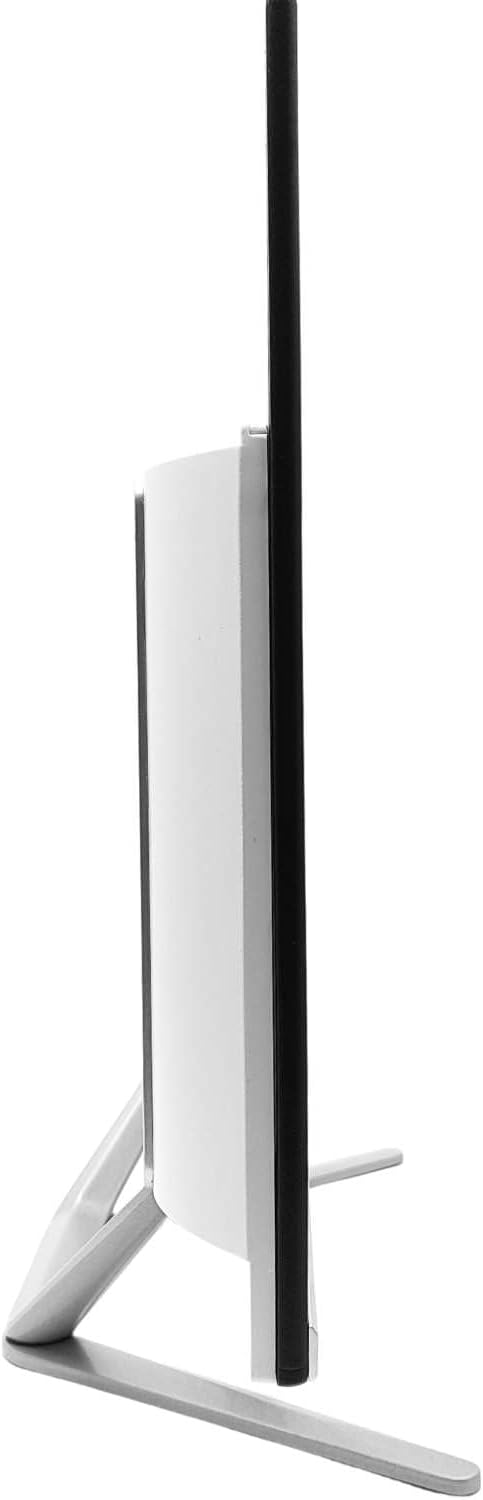
Image 4.2: Side profile of the Aitek All-in-One PC, highlighting its minimal thickness.

Image 4.3: Side view displaying conveniently located USB ports and the power button for easy access.
4.2 Rear View and Ports

Image 4.4: Rear view of the Aitek All-in-One PC, showing the product information label.
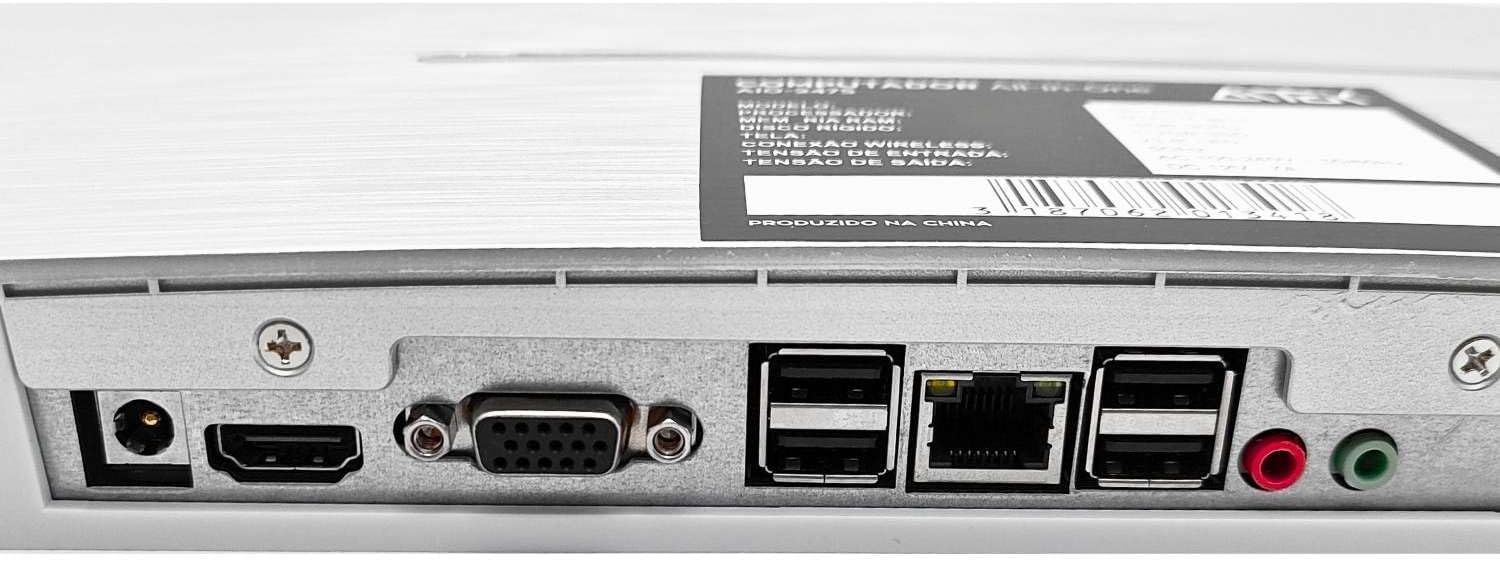
Image 4.5: Detailed view of the rear connectivity ports, including power input, HDMI, VGA, USB, Ethernet, and audio jacks.
The rear panel provides the following connectivity options:
- DC Power Input: Connect the power adapter here.
- HDMI Port: For connecting to an external display.
- VGA Port: For connecting to an older external display.
- USB Ports (2.0 & 3.0): For connecting peripherals like keyboards, mice, and external storage.
- Ethernet (LAN) Port: For wired network connection.
- Audio Jacks: For headphones/speakers and microphone.
5. Setup
5.1 Unpacking and Placement
- Carefully remove the All-in-One PC and all accessories from the packaging.
- Place the computer on a stable, flat, and well-ventilated surface.
- Ensure there is enough space around the device for proper airflow.
5.2 Connecting Power
- Connect the power adapter cable to the DC Power Input port on the rear of the All-in-One PC.
- Plug the power adapter into a suitable electrical outlet.
5.3 Connecting Peripherals
- Connect your USB keyboard and mouse to the available USB ports on the side or rear of the computer.
- If using external speakers or headphones, connect them to the audio output jack.
- For a wired network connection, plug an Ethernet cable into the LAN port.
5.4 Initial Boot-Up
- Press the power button located on the side of the All-in-One PC.
- The computer will start and guide you through the initial Windows 11 setup process. Follow the on-screen instructions to configure your operating system, network, and user accounts.
6. Operating
6.1 Windows 11 Basics
Your Aitek All-in-One PC comes pre-installed with Windows 11. For detailed information on using Windows 11, refer to Microsoft's official documentation and support resources.
- Start Menu: Access applications, settings, and power options.
- Taskbar: Pin frequently used apps and manage open windows.
- Settings: Customize your PC, manage devices, and update Windows.
6.2 Network Connectivity
- Wi-Fi: To connect to a wireless network, click the Wi-Fi icon in the taskbar, select your network, and enter the password.
- Bluetooth: To pair Bluetooth devices, go to Settings > Bluetooth & devices, turn on Bluetooth, and select 'Add device'.
- Ethernet: If an Ethernet cable is connected, the PC will automatically establish a wired network connection.
7. Maintenance
7.1 Cleaning
- Screen: Use a soft, lint-free cloth specifically designed for electronics. For stubborn marks, lightly dampen the cloth with water or a screen cleaner. Do not spray liquid directly onto the screen.
- Casing: Wipe the exterior with a soft, dry cloth. Avoid abrasive materials or strong cleaning agents.
- Ventilation: Periodically check and gently clean the ventilation openings to prevent dust buildup, which can affect performance and lead to overheating. Use compressed air if necessary, holding the can upright.
7.2 Software Updates
Regularly update your Windows operating system and drivers to ensure optimal performance, security, and compatibility. Windows Update typically handles this automatically, but you can manually check for updates via Settings > Windows Update.
8. Troubleshooting
This section addresses common issues you might encounter with your All-in-One PC.
| Issue | Possible Solution |
|---|---|
| No power / PC does not turn on |
|
| No display on screen |
|
| Wi-Fi / Bluetooth connectivity issues |
|
| Slow performance |
|
9. Specifications
Detailed technical specifications for the Aitek All-in-One PC AIO-2475:
| Feature | Detail |
|---|---|
| Brand | NANU SHOP |
| Model Number | AIO-2475 |
| Operating System | Windows 11 |
| CPU Model | Intel Core i7 |
| CPU Speed | 5 GHz |
| RAM Installed Size | 16 GB |
| RAM Technology | DDR4 SDRAM |
| Storage Capacity | 512 GB SSD |
| Screen Size | 23.8 Inches |
| Screen Resolution | 1920 x 1080 Pixels (Full HD) |
| Graphics Card | Integrated Intel |
| Wireless Connectivity | Wi-Fi (802.11ac), Bluetooth |
| Hardware Interface | HDMI, USB 2.0, USB 3.0, Ethernet |
| Dimensions (L x W x H) | 54 x 20 x 42 cm |
| Item Weight | 7.36 Kilograms |
10. Warranty and Support
10.1 Warranty Information
This product comes with a 90-day warranty provided by the store. Please retain your proof of purchase for any warranty claims.
10.2 Technical Support
For technical assistance, troubleshooting beyond this manual, or warranty inquiries, please contact the NANU SHOP customer support. Refer to your purchase documentation for contact details.