
Farberware 0.9 Cu. Ft Countertop Microwave Oven
Farberware 0.9 Cu. Ft Countertop Microwave Oven Instruction Manual
Model: 0.9 Cu. Ft Countertop Microwave Oven
1. Important Safety Instructions
When using electrical appliances, basic safety precautions should be followed, including the following:
- Read all instructions before using the appliance.
- Do not operate the oven if the door or door seals are damaged.
- Do not heat liquids or other foods in sealed containers as they are liable to explode.
- Only allow children to use the oven without supervision when adequate instructions have been given so that the child is able to use the oven in a safe way and understands the hazards of improper use.
- Use only utensils that are suitable for use in microwave ovens.
- Maintain the oven and its ventilation openings free from obstructions.
- Do not attempt to service or repair the appliance yourself. Contact qualified service personnel.
- Always ensure the turntable and roller ring are correctly positioned before operation.
2. Product Overview
2.1 Components
The Farberware 0.9 Cu. Ft Countertop Microwave Oven includes the following main components:
- Microwave Oven Unit
- Glass Turntable
- Roller Ring
- Instruction Manual (this document)

Figure 2.1: Front view of the Farberware 0.9 Cu. Ft Countertop Microwave Oven. It features a black door with a viewing window, a digital display, and a control panel on the right side, all encased in a stainless steel finish.
2.2 Control Panel Features
The control panel provides various buttons and a digital display for operating the microwave oven.

Figure 2.2: Detailed view of the control panel, highlighting six auto-cook presets (Potato, Popcorn, Pizza, Beverage, Frozen Vegetable, Dinner Plate), defrost programs, an intuitive control panel with number keys, a one-touch start button, and a child safety lock feature.
- Digital Display: Shows time, power level, and cooking indicators.
- Auto Cook Menus: Pre-programmed settings for common foods (e.g., Popcorn, Potato, Pizza).
- Time Cook: Manually set cooking time.
- Defrost: Options for defrosting by time or weight.
- Power Level: Adjust microwave power output.
- Clock: Set the current time.
- Kitchen Timer: Functions as a standalone timer.
- Number Pads (0-9): For entering time and other values.
- Start/+30 Sec: Initiates cooking or adds 30 seconds to cooking time.
- Stop/Cancel: Stops cooking or clears settings.
- Child Safety Lock: Engages or disengages the child lock feature.
3. Setup and Installation
3.1 Unpacking
- Remove all packaging materials from inside and outside the microwave oven.
- Inspect the oven for any damage, such as dents or a misaligned door. Do not operate if damaged.
- Remove the protective film from the control panel and exterior surfaces.
3.2 Placement
- Place the microwave oven on a flat, stable surface capable of supporting its weight.
- Ensure adequate ventilation: leave at least 4 inches (10 cm) of space around the sides, back, and top of the oven for proper airflow.
- Do not place the oven near heat sources or in areas with high humidity.
- The oven should be positioned so that the plug is accessible.

Figure 3.1: Illustration of the microwave oven's compact dimensions (18.9" W x 13.5" D x 10.7" H), emphasizing the need for sufficient surrounding space for proper ventilation and fit.
3.3 Electrical Connection
Plug the oven into a properly grounded 3-prong outlet. Do not use an extension cord or adapter.
4. Operating Instructions
4.1 Setting the Clock
- Press the CLOCK button once.
- Use the number pads to enter the current time (e.g., 12:30 for 12:30 PM).
- Press the CLOCK button again to confirm.
4.2 Basic Microwave Cooking
- Place food in a microwave-safe container on the glass turntable.
- Close the oven door securely.
- Enter the desired cooking time using the number pads.
- To adjust power level (optional): Press POWER LEVEL, then enter a number from 1 (low) to 10 (high).
- Press START/+30 SEC to begin cooking.
Quick Start: For immediate cooking at full power, simply press START/+30 SEC multiple times to add 30-second increments.
4.3 Auto Cook Menus
The oven features pre-programmed settings for convenience.
| Menu Item | Instructions |
|---|---|
| Potato | Press POTATO, then select quantity (e.g., 1, 2, or 3 potatoes). |
| Popcorn | Press POPCORN, then select bag size (e.g., 1.75 oz, 3.0 oz). |
| Pizza | Press PIZZA, then select slice quantity. |
| Beverage | Press BEVERAGE, then select cup quantity. |
| Frozen Vegetable | Press FROZEN VEGETABLE, then select weight. |
| Dinner Plate | Press DINNER PLATE, then select plate size. |


Figure 4.1: Examples of foods suitable for auto-cook functions, such as a baked potato and a takeout dinner plate.
4.4 Defrosting
The microwave offers two defrost modes:
- Defrost by Weight:
- Press WEIGHT DEFROST.
- Enter the food's weight using the number pads (e.g., 1.0 for 1 lb).
- Press START/+30 SEC.
- Defrost by Time:
- Press TIME DEFROST.
- Enter the desired defrosting time.
- Press START/+30 SEC.

Figure 4.2: Example of food suitable for defrosting, such as a frozen tuna steak.
4.5 Kitchen Timer
- Press the KITCHEN TIMER button once.
- Enter the desired time using the number pads.
- Press START/+30 SEC. The timer will count down without microwave operation.
4.6 Child Safety Lock
To prevent unintended operation, especially by children:
- To Activate: Press and hold the STOP/CANCEL button for 3 seconds. A lock indicator will appear on the display.
- To Deactivate: Press and hold the STOP/CANCEL button for 3 seconds again. The lock indicator will disappear.

Figure 4.3: A child reaching for a countertop, illustrating the importance of the child safety lock feature.
5. Maintenance and Cleaning
Regular cleaning and maintenance will ensure the longevity and optimal performance of your microwave oven.
- Interior: Wipe the interior with a damp cloth after each use. For stubborn stains, use a mild detergent or a microwave-safe cleaner. Do not use abrasive cleaners.
- Exterior: Clean the exterior surfaces with a soft, damp cloth. Avoid harsh chemicals.
- Door and Seals: Regularly clean the door, door seals, and the area around the door to remove spills and splatters.
- Glass Turntable and Roller Ring: These can be removed and washed in warm, soapy water or in the dishwasher. Ensure they are dry before placing them back in the oven.
- Before Cleaning: Always unplug the microwave oven from the power outlet before cleaning.
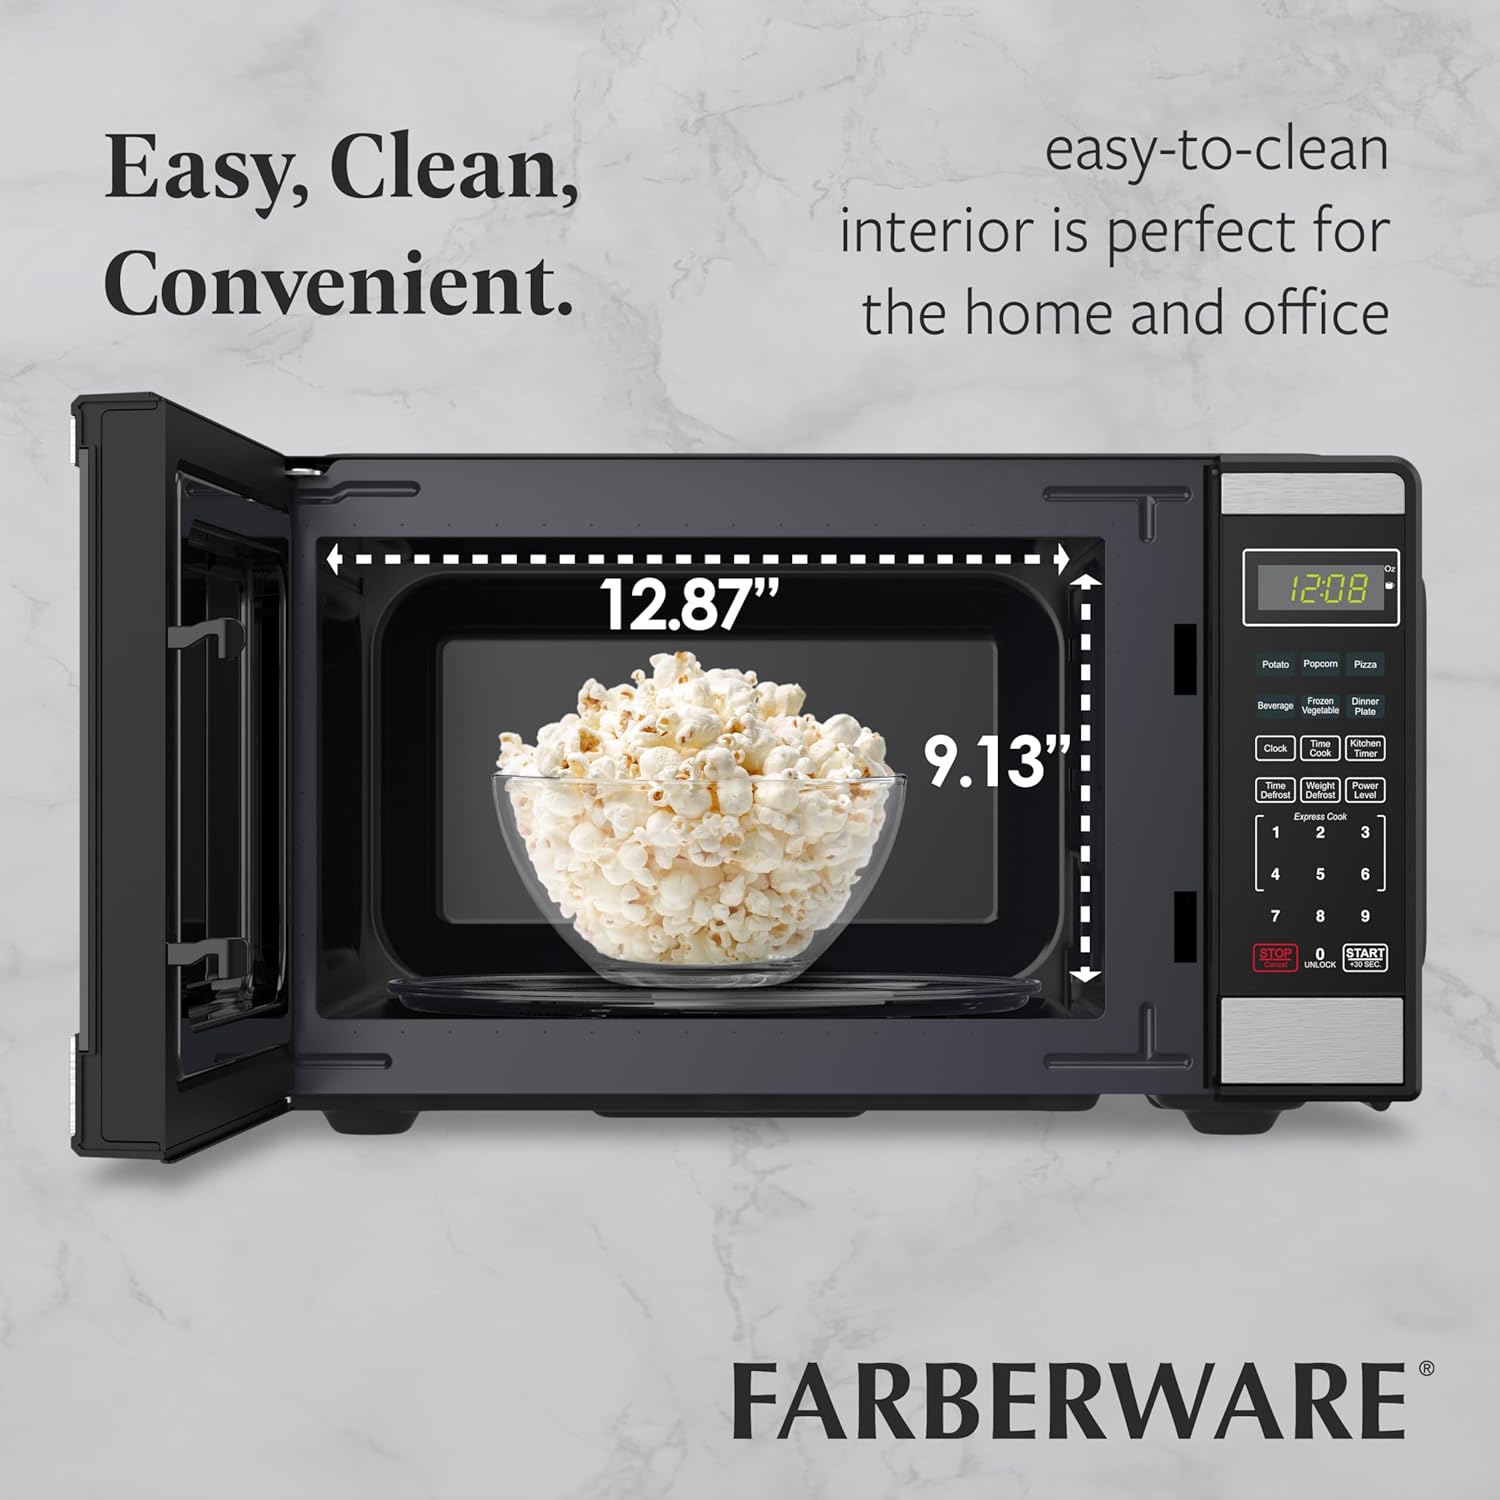
Figure 5.1: View of the microwave interior with a bowl of popcorn, illustrating the spacious and easy-to-clean design.
6. Troubleshooting
If you encounter issues with your microwave oven, refer to the following table for common problems and solutions.
| Problem | Possible Cause | Solution |
|---|---|---|
| Oven will not start | Door not closed properly; Plug not inserted firmly; Fuse blown or circuit breaker tripped; Child lock activated. | Ensure door is securely latched; Check power plug connection; Reset circuit breaker or replace fuse; Deactivate child lock (see Section 4.6). |
| Food not heating | Incorrect cooking time/power level; Microwave-safe dish not used. | Adjust cooking time and power level; Use only microwave-safe cookware. |
| Turntable not rotating | Turntable or roller ring not positioned correctly; Debris under turntable. | Ensure turntable and roller ring are correctly seated; Clean under the turntable. |
| Unusual noises during operation | Loose components; Food container touching oven walls. | Check for loose parts; Ensure food container does not obstruct turntable rotation. |
7. Specifications
| Feature | Detail |
|---|---|
| Model | 0.9 Cu. Ft Countertop Microwave Oven (ASIN: B0DV5Q8JPS) |
| Capacity | 0.9 Cubic Feet |
| Wattage | 900 Watts |
| Product Dimensions (D x W x H) | 13.5" x 18.98" x 10.75" |
| Item Weight | 28 pounds |
| Material | Stainless Steel |
| Special Features | Child Safety Lock, Digital Control, Programmable, Auto Cook Menus |
| Installation Type | Countertop |
8. Warranty and Support
For warranty information and customer support, please refer to the warranty card included with your product or visit the official Farberware website.
You can also find additional support and contact information on the Farberware Store on Amazon.
Related documents0.9 Cu. Ft Countertop Microwave Oven


Ask a question about this manual
Ask about setup, troubleshooting, compatibility, parts, safety, or missing instructions. Manuals+ will review the question and use this page’s manual context to help answer it.