1. Introduction
This manual provides essential instructions for the setup, operation, and maintenance of your GOCHIFIX 10.1-inch 3-Lens Digital Microscope (Model GM-0301). This advanced digital microscope is designed for detailed observation across various applications, from coin inspection to biological slide analysis and electronic soldering. It features a high-resolution IPS display, multiple magnification lenses, adjustable LED lighting, and versatile connectivity options.
2. Package Contents
Please verify that all items listed below are included in your package:
- GOCHIFIX 10.1in Digital Microscope x1
- Base x1
- Stand x1
- Lighting Platform x1
- Thumb Screws x2
- Remote Control x1
- Type-C Cable x2
- HDMI Cable x1
- 64GB TF Card x1
- User Manual x1
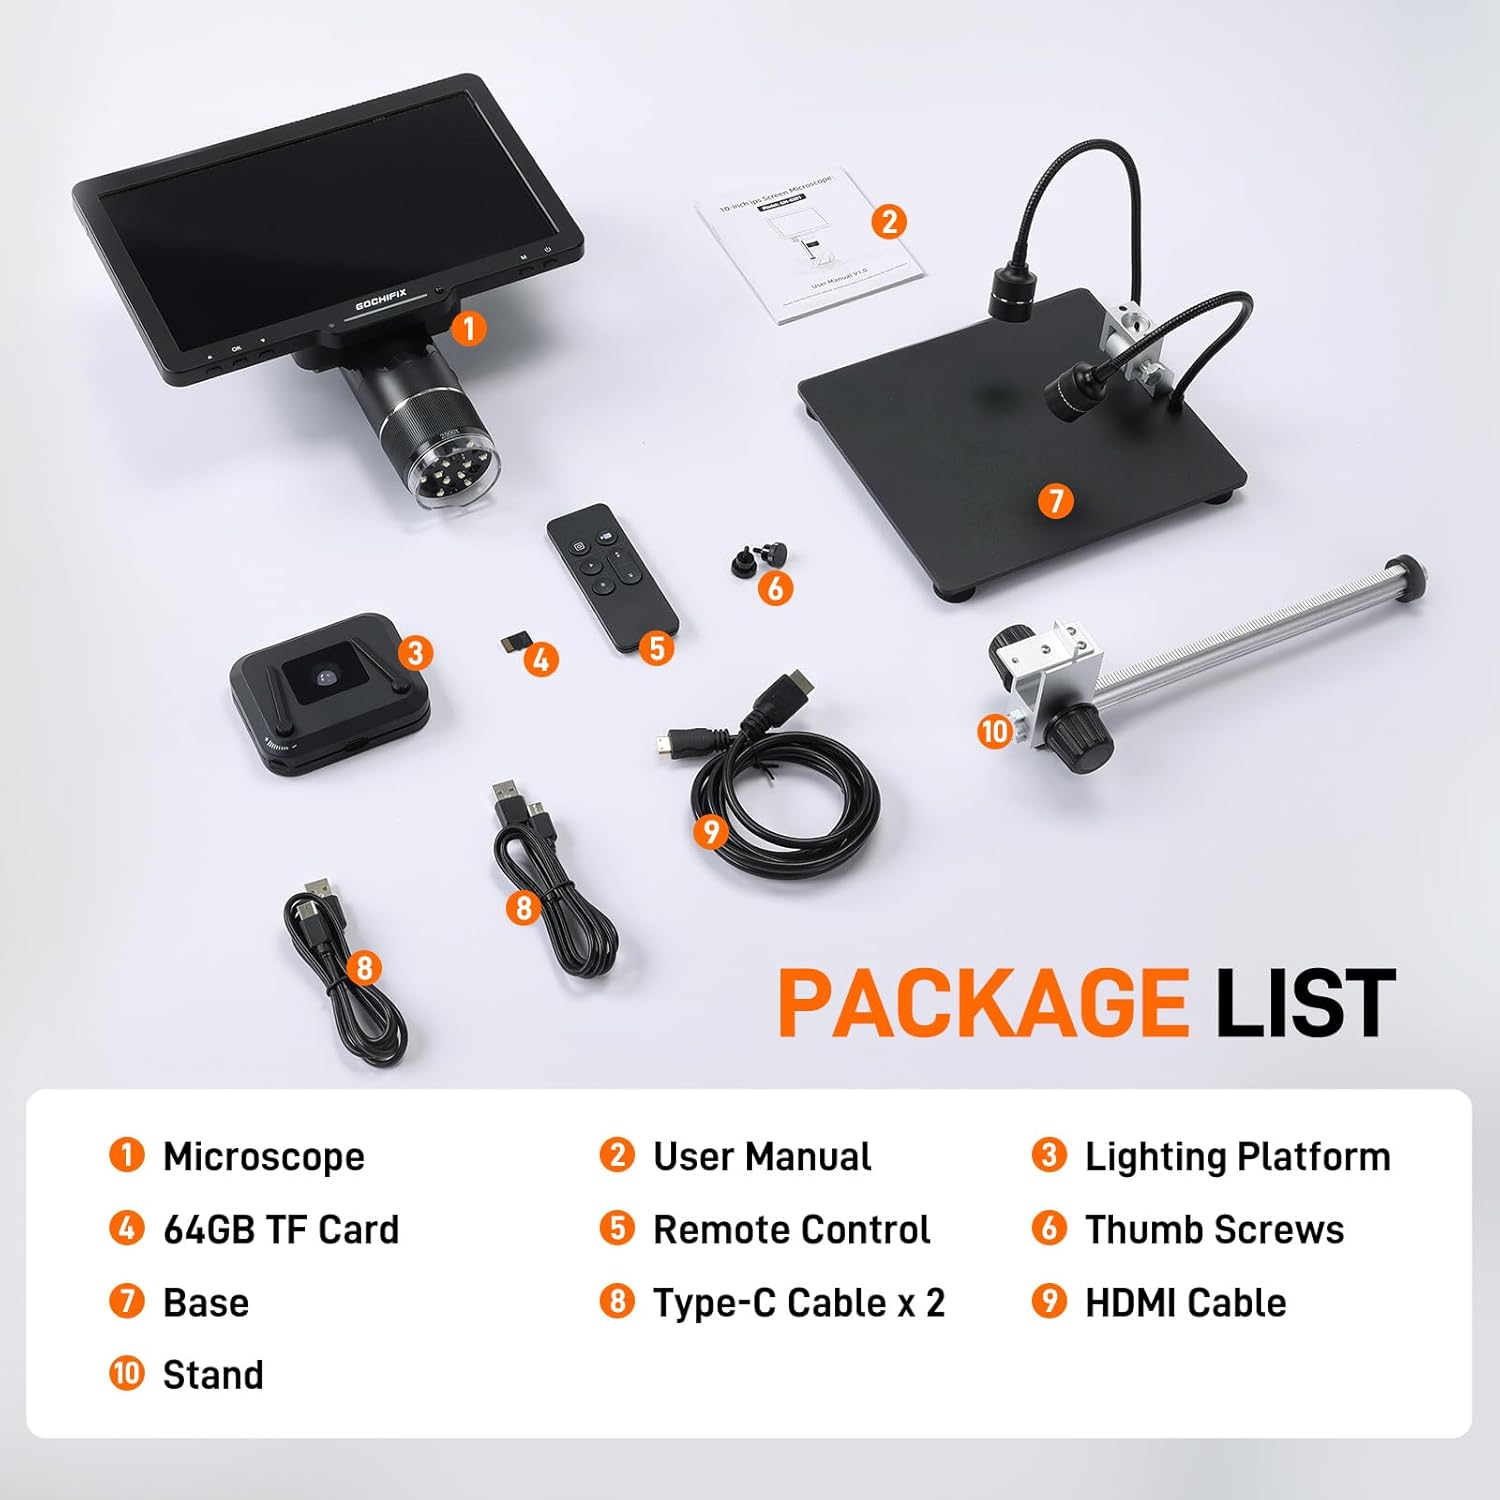
Figure 2.1: All components included in the package.
3. Setup Instructions
Follow these steps to assemble your digital microscope:
- Assemble the Stand: Attach the stand to the base using the provided thumb screws. Ensure it is securely fastened.
- Mount the Microscope Unit: Carefully attach the digital microscope unit to the stand. Use the adjustment knobs to set the desired height and angle.
- Connect Lighting: Attach the two flexible gooseneck side lights to the stand. Position them to provide optimal illumination for your viewing area. The lighting platform can be placed on the base for bottom illumination.
- Power Connection: Connect one of the Type-C cables to the microscope unit and to a suitable power source (e.g., USB wall adapter, computer USB port). The microscope contains a built-in Lithium Ion battery.
- Insert TF Card: Locate the TF card slot on the microscope unit and insert the provided 64GB TF card. This is essential for saving photos and videos.
- Optional: HDMI/USB Connection: If connecting to an external display, use the HDMI cable for TV/monitor or a Type-C cable for PC/laptop.
4. Operating Instructions
4.1. Powering On/Off
Press and hold the 'POWER' button on the microscope unit or the remote control to turn the device on or off. The 10.1-inch IPS display will activate, showing the live view.

Figure 4.1: The 10.1-inch IPS Display provides a wide viewing angle and vivid colors.
4.2. Lens Selection and Magnification
The microscope comes with three interchangeable lenses, each designed for specific magnification ranges:
- 1000X Lens (2X-1000X): Ideal for observing coins, stamps, and gemstones. Working distance: 50-210mm.
- 1500X Lens (10X-1500X): Suitable for precise PCB soldering and watch repair. Working distance: 40-170mm.
- 2500X Lens (2000X-2500X): Designed for detailed observation of biological slides. Working distance: 3-5mm.
To switch lenses, simply rotate the lens barrel on the microscope unit. Adjust the focus by twisting the focus knob on the microscope unit until the image on the screen is clear.

Figure 4.2: Easily switch between 3 lenses for various magnification needs.
4.3. Adjustable Lighting
The microscope is equipped with multiple lighting options to ensure optimal visibility:
- 12 Built-in LED Main Lights: Brightness is adjustable from 10% to 100%.
- 2 Flexible Gooseneck Side Lights: Independently adjustable to illuminate objects from different angles.
- Bottom Slide Light: Provides illumination from below, useful for transparent specimens.
Each light source can be independently adjusted using the controls on the microscope unit or the remote control. This allows for precise illumination, even in low-light environments.
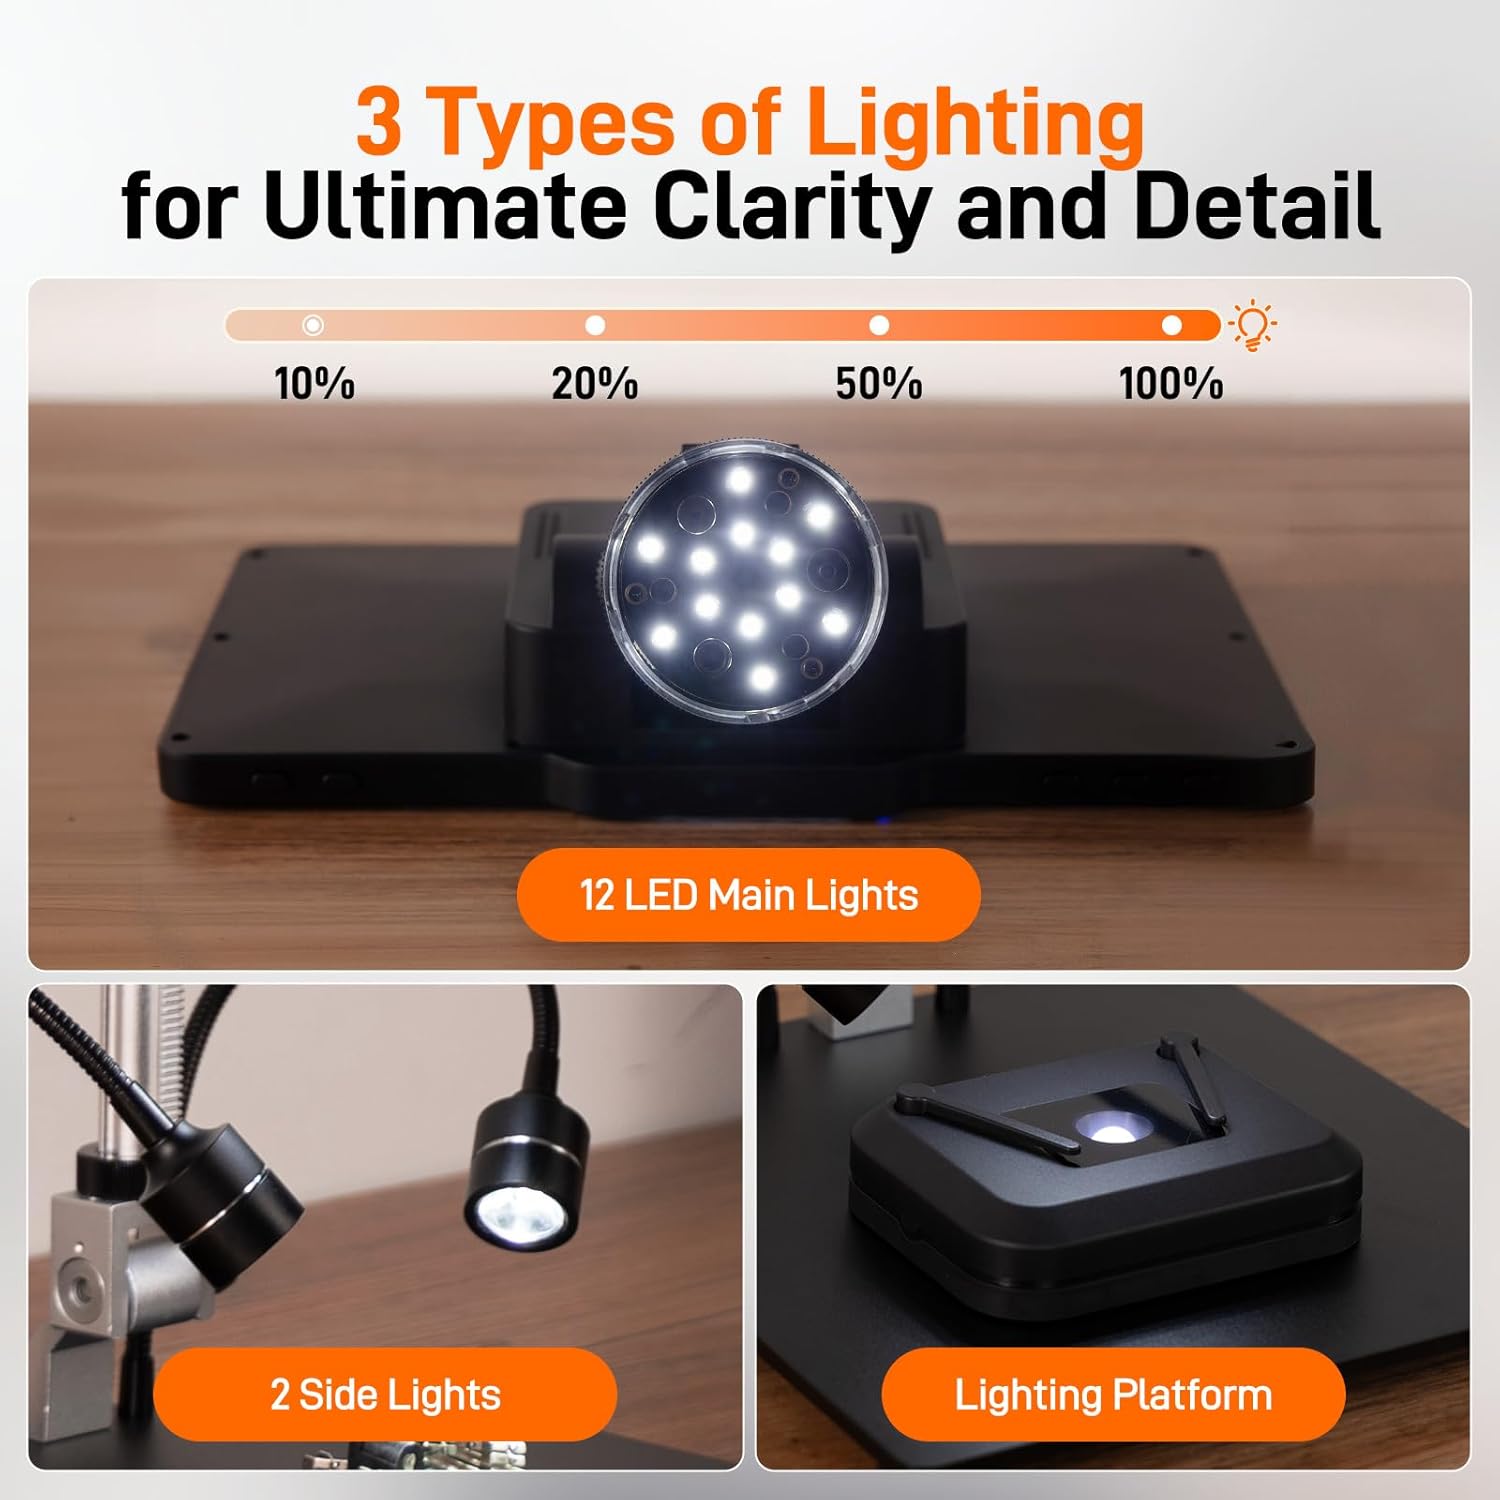
Figure 4.3: Utilize three types of lighting for ultimate clarity and detail.
4.4. Using the Wireless Remote Control
The included wireless remote control provides convenient operation without disturbing the microscope setup. Use it to:
- Zoom in and out.
- Capture photos (24MP resolution).
- Record videos (2K resolution).
- Navigate menus and adjust settings.
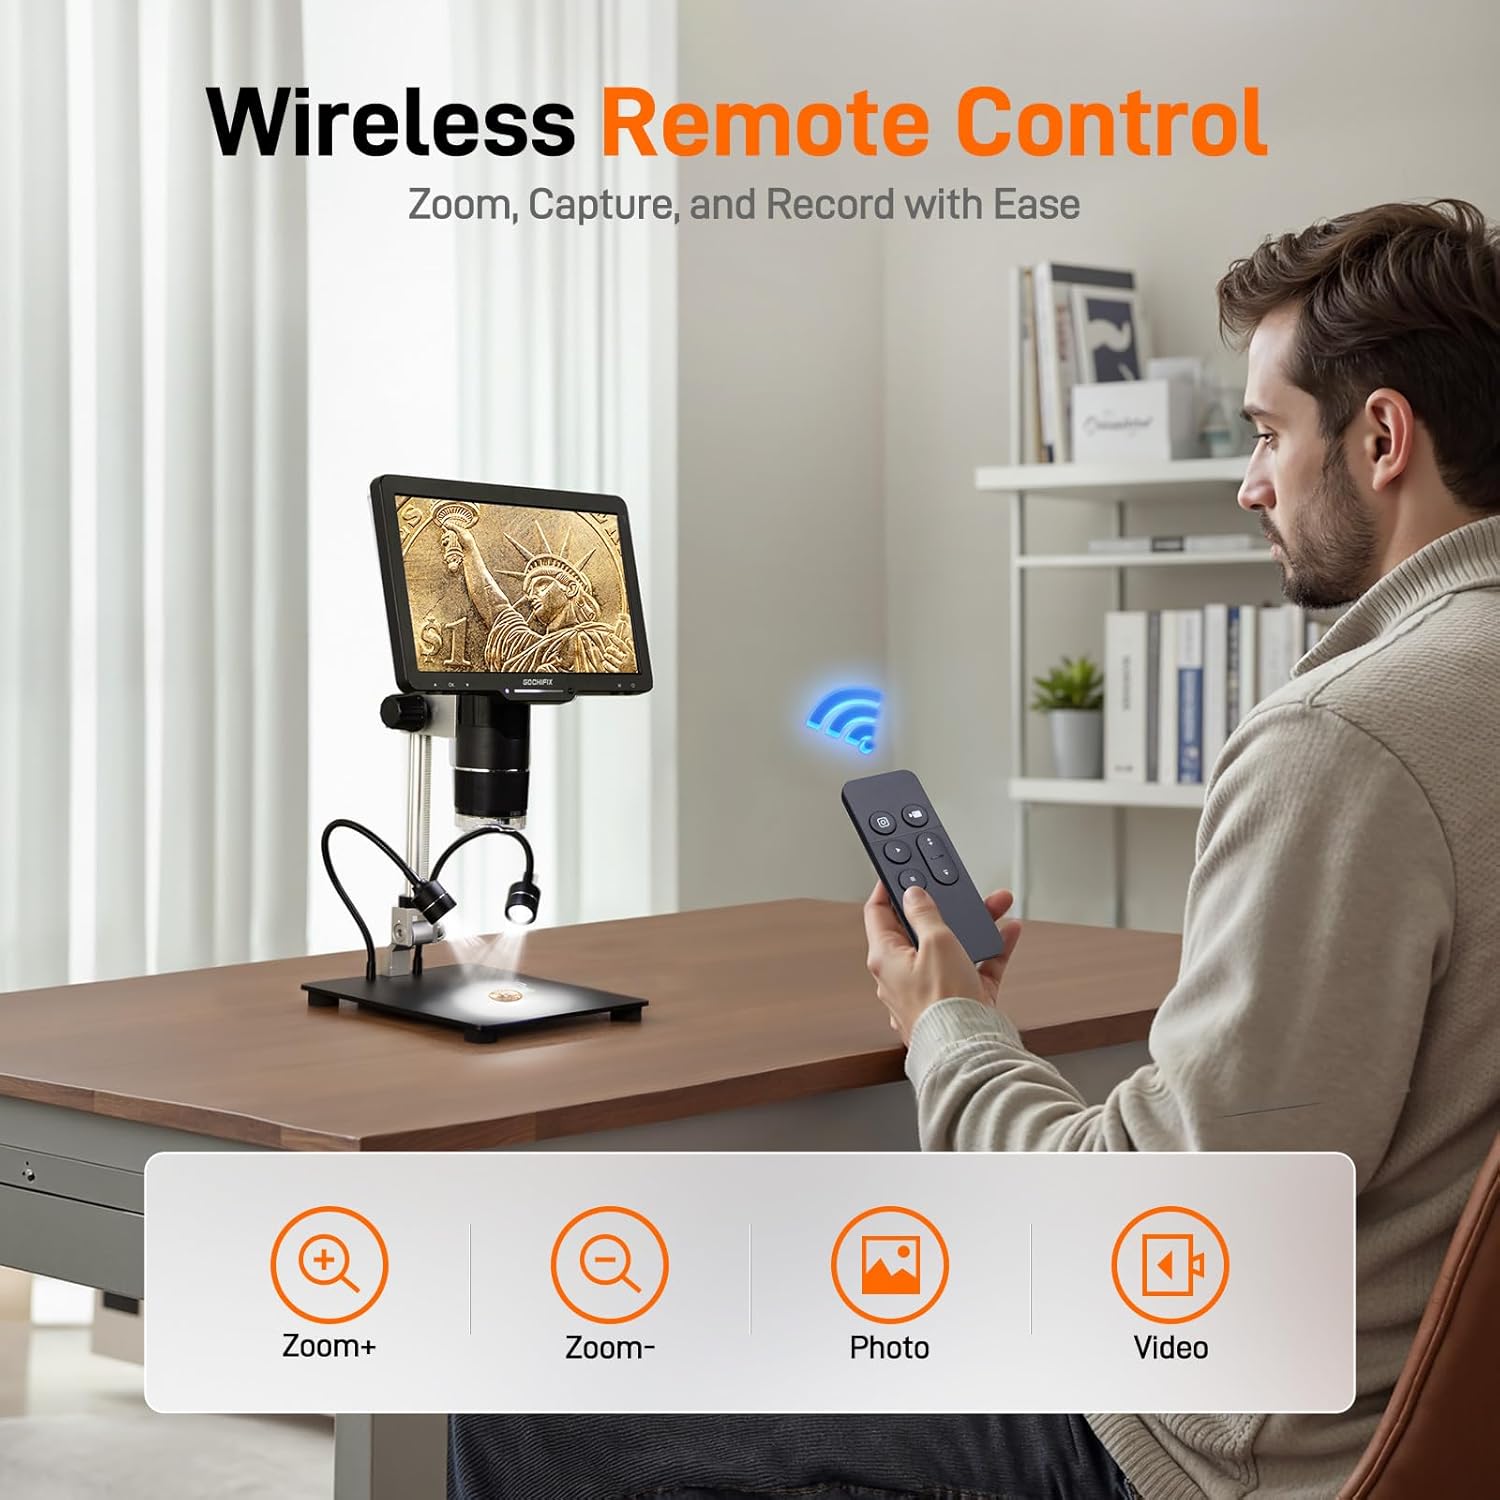
Figure 4.4: Effortless control with the wireless remote for zooming, capturing, and recording.
4.5. Photo and Video Recording
With the 64GB TF card installed, you can easily save high-resolution photos and 2K videos directly from the microscope. Use the dedicated buttons on the remote or the microscope unit to switch between photo and video modes and to initiate recording.

Figure 4.5: The included 64GB storage card allows ample space for high-resolution media.
5. External Connectivity (HDMI & USB Output)
The GOCHIFIX Digital Microscope supports real-time output to external displays for a larger and clearer viewing experience. It is compatible with Windows and Mac OS.
- HDMI Output: Connect the microscope to a TV or monitor using the provided HDMI cable. The microscope's display will mirror on the external screen.
- USB Output: Connect the microscope to a PC or laptop via a Type-C cable. You may need to install specific software (refer to the included User Manual for software details) to view and control the microscope from your computer.
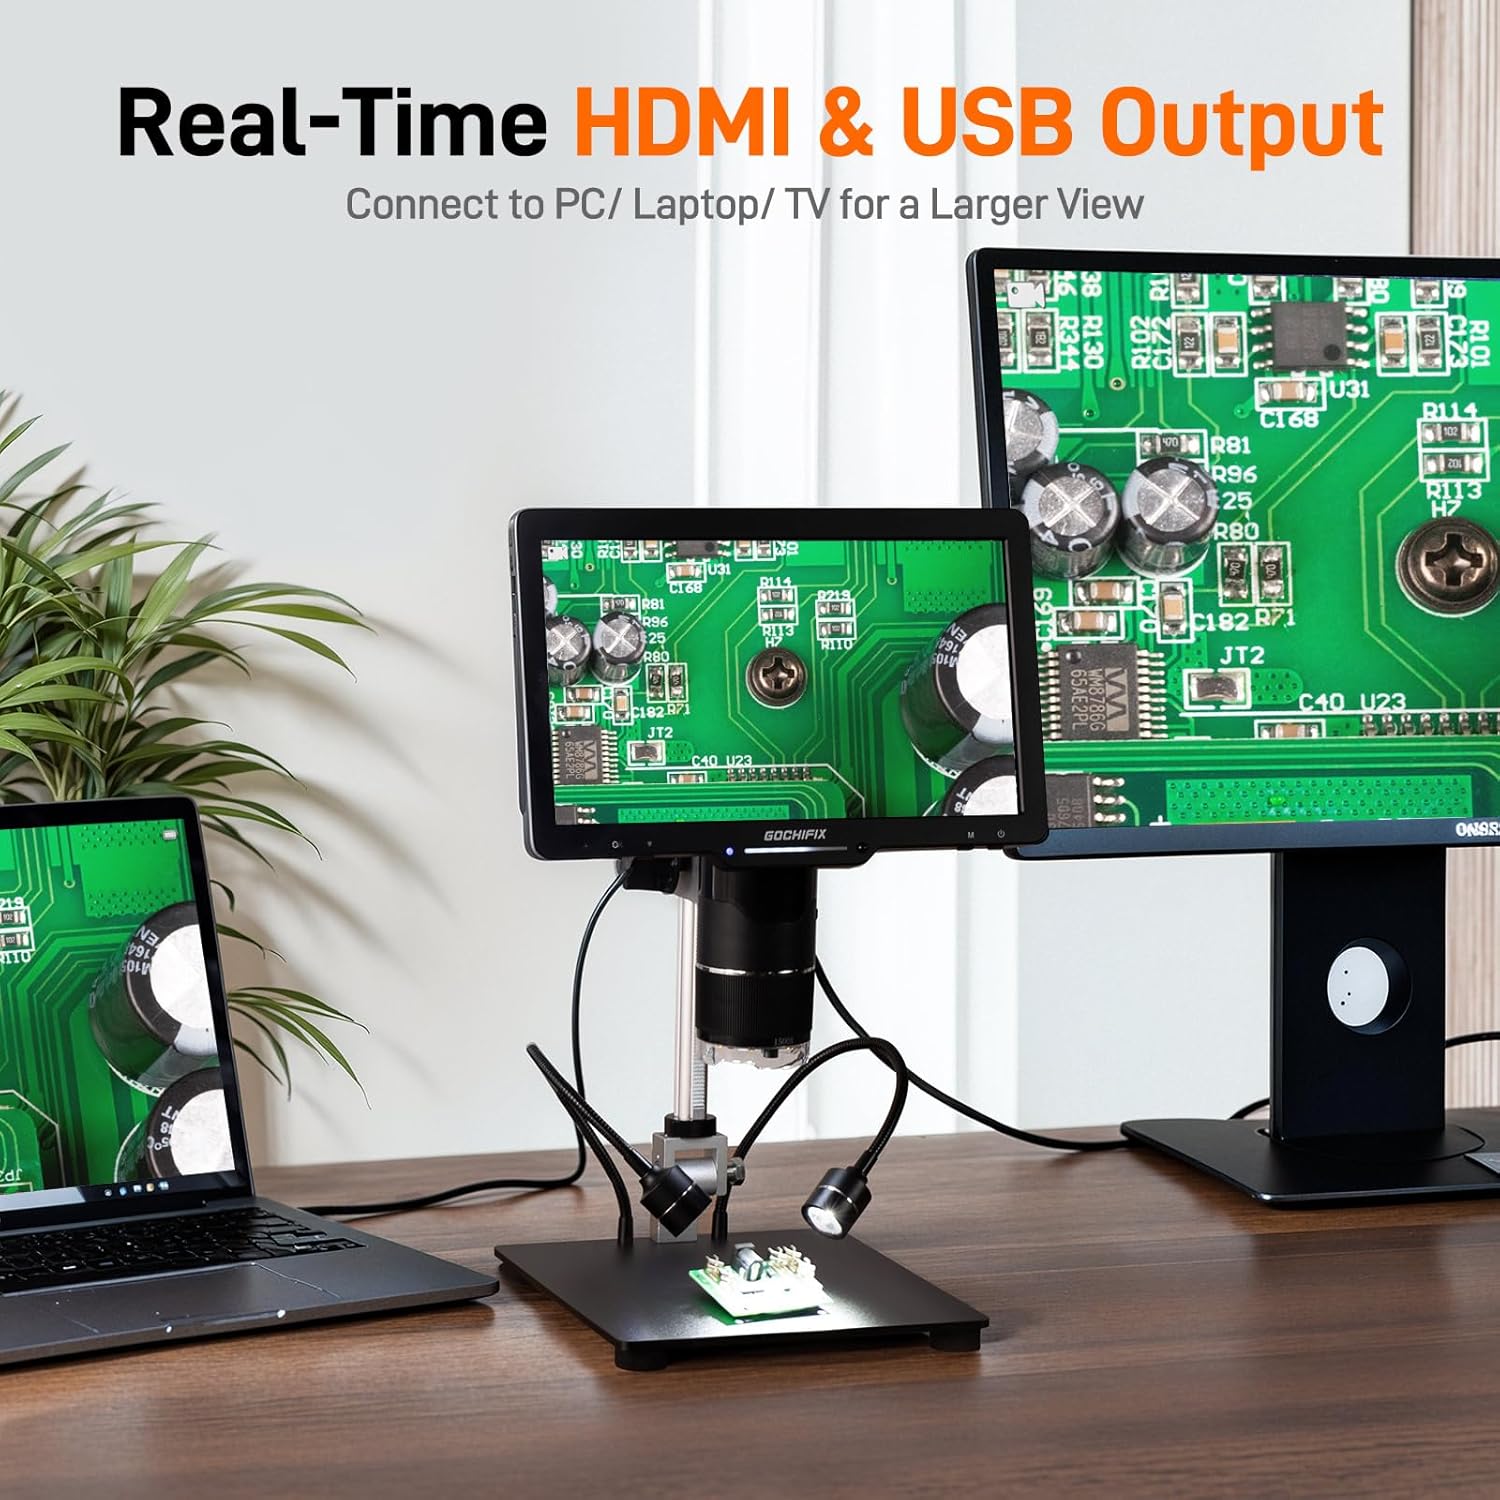
Figure 5.1: Seamlessly connect to PC, laptop, or TV for an enhanced viewing experience.
6. Maintenance
- Cleaning: Use a soft, dry cloth to clean the microscope body. For lenses, use a specialized lens cleaning cloth and solution to avoid scratches.
- Storage: Store the microscope in a dry, dust-free environment when not in use.
- Battery Care: The device includes a Lithium Ion battery. For optimal battery life, avoid fully discharging the battery frequently and store it with a partial charge if not used for extended periods.
7. Troubleshooting
- No Power: Ensure the Type-C cable is securely connected to both the microscope and a working power source. Check if the battery is charged.
- Blurred Image: Adjust the focus knob on the microscope unit. Ensure the correct lens is selected for the working distance of your specimen. Clean the lens if necessary.
- No Image on External Display: Verify that the HDMI or USB cable is correctly connected. For USB, ensure the correct software/drivers are installed on your computer.
- Remote Control Not Responding: Check the battery in the remote control. Ensure there are no obstructions between the remote and the microscope.
For further assistance, please refer to the detailed User Manual included in your package or contact GOCHIFIX customer support.
8. Specifications
| Feature | Detail |
|---|---|
| Model Number | GM-0301 |
| Display Size | 10.1 inches IPS |
| Photo Resolution | 24MP |
| Video Resolution | 2K |
| Magnification (Max) | 2500x |
| Lenses Included | 1000X, 1500X, 2500X |
| Lighting | 12 Built-in LED Main Lights, 2 Flexible Gooseneck Side Lights, Bottom Slide Light |
| Storage | 64GB TF Card (included) |
| Output Ports | HDMI, USB |
| Compatibility | Windows, Mac OS |
| Power Source | Battery Powered (1 Lithium Ion battery included) |
| Item Weight | 4.81 pounds |
| Package Dimensions | 12.13 x 11.5 x 4.25 inches |
9. Warranty and Support
This product is subject to a 30-day return policy. For specific warranty details and technical support, please refer to the official GOCHIFIX website or contact their customer service directly. Contact information can typically be found in the included User Manual or on the product packaging.


