RecPro RP-1989
RecPro IRV 37 RV Mechless Stereo Unit User Manual
Model: RP-1989
1. Introduction
Thank you for choosing the RecPro IRV 37 RV Mechless Stereo Unit. This unit is designed to provide a comprehensive audio and video entertainment experience in your RV, featuring AM/FM radio, Bluetooth connectivity, and versatile input options. This manual provides detailed instructions for installation, operation, and maintenance to ensure optimal performance and longevity of your stereo unit.
2. Safety Information
Please read all safety instructions carefully before installation and operation. Keep this manual for future reference.
- Electrical Connections: Ensure all wiring is correctly connected to prevent short circuits or damage. Incorrect wiring can lead to fire or electrical shock.
- Power Supply: The unit requires a 11-15V DC power supply. Do not connect to a 24V system.
- Wiring Warning: Both Yellow BAT and Red ACC wires cannot be left empty. If there is only one power supply in the vehicle, Yellow BAT and Red ACC must be connected together to the positive terminal of the power supply.
- Ventilation: Ensure adequate ventilation around the unit to prevent overheating.
- Moisture: Do not expose the unit to water or excessive moisture.
- Professional Installation: If you are unsure about any installation steps, consult a qualified technician.
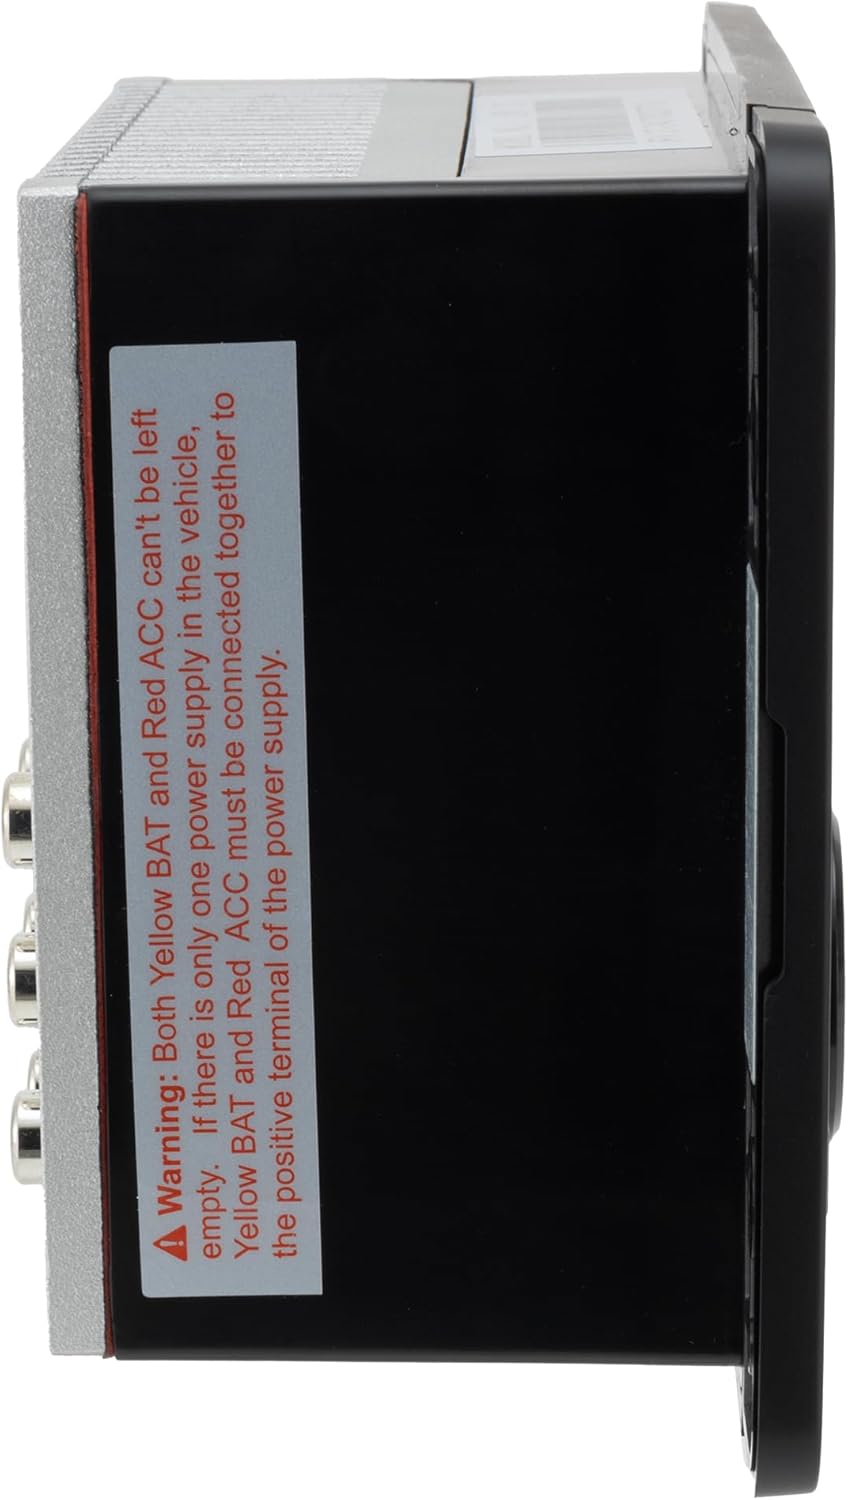
Figure 2.1: Side view of the stereo unit with important wiring warning.
3. Product Overview
The IRV 37 RV Mechless Stereo Unit offers a range of features for your entertainment needs:
- Bluetooth Connectivity: Easily connect your phone or tablet wirelessly for audio streaming.
- Versatile Audio & Video Inputs: Equipped with HDMI ARC input/output, plus audio and video inputs to integrate DVD players, game consoles, and more.
- Built-in AM/FM Tuner: Access 18 preset FM stations and 12 AM stations.
- Convenient USB Charging: Keep your devices powered with a 5V USB charging port.
- Dual Zone Audio: Control audio in two separate areas of your RV for a tailored listening experience.
- LCD Display: Clear and easy-to-read LCD display with clock function.
3.1 Front Panel Controls and Features

Figure 3.1: Front panel of the IRV 37 Stereo Unit.
- MUTE Button: Mutes/unmutes audio output.
- BT Button: Switches to Bluetooth mode.
- AM/FM Button: Toggles between AM and FM radio bands.
- MODE Button: Cycles through available audio sources (AM/FM, Bluetooth, AUX, HDMI).
- Play/Pause Button: Controls playback in media modes.
- Skip/Track Buttons (<<, >>): Navigates tracks or tunes radio frequencies.
- Volume Knob: Rotates to adjust volume. Press to select or confirm.
- ZONE1 / ZONE2 Buttons: Activates or deactivates audio output for respective zones.
- USB Port: 5V charging port.
- HDMI Port: HDMI ARC input/output.
3.2 Rear Panel Connections

Figure 3.2: Rear panel connections.
The rear panel includes connections for the main wiring harness, HDMI ARC, and various RCA audio/video inputs and outputs for connecting external devices and speakers.
3.3 Remote Control
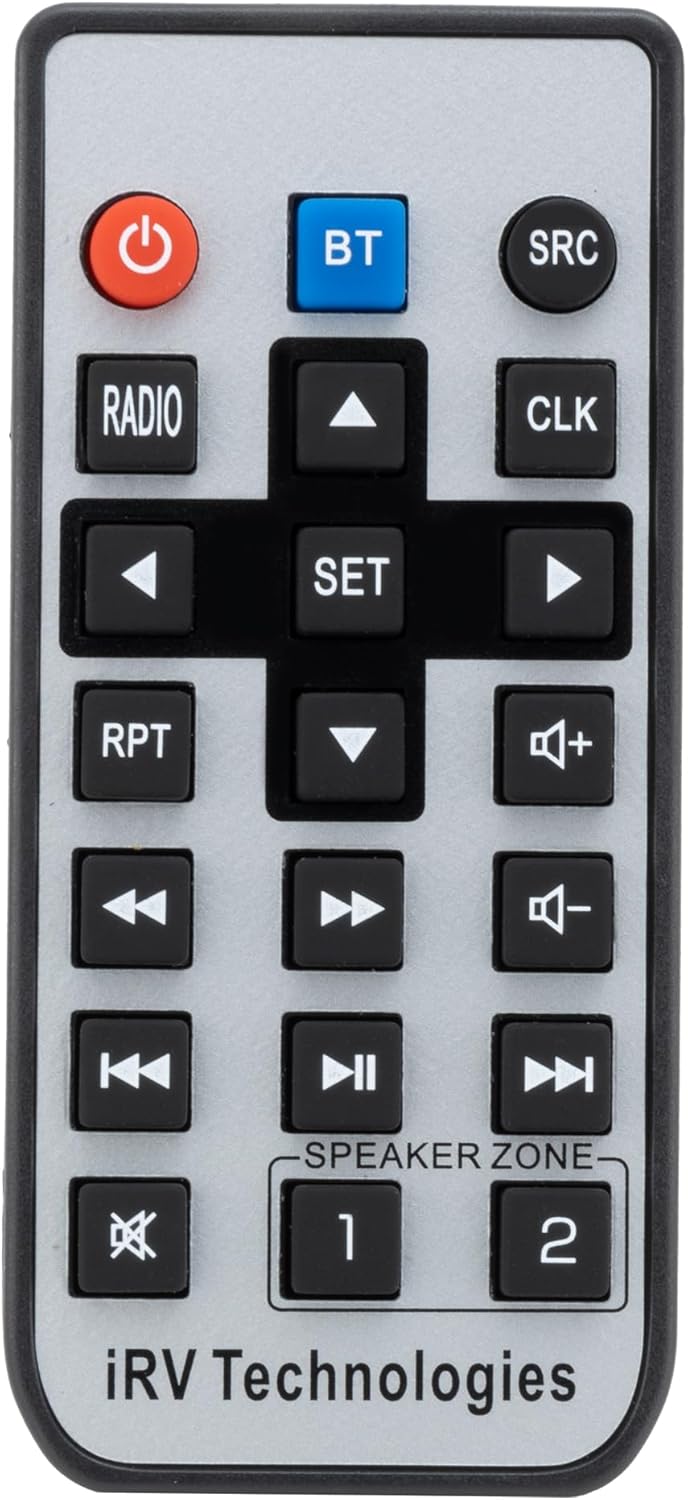
Figure 3.3: Included remote control.
The remote control provides convenient access to all major functions of the stereo unit, including power, source selection, volume adjustment, and dual-zone control.
4. Setup
4.1 Installation
Before installation, ensure you have the necessary tools and a suitable mounting location in your RV. The unit requires a cutout for flush mounting.

Figure 4.1: Stereo unit and cutout dimensions.
- Unit Dimensions: Approximately 6 ¼" (width) x 4 ⅜" (height) x 4 ½" (depth).
- Cutout Dimensions: Approximately 4 ¼" (width) x 3 ⅞" (height).
- Carefully measure and cut the opening in your RV's panel.
- Secure the unit using appropriate mounting hardware (not included unless specified).
4.2 Wiring Connections
Refer to the wiring diagram and the included wiring harness for correct connections. Incorrect wiring can damage the unit or your vehicle's electrical system.

Figure 4.2: Wiring harness.
- Connect the main power wires (Yellow BAT, Red ACC, Black GND) according to your RV's electrical system. Remember the warning from Section 2.
- Connect speaker wires to the appropriate speaker outputs.
- Connect any external audio/video sources (e.g., DVD player) to the RCA input jacks.
- If using HDMI ARC, connect compatible devices to the HDMI port.
- Ensure all connections are secure and insulated to prevent short circuits.
5. Operating Instructions
5.1 Basic Operation
- Power On/Off: Press the power button on the remote or the volume knob on the unit to turn the stereo on or off.
- Volume Control: Rotate the volume knob clockwise to increase volume, counter-clockwise to decrease.
- Mute: Press the MUTE button on the unit or remote to silence the audio. Press again to restore.
- Source Selection: Press the MODE button on the unit or SRC button on the remote to cycle through available audio sources (AM/FM, Bluetooth, AUX, HDMI).
5.2 AM/FM Radio
- Select AM/FM: Press the AM/FM button to switch between radio bands.
- Tuning: Use the Skip/Track buttons (<<, >>) to manually tune frequencies or seek for the next strong station.
- Presets: The unit supports 18 FM and 12 AM presets. Refer to the full manual (if available) for saving and recalling presets.
5.3 Bluetooth Operation
- Pairing:
- Press the BT button on the unit or remote to enter Bluetooth mode. The display will indicate "BT" or "Pairing".
- On your mobile device, enable Bluetooth and search for available devices.
- Select "IRV 37" (or similar name) from the list.
- Once paired, the unit will confirm the connection, and you can stream audio from your device.
- Playback Control: Use the Play/Pause and Skip/Track buttons on the unit or remote to control audio playback.
5.4 USB Functionality
- Charging: Connect your USB-powered device to the 5V USB port on the front panel to charge it.
- Note: This USB port is primarily for charging. Refer to the full product specifications for media playback capabilities via USB.
5.5 Dual Zone Audio
The IRV 37 allows you to control audio output in two separate zones within your RV.

Figure 5.1: Dual Zone Audio capability.
- Activating Zones: Press the ZONE1 or ZONE2 buttons on the front panel or remote to enable or disable audio output for the respective zone.
- This allows you to have different audio levels or even different sources (if supported by your setup) in distinct areas of your RV.
6. Maintenance
- Cleaning: Use a soft, dry cloth to clean the unit's surface. Do not use abrasive cleaners or solvents.
- Connections: Periodically check all wiring connections to ensure they are secure and free from corrosion.
- Fuse Replacement: If the unit does not power on, check the fuse on the wiring harness. Replace with a fuse of the same rating (15A).
7. Troubleshooting
| Problem | Possible Cause | Solution |
|---|---|---|
| No Power | Incorrect wiring; Blown fuse; No power from vehicle. | Check all power connections (Yellow BAT, Red ACC, Black GND). Verify fuse. Test vehicle's power supply. |
| No Sound | Volume too low; Mute activated; Incorrect speaker wiring; Wrong audio source selected. | Increase volume. Deactivate mute. Check speaker connections. Select correct audio source. Ensure zones are active. |
| Bluetooth Not Connecting | Unit not in pairing mode; Device too far; Previous connection active. | Ensure unit is in BT pairing mode. Move device closer. Disconnect from other Bluetooth devices. |
| Poor Radio Reception | Antenna not connected; Weak signal area. | Check antenna connection. Try tuning to a stronger station or relocate vehicle. |
8. Specifications
| Feature | Detail |
|---|---|
| Model Number | RP-1989 |
| Brand | RecPro |
| Power Supply | 11-15V DC |
| Connectivity | AM/FM Radio, Bluetooth, HDMI ARC, Audio/Video Inputs |
| USB Port | 5V Charging |
| Display | LCD with Clock Function |
| Included Components | Radio unit, Remote control, Wiring harness |
| Country of Origin | China |
| UPC | 193652110163 |
9. Warranty and Support
For warranty information or technical support, please contact RecPro customer service. Details can typically be found on the manufacturer's website or through your point of purchase.
You may also consider purchasing extended protection plans for your product, if available, to cover potential issues beyond the standard warranty period.
Visit the RecPro Store on Amazon for more products and information.
Related Documents - RP-1989
 |
RECPRO 6.3 cu ft Gas and Electric RV Refrigerator User Manual RP-2165 RP-2166 User manual and installation guide for the RECPRO 6.3 cu ft Gas and Electric RV Refrigerator, models RP-2165 and RP-2166. Covers installation, operation, troubleshooting, and technical specifications. |
 |
RP-1216 Digital Mobile Receiver System User Manual Comprehensive user manual for the RP-1216 Digital Mobile Receiver System, covering installation, wiring, operation, key functions, troubleshooting, and FCC compliance. |
 |
RecPro RP-AFRM Non-Powered Awning Installation Manual Comprehensive installation manual for the RecPro RP-AFRM Non-Powered Awning, detailing parts, preparation, installation steps, operation, maintenance, and warranty information. |
 |
Klipsch Reference Premiere Series User Manual - Setup, Placement, and Connections Comprehensive user manual for Klipsch Reference Premiere Series speakers, covering setup, room placement, connection guides, Dolby Atmos integration, care, and product registration. Includes model details for RP-8060FA, RP-8000F, RP-6000F, RP-5000F, RP-4000F, RP-600M, RP-500M, RP-400M, RP-502S, RP-402S, RP-500SA, RP-504C, RP-404C, RP-600C, RP-500C, RP-400C, and RP-160M. |
 |
Klipsch Reference Premiere Speakers User Manual User manual for Klipsch Reference Premiere speakers, covering setup, placement, connection, care, and warranty information. Features detailed specifications and diagrams for various models including RP-8060FA, RP-8000F, RP-6000F, RP-5000F, RP-4000F, RP-600M, RP-500M, RP-400M, RP-502S, RP-402S, RP-500SA, RP-504C, RP-404C, RP-600C, RP-500C, and RP-400C. |
Ask a question about this manual
Ask about setup, troubleshooting, compatibility, parts, safety, or missing instructions. Manuals+ will review the question and use this page’s manual context to help answer it.