
1. Introduction
Thank you for choosing the BUUBO DC Power Supply. This adjustable laboratory bench power supply is designed for precision and reliability, offering stable voltage and current output for a wide range of applications. This manual provides essential information for the safe and effective operation, setup, and maintenance of your device.
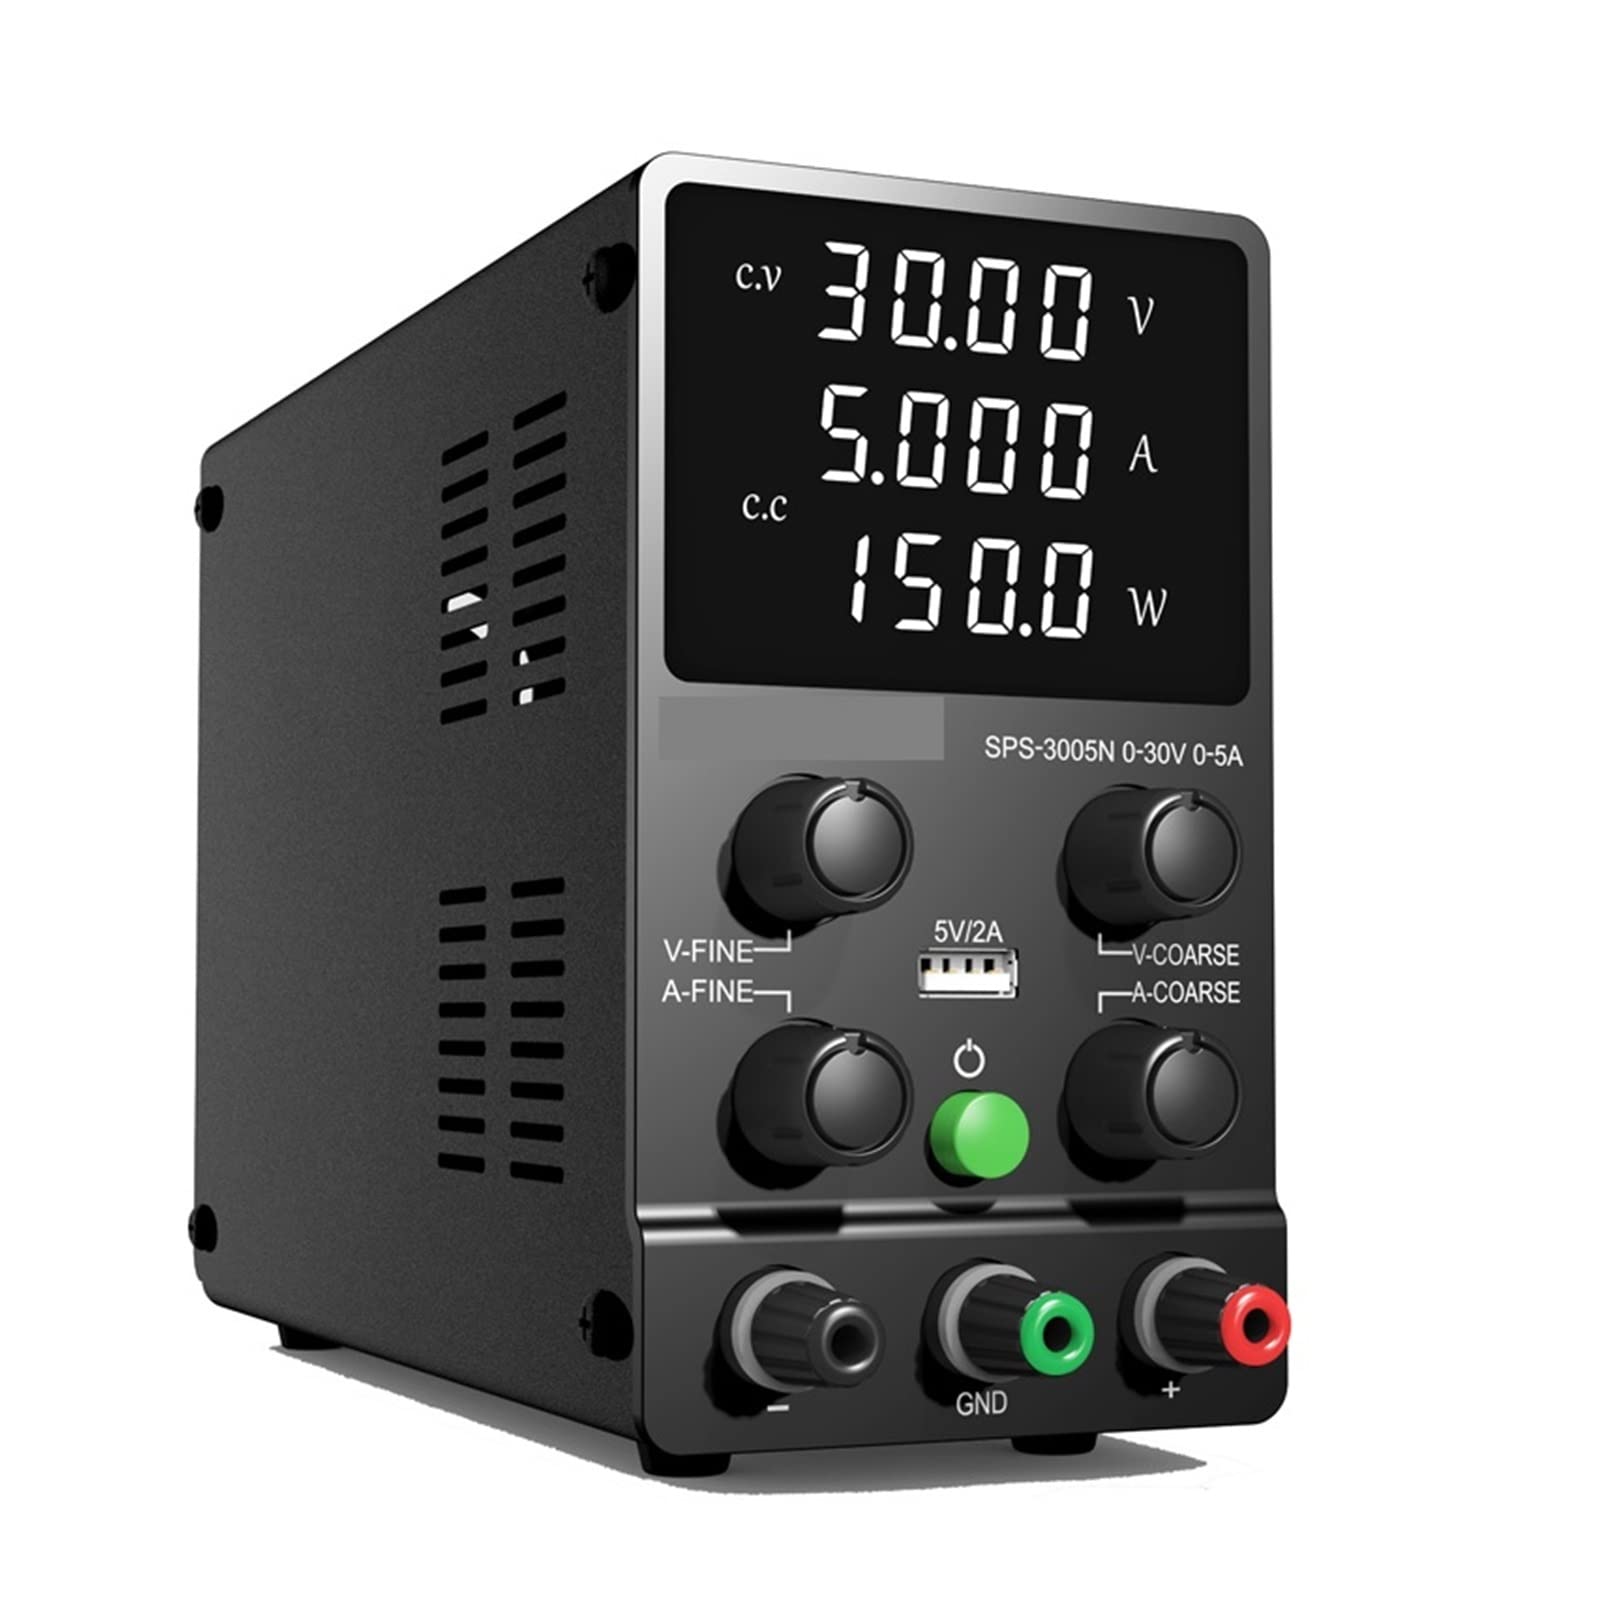
Image 1.1: The BUUBO DC Power Supply, featuring a white digital display for voltage, current, and power readings.
2. Safety Instructions
Please read and understand all safety warnings and operating instructions before using this product. Failure to follow these instructions may result in electric shock, fire, or serious injury.
- Power Source: Connect the power supply only to a grounded AC outlet with the correct voltage.
- Ventilation: Ensure adequate ventilation around the unit. Do not block ventilation openings.
- Environment: Do not operate in wet or damp conditions, or in areas with flammable gases or vapors.
- Overload: Do not exceed the rated voltage and current limits of the device.
- Maintenance: Refer all servicing to qualified personnel. Do not attempt to open or repair the unit yourself.
- Output Terminals: Ensure output terminals are properly connected before applying power. Avoid short-circuiting the output terminals.
3. Package Contents
Verify that all items listed below are included in your package:
- 1x BUUBO DC Power Supply Unit
- 1x Power Adapter Cable
- 1x Black Output Line (Test Lead)
- 1x Red Output Line (Test Lead)
- 1x Instruction Book (English)
- 1x Hard Package Box
- 2x Protective Sponge Inserts

Image 3.1: The DC power supply unit shown with its power adapter cable and red and black output test leads.
4. Product Overview
The BUUBO DC Power Supply features a clear digital display and intuitive controls for precise voltage and current regulation. Understanding the layout of the front and rear panels is crucial for proper operation.

Image 4.1: Detailed diagram illustrating the various components and controls of the power supply, including the display, adjustment knobs, and connection ports.
Front Panel Controls and Indicators:
- Output Voltage Display: Shows the current output voltage in Volts (V).
- Output Current Display: Shows the current output current in Amperes (A).
- Output Power Display: Shows the current output power in Watts (W).
- Voltage Regulator (Coarse/Fine): Adjusts the output voltage.
- Current Regulator (Coarse/Fine): Adjusts the output current limit.
- Voltage Coarse Tuner (V-COARSE): For large adjustments of voltage.
- Current Coarse Tuner (A-COARSE): For large adjustments of current.
- Voltage Fine Tuner (V-FINE): For precise adjustments of voltage.
- Current Fine Tuner (A-FINE): For precise adjustments of current.
- USB Charging Socket (5V/2A): Provides a 5V, 2A USB output for charging devices.
- Positive Polarity Output (Red): Connects to the positive terminal of your load.
- Grounding Terminal (Green): Connects to earth ground for safety.
- Negative Polarity Output (Black): Connects to the negative terminal of your load.
Rear Panel Components:
- Power Switch: Turns the unit ON/OFF.
- Cooling Fan: Activates automatically to dissipate heat.
- Power Socket: Connects the power adapter cable.
- Fuse Box: Contains the protective fuse.
5. Setup
Follow these steps to set up your BUUBO DC Power Supply:
- Unpack: Carefully remove the power supply and all accessories from the packaging.
- Placement: Place the unit on a stable, level surface with adequate ventilation. Ensure no objects are blocking the cooling fan on the rear panel.
- Power Connection: Connect the provided power adapter cable to the Power Socket (16) on the rear panel and then plug it into a grounded AC outlet.
- Initial Check: Before connecting any load, turn on the power supply using the Power Switch (14). The display should illuminate.
- Output Lead Connection: Connect the red output line to the Positive Polarity Output (11) and the black output line to the Negative Polarity Output (13). If grounding is required for your application, connect a separate ground wire to the Grounding Terminal (12).
6. Operating Instructions
The BUUBO DC Power Supply operates in two main modes: Constant Voltage (CV) and Constant Current (CC).
6.1 Setting Voltage and Current Limits (Pre-setting)
It is recommended to set the desired voltage and current limits before connecting your load.
- Power On: Ensure the power supply is turned on but no load is connected to the output terminals.
- Set Voltage: Adjust the Voltage Coarse Tuner (6) and Voltage Fine Tuner (8) until the Output Voltage Display (1) shows your desired voltage.
- Set Current Limit: To set the current limit, temporarily short-circuit the output terminals using a suitable test lead (or connect a low-resistance load). The Output Current Display (2) will show the current flowing. Adjust the Current Coarse Tuner (7) and Current Fine Tuner (9) until the display shows your desired current limit. Remove the short circuit or low-resistance load.
- Connect Load: Now, connect your device or circuit to the output terminals. The power supply will operate within the set voltage and current limits.
6.2 Constant Voltage (CV) Mode
In CV mode, the output voltage remains constant at the set value, while the output current varies depending on the load resistance, up to the set current limit. The CV indicator on the display will be lit.
6.3 Constant Current (CC) Mode
In CC mode, the output current remains constant at the set value, while the output voltage varies depending on the load resistance, down to the set voltage limit. This mode is typically used for charging batteries or driving LEDs. The CC indicator on the display will be lit.
6.4 USB Charging
The USB Charging Socket (10) provides a fixed 5V, 2A output. Simply connect your USB-powered device to this port for charging.
7. Applications
This versatile DC power supply is suitable for a variety of uses, including:
- Factory production line testing.
- Mobile phone, computer, and electrical appliance repair and maintenance.
- Product aging tests for components like resistors, capacitors, relays, DC motors, and LEDs.
- Battery charging (including car batteries).
- Laboratory experiments, scientific research, and educational purposes.
- Security monitoring systems and building automation systems.

Image 7.1: Examples of the power supply being used in different professional and hobbyist settings, such as product aging, testing, and maintenance.
8. Maintenance
Proper maintenance ensures the longevity and reliable operation of your power supply.
- Cleaning: Disconnect power before cleaning. Use a soft, dry cloth to wipe the exterior. Do not use abrasive cleaners or solvents.
- Ventilation: Regularly check that the cooling fan and ventilation openings are free from dust and obstructions.
- Storage: When not in use for extended periods, store the unit in a cool, dry place, away from direct sunlight and extreme temperatures.
- Fuse Replacement: If the unit fails to power on, check the fuse in the Fuse Box (17) on the rear panel. Replace with a fuse of the same type and rating if necessary.
9. Troubleshooting
If you encounter issues with your power supply, refer to the following common problems and solutions:
| Problem | Possible Cause | Solution |
|---|---|---|
| No power/Display off | Power cable disconnected, power switch off, blown fuse. | Check power cable connection, ensure power switch is ON, replace fuse if blown. |
| No output voltage/current | Output terminals not connected, voltage/current set to zero, unit in CC mode with no load. | Ensure output leads are connected, adjust voltage/current knobs, check load connection. |
| Output voltage/current unstable | Poor load connection, faulty load, internal fault. | Check all connections, test with a different load, contact support if problem persists. |
| Overheating | Blocked ventilation, excessive load. | Ensure clear ventilation, reduce load or operating time. |
10. Specifications
The following table details the technical specifications for the BUUBO DC Power Supply Model 174820209 (30V 5A variant):
| Parameter | Value |
|---|---|
| Model Name | SPS-3005 (for 30V 5A variant) |
| Output Voltage | 0-30V (Continuously Adjustable) |
| Output Current | 0-5A (Continuously Adjustable) |
| Output Power | 150W |
| Working Humidity | <80% RH |
| Storage Humidity | <70% RH |
| Constant Voltage (CV) Mode: | |
| Voltage Stability | 0.1% ± 3mV |
| Load Stability | 0.2% ± 3mV |
| Ripple Voltage | 0.5% Vp-p |
| Constant Current (CC) Mode: | |
| Current Stability | 0.1% ± 3mA |
| Load Stability | 0.2% ± 3mA |
| Ripple Current | 0.5% Vp-p |
| Recovery Time | 500µS |
| Temperature Coefficient | 100ppm/°C |
| Display Type | LED Digital Display |
| Display Accuracy | 0.5% ± digits |
| Display Resolution (Voltage) | 0.1V / 0.01V |
| Display Resolution (Current) | 0.01A / 0.001A |
| Item Weight | 500 Grams |
| Dimensions (Approx.) | 220mm (L) x 85mm (W) x 150mm (H) |

Image 10.1: The compact dimensions of the power supply, illustrating its lightweight and small size for easy placement on a workbench.
11. Warranty and Support
For warranty information and technical support, please refer to the contact details provided with your purchase or visit the official BUUBO website. Keep your purchase receipt as proof of purchase for any warranty claims.
If you require further assistance or have questions not covered in this manual, please do not hesitate to contact our customer support team.