
1. Introduction
This manual provides essential information for the safe assembly, operation, maintenance, and troubleshooting of your ECOCOGY EB7PRO 5000W Dual Motor Electric Bike. Please read this manual thoroughly before your first ride to ensure proper usage and to maximize your riding experience. Retain this manual for future reference.
Safety Warnings
- Always wear a helmet and appropriate safety gear when riding.
- Familiarize yourself with local e-bike regulations and traffic laws.
- Perform a pre-ride inspection before each use, checking brakes, tires, and battery.
- Do not operate the bike under the influence of alcohol or drugs.
- Keep the original packaging box for at least one month for potential returns or warranty claims.
2. Package Contents
Upon unpacking, verify that all components listed below are present. If any items are missing or damaged, contact customer support immediately.

Figure 2.1: Included Components Overview
- ECOCOGY EB7PRO Electric Bike (90% pre-assembled)
- 52V 32AH Battery (with keys)
- Battery Charger
- Front and Rear Fenders
- Rear Rack
- Phone Holder with USB Charging Port
- Headlight and Taillight (pre-installed)
- Installation Tools
- User Manual
3. Setup & Assembly
Your ECOCOGY EB7PRO electric bike arrives approximately 90% pre-assembled. The following steps detail the final assembly process.
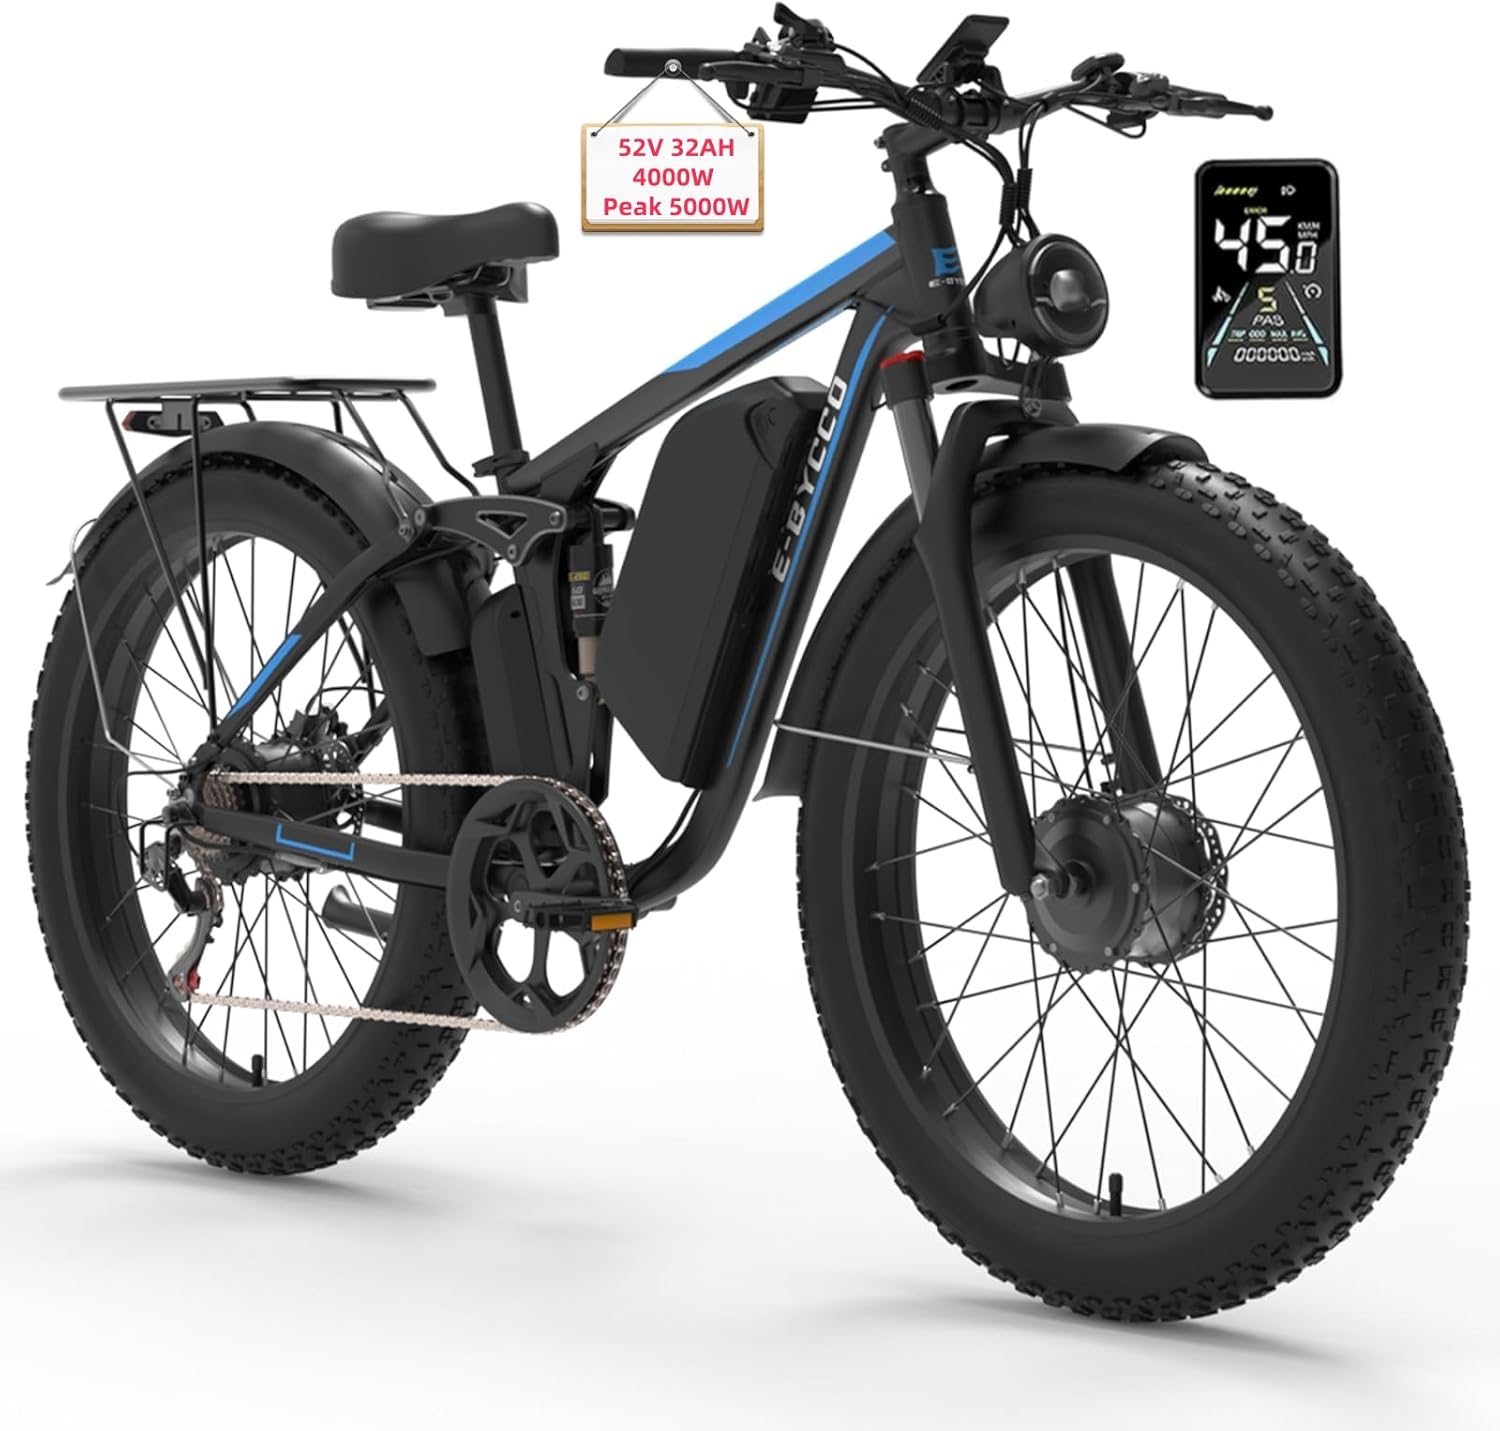
Figure 3.1: ECOCOGY EB7PRO Electric Bike
3.1 Unpacking and Initial Inspection
- Carefully remove the bike and all components from the packaging.
- Inspect the bike for any visible damage that may have occurred during shipping. Report any damage to customer support immediately.
- Remove all protective packaging materials.
3.2 Handlebar Installation
- Loosen the stem bolts on the handlebar.
- Insert the handlebar into the stem, ensuring it is centered and aligned with the front wheel.
- Tighten the stem bolts securely.
3.3 Front Wheel Installation
- Align the front wheel with the fork dropouts.
- Ensure the brake rotor is correctly seated within the brake caliper.
- Install the quick-release skewer or axle nuts and tighten them firmly.
3.4 Pedal Installation
- Identify the left (L) and right (R) pedals.
- The right pedal (R) threads clockwise into the right crank arm.
- The left pedal (L) threads counter-clockwise into the left crank arm.
- Tighten both pedals securely with a wrench.
3.5 Fender and Rear Rack Installation
- Attach the front and rear fenders using the provided hardware.
- Secure the rear cargo rack to the designated mounting points on the frame.
3.6 Seat Adjustment
- Adjust the seat post height to a comfortable riding position, ensuring your feet can touch the ground when stopped.
- Tighten the quick-release lever or seat post clamp securely.
4. Operating Instructions
Understanding the controls and functions of your ECOCOGY EB7PRO is crucial for a safe and enjoyable ride.

Figure 4.1: Handlebar Controls
4.1 Powering On/Off
- To power on the bike, ensure the battery is installed and unlocked. Press and hold the 'M' (Power/Level) button on the handlebar control panel.
- To power off, press and hold the 'M' button again until the display turns off.
4.2 LCD Display Functions
The integrated LCD display provides real-time riding information.

Figure 4.2: LCD Display
- Power-on Password: If enabled, enter the password to unlock the bike.
- Battery Level: Indicates the remaining battery charge.
- Riding Speed: Displays current speed.
- PAS (Pedal Assist) Level: Shows the current level of motor assistance (0-5).
- Use the 'i' button to cycle through Trip A (mileage after startup), ODO (odometer), Max Speed, and Average Speed.
4.3 Riding Modes
- Pedal Assist Mode: The motor provides assistance as you pedal. Adjust the assist level (0-5) using the '+' and '-' buttons.
- Pure Electric Mode (Throttle): Use the thumb throttle to engage the motor without pedaling.
- Dual Motor Operation: The EB7PRO features dual motors (front and rear). Use the green 'Front Motor Switch' button on the handlebar to toggle the front motor on or off, allowing for single or dual motor operation. Dual motor mode provides maximum power and speed.
4.4 Shifting Gears
The bike is equipped with a Shimano 7-speed gear system. Use the thumb shifter on the right handlebar to change gears, adapting to different terrains and riding conditions.
4.5 Braking System
The ECOCOGY EB7PRO features dual hydraulic disc brakes for reliable stopping power.
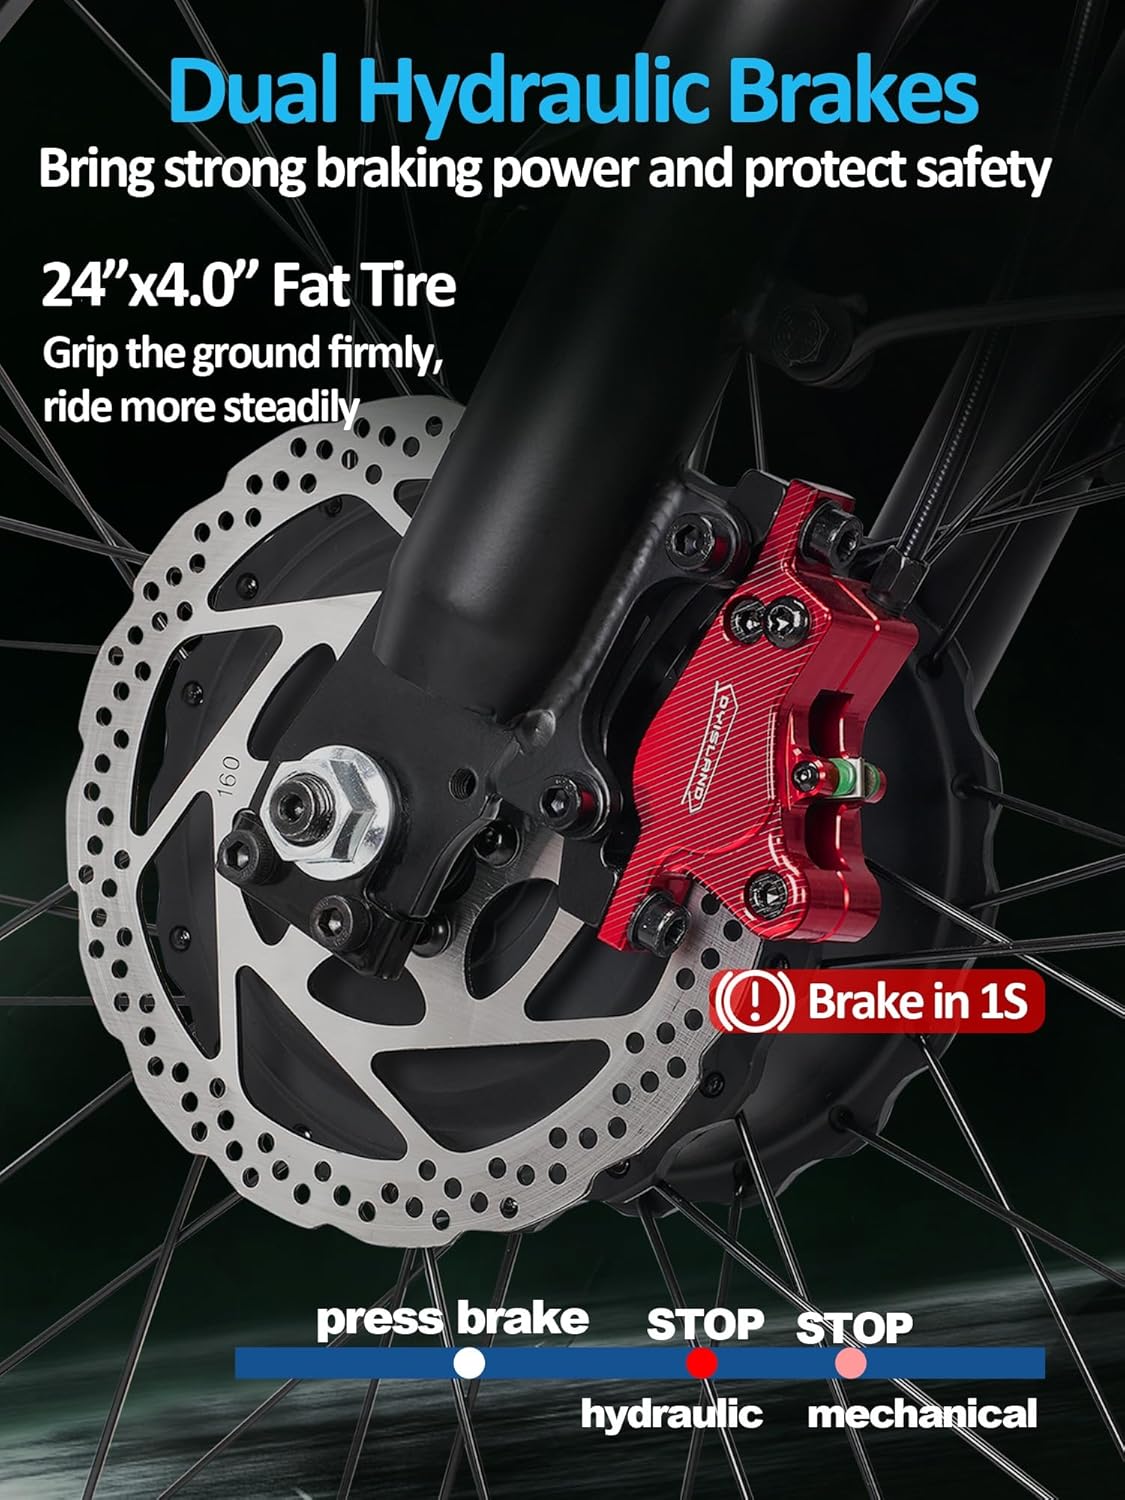
Figure 4.3: Hydraulic Disc Brake
- Squeeze both brake levers simultaneously for optimal stopping performance.
- Hydraulic disc brakes offer consistent braking in various weather conditions.
5. Battery Information
The ECOCOGY EB7PRO is powered by a 52V 32AH large capacity battery.

Figure 5.1: 52V 32AH Battery Details
5.1 Charging the Battery
- Connect the charger to a standard power outlet and then to the bike's charging port.
- The charging time is approximately 8-10 hours.
- The battery can be charged while installed on the bike or removed for convenience.
5.2 Battery Range
- Pure Electric Mode: Up to 40 miles (single motor) or 25 miles (dual motor).
- Pedal Assist Mode: Up to 90 miles (single motor) or 40 miles (dual motor).
- Actual range may vary based on terrain, rider weight, assist level, and weather conditions.
5.3 Battery Removal and Security
- Use the provided key to unlock and remove the battery from the frame.
- Always lock the battery when installed on the bike to prevent theft.
6. Maintenance
Regular maintenance ensures the longevity and safe operation of your electric bike.
6.1 General Cleaning
- Clean the bike regularly with a damp cloth and mild soap. Avoid high-pressure washing directly on electrical components.
- Dry the bike thoroughly after cleaning.
6.2 Tire Pressure
- Check tire pressure before each ride. Refer to the tire sidewall for recommended PSI.
- Proper tire pressure improves ride quality, efficiency, and reduces the risk of punctures.
6.3 Brake Inspection
- Regularly inspect brake pads for wear and replace them when necessary.
- Ensure brake levers feel firm and responsive. If they feel spongy, the hydraulic system may need bleeding by a qualified technician.
6.4 Chain Lubrication
- Keep the chain clean and lubricated to ensure smooth gear changes and prevent wear.
- Apply bicycle-specific chain lubricant after cleaning or when the chain appears dry.
6.5 Battery Care
- Store the battery in a cool, dry place when not in use.
- Avoid fully discharging the battery. Charge it regularly, even during periods of non-use.
7. Troubleshooting
This section addresses common issues you might encounter with your ECOCOGY EB7PRO electric bike.
| Problem | Possible Cause | Solution |
|---|---|---|
| Bike does not power on | Battery not charged, battery not properly seated, power button not pressed correctly, battery switch off. | Charge battery, ensure battery is fully inserted and locked, press and hold power button, check battery power switch. |
| Motor not assisting | PAS level set to 0, throttle not engaged, front motor switch off (if using dual motor), brake levers engaged. | Increase PAS level, engage throttle, check front motor switch, ensure brake levers are released. |
| Brakes feel weak or spongy | Worn brake pads, air in hydraulic lines, low brake fluid. | Inspect and replace brake pads, consult a bike technician for hydraulic system service. |
| Unusual noises during riding | Loose components, dry chain, rubbing fenders, motor issue. | Check all bolts and fasteners, lubricate chain, adjust fenders, contact support if motor noise persists. |
If you encounter an issue not listed here or if the suggested solutions do not resolve the problem, please contact ECOCOGY customer support.
8. Specifications
Key technical specifications for the ECOCOGY EB7PRO 5000W Dual Motor Electric Bike.

Figure 8.1: Bike Dimensions and Rider Recommendation
| Feature | Detail |
|---|---|
| Model Name | EB7PRO |
| Bike Type | Electric Bike, Fat Tire, Full Suspension |
| Motor | Dual Motor (5000W Peak) |
| Battery | 52V 32AH Lithium Battery (UL Certified) |
| Max Speed | Up to 45 MPH |
| Wheel Size | 24 Inches (4.0" Fat Tires) |
| Frame Material | Aluminum |
| Suspension Type | Dual Suspension |
| Brake Style | Hydraulic Disc Brakes |
| Gears | Shimano 7-Speed |
| Max Load Weight | 330 lbs |
| Ebike Weight | 81 lbs |
| Recommended Age Range | Adult |
| Special Features | LCD Display, Rechargeable, Water-Resistant, Adjustable Seat, Phone Holder with USB |
9. Warranty & Customer Support
9.1 Warranty Information
Your ECOCOGY EB7PRO electric bike comes with a 1-year limited warranty. This warranty covers manufacturing defects and does not include damage caused by misuse, accidents, or unauthorized modifications. For detailed warranty information, please refer to the terms provided in the manual or contact customer support.
9.2 Customer Support
For any questions, technical assistance, or warranty claims, please contact ECOCOGY customer support:
- Email: support@ecocogy.com
Our support team is available to assist you with any concerns regarding your electric bike.


