
Beleeb BLB-48V50A
48V 50A Adjustable Battery Charger User Manual
Model: BLB-48V50A | Brand: Beleeb
1. Product Overview
The Beleeb 48V 50A Adjustable Battery Charger is a high-efficiency, intelligent charging device engineered for a wide range of 48V battery systems, including lead-acid and LiFePO4 lithium batteries. Its robust design and advanced features make it ideal for demanding applications such as forklifts, golf carts, sightseeing cars, and energy storage systems. This manual provides essential information for safe installation, operation, and maintenance of your charger.
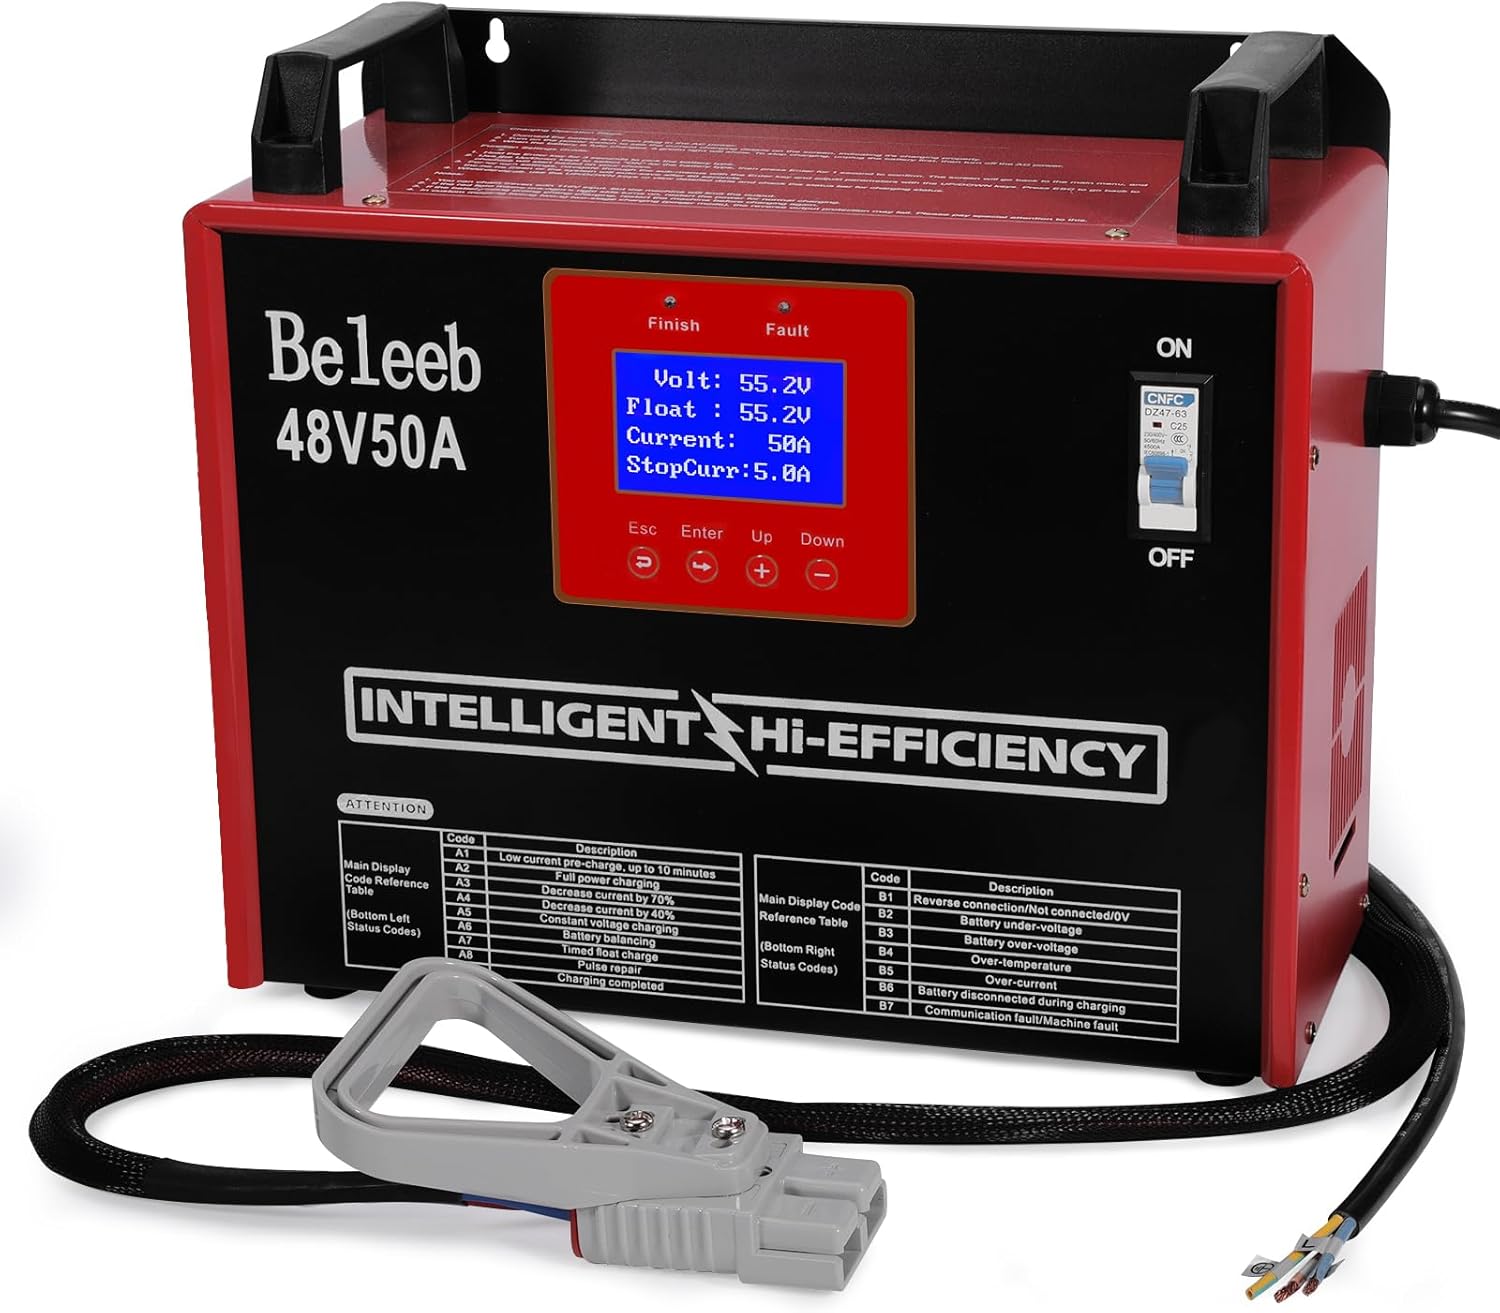
Figure 1: Front view of the Beleeb 48V 50A Adjustable Battery Charger, showing the LCD screen, control buttons, and main power switch.
2. Important Safety Information
Please read all safety warnings and instructions carefully before installing or operating this product. Failure to follow these instructions may result in electric shock, fire, or serious injury.
- Hardwired Installation: This battery charger requires hardwired installation. Electrical expertise is necessary for safe installation. Ensure the charger is grounded and connected to a suitably rated circuit breaker, compliant with the National Electric Code and local regulations.
- Protection Features: The charger is equipped with comprehensive protection against overvoltage, undervoltage, overcurrent, short circuit, and reverse polarity. However, proper installation and usage are still critical.
- Ventilation: Ensure adequate ventilation around the charger during operation to prevent overheating.
- Environment: Do not expose the charger to rain or excessive moisture. Operate in a clean, dry environment.
- Battery Compatibility: Only use this charger with 48V lead-acid or LiFePO4 lithium batteries as specified. Using it with incompatible battery types or voltages may cause damage to the charger or battery.
3. Product Features
- Versatile Charging Modes: Supports dedicated charging modes for both lead-acid and LiFePO4 lithium batteries, optimizing performance and extending battery life.
- Customizable Settings: Allows adjustment of parameters such as voltage, current, and float charging to meet specific battery requirements.
- Intelligent Control: Utilizes advanced microprocessor technology for safe and efficient charging, automatically adapting to battery needs and preventing overcharging.
- Clear LCD Display: Provides real-time monitoring of charging status, voltage, current, and fault information for easy operation.
- Enhanced Safety Features: Includes built-in protection against overvoltage, undervoltage, overcurrent, short circuit, and reverse polarity.
- Efficient Cooling: Equipped with efficient cooling fans that continuously operate to safeguard the charging process and prevent overheating.
- Portable Design: Features a portable handle for easier transportation and positioning.
4. Setup and Installation
4.1 Hardwired Connection (208-240 Volt A.C.)
This charger is designed for hardwired installation to a single-phase 208-240 Volt A.C. power source. Professional electrical installation is highly recommended.
- Connect Hot Wires: Connect the two hot wires (180° phase-shifted) from your 208-240V AC supply to the charger's L1/L2 terminals.
- Install Circuit Breaker: Install a double-pole circuit breaker (≥25A) to power both hot wires. This breaker should be suitably rated for the charger's current draw.
- Ground Wire Connection: Ensure a proper ground wire connection to the charger's ground terminal.
Caution: Avoid connecting to a standard 110V outlet. Doing so will reduce the output current to approximately 25A (half of the rated current), leading to extended charging times, reduced battery efficiency, and increased risks of overheating or equipment failure.
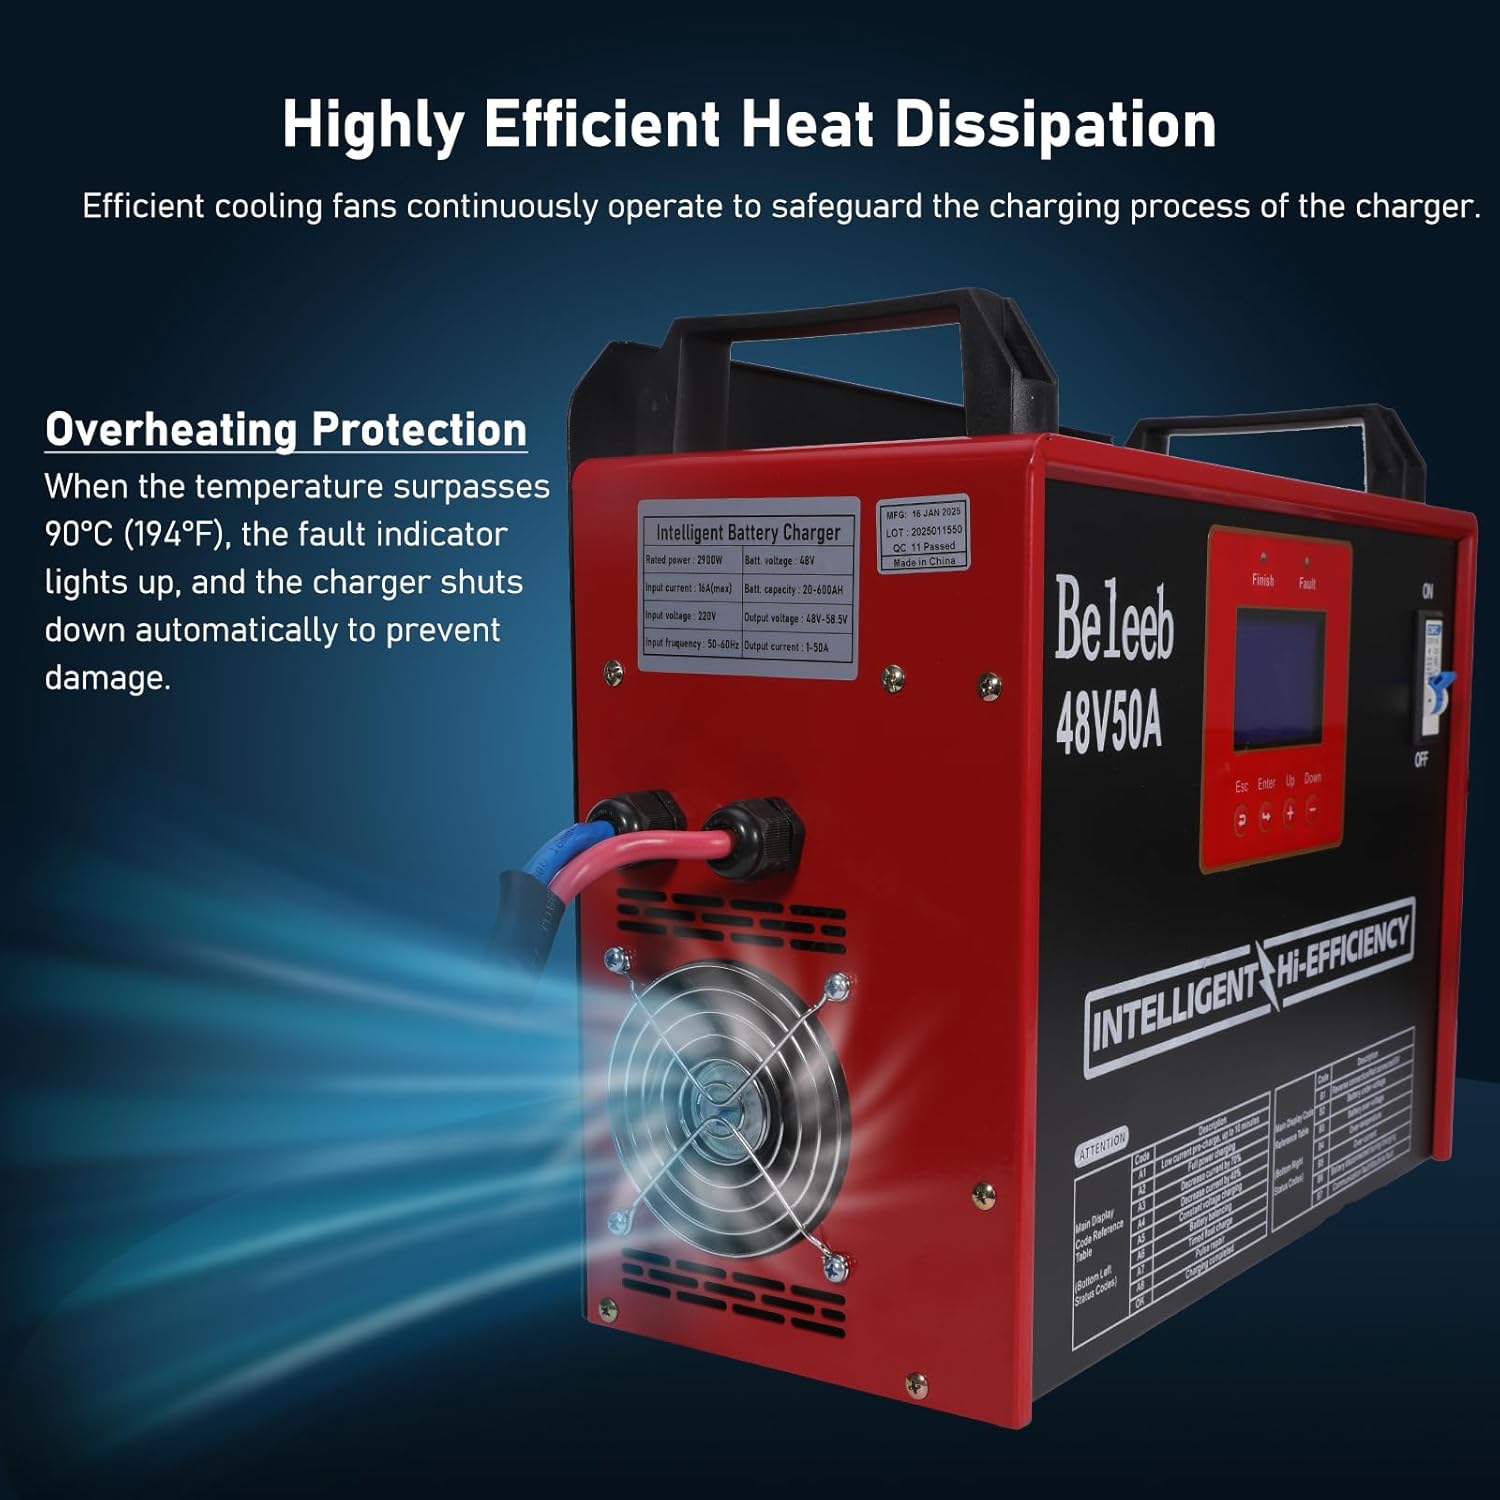
Figure 2: Hardwired installation guide for 208-240 Volt A.C. power supply, illustrating proper wiring to L1/L2 terminals and circuit breaker requirements.
4.2 Battery Connection
Connect the charger's output cable, typically with a 175A Anderson plug, to your 48V battery system. If the included plug is incompatible, it can be replaced with a compatible plug purchased separately.
5. Operating Instructions
5.1 Control Panel and LCD Display
The charger features an intuitive LCD display and control buttons (Esc, Enter, Up, Down) for monitoring and adjusting settings.

Figure 3: Detailed view of the control panel with LCD display, showing options for Custom, Voltage, Current, and fault codes (A0, B7).
- Custom Mode: Allows access to advanced settings for voltage, current, and float charging.
- Voltage/Current Display: Shows real-time charging voltage and current data.
- Fault Codes: Displays codes (e.g., A0, B7) indicating the current phase of the charging process or the nature of any encountered faults.
5.2 Charging Modes
The charger supports various charging programs tailored for different 48V battery types.

Figure 4: Overview of the charger's versatile charging programs, including support for Lead-Acid and Lithium-Ion batteries, with adjustable voltage, current, and charge timer settings.

Figure 5: Smart Charging Technology graphs demonstrating custom charging curves for Lithium, Lead-Acid, and a general Customized Mode, ensuring safety, efficiency, and extended battery life.
- Lead-Acid Mode: Optimized charging curve for lead-acid batteries.
- Lithium-Ion Mode: Optimized charging curve for LiFePO4 lithium batteries.
- Custom Mode: Allows users to define specific charging parameters (voltage, current, timer) to fit unique battery requirements. Select 'Custom' on the display to access these settings.
5.3 "H" Mode (Equalized Charging)
The "H" mode, also known as high voltage pulse or equalized charging, is designed to balance the charge status of individual batteries within a multi-battery system (e.g., a golf cart with 4 to 8 batteries). Over time, individual batteries can become inconsistent in their charge levels, leading to premature deterioration. Using "H" mode approximately once every 3 months can help equalize the battery pack, prolonging its overall lifespan.
6. Maintenance
6.1 Overheating Protection
The charger is equipped with an overheating protection system. If the internal temperature surpasses 90°C (194°F), the fault indicator lights up, and the charger automatically shuts down to prevent damage. Ensure the charger has adequate ventilation during operation.

Figure 6: Illustration of the charger's highly efficient heat dissipation system, highlighting the cooling fan and the overheating protection mechanism.
6.2 General Care
- Keep the charger clean and free from dust and debris. Use a dry cloth for cleaning.
- Regularly inspect all cables and connections for any signs of wear or damage. Replace damaged components immediately.
- Store the charger in a cool, dry place when not in use.
7. Troubleshooting
7.1 LCD Display Fault Codes
The LCD display provides various codes to indicate the charger's status or specific faults. Refer to the tables below for common codes and their descriptions.
Attention Codes (Left Side of Display)
| Code | Description |
|---|---|
| A1 | Low current pre-charge (up to 10 minutes) |
| A2 | Over-temperature |
| A3 | Over-voltage |
| A4 | Over-current |
| A5 | Reverse current by 40% |
| A6 | General fault |
| A7 | Battery balancing |
| A8 | Pulse repair |
| A9 | Battery connected |
Fault Codes (Right Side of Display)
| Code | Description |
|---|---|
| B1 | Reverse connection/Not connected/0V |
| B2 | Battery under-voltage |
| B3 | Battery over-voltage |
| B4 | Over-temperature |
| B5 | Over-current |
| B6 | Battery disconnected during charging |
| B7 | Communication fault/Machine fault |
7.2 Common Issues
- Charger Not Activating: Ensure the charger is properly hardwired to a 208-240V AC supply and the circuit breaker is on. Check all connections to the battery.
- Slow Charging/Reduced Output: Verify that the charger is connected to a 208-240V AC supply. Connection to a 110V outlet will significantly reduce output.
- Battery Pack Imbalance: If individual batteries within a pack show inconsistent charge levels, utilize the "H" mode (equalized charging) periodically to balance them.
8. Specifications
| Specification | Value |
|---|---|
| Model Number | BLB-48V50A |
| Product Dimensions | 6.3 x 14.2 x 13 inches (6.3"D x 14.2"W x 13"H) |
| Item Weight | 19.8 pounds |
| Output Voltage | 48 Volts (DC) |
| Output Current | 50 Amps |
| Input Voltage | 208-240 Volts (AC) |
| Color | Red |
| Manufacturer | Beleeb |
9. Warranty and Support
For warranty information and technical support, please refer to the documentation included with your purchase or contact Beleeb customer service. Additional protection plans may be available for purchase to extend coverage beyond the standard warranty.
Related documentsBLB-48V50A


Ask a question about this manual
Ask about setup, troubleshooting, compatibility, parts, safety, or missing instructions. Manuals+ will review the question and use this page’s manual context to help answer it.