
1. Product Overview
The SMARTSTANDARD Pocket Door Frame Kit is designed to provide a space-saving solution for interior doors. This kit features a durable frame constructed from a high-quality wood header and galvanized steel studs, ensuring stability and corrosion resistance. It includes a two-way soft-close mechanism for smooth and quiet door operation, suitable for doors weighing up to 120 lbs.
This manual provides detailed instructions for the proper assembly, installation, operation, and maintenance of your pocket door frame kit.
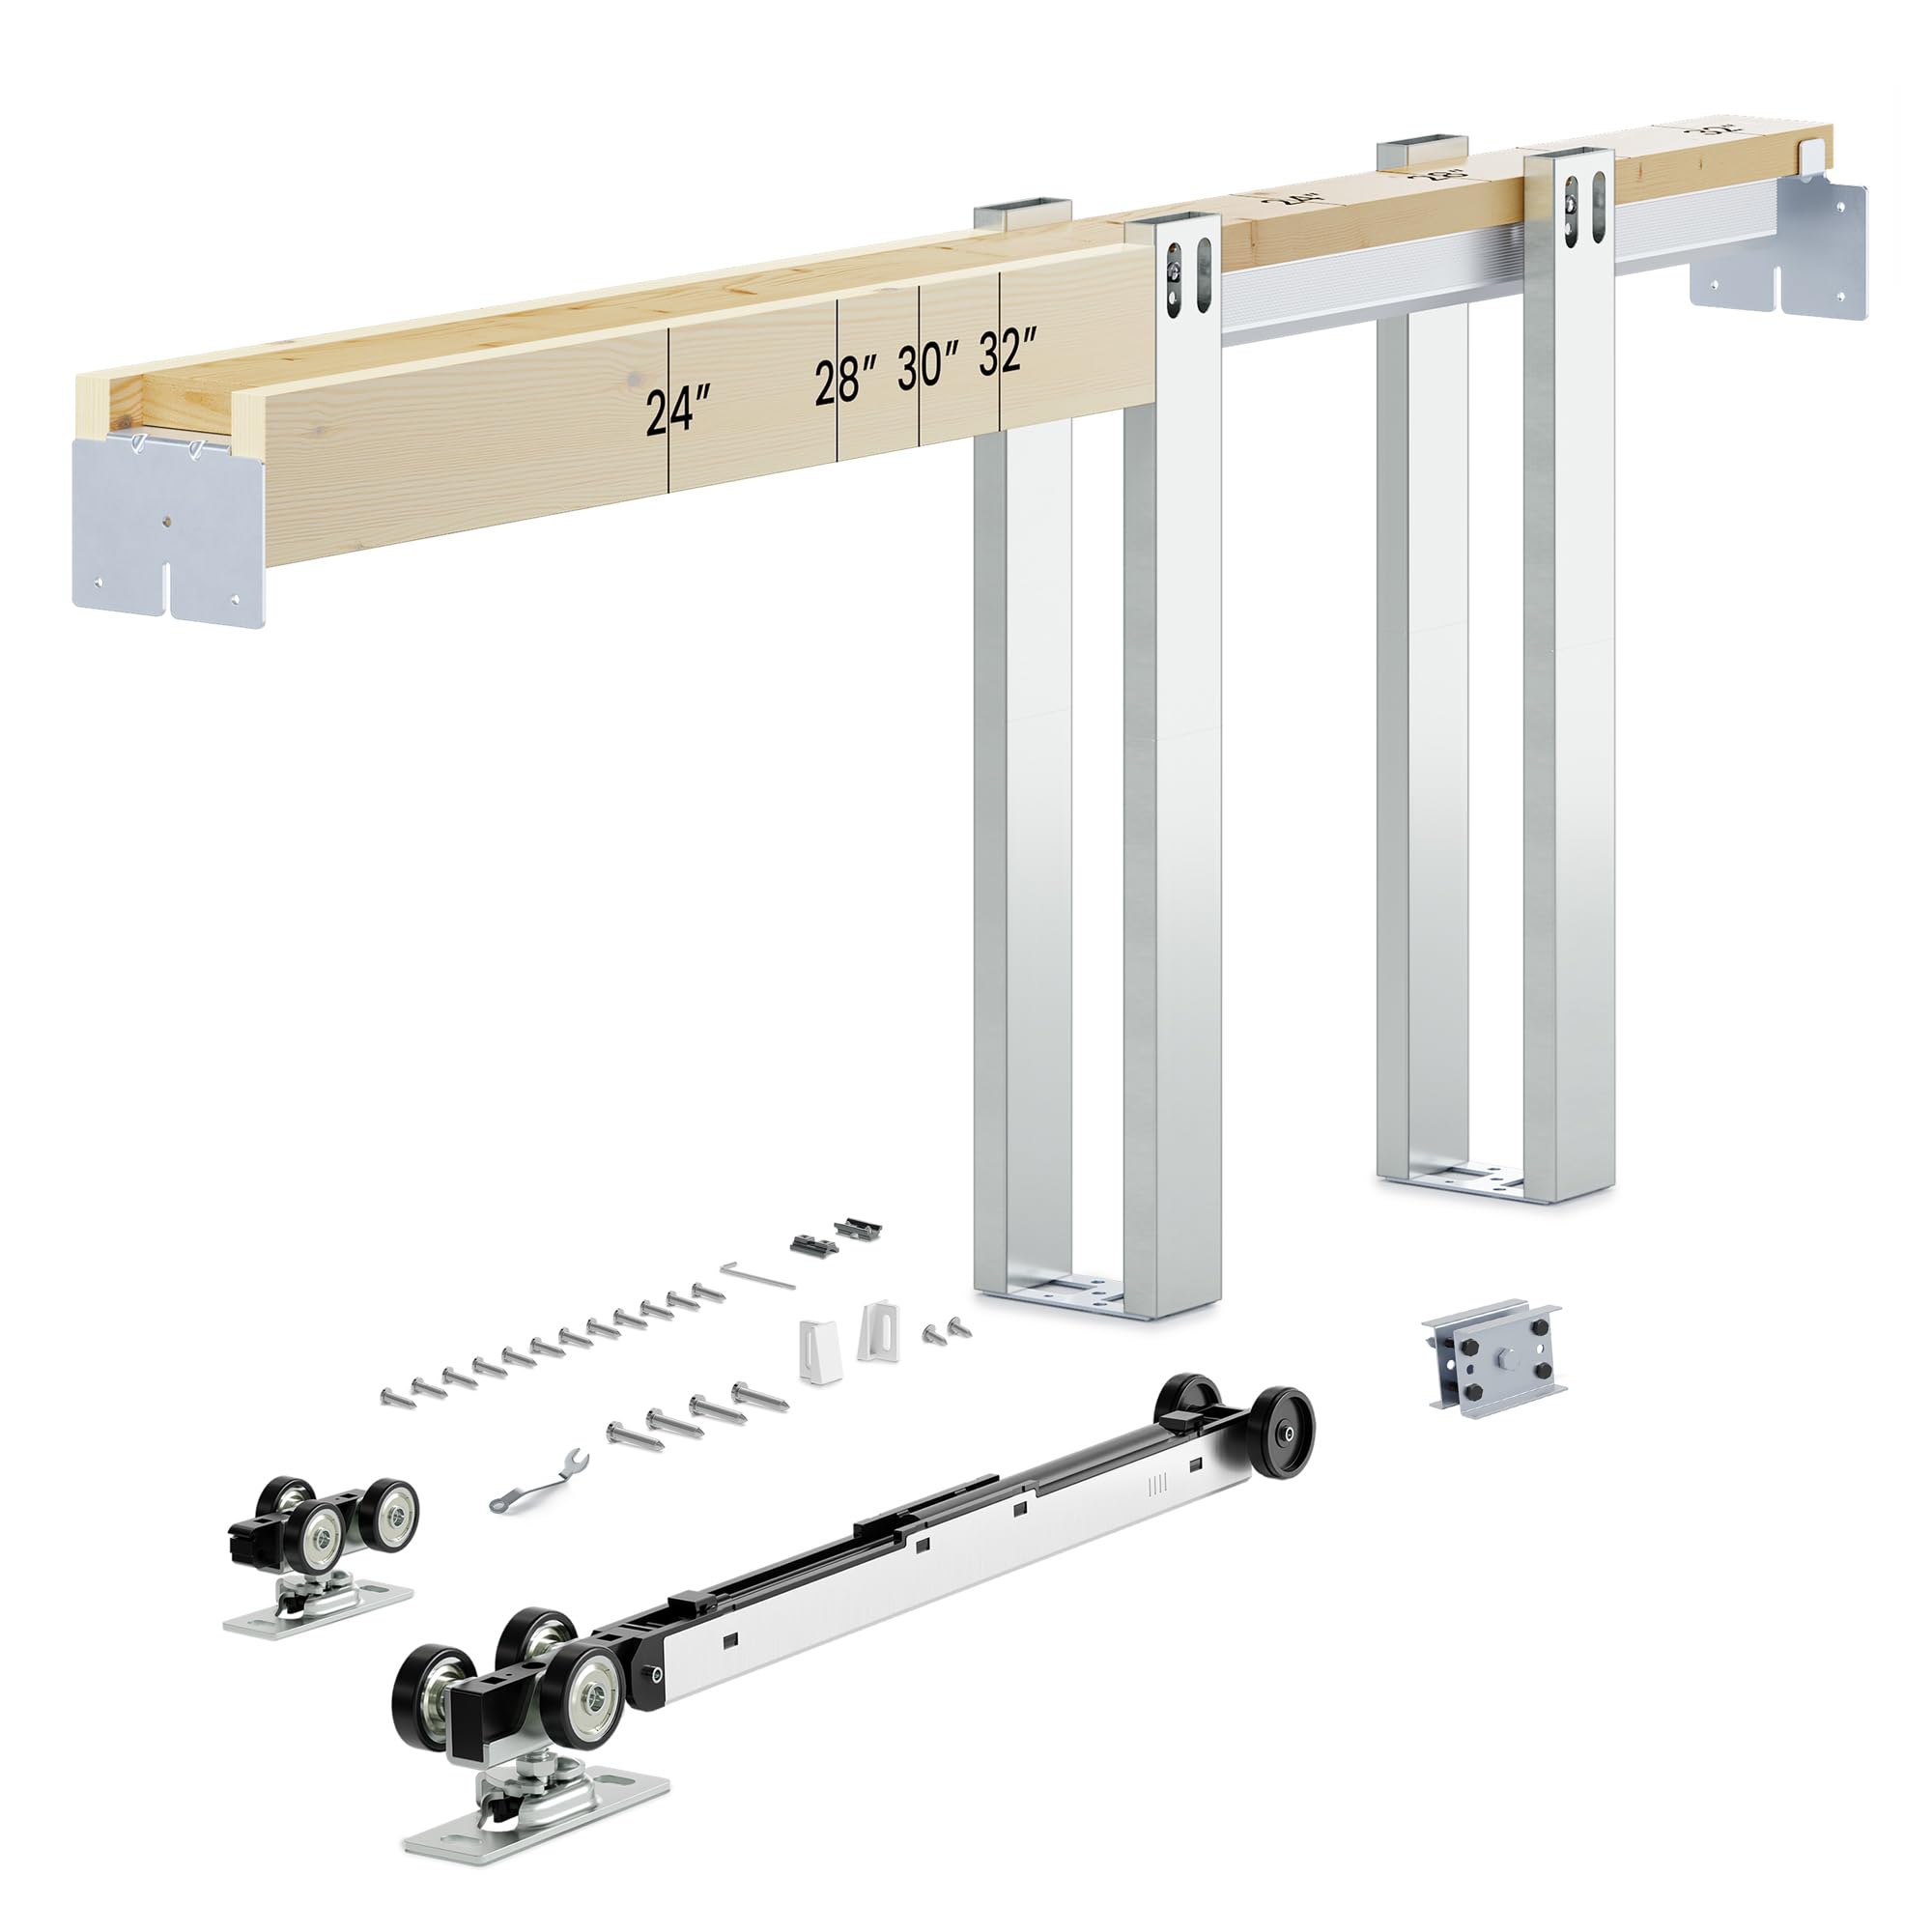
Figure 1.1: Fully installed SMARTSTANDARD Pocket Door Frame Kit with a wooden door, showing the frame integrated into a wall structure.
2. Package Contents
Before beginning installation, verify that all components listed below are present and undamaged. If any parts are missing or damaged, please contact customer support.
- 1 Aluminum track with wood slot
- 1 Two-way soft-close mechanism
- 1 Hanger (without soft close)
- 4 Split tubes
- 1 Bracket fastener
- 2 Door guides
- Various screws and fasteners
- Installation Manual (this document)

Figure 2.1: All components included in the SMARTSTANDARD Pocket Door Frame Kit.
3. Specifications
| Feature | Detail |
|---|---|
| Model Number | M-PDF-KITA |
| Compatible Door Thickness | 1" to 1-3/4" |
| Compatible Door Width | 24" to 36" |
| Compatible Door Height | 80" |
| Maximum Door Weight | 120 lbs |
| Frame Material | High-quality wood header, galvanized steel track and studs |
| Soft-Close Mechanism | Two-way soft-close |
| Item Weight (Kit) | Approximately 10.6 pounds |

Figure 3.1: Key dimensions and specifications for the pocket door frame kit. Note the track length (with wood header) is 72", fit door width 24"-36", fit door thickness 1"-1-3/4", fit door height 80", and rough opening width is 2 x Door Width + 1".
4. Setup and Installation
This pocket door frame kit is designed for easy assembly. Follow these steps carefully for proper installation. It is recommended to have basic carpentry skills and tools for this installation.
4.1 Pre-Installation Checks
- Ensure the wall studs are 2x4 for proper frame integration.
- Verify the rough opening dimensions. The rough opening width should be 2 x Door Width + 1". For an 80" high door, the rough opening height should accommodate the track and frame structure.
- Confirm your door's dimensions (width, height, thickness) are within the kit's specifications (24"-36" width, 80" height, 1"-1-3/4" thickness).
- Gather necessary tools: measuring tape, level, drill, screwdriver, saw (if trimming studs/track), safety glasses.
4.2 Assembling the Frame
- Attach the galvanized steel studs to the wood header. The wood header has markings for common door widths (24", 28", 30", 32", 36"). Align the studs according to your door's width.
- Secure the aluminum track into the wood header slot. Ensure it is flush and securely fastened.
- If your door is shorter than 80", the steel studs can be cut to the required height. The track can also be trimmed to fit various opening sizes, as indicated by the markings on the wood header.

Figure 4.1: Assembling the frame components, showing the wood header with width indicators and steel studs.
4.3 Installing the Frame into the Wall
- Position the assembled frame within the rough opening. Ensure the wood header is level and securely fastened to the overhead framing.
- Fasten the steel studs to the floor and to the vertical wall studs. Use appropriate fasteners for your wall material.
- Install the door hangers onto the top edge of your door.
- Carefully lift the door and engage the hangers with the track rollers.
- Install the door guides at the bottom to prevent the door from swinging.
Note: Some screws provided may vary in size. Refer to the detailed diagrams in the included paper manual for specific screw placement. Ensure all connections are tight and secure.
5. Operating Instructions
The SMARTSTANDARD Pocket Door Frame Kit features a two-way soft-close mechanism for enhanced user experience.
5.1 Soft-Close Mechanism
- The soft-close mechanism is designed to gently slow down and pull the door into its fully open or fully closed position. This prevents slamming and reduces wear on the door and frame.
- To operate, simply push or pull the door towards its open or closed position. Once it reaches a certain point, the soft-close actuator will engage, smoothly guiding the door to its final resting place.
- The mechanism works in both directions, providing a soft open and a soft close.

Figure 5.1: Detailed view of the soft-close mechanism and associated hardware.

Figure 5.2: Demonstration of the pocket door in fully open, half-open, and fully closed positions.
6. Maintenance
Regular maintenance ensures the longevity and smooth operation of your pocket door frame kit.
- Cleaning: Periodically clean the track to remove dust and debris that could impede smooth operation. Use a dry cloth or a vacuum cleaner with a brush attachment.
- Lubrication: If the door's movement becomes stiff or noisy, apply a silicone-based lubricant to the track and rollers. Avoid oil-based lubricants as they can attract dust.
- Fastener Check: Annually inspect all visible fasteners to ensure they remain tight. Tighten any loose screws to maintain structural integrity.
- Soft-Close Adjustment: If the soft-close mechanism does not engage properly or the door slams, it may require adjustment. Refer to the detailed instructions in the paper manual for specific adjustment procedures.
7. Troubleshooting
This section addresses common issues you might encounter with your pocket door frame kit.
| Problem | Possible Cause | Solution |
|---|---|---|
| Door does not slide smoothly or is noisy. | Debris in track, lack of lubrication, loose rollers. | Clean the track thoroughly. Apply silicone lubricant to the track and rollers. Check and tighten roller fasteners. |
| Soft-close mechanism not engaging or door slams. | Mechanism misaligned or improperly adjusted. | Inspect the soft-close actuator for proper alignment. Adjust the mechanism according to the detailed instructions in the paper manual. Ensure the door weight is within the 120 lbs limit. |
| Door is difficult to open or close. | Misaligned frame, damaged rollers, or door rubbing against frame. | Check if the frame is level and plumb. Inspect rollers for damage and replace if necessary. Ensure the door guides are correctly installed and not causing friction. |
| Screws stripping during installation. | Using incorrect drill bit size for pilot holes, excessive torque, or subpar screws. | Always pre-drill pilot holes of the correct size. Use a hand screwdriver or a drill with adjustable torque settings. If screws are consistently stripping, consider using higher quality replacement screws. |
8. Customer Support
For any questions, assistance with assembly, installation, or troubleshooting, please contact SMARTSTANDARD customer support. Our team is available to help you with any issues you may encounter.
You can find contact information on the SMARTSTANDARD official website or through your purchase platform.
Note: If you need to replace any parts after assembly, you can typically do so without disassembling the entire frame.