
BELLA 90240
BELLA PRO 4.2-qt. Touchscreen Air Fryer Instruction Manual
Model: 90240
Introduction
Thank you for purchasing the BELLA PRO 4.2-qt. Touchscreen Air Fryer. This appliance is designed to cook your favorite foods with little to no oil, providing a healthier alternative to traditional frying. Its intuitive touchscreen controls and compact design make it a versatile addition to any kitchen. Please read this manual thoroughly before use to ensure safe and optimal operation.
Important Safeguards
When using electrical appliances, basic safety precautions should always be followed, including the following:
- Read all instructions before operating.
- Do not touch hot surfaces. Use handles or knobs.
- To protect against electrical shock, do not immerse cord, plugs, or air fryer in water or other liquid.
- Close supervision is necessary when any appliance is used by or near children.
- Unplug from outlet when not in use and before cleaning. Allow to cool before putting on or taking off parts.
- Do not operate any appliance with a damaged cord or plug or after the appliance malfunctions or has been damaged in any manner.
- The use of accessory attachments not recommended by the appliance manufacturer may cause injuries.
- Do not use outdoors.
- Do not let cord hang over edge of table or counter, or touch hot surfaces.
- Do not place on or near a hot gas or electric burner, or in a heated oven.
- Extreme caution must be used when moving an appliance containing hot oil or other hot liquids.
- Always attach plug to appliance first, then plug cord into the wall outlet. To disconnect, turn any control to "off", then remove plug from wall outlet.
- Do not use appliance for other than intended use.
- Ensure the air fryer basket is properly inserted before operating.
- A short power-supply cord is provided to reduce the risk resulting from entanglement or tripping over a longer cord.
Product Overview

Figure 1: Front view of the BELLA PRO Air Fryer, showcasing its stainless steel finish and the intuitive touchscreen control panel.
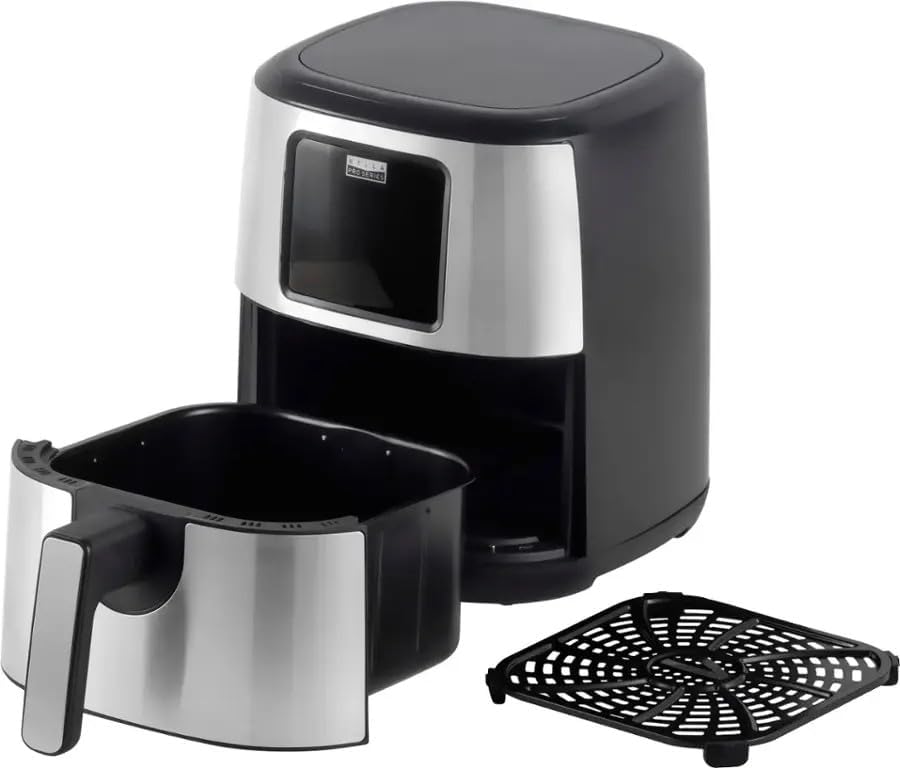
Figure 2: The air fryer unit with its removable cooking basket and crisping tray, demonstrating the separate components for easy cleaning and food preparation.
Components:
- Main Unit: Houses the heating element and fan.
- Control Panel: Digital touchscreen for setting time, temperature, and selecting presets.
- Cooking Basket: Removable, non-stick basket for holding food.
- Crisping Tray: Sits inside the cooking basket, allowing air to circulate around food for even cooking.
- Handle: Ergonomic handle for safely pulling out the cooking basket.

Figure 3: Detailed view of the touchscreen display, highlighting the temperature setting (400°F) and various cooking function buttons like Air Fry, Bake, Roast, Broil, Reheat, Keep Warm, French Fries, and Wings.
Control Panel Functions:
- TEMP +/-: Adjusts cooking temperature.
- TIME +/-: Adjusts cooking time.
- Preset Functions: Dedicated buttons for Air Fry, Bake, Roast, Broil, Reheat, Keep Warm, French Fries, and Wings.
- Start/Pause: Initiates or pauses the cooking cycle.
- Power Button: Turns the unit on/off.
- MENU: Cycles through preset options or custom settings.
Setup
- Unpacking: Carefully remove all packaging materials from the air fryer and its accessories.
- Initial Cleaning: Before first use, wash the cooking basket and crisping tray with warm, soapy water. Rinse thoroughly and dry completely. Wipe the exterior of the main unit with a damp cloth.
- Placement: Place the air fryer on a stable, heat-resistant surface, away from walls and other appliances to allow for proper air circulation. Ensure there is at least 6 inches of space on all sides and above the unit.
- Power Connection: Plug the power cord into a grounded electrical outlet.
- Pre-heating (Optional): For best results, pre-heat the air fryer for 3-5 minutes before adding food.
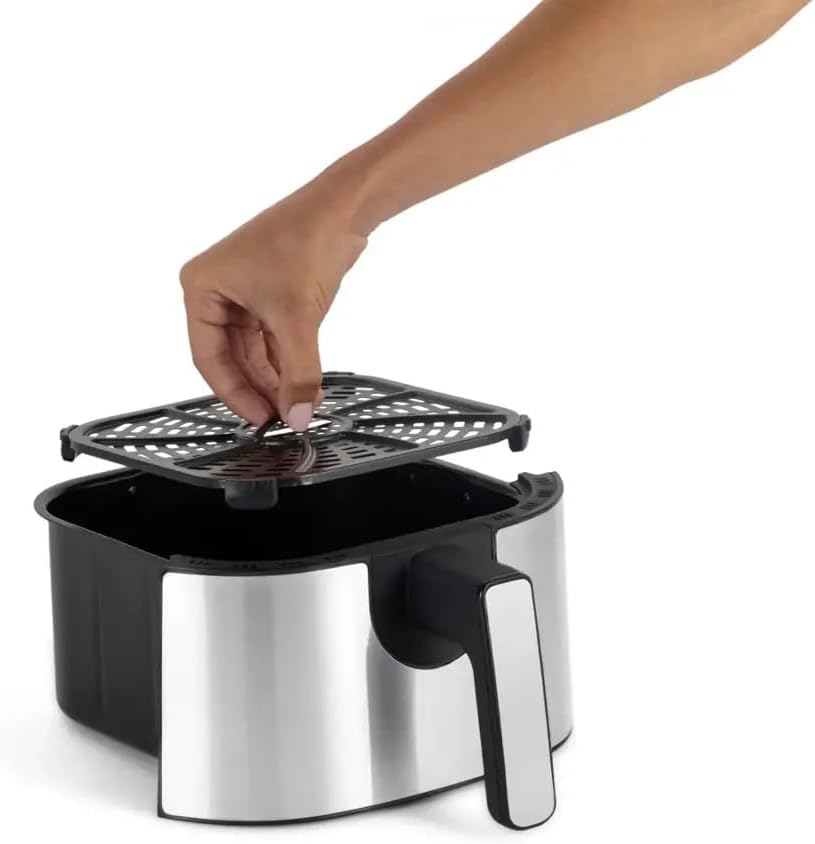
Figure 4: Demonstrates the correct way to place the crisping tray inside the cooking basket before adding food.

Figure 5: A top-down view of the crisping tray securely positioned at the bottom of the air fryer basket, ready for food.
Operating Instructions
Basic Operation:
- Place the crisping tray inside the cooking basket.
- Place food into the cooking basket. Do not overfill.
- Slide the cooking basket back into the air fryer until it clicks into place.
- Press the Power button to turn on the unit.
- Manual Setting: Use the TEMP +/- buttons to set the desired temperature and TIME +/- buttons to set the cooking duration.
- Preset Functions: Select a preset function (e.g., "Air Fry", "French Fries", "Wings") by pressing the corresponding button. The unit will automatically set a recommended time and temperature.
- Press the Start/Pause button to begin cooking.
- During cooking, you may pull out the basket to shake or flip food. The air fryer will pause automatically and resume when the basket is reinserted.
- Once cooking is complete, the air fryer will beep. Carefully pull out the basket and remove food using tongs.

Figure 6: A user interacting with the touchscreen control panel of the air fryer, demonstrating ease of use in a kitchen setting.

Figure 7: The cooking basket filled with perfectly air-fried french fries, illustrating the appliance's cooking capability.
Cooking Tips:
- For crispier results, shake the basket halfway through cooking.
- Do not overcrowd the basket; cook in batches if necessary.
- Lightly spray or toss food with oil for enhanced browning and crispiness.
- Refer to a reliable air fryer recipe guide for specific cooking times and temperatures for various foods.
Maintenance and Cleaning
Proper maintenance ensures the longevity and optimal performance of your air fryer.
- Unplug and Cool: Always unplug the air fryer from the power outlet and allow it to cool completely before cleaning.
- Basket and Tray: The cooking basket and crisping tray are non-stick and dishwasher safe. For manual cleaning, wash them with warm, soapy water and a non-abrasive sponge. Rinse and dry thoroughly.
- Exterior: Wipe the exterior of the air fryer with a damp cloth. Do not use abrasive cleaners or scouring pads.
- Interior: If necessary, wipe the interior with a damp cloth. For stubborn residue, a small amount of mild dish soap can be used. Ensure the interior is completely dry before next use.
- Heating Element: Gently clean the heating element with a soft brush to remove any food residue.
- Storage: Store the air fryer in a cool, dry place. Ensure all parts are clean and dry before storage.
Troubleshooting
| Problem | Possible Cause | Solution |
|---|---|---|
| Air fryer does not turn on. | Not plugged in; power outlet malfunction; basket not fully inserted. | Ensure power cord is securely plugged in. Check power outlet. Push basket firmly until it clicks into place. |
| Food is not cooked evenly. | Basket overcrowded; food not shaken/flipped. | Cook in smaller batches. Shake or flip food halfway through cooking. |
| Food is not crispy. | Not enough oil; temperature too low; cooking time too short. | Lightly toss food with oil. Increase temperature or cooking time. |
| White smoke coming from unit. | Grease residue from previous use; high-fat food cooking. | Clean the basket and crisping tray thoroughly. For high-fat foods, drain excess fat during cooking. |
| Unit smells like plastic. | New appliance odor. | This is normal for first few uses. It will dissipate. Ensure good ventilation. |
Specifications

Figure 8: Dimensional drawing of the BELLA PRO Air Fryer, indicating its height (11.88 inches), width (10.23 inches), and depth (12.99 inches).
- Model: 90240
- Capacity: 4.2 Quarts
- Control Method: Touchscreen Digital
- Color: Stainless Steel
- Nonstick Coating: Yes
- Inner Material: Plastic
- Dishwasher Safe Parts: Basket and Crisping Tray
- Product Dimensions (L x W x H): 12.99 x 10.23 x 11.88 inches
- Item Weight: 10.14 pounds
- UPC: 829486902406
Warranty and Support
For warranty information or product support, please refer to the warranty card included with your purchase or visit the official BELLA website. Keep your purchase receipt as proof of purchase for warranty claims.
Customer Service: For assistance, please contact BELLA customer service. Contact details can typically be found on the product packaging or the brand's official website.
Related documents90240


Ask a question about this manual
Ask about setup, troubleshooting, compatibility, parts, safety, or missing instructions. Manuals+ will review the question and use this page’s manual context to help answer it.