
1. Product Overview
The Raddy WS-7 Solar Drip Irrigation Kit is an advanced automatic watering system designed for up to 15 potted plants. It features a solar-powered design with a built-in 2600mAh battery, ensuring continuous operation even on cloudy days. The system incorporates smart soil moisture detection to prevent overwatering and underwatering, saving up to 50% more water compared to traditional timer-based systems. Its powerful pump delivers a strong 4–5m lift height, suitable for elevated or multi-level plant arrangements. With IPX7 waterproof protection, the unit is built for durability in various outdoor conditions. The large display and easy setup make it user-friendly for all plant enthusiasts.
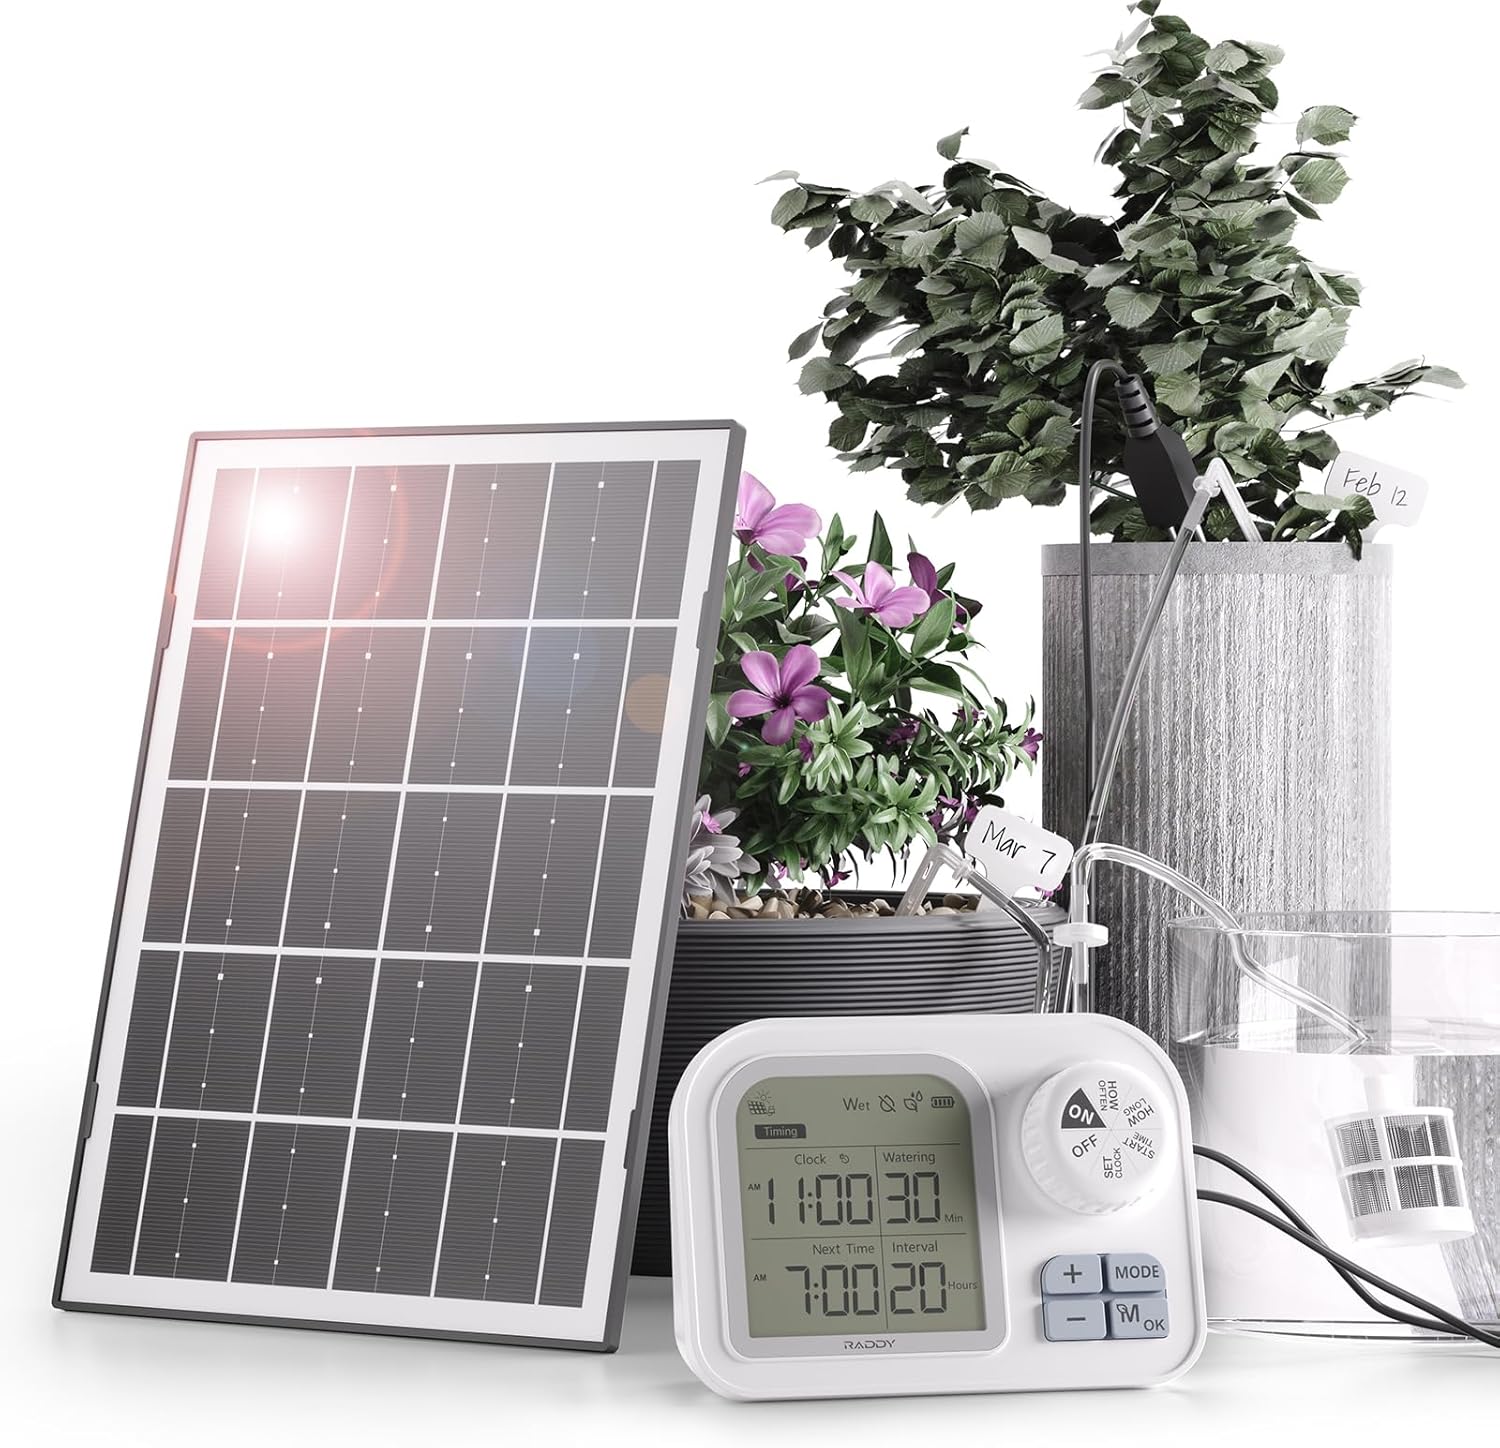
Figure 1: Raddy WS-7 Solar Drip Irrigation Kit in use, showing the solar panel, control unit, and drip lines to plants.
Key Features:
- Solar-Powered Automatic Watering: Adjustable solar panel and 2600mAh battery for self-sufficient operation.
- Smart Soil Moisture Irrigation: Automatically waters when humidity drops below 64%, optimizing water usage.
- Powerful Pump for 15 Pots: Delivers strong water flow with a 4–5m lift height for multiple plants.
- IPX7 Waterproof Protection: Fully sealed circuit board ensures reliability in wet conditions.
- Easy Setup: Simple connection and scheduling with a clear display for real-time status.
2. Package Contents
Please verify that all items listed below are included in your package:

Figure 2: Visual representation of all components included in the Raddy WS-7 Solar Drip Irrigation Kit.
- Water Timer x 1
- 7W Solar Panel x 1
- Solar Panel Bracket x 1
- 50ft 1/4" Pipe x 1
- Tag Plate x 10
- Micro Dripper x 15
- T-barb Connector x 15
- Cross Connector x 1
- Filter x 1
- Regulating Valve x 1
- Check Valve x 1
- Sealing End x 3
- Cable Tie x 10
- Hook x 1
- Charging Cable x 1
- Soil Moisture Sensor x 1
3. Setup Guide
Follow these steps to set up your Raddy WS-7 irrigation system:

Figure 3: Easy setup guide illustrating the connection process for the irrigation kit.
- Charge the Unit: Before first use, fully charge the built-in 2600mAh battery using the provided charging cable. The solar panel will maintain the charge during operation.
- Connect Solar Panel: Attach the solar panel to the main unit using the provided cable. Position the solar panel in a shadow-free area to maximize sunlight exposure. Use the solar panel bracket for mounting if desired.
- Prepare Water Source: Place the filter onto one end of the inlet pipe and insert it into your water container. Ensure the water source is positioned below the level of your plants to prevent siphoning.
- Connect Tubing: Connect the 1/4" pipe to the outlet of the water timer. Use the T-barb connectors and cross connectors to branch out the tubing to each plant.
- Install Drippers: Insert a micro dripper into the soil of each potted plant. Secure tubing with cable ties as needed.
- Install Check Valve and Regulating Valve: Attach the check valve and regulating valve to the outlet tube near the timer. Ensure the check valve is installed in the correct direction as indicated in the instruction booklet to prevent backflow. The regulating valve allows for manual adjustment of water flow.
- Seal End: Install a sealing end cap at the end of the main pipe run to ensure proper pressure distribution.
Important Note on Siphoning: To prevent continuous water flow due to siphoning, ensure your water reservoir is always positioned lower than the lowest point of your irrigation system (i.e., the drippers in your plants). The system includes a check valve to assist with this, but proper placement of the water source is crucial.
4. Operating Instructions
The Raddy WS-7 offers both timed and smart soil moisture irrigation modes, along with manual watering options.
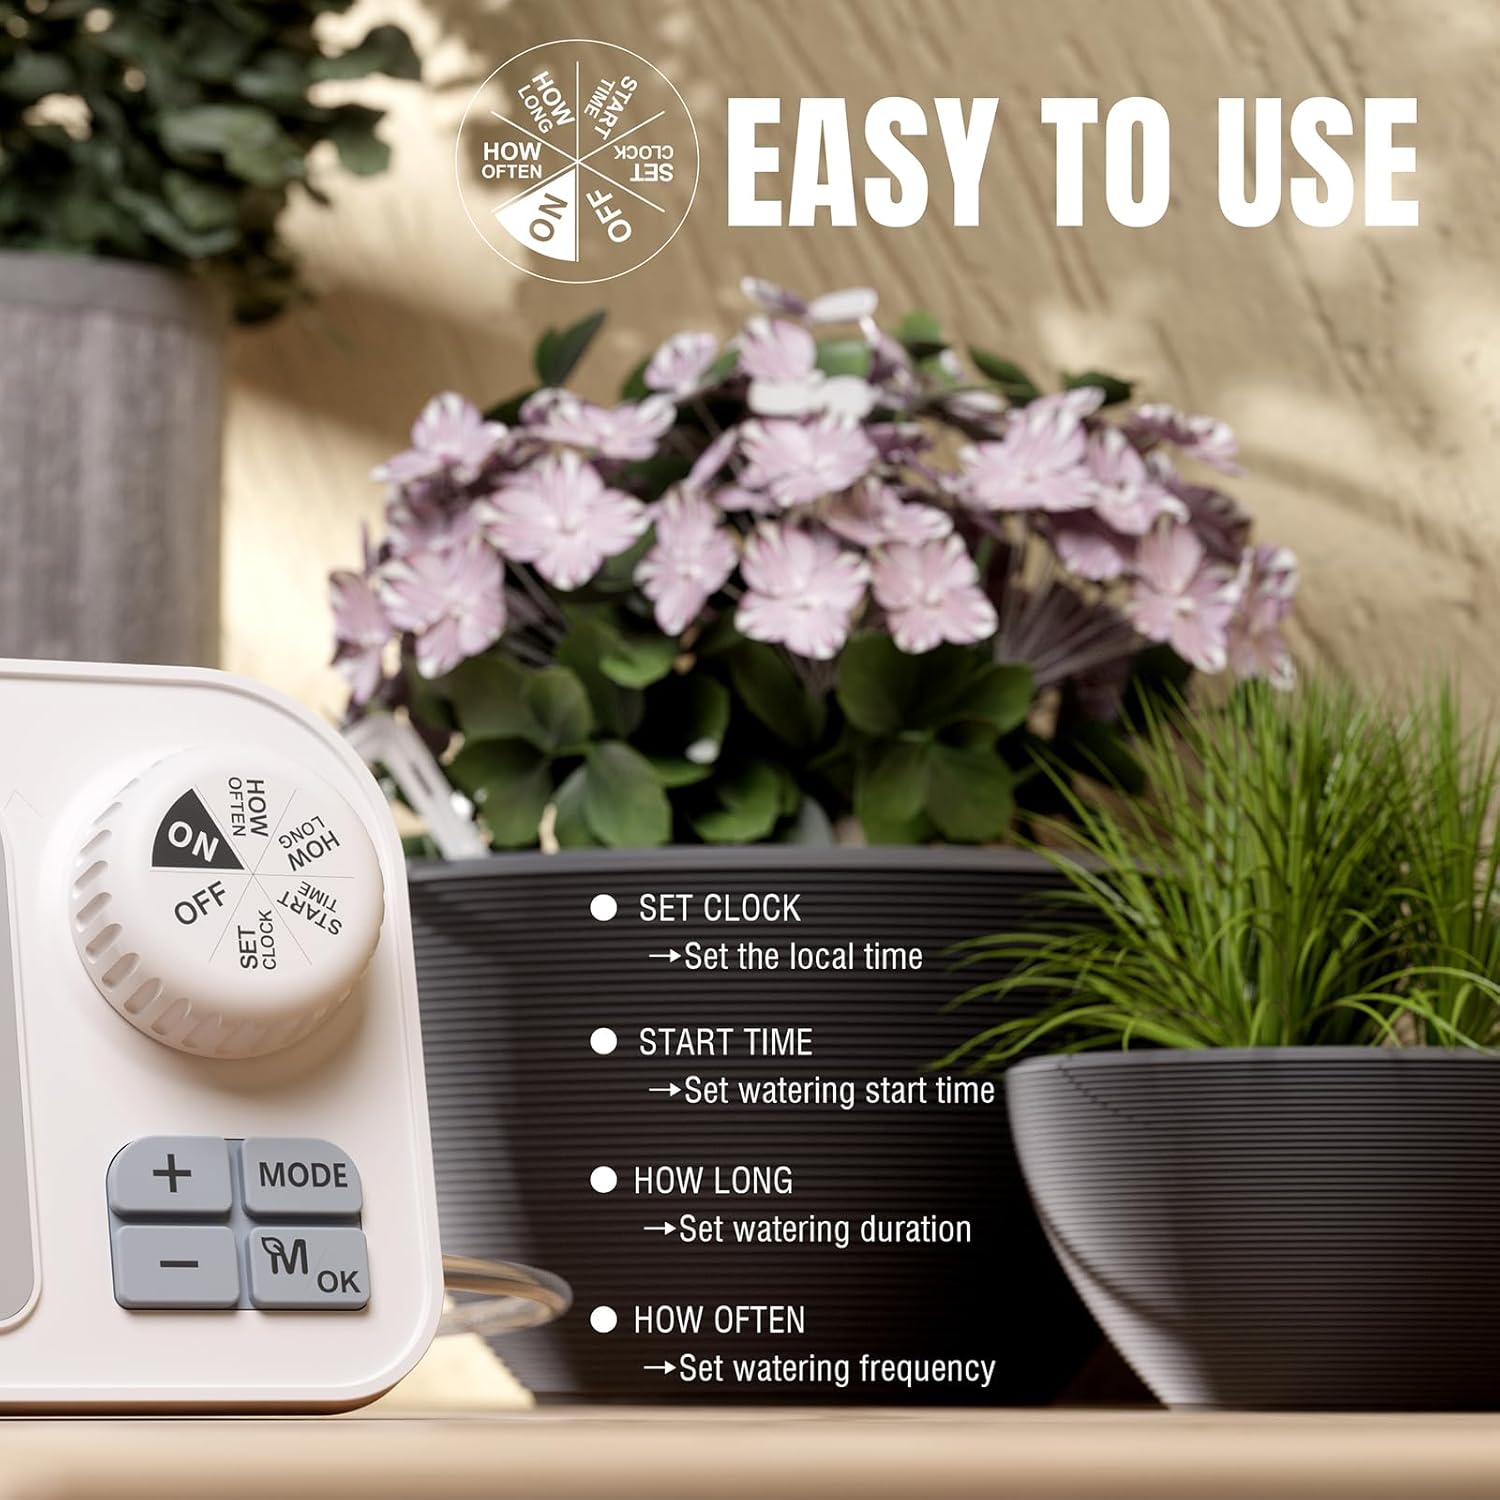
Figure 4: The control unit's dial for setting clock, start time, watering duration, and frequency.
Setting the Watering Schedule:
Use the rotary dial on the control unit to navigate through settings:
- SET CLOCK: Set the current local time.
- START TIME: Set the desired start time for automatic watering cycles.
- HOW LONG: Set the duration of each watering session (0s to 30min).
- HOW OFTEN: Set the frequency of watering (1h to 30 days).
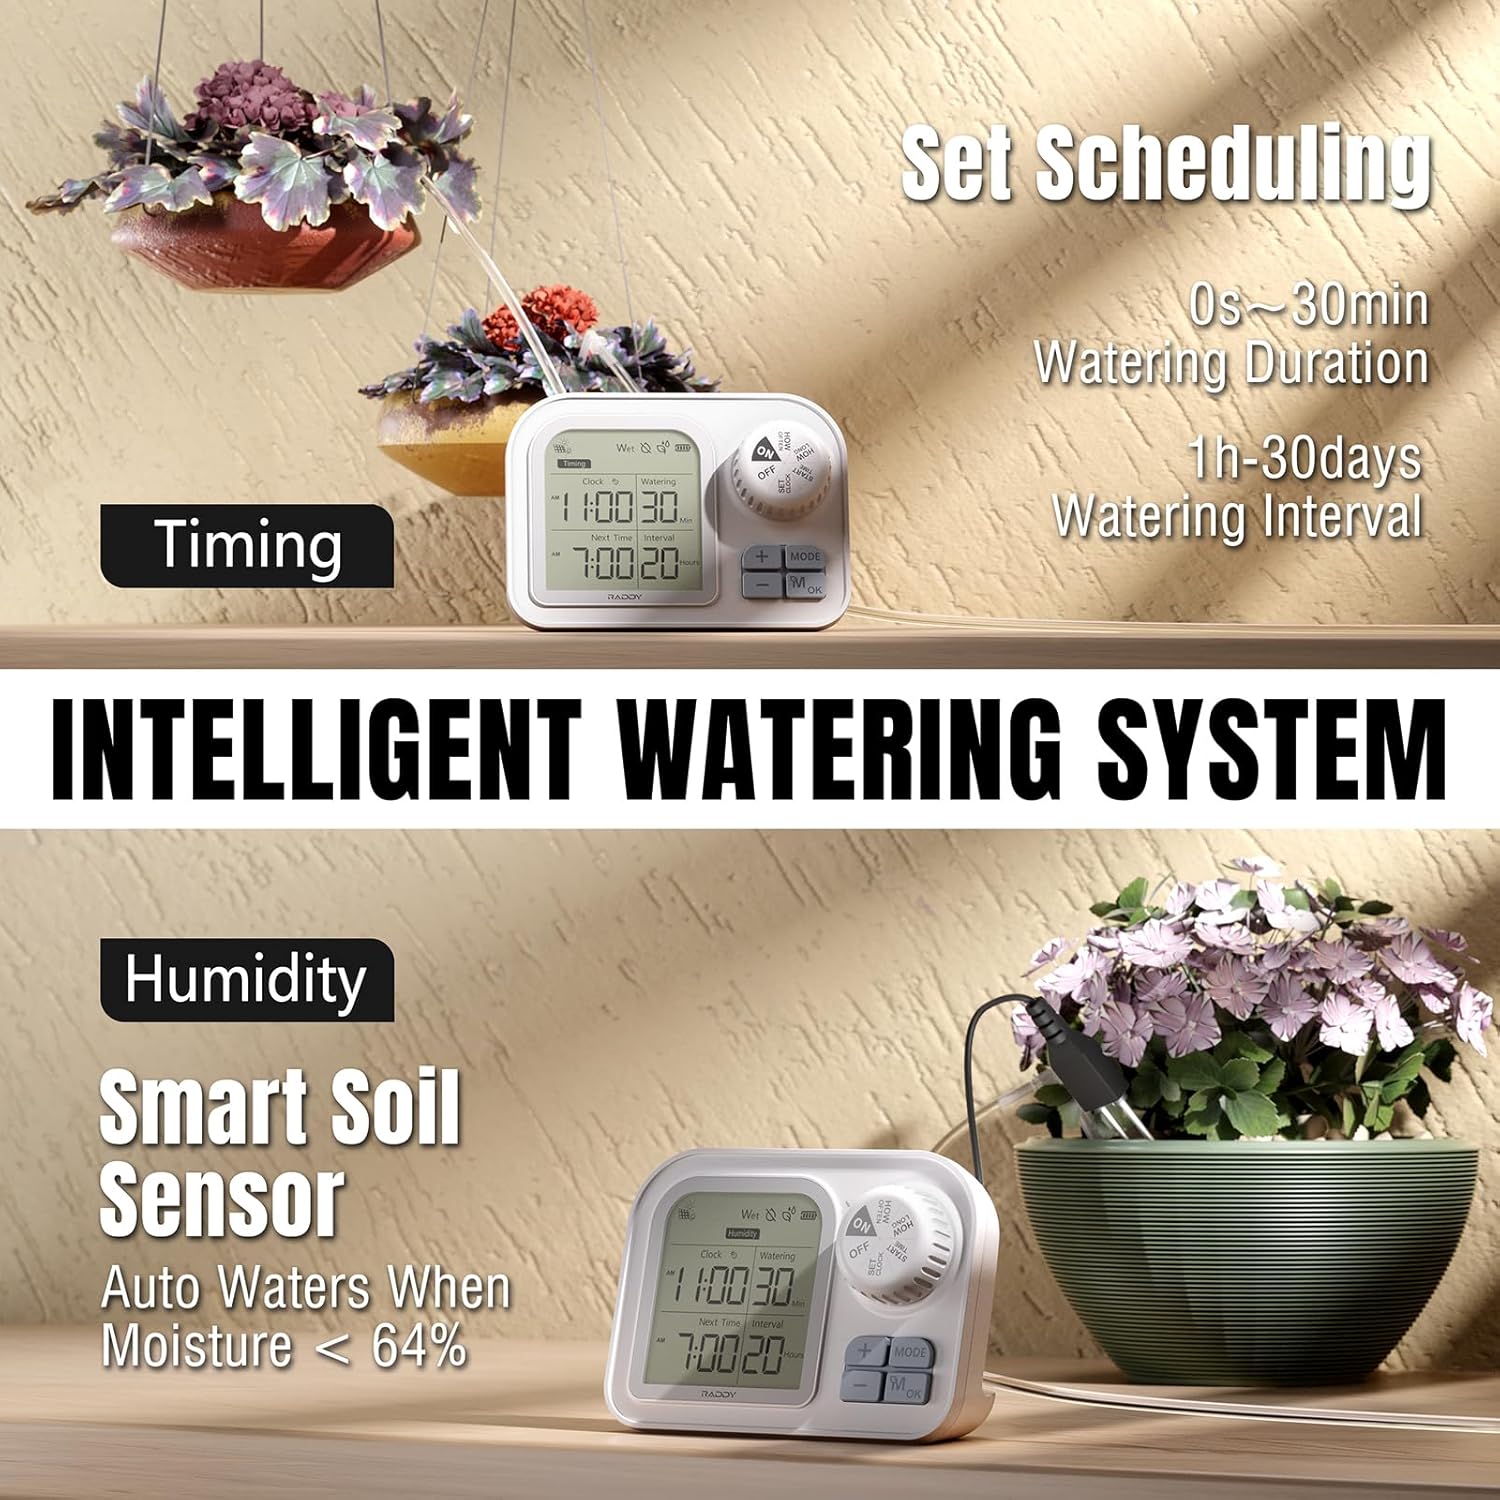
Figure 5: The intelligent watering system display, highlighting timing and humidity modes.
Watering Modes:
- Timing Mode: The system waters according to the schedule you set (duration and frequency).
- Humidity Mode (Smart Soil Sensor): When the soil moisture sensor is connected, the system will automatically water when the humidity level drops below 64%. This mode helps prevent both overwatering and underwatering.

Figure 6: Manual watering can be initiated by pressing the appropriate button on the control unit.
Manual Watering:
You can initiate manual watering at any time by pressing the "MODE" or "M/OK" button. The system will run for a short duration. This is useful for testing the system or providing extra water as needed.

Figure 7: The regulating valve allows for fine-tuning of the water flow to individual drippers.
Adjusting Drip Rate:
The included regulating valve allows you to control the water flow to specific drippers. This is particularly useful if you have plants with varying water needs or different pot sizes. Adjust the valve by turning its top to increase or decrease the flow.
5. Maintenance
- Filter Cleaning: Regularly check and clean the filter at the end of the inlet pipe to prevent clogs and ensure consistent water flow.
- Battery Charging: While the solar panel provides continuous charging, ensure the unit is fully charged via USB before initial use and periodically if stored for long periods or during extended cloudy weather.
- IPX7 Waterproof: The main unit is IPX7 waterproof, meaning it can withstand splashes and rain. However, avoid submerging the entire unit for prolonged periods.
- Winterization: In colder climates, drain the system and store the unit and tubing indoors to prevent freezing damage.
6. Troubleshooting
| Problem | Possible Cause | Solution |
|---|---|---|
| No water flow / Weak flow |
|
|
| System waters continuously (siphoning) | Water reservoir is higher than the drippers. | Ensure the water reservoir is always placed lower than the lowest point of your irrigation system (e.g., the plant pots). |
| Humidity detection not working | Soil moisture sensor not properly inserted or faulty. | Ensure the soil moisture sensor is fully and correctly inserted into the soil. Test in different soil conditions. If issues persist, contact support. |
| Uneven water distribution |
|
|
7. Specifications
- Model: WS-7
- Brand: Raddy
- Color: White
- Material: Plastic
- Product Dimensions: 6"D x 2"W x 4"H
- Item Weight: 1.3 Pounds
- Battery: 1 9V batteries required.
- Water Lift Height: 4-5m
- Watering Capacity: Up to 15 potted plants
- Waterproof Rating: IPX7
8. Warranty and Support
For warranty information, technical support, or customer service inquiries, please refer to the official Raddy website or contact their customer support directly. Details are typically provided with your product packaging or on the manufacturer's official online channels.
You may also find additional resources and FAQs on the Raddy Store on Amazon.


