
1. Introduction
This manual provides comprehensive instructions for the installation, operation, and maintenance of your Jebao Jecod Doser 5.4 Bluetooth 4-Channel Auto Dosing Pump. This device is designed to automatically and precisely add various nutrient solutions to saltwater reef aquariums, ensuring stable water parameters. Please read this manual thoroughly before use to ensure proper function and longevity of the product.
2. Safety Information
- Ensure the power supply matches the specified voltage (DC 12V).
- Do not immerse the dosing pump in water. This product is not waterproof.
- Avoid contact with moisture and water. If the device gets wet, immediately disconnect power.
- Do not operate the pump if the power cord or plug is damaged.
- Keep out of reach of children.
- Always disconnect power before performing any maintenance or cleaning.
- Ensure all tubing connections are secure to prevent leaks.
- This device is intended for indoor use only.
3. Package Contents
Verify that all items are present in the package:
- Jebao Jecod Doser 5.4 Dosing Pump (1 unit)
- AC Power Adapter (1 unit)
- Instruction Manual (1 copy)
- Dosing Tubing (4 pieces)
- Tubing Connectors/Holders (4 pieces)
4. Product Overview
The Jebao Jecod Doser 5.4 is a compact, 4-channel automatic dosing pump designed for precise liquid additions to your aquarium. It features both manual and Bluetooth app control for flexible operation.

Figure 4.1: Front view of the Jebao Jecod Doser 5.4, showing the LCD display, control buttons, and four dosing heads with tubing connections.

Figure 4.2: Angled view of the dosing pump, highlighting its compact design and the transparent cover over the dosing heads.

Figure 4.3: Rear view of the dosing pump, showing the mounting holes for secure installation.
Components:
- LCD Display: Shows current time, dosing status, and settings.
- Control Buttons: For manual navigation and setting adjustments.
- Dosing Heads (C1-C4): Four independent peristaltic pumps for precise liquid delivery.
- Power Input: DC 12V connection for the power adapter.
- Tubing Connections: Inlet and outlet ports for each dosing channel.
5. Setup
5.1 Physical Installation
- Choose a dry, stable location near your aquarium, away from direct sunlight and excessive heat.
- Mount the doser securely using the mounting holes on the back of the unit.
- Connect the provided dosing tubing to the inlet and outlet ports of each dosing head (C1-C4). Ensure a snug fit to prevent leaks.
- Place the inlet ends of the tubing into your desired supplement containers. Ensure the tubing reaches the bottom of the containers.
- Position the outlet ends of the tubing securely into your aquarium or sump, ensuring they are above the water level to prevent back-siphoning.
5.2 Power Connection
- Connect the AC power adapter to the power input port on the dosing pump.
- Plug the power adapter into a suitable electrical outlet. The LCD display should illuminate.
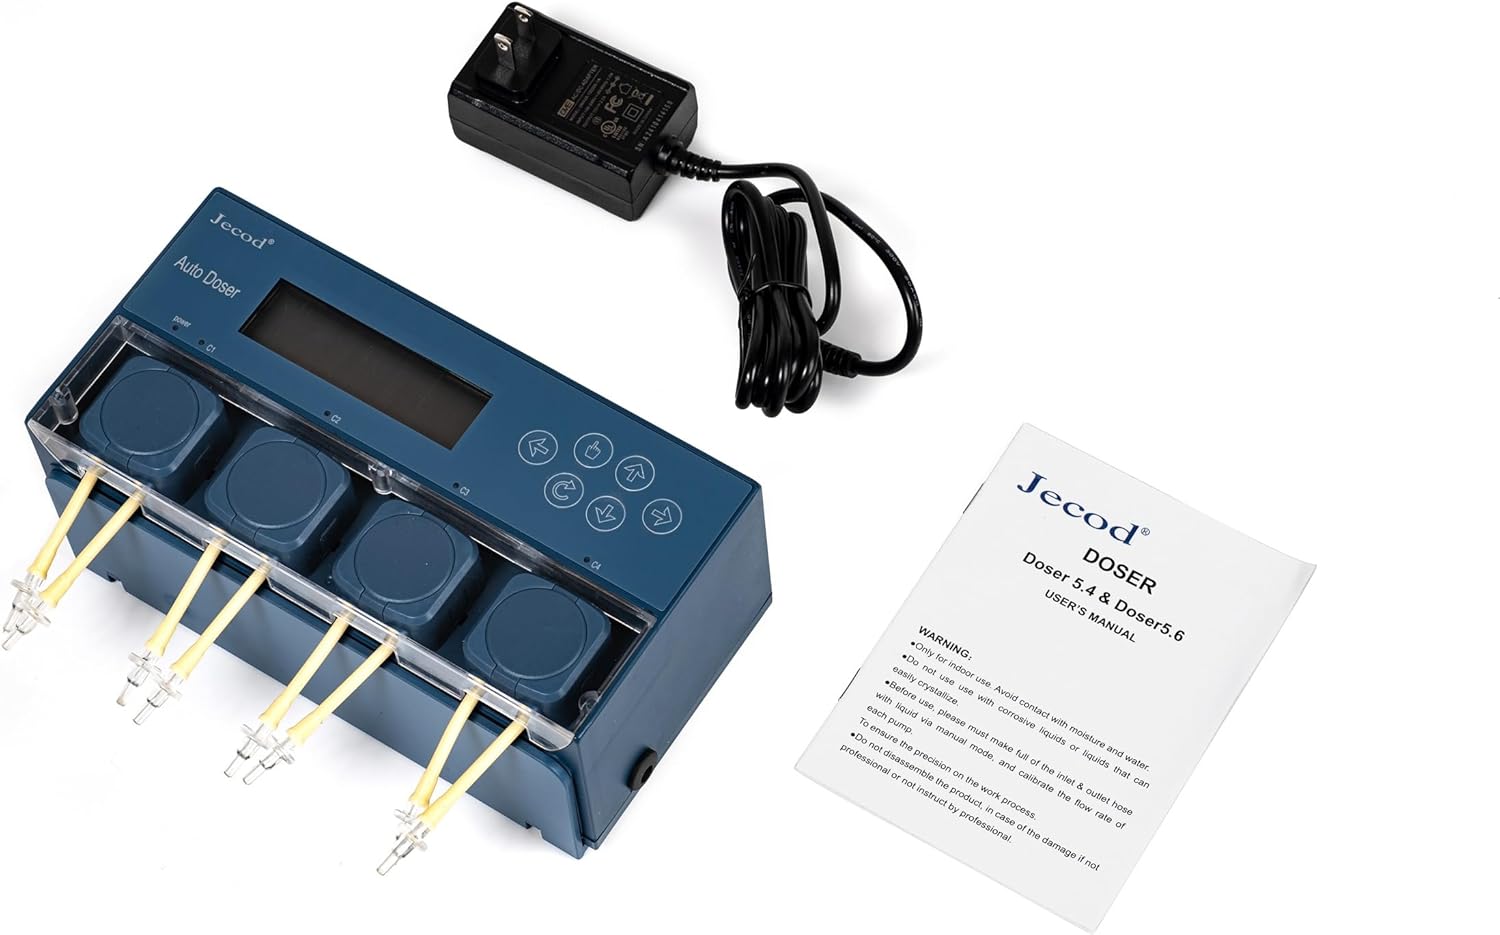
Figure 5.1: The dosing pump connected to its power adapter, ready for initial setup.
5.3 App Installation and Bluetooth Pairing
- Download the official Jecod/Jebao dosing pump application from your smartphone's app store (iOS or Android).
- Enable Bluetooth on your smartphone.
- Open the dosing pump application. The app should automatically detect nearby Jebao Doser 5.4 devices.
- Select your device from the list to pair. Follow any on-screen prompts to complete the pairing process.

Figure 5.2: The dosing pump connected via Bluetooth to a smartphone, displaying the app interface for control.
6. Operating Instructions
The Doser 5.4 can be operated via its physical buttons or through the dedicated smartphone application.
6.1 Manual Control (via Device Buttons)
- Use the arrow buttons to navigate through the menu options on the LCD display.
- The 'Enter' or 'OK' button (often a central button) confirms selections.
- Adjust settings such as current time, dosing volume, and frequency directly on the device. Refer to the on-screen prompts for specific parameter adjustments.
6.2 App Control (Recommended)
The smartphone app provides a more intuitive interface for setting up and managing your dosing schedules.
- Time Synchronization: Upon successful Bluetooth connection, the device time should automatically synchronize with your phone.
- Channel Configuration: Select each dosing channel (C1-C4) within the app.
- Dosing Volume: Set the desired volume (in ml) for each dose.
- Dosing Frequency: Define how many times per day each channel should dose.
- Dosing Schedule: For each channel, you can set specific times for dosing throughout the day. The app allows for detailed scheduling, including daily intervals and multiple doses per day.
- Calibration: It is recommended to calibrate each pump channel periodically to ensure accurate dosing. Follow the app's calibration guide, typically involving dispensing a known volume into a measuring cup and adjusting the pump's output accordingly.

Figure 6.1: Screenshot of the smartphone application, illustrating the detailed options for setting day intervals and specific dosing schedules for each channel.
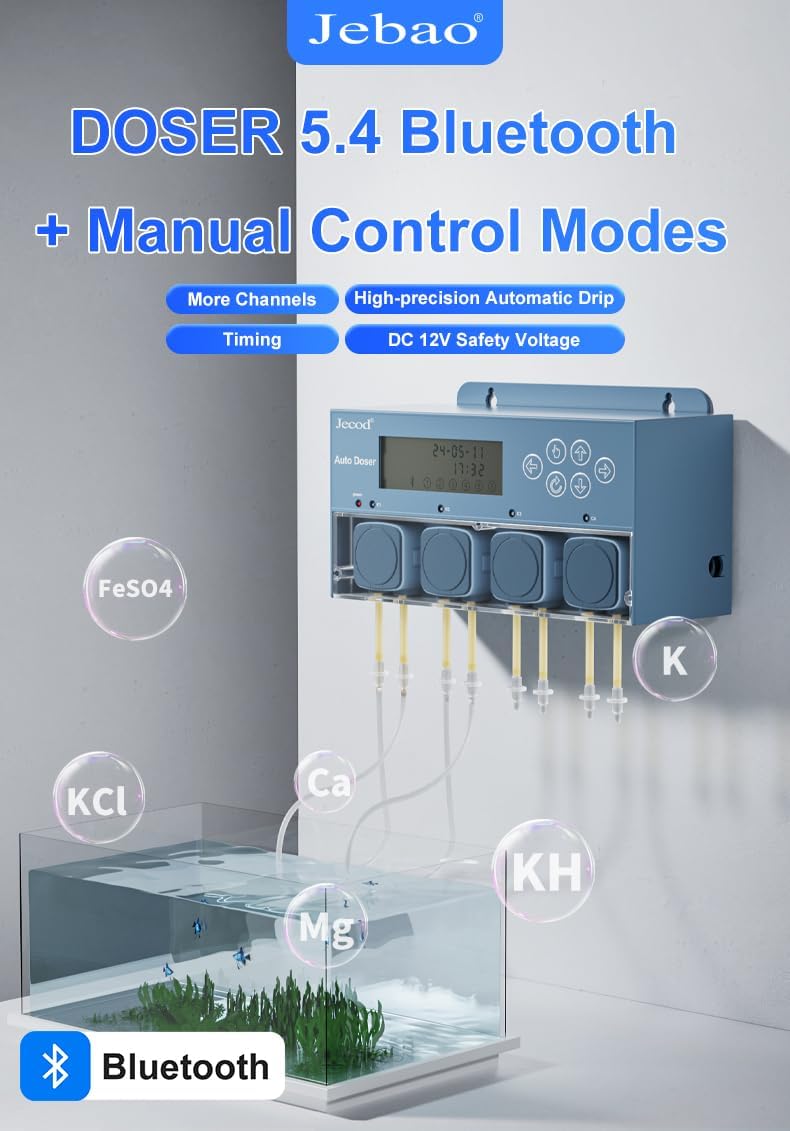
Figure 6.2: The dosing pump in operation, connected to multiple bottles containing different aquarium supplements such as FeSO4, KCl, Ca, Mg, KH, and K.
7. Maintenance
Regular maintenance ensures optimal performance and extends the lifespan of your dosing pump.
- Tubing Inspection: Periodically check all dosing tubing for kinks, blockages, or wear. Replace tubing if it becomes stiff, discolored, or damaged.
- Pump Head Cleaning: If dosing heads become noisy or dosing accuracy decreases, they may require cleaning. Disconnect power, remove the tubing, and carefully open the pump head cover (if applicable) to inspect the rollers and tubing inside. Clean with fresh water if necessary.
- External Cleaning: Wipe the exterior of the unit with a soft, damp cloth. Do not use harsh chemicals or abrasive cleaners.
- Calibration Check: Re-calibrate the pumps every few months or if you notice inconsistencies in dosing volumes.
8. Troubleshooting
Refer to the table below for common issues and their solutions.
| Problem | Possible Cause | Solution |
|---|---|---|
| Pump not turning on | No power, faulty adapter, loose connection | Check power outlet, ensure adapter is securely connected, try a different outlet. |
| Bluetooth connection failure | Bluetooth off, app issue, device too far | Ensure Bluetooth is enabled on phone, restart app, move phone closer to doser, restart doser. |
| Inaccurate dosing volume | Pump not calibrated, tubing issues, air bubbles | Perform pump calibration via the app, check tubing for kinks or blockages, ensure no air is trapped in the lines. |
| No liquid dispensed | Tubing blocked, air lock, empty supplement container | Check tubing for blockages, prime the pump to remove air, refill supplement container. |
| Excessive noise from pump | Worn tubing, debris in pump head | Inspect and replace tubing if worn, clean pump head. |
9. Specifications
| Feature | Specification |
|---|---|
| Model | Doser 5.4 |
| Channels | 4 |
| Power Input | DC 12V |
| Power Consumption | 12W |
| Maximum Flow Rate | 50 ml/minute (per channel) |
| Maximum Lifting Height | 1.5 meters (4.9 feet) |
| Control Method | Bluetooth APP and Manual Buttons |
| Dimensions (L x W x H) | 8.9" x 3.3" x 2.4" (22.6 cm x 8.4 cm x 6.1 cm) |
| Item Weight | 2 pounds (0.91 kg) |
| Material | Stainless Steel (internal components), Plastic (housing) |
10. Warranty and Support
This product is covered by a manufacturer's warranty against defects in materials and workmanship. For specific warranty terms and duration, please refer to the documentation provided with your purchase or contact Jebao customer support. For technical assistance, troubleshooting, or spare parts, please contact your retailer or the manufacturer directly. Keep your purchase receipt as proof of purchase for warranty claims.

