Introduction
This manual provides comprehensive instructions for the installation, operation, and maintenance of your Loccess Smart Key Lock Box with WiFi. Please read this manual thoroughly before using the product to ensure proper function and safety. This device offers secure key storage with multiple access options, including a numerical keypad, Bluetooth app control, and remote WiFi access via a gateway.
What's in the Box
Upon unpacking, please verify that all the following components are present:
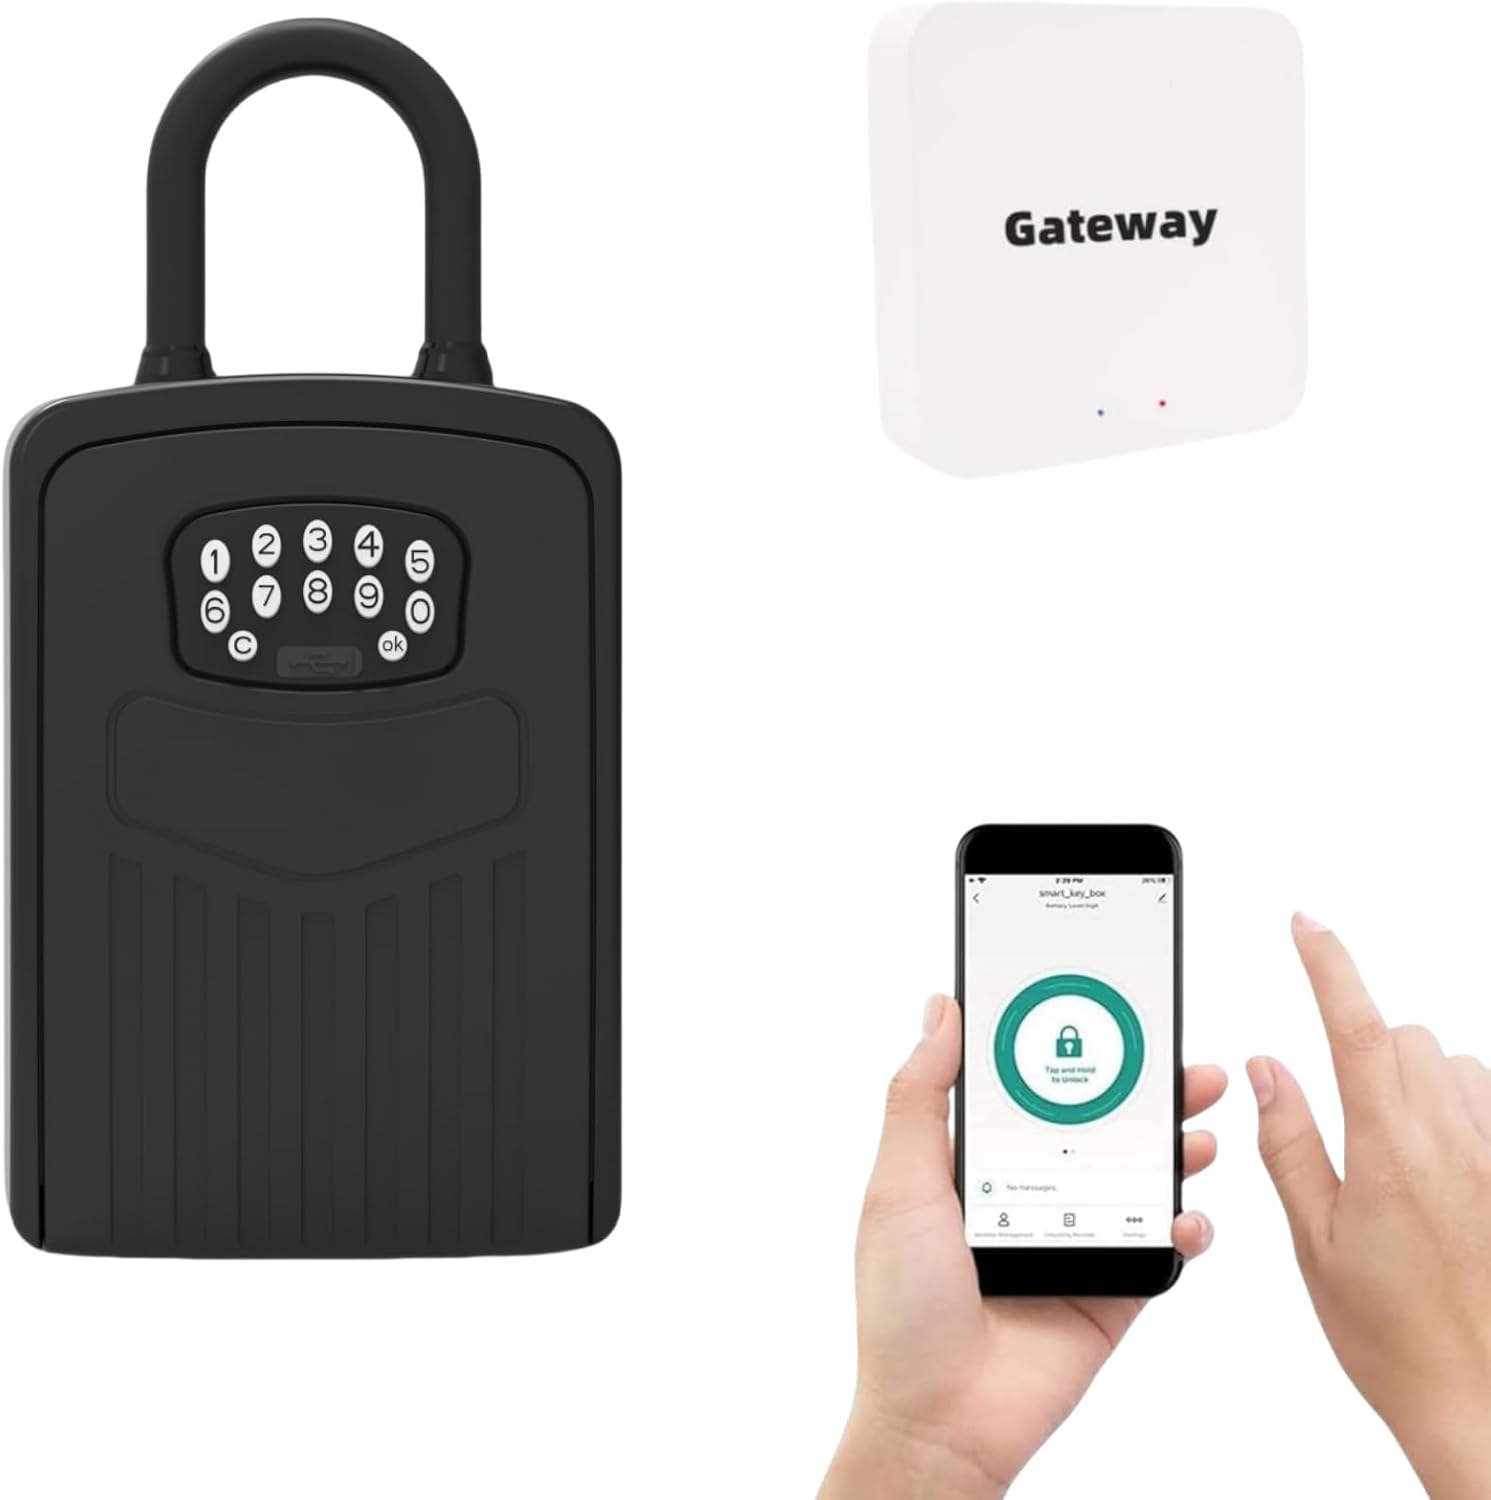
- Smart Key Lock Box
- Gateway (for remote control version)
- Temporary Power Cord (USB)
- Mounting Screws Set (4 screws)
- Drill Template
- User Manual (this document)

Setup
1. Initial Opening and Battery Installation
Before first use, the lock box requires power to open and install the batteries. Use the provided temporary power cord to connect the lock box to a power source (e.g., power bank, phone charger, computer USB port).
- Connect the temporary power cord to the USB port on the lock box.
- Enter the default code "123456" on the keypad and press "OK" to open the lock box.
- Once open, locate the battery compartment. Install 4 AAA alkaline batteries (not included), ensuring correct polarity.
- Close the battery compartment cover securely.
- The U-hook is initially installed. If you intend to wall-mount the device, remove the U-hook by pressing the two buttons on the top of the lock box and pulling the hook out. Store it safely if you plan to use it later.
2. App Connection (Bluetooth)
To utilize the smart features of your lock box, connect it to your smartphone via the 'Smart Life' application.
- Download the "Smart Life" app from your phone's app store (available on iOS and Android).
- Register or log in to your Smart Life account.
- Ensure your phone's Bluetooth is enabled.
- In the app, tap "Add Device" or the "+" icon. The app should automatically discover the "smart_key_box". Tap "Add".
- Once connected, the original default code "123456" will no longer open the lock box. All operations will be managed through the app or newly set codes.
3. Setting a New Password via App
After successful app connection, you can set custom passwords for the lock box.
- In the Smart Life app, navigate to the lock box device interface.
- Select "Member Management" and then "Me".
- Tap "Add" to create a new code. Enter an 8-10 digit password and assign a name for easy identification.
- Save the new password. You can now use this new code to open the lock box.
Operating
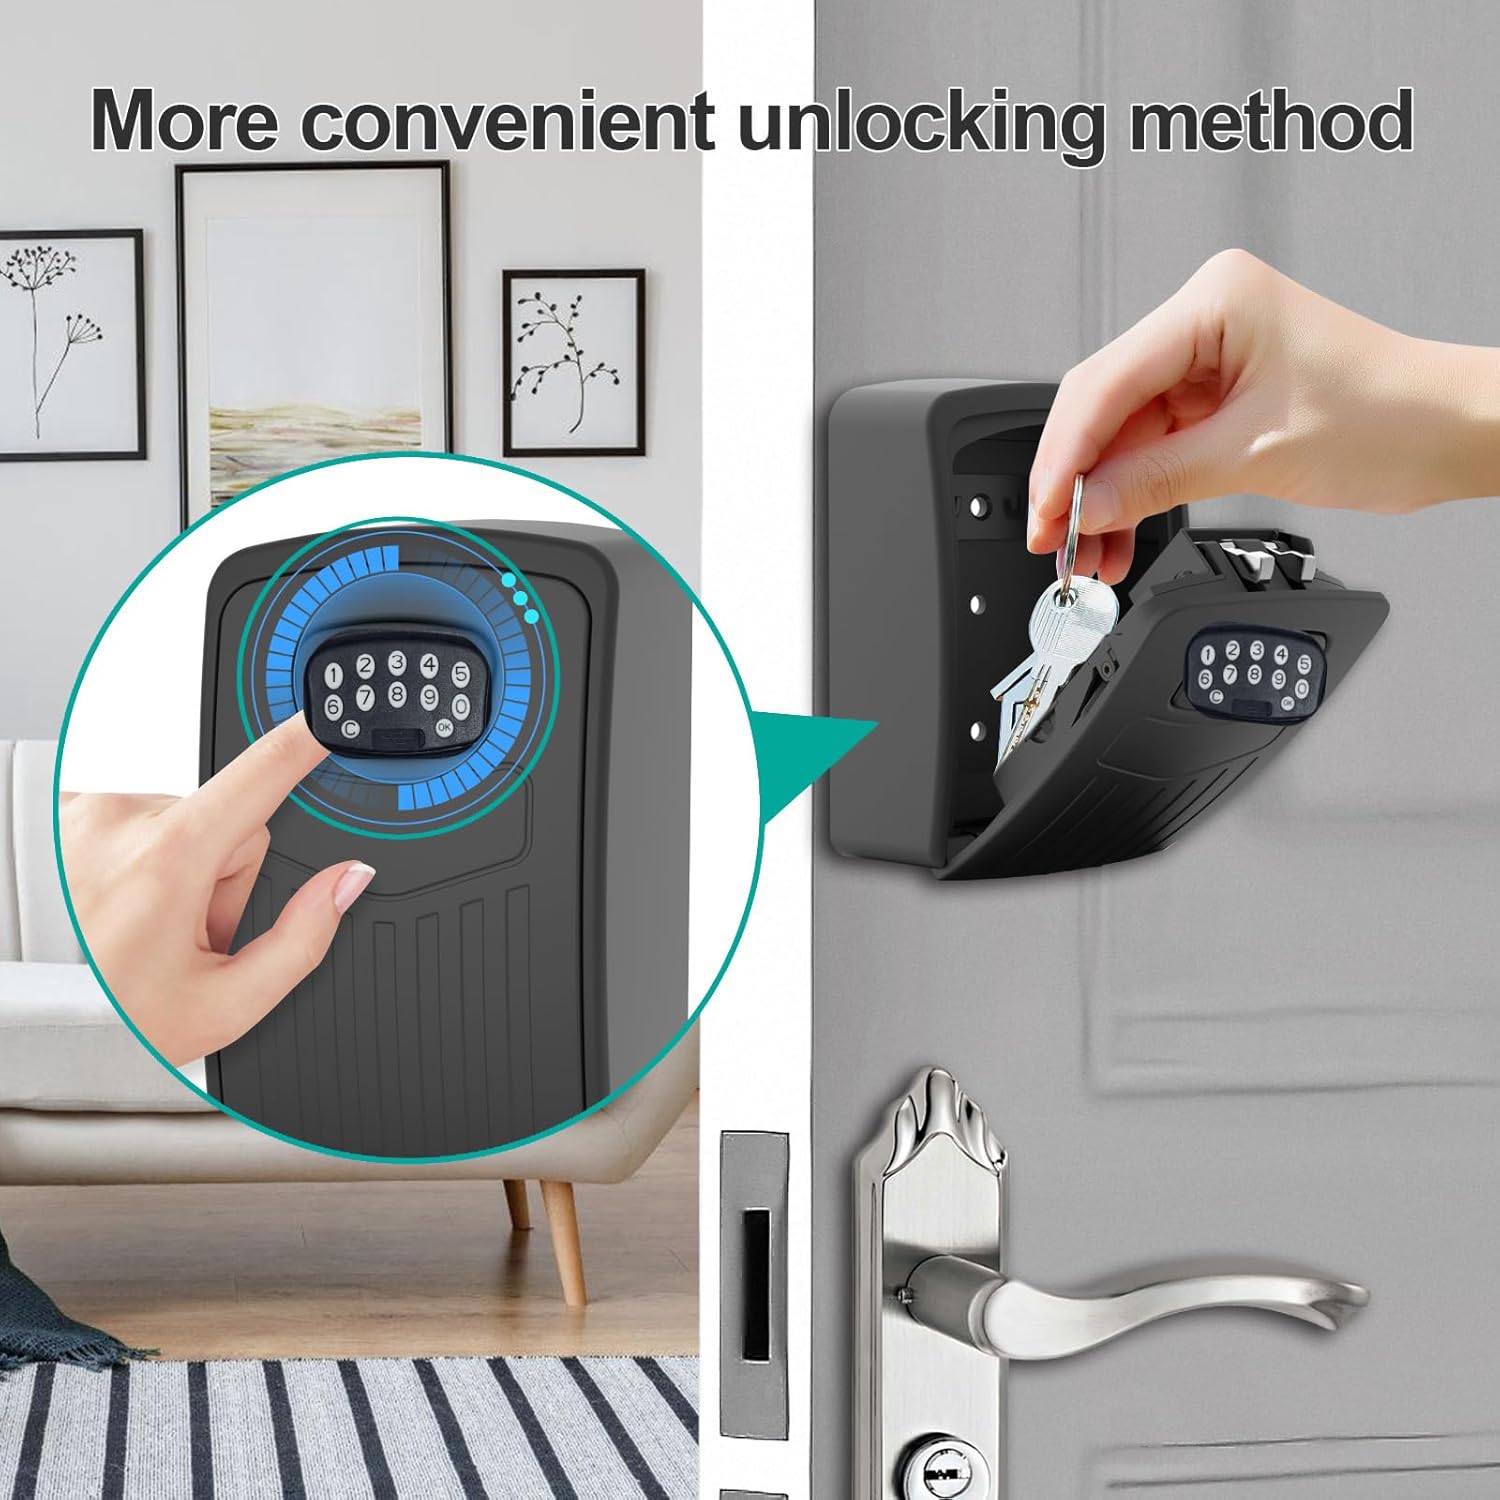
1. Manual Operation (Keypad)
To open the lock box using a programmed code:
- Enter your 8-10 digit password on the keypad.
- Press the "OK" button. The lock box will unlock, allowing you to open the compartment.
2. Remote Control (with Gateway)
For remote access, the gateway must be connected and associated with your lock box.
- Plug the gateway into a power source.
- In the Smart Life app, add the gateway device by following the on-screen instructions, including connecting it to your WiFi network.
- Once the gateway is added, associate your smart key lock box with the gateway within the app's settings.
- With the gateway successfully associated, you can now remotely unlock the key box from anywhere with an internet connection via the Smart Life app.
- The app also provides an operation log, allowing you to view a history of unlocks, including remote unlocks.

Installation
The Loccess Smart Key Lock Box offers two primary installation methods:
1. Wall Mount Installation
For a permanent and secure installation, you can mount the lock box directly to a wall.
- Select a suitable location on a sturdy wall.
- Use the provided drill template to mark the drilling points.
- Drill holes at the marked positions.
- Align the lock box with the drilled holes and secure it using the supplied screws.
2. Hanging (U-Hook) Installation
For a more portable or temporary solution, use the U-hook to hang the lock box.
- Ensure the U-hook is securely attached to the top of the lock box.
- Hang the lock box on a doorknob, fence, or any other suitable fixture.

Maintenance
Battery Replacement
The lock box operates on 4 AAA alkaline batteries. When the battery level is low, the app will provide a notification. Replace batteries promptly to ensure continuous operation. If batteries completely drain, use the temporary power cord to open the box and replace them.
Weather Resistance
The Loccess Smart Key Lock Box is designed with IP65 waterproof rating, making it suitable for outdoor use and resistant to rain, snow, and sun exposure. Ensure the cover is properly closed to maintain its weather resistance.

Troubleshooting
Original Code Not Working
After successfully connecting the lock box to the Smart Life app via Bluetooth, the original default code "123456" will no longer function. You must use the app to set a new password or unlock the device directly through the app.
Factory Reset
To restore the lock box to its factory settings, which will allow the original code "123456" to work again:
- Open the Smart Life app and navigate to the lock box device interface.
- Tap the pen icon (or similar settings icon) in the upper right corner of the app interface.
- Scroll down and select "Remove Device". Choose the option to "Remove and Clear Data".
- Confirm the action. The device will be removed from your app, and its settings will revert to factory defaults. You can then use the original code "123456" to open the box.
Specifications
| Feature | Detail |
|---|---|
| Brand | Loccess |
| Product Dimensions | 5"D x 3"W x 2"H |
| Lock Type | Mechanical Code Lock |
| Color | Black |
| Capacity | 60 Cubic Centimeters |
| Material | Metal |
| Special Feature | Waterproof |
| Mounting Type | Wall Mount |
| Water Resistance Level | Water Resistant (IP65) |
| Item Weight | 1.92 pounds |
| Model Number | SMKB2-BTS-Gateway |
| UPC | 787659599603 |
Warranty and Support
For warranty information, technical support, or any inquiries regarding your Loccess Smart Key Lock Box, please refer to the contact information provided with your purchase or visit the official Loccess website. Keep your purchase receipt for warranty claims.


