
1. Introduction
Thank you for choosing the Siljoy L52'' Rectangular Crystal Chandelier. This modern oval brushed nickel chandelier features two tiers of K9 crystal raindrops, designed to enhance various indoor spaces such as dining rooms, living rooms, and kitchen islands. This manual provides essential information for safe installation, operation, and maintenance of your new lighting fixture.
Safety Information
- Always turn off the main power supply at the circuit breaker before beginning installation, maintenance, or bulb replacement.
- Consult a qualified electrician if you are not familiar with electrical wiring.
- Ensure the mounting surface can support the weight of the chandelier (approximately 55.8 lbs).
- Do not connect the fixture to an ungrounded electrical system.
- Handle crystal components with care to prevent breakage.
2. Package Contents
Verify that all components are present and undamaged before proceeding with installation. If any parts are missing or damaged, contact Siljoy customer service.
- Chandelier Frame (Brushed Nickel)
- K9 Crystal Strands (Preinstalled)
- Mounting Hardware Kit
- Instruction Manual
Note: E12 bulbs (Max 40W) are not included and must be purchased separately.
3. Specifications
| Feature | Detail |
|---|---|
| Brand | Siljoy |
| Model Name | Crystal Chandelier |
| Model Number | HLP1251304NQG |
| Dimensions | L52" (131cm) x W15.7" (40cm) x H9.8" (25cm) |
| Adjustable Hanging Height | Max 59" (150cm) |
| Material | Crystal, Nickel |
| Finish Type | Brushed Nickel |
| Shade Material | Crystal (Clear) |
| Number of Light Sources | 20 |
| Bulb Base | E12 |
| Max Wattage per Bulb | 40 Watts |
| Voltage | 110 Volts (AC) |
| Item Weight | 55.8 Pounds |
| Room Coverage | 215-430 square feet (20m²-40m²) |
| Installation Type | Semi Flush Mount / Ceiling Mount |
| Special Features | Adjustable Height, Color Changing (with compatible bulbs), Dimmable (with compatible dimmer and bulbs) |
| Indoor/Outdoor Usage | Indoor |
The chandelier is suitable for installation on both flat and sloped ceilings.

Figure 3.1: Detailed dimensions and specifications of the chandelier.
4. Setup and Installation
Professional installation is recommended. If you are performing self-assembly, ensure you have the necessary tools and follow all safety precautions.
4.1 Pre-Installation Checks
- Unpack all components and inspect for any damage.
- Ensure the ceiling junction box is securely mounted and capable of supporting the chandelier's weight.
- Turn off power at the circuit breaker before starting.
4.2 Mounting the Fixture
- Attach the mounting bracket to the ceiling junction box using the provided hardware.
- Connect the electrical wires (live, neutral, ground) from the chandelier to the corresponding wires in the ceiling, following local electrical codes. Secure connections with wire nuts.
- Carefully lift the chandelier frame and secure it to the mounting bracket.
4.3 Adjusting Hanging Height
The chandelier's hanging height is adjustable up to a maximum of 59 inches (150cm). To adjust the cable length:
- Locate the cable lockers on the canopy.
- Press the locker mechanism to release the cable.
- Adjust the cable to the desired length, then release the locker to secure it.
- Ensure all cables are evenly adjusted for a level fixture.

Figure 4.1: The chandelier is compatible with both flat and sloped ceiling installations.
4.4 Crystal Installation
The K9 crystal strands are preinstalled on the chandelier frame. No individual crystal assembly is required. Simply ensure all strands are securely attached and hang freely.

Figure 4.2: The chandelier features preinstalled K9 crystals for simplified setup.
5. Operating Instructions
5.1 Bulb Installation
- Ensure power is off before installing bulbs.
- Screw 20 E12 base bulbs (Max 40W each, not included) into the sockets.
5.2 Light Color Temperature Adjustment
If using 3-color E12 LED bulbs (not included), you can change the light color temperature (Warm 2700K, Neutral 4500K, Cool 6000K) by continuously pressing your regular wall switch ON and OFF.
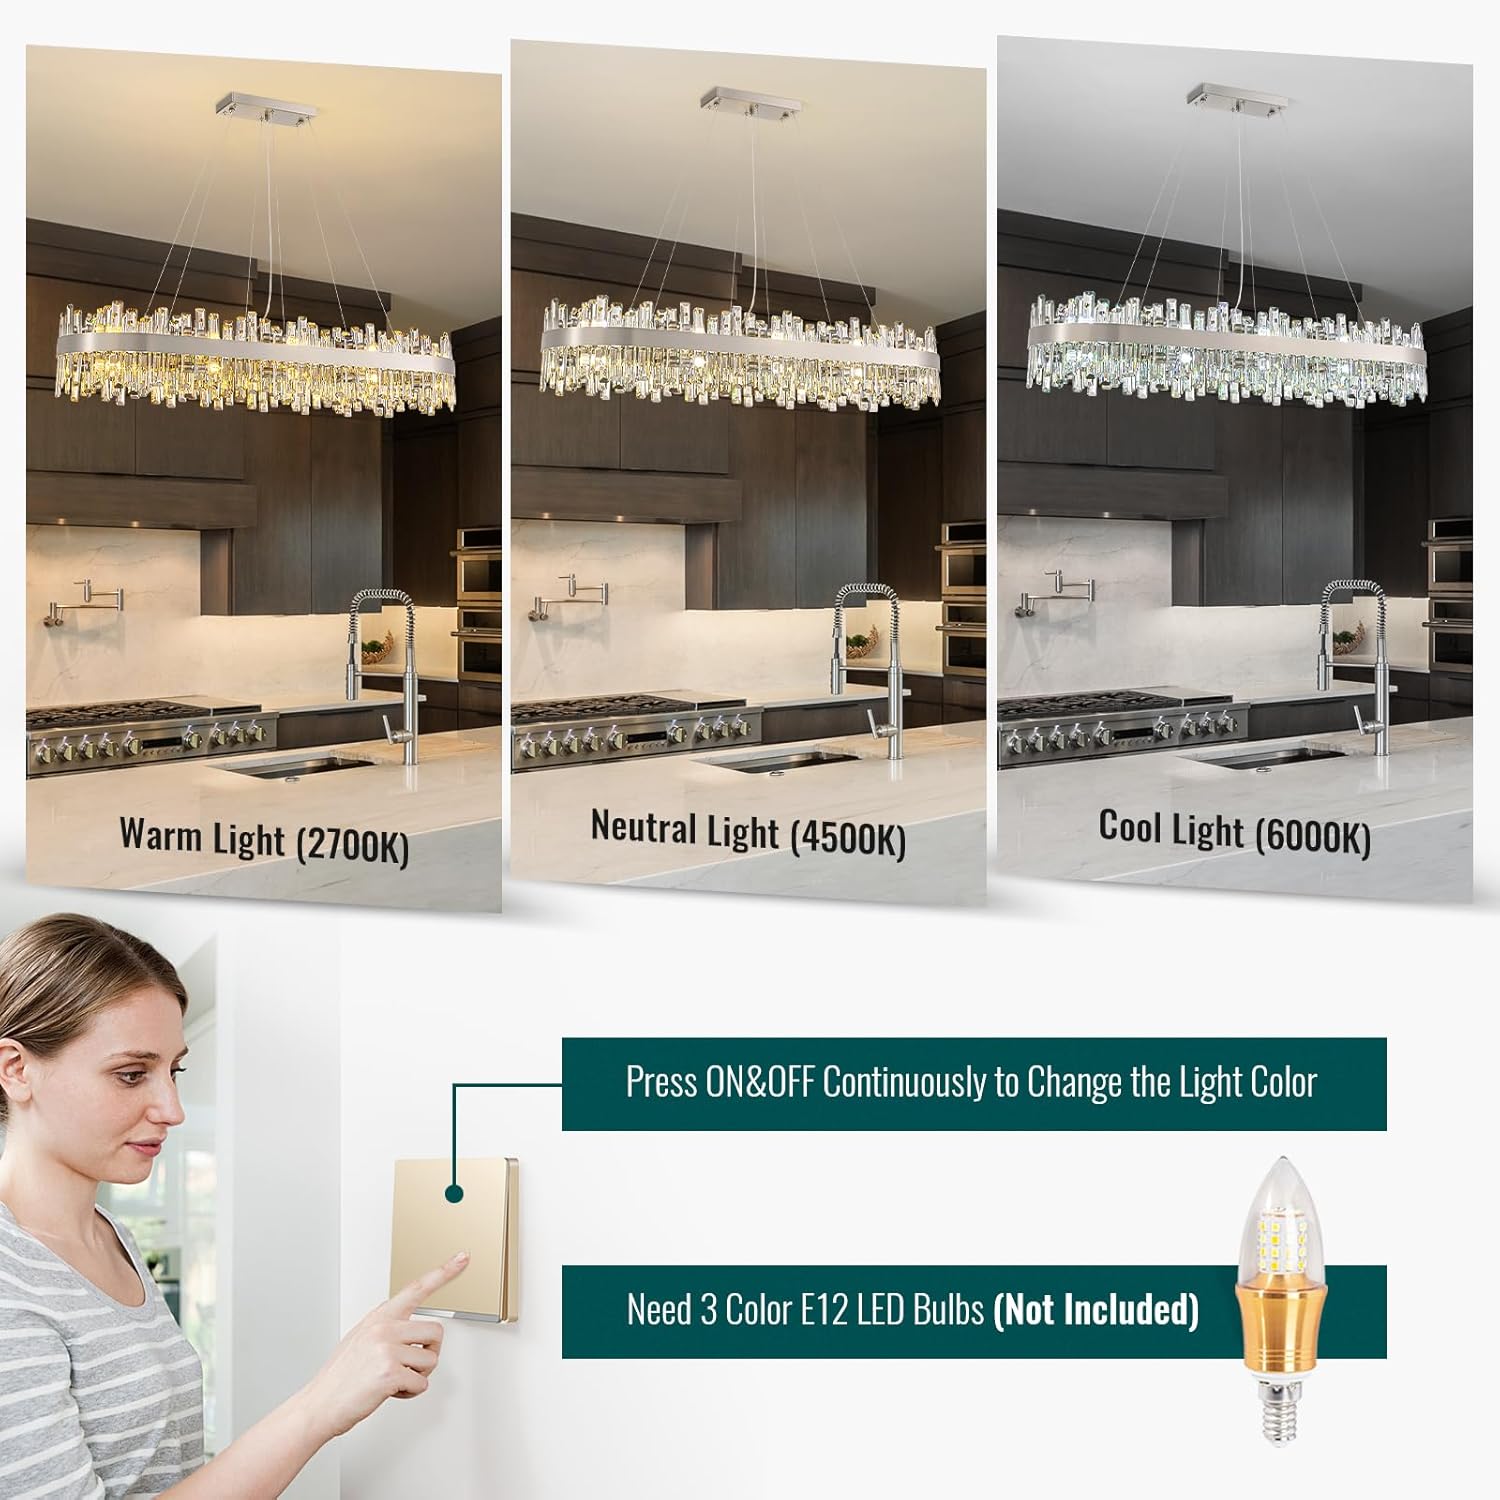
Figure 5.1: Adjusting light color temperature with a standard wall switch (requires compatible bulbs).
5.3 Dimming Functionality
The chandelier is fully dimmable when used with a compatible dimmer switch and dimmable E12 bulbs (both not included).
6. Maintenance
6.1 Cleaning
- Always turn off power to the fixture before cleaning.
- For the metal frame, wipe with a soft, dry cloth. Do not use abrasive cleaners or polishes as they may damage the finish.
- For the crystal components, gently wipe with a soft, lint-free cloth dampened with water or a mild glass cleaner. Avoid spraying cleaner directly onto the fixture.
6.2 Bulb Replacement
- Ensure power is off and bulbs have cooled before attempting to replace them.
- Unscrew the old bulb and screw in a new E12 bulb (Max 40W).
7. Troubleshooting
| Problem | Possible Cause | Solution |
|---|---|---|
| Light does not turn on | No power supply Loose wiring Faulty bulb | Check circuit breaker and wall switch. Verify all wire connections are secure (ensure power is off). Replace bulb. |
| Light flickers | Loose bulb Incompatible dimmer switch Loose wiring | Tighten bulb. Ensure dimmer switch is compatible with LED bulbs (if using LED). Check wiring connections (ensure power is off). |
| Crystals appear dull | Dust or residue buildup | Clean crystals as per maintenance instructions. |
If troubleshooting steps do not resolve the issue, contact Siljoy customer service or a qualified electrician.
8. Warranty and Customer Support
8.1 Warranty Information
This Siljoy chandelier is covered by a 2-year limited warranty from the date of purchase. This warranty covers defects in materials and workmanship under normal use. It does not cover damage caused by improper installation, misuse, accidents, or unauthorized modifications.
Additionally, Siljoy offers a 30-day free return and refund policy. If you receive the chandelier with any defects or broken parts, please contact customer service for replacements.
8.2 Customer Support
For any questions, concerns, or warranty claims, please contact Siljoy customer service. Refer to your purchase documentation for specific contact details or visit the official Siljoy store online.