
Introduction
This manual provides detailed instructions for the installation, operation, and maintenance of your Matane 9-inch Dimmable Motion Sensor LED Ceiling Light. Please read this manual thoroughly before installation and use to ensure proper function and safety.
Safety Information
- Electrical Safety: Always turn off power at the circuit breaker before installing or servicing the light fixture. If you are unsure about electrical wiring, consult a qualified electrician.
- Installation Location: Install the light fixture in a dry indoor location. Ensure the mounting surface can support the weight of the fixture.
- Operating Voltage: This fixture is designed for 120 Volts (AC) electrical systems.
- Remote Control: Keep the remote control away from water and extreme temperatures.
- Children: Keep small parts and packaging materials away from children.
Package Contents
- Matane 9-Inch Dimmable Motion Sensor LED Ceiling Light
- Remote Control
- Mounting Hardware (screws, wire nuts)
- Instruction Manual
Specifications
| Feature | Detail |
|---|---|
| Brand | Matane |
| Model Number | LS-CL-G18W-M-DCCT |
| Size | 8.7 Inch Diameter |
| Material | Plastic |
| Power Source | Corded Electric |
| Voltage | 120 Volts (AC) |
| Wattage | 18 Watts |
| Brightness | 1800 Lumens |
| Color Temperature | 3000K (Warm White), 4000K (Natural White), 5000K (Cool White) |
| Dimmable Range | 10% - 100% |
| Sensor Type | 360° Microwave Motion Sensor, Light Sensor |
| Detection Range | 3 to 20 feet (adjustable) |
| Hold Time | 30 seconds, 60 seconds, 5 minutes (adjustable) |
| Daylight Sensor | 15 lux, 50 lux, Disable (adjustable) |
| Mounting Type | Ceiling Mount / Wall Mount (Flush Mount) |
| Lifespan | Over 30,000 hours |
Setup (Installation)
Before You Begin: Ensure the power is turned off at the circuit breaker before starting installation. Read all instructions carefully.
- Prepare the Mounting Surface: This fixture is designed for flush mounting on ceilings or walls. Ensure the junction box is securely installed and accessible.
- Attach Mounting Bracket: Secure the mounting bracket to your junction box using the provided screws. Ensure it is firmly attached.
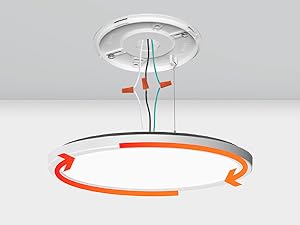
Image: Secure the mounting bracket to the junction box.
- Wire Connections: Connect the electrical wires from the fixture to your household wiring. Match the colors: black to black (live), white to white (neutral), and green/bare copper to green/bare copper (ground). Use the provided wire nuts to secure connections.
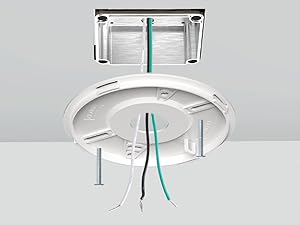
Image: Connect the fixture wires to the household wires.
- Mount the Fixture: Carefully align the light fixture with the mounting bracket and twist to lock it into place. Ensure it is flush with the ceiling/wall and securely fastened.
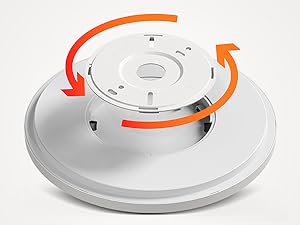
Image: Twist the light fixture onto the mounting bracket to secure it.
- Restore Power: Once the fixture is securely installed and wired, restore power at the circuit breaker.
Installation Video Guide
Video: Official installation guide for the Matane 9-inch Dimmable Motion Sensor Light. This video demonstrates the steps for hardwired installation and initial setup.
Operating Instructions
Your Matane LED Ceiling Light features a remote control for customizing settings. Ensure the remote has working batteries.
Remote Control Functions

Image: Overview of the remote control and its customizable lighting settings.
- Power Button (Red): Turns the light ON or OFF.
- Reset Button: Resets all settings to default.
- Detection Range: Adjusts the motion sensor's detection distance (3 feet, 13 feet, 20 feet).
- Daylight Sensor: Sets the ambient light level at which the motion sensor activates (15 lux, 50 lux, Disable). "Disable" means the motion sensor will always activate regardless of ambient light.
- Brightness Adjustment: Dims the light from 10% to 100%.
- Color Temperature (3CCT): Selects between 3000K (Warm White), 4000K (Natural White), and 5000K (Cool White).

Image: Visual representation of the three selectable color temperatures and dimmable brightness.
- Hold Time: Sets how long the light stays on after motion is no longer detected (30 seconds, 60 seconds, 5 minutes).
- Motion Sensor ON/OFF: Enables or disables the motion sensor function. When disabled, the light can be set to stay on permanently using the ON mode.
Operating Modes

Image: Explanation of the Auto, G, and ON operating modes.
- AUTO Mode (Motion and Light Sensor): The light turns on only when motion is detected in a dark environment. This mode utilizes both the microwave motion sensor and the light sensor.
- G Mode (Motion Sensor Only): The light turns on whenever motion is detected, regardless of the ambient light level.
- ON Mode: The light remains constantly on. The motion sensor function is disabled in this mode.
Motion Sensor Functionality
The integrated 360° microwave sensor detects movement within a range of 3 to 20 feet. This sensor can detect motion through thin walls, doors, or windows, offering broad coverage. For optimal performance, avoid installing the light within 1.5 meters of switches or Wi-Fi routers to prevent interference.
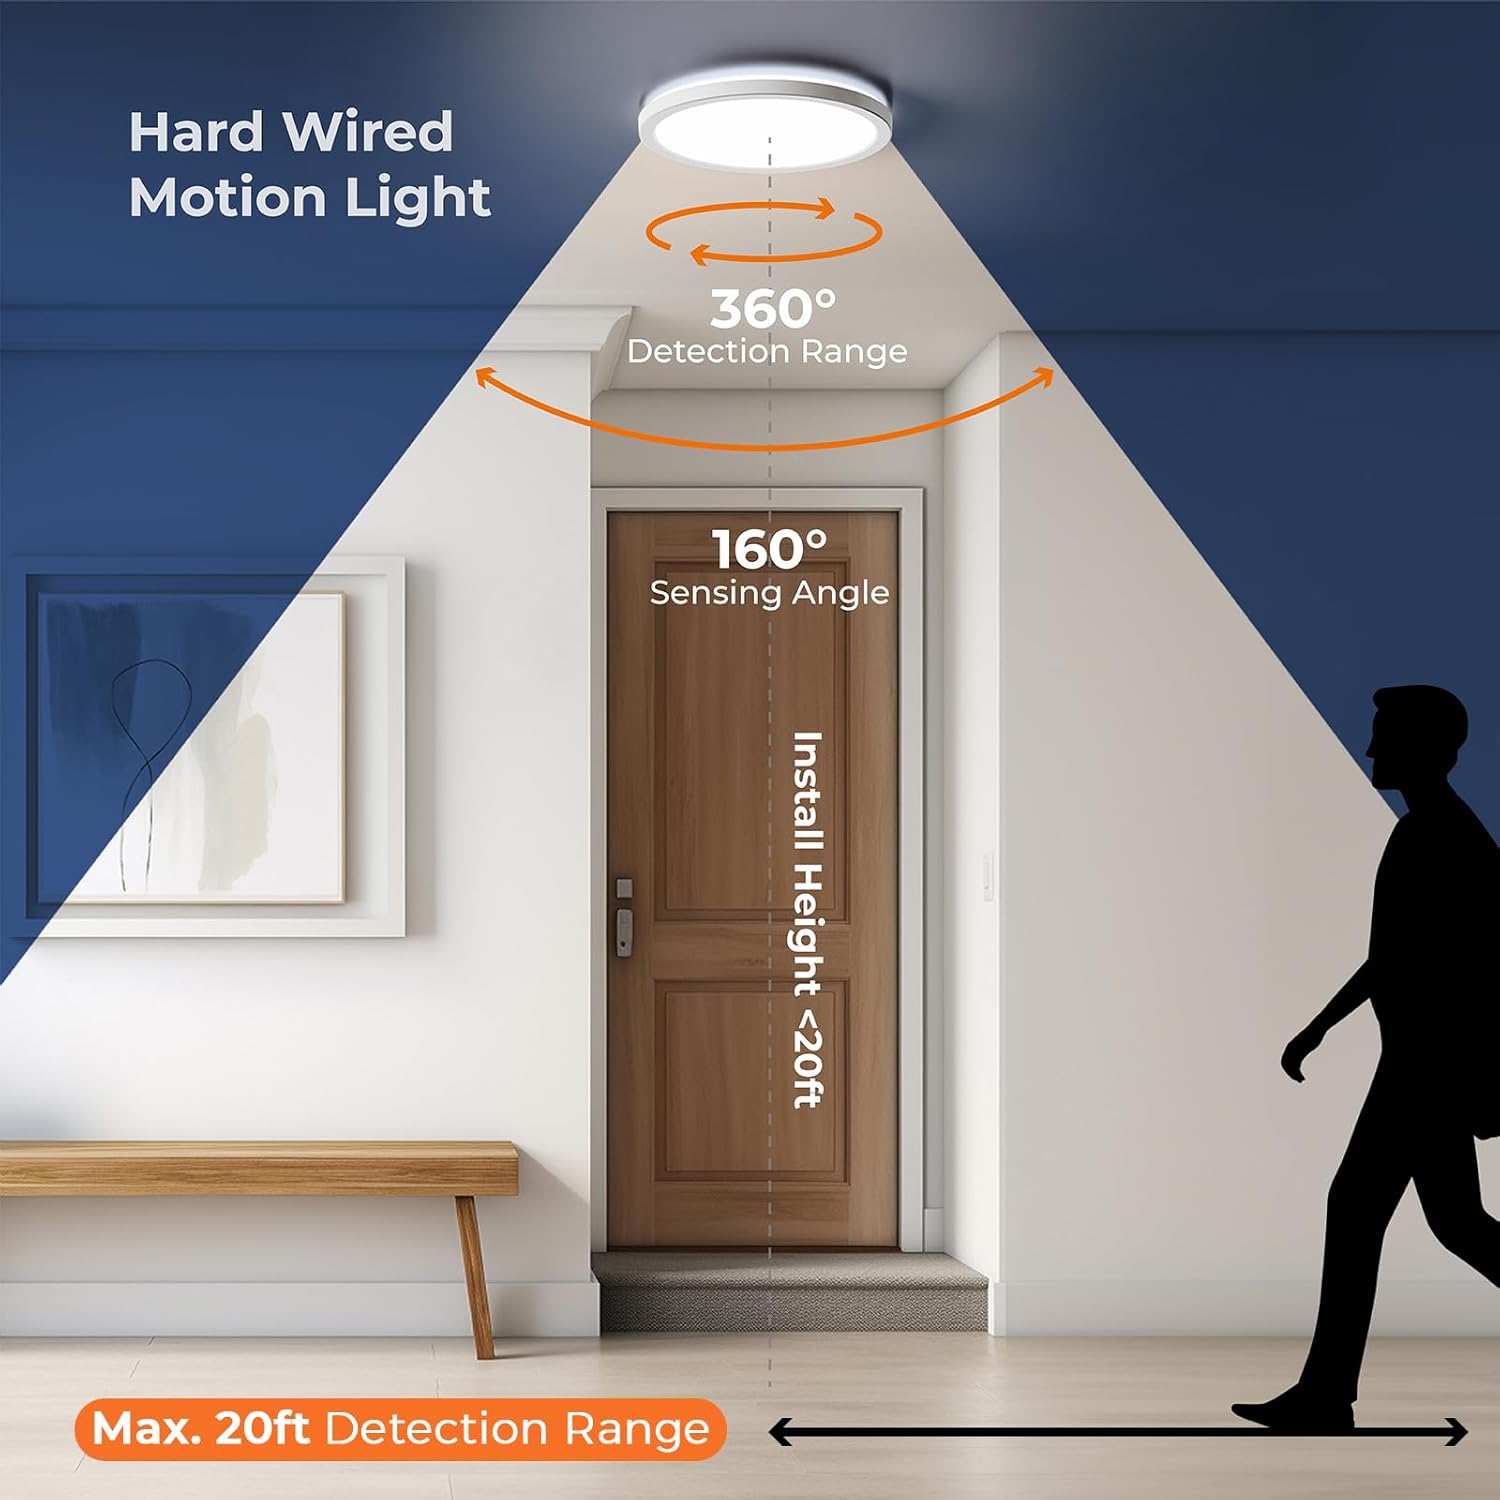
Image: Illustration of the 360° detection range and sensing angle.

Image: The sensitive radar sensor can detect motion through walls.
Maintenance
- Cleaning: To clean the light fixture, ensure the power is off at the circuit breaker. Use a soft, dry cloth to wipe the surface. Do not use abrasive cleaners or solvents, as these may damage the finish.
- Bulb Replacement: This LED fixture has an integrated LED light source designed for a long lifespan (over 30,000 hours). The LED light source is not user-replaceable.
- Remote Control: If the remote control stops responding, check and replace the batteries.
Troubleshooting
| Problem | Possible Cause | Solution |
|---|---|---|
| Light does not turn on. | No power supply. Incorrect wiring. Motion sensor disabled or settings too low. | Check circuit breaker. Verify wiring connections (consult an electrician if unsure). Ensure motion sensor is enabled and adjust detection range/daylight sensor settings using the remote. |
| Light stays on continuously. | Light is in ON mode. Motion sensor sensitivity too high. Constant motion in detection area. | Switch to AUTO or G mode using the remote. Reduce the detection range or adjust daylight sensor settings. Ensure no objects are causing continuous motion detection. |
| Light turns on randomly or when no motion is present. | Motion sensor sensitivity too high. Interference from other devices (e.g., Wi-Fi router). Sensor detecting motion through thin walls. | Reduce the detection range using the remote. Ensure the light is installed at least 1.5m away from switches and Wi-Fi routers. Adjust sensor sensitivity if possible. |
| Light flashes or flickers. | Loose wiring connection. Product malfunction. | Turn off power and check all wiring connections. If problem persists, contact customer support. |
| Remote control not working. | Dead batteries. Obstruction between remote and light. | Replace remote control batteries. Ensure a clear line of sight or reduce distance to the light. |
Warranty
This Matane LED Ceiling Light is covered by a 2-year manufacturer's warranty from the date of purchase. This warranty covers defects in materials and workmanship under normal use. It does not cover damage caused by improper installation, misuse, accidents, or unauthorized modifications. Please retain your proof of purchase for warranty claims.
Support
If you encounter any issues or have questions regarding your Matane Dimmable Motion Sensor LED Ceiling Light that are not addressed in this manual, please contact Matane customer support:
- Email: [Insert Customer Support Email Here]
- Phone: [Insert Customer Support Phone Number Here]
- Website: Visit the Matane Store on Amazon
Please have your model number (LS-CL-G18W-M-DCCT) and purchase date ready when contacting support.