
1. Introduction
This manual provides essential information for the safe and effective operation, maintenance, and troubleshooting of your meite ST64L Concrete Nail Gun. Please read all instructions carefully before use to ensure proper handling and to prevent injury or damage.
2. Safety Information
Always prioritize safety when operating power tools. Failure to follow these safety guidelines may result in serious injury.
- Wear Personal Protective Equipment (PPE): Always wear safety glasses, hearing protection, and gloves. A dust mask is recommended in dusty environments.
- Inspect Tool Before Use: Before each use, check the nail gun for any damage, loose parts, or air leaks. Do not use a damaged tool.
- Use Correct Air Pressure: Operate the nail gun within the recommended air pressure range of 85-120 PSI. Exceeding this range can cause tool damage or injury.
- Disconnect Air Supply: Always disconnect the air supply before loading nails, clearing jams, performing maintenance, or when the tool is not in use.
- Keep Work Area Clear: Ensure your work area is clean, well-lit, and free from obstructions. Keep bystanders, especially children, away from the operating area.
- Maintain Firm Grip: Hold the tool firmly with both hands during operation.
- Avoid Accidental Firing: Never carry the tool with your finger on the trigger. The tool features a safety switch lock that prevents accidental firing unless pressed against the work surface.
- Secure Workpiece: Ensure the material you are nailing is stable and securely fastened.
- Use Correct Fasteners: Only use 14 GA glue-collated concrete T-nails ranging from 3/4" to 2-1/2" (18-64 mm) in length.
3. Product Components
The meite ST64L Concrete Nail Gun includes the following main components:
- Metal Body: The main housing of the tool.
- Exhaust Cover: Directs air exhaust away from the user.
- Rubber Handle: Provides a comfortable and secure grip.
- Air Inlet: Connection point for the air compressor hose.
- Trigger: Activates the nailing mechanism.
- Muzzle Panel: The front part of the tool where nails exit.
- Safety Switch Lock: Prevents accidental firing.
- Sturdy Magazine: Holds the strip of nails.
- Magazine Release Latch: Used to open the magazine for loading.

4. Specifications
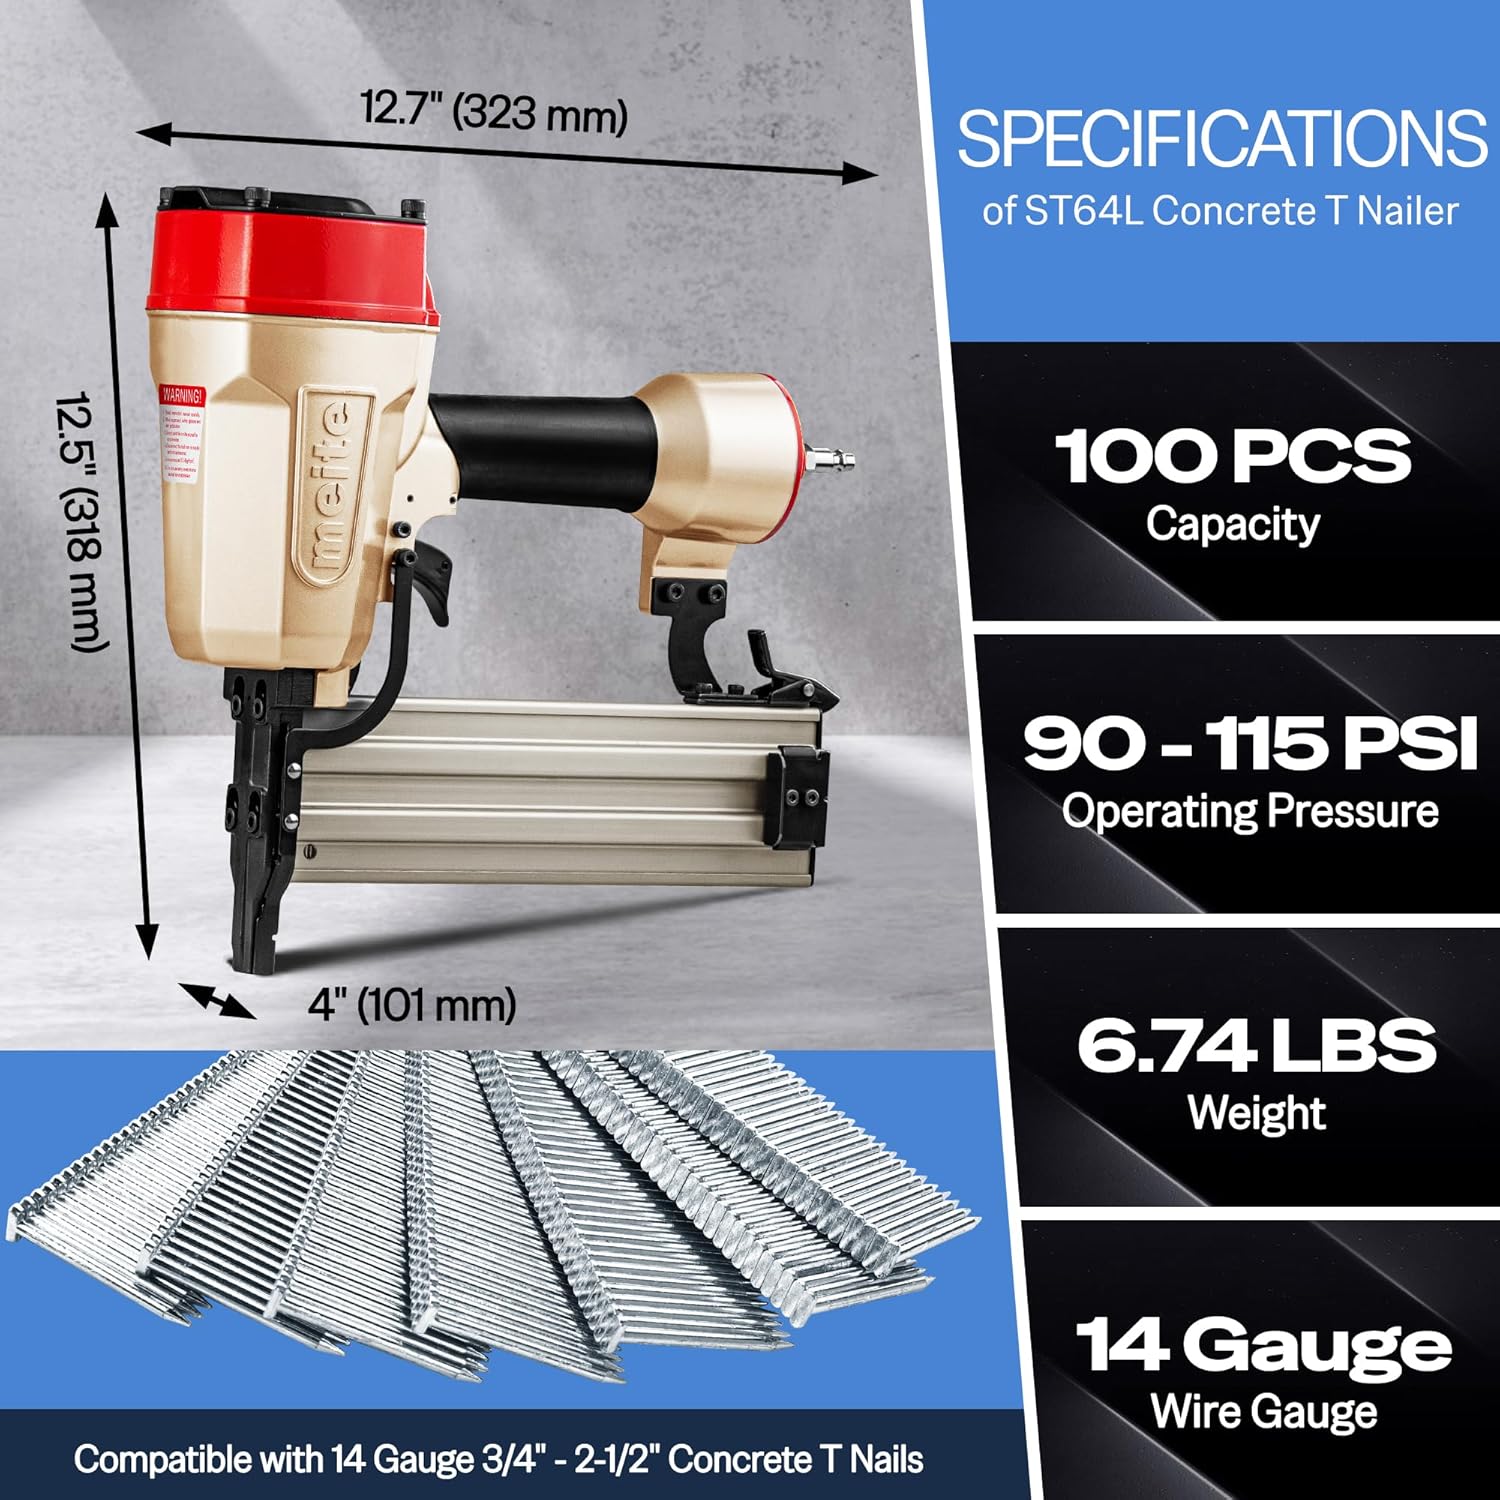
| Specification | Value |
|---|---|
| Model Number | ST64L |
| Nail Gauge | 14 GA |
| Nail Length Range | 3/4" to 2-1/2" (18-64 mm) |
| Operating Pressure | 85-120 PSI |
| Magazine Capacity | 100 Nails |
| Item Weight | 2.45 pounds (tool only) |
| Muzzle Design | Extended Muzzle (4 inches) |
| Included Components | 1PC Instruction Manual, 3PCS Hexagonal Wrenches, 400PCS 14GA T Nails 1-1/2", Pneumatic Concrete T Nail Gun |
5. Setup
5.1 Nail Compatibility
The meite ST64L is designed to work with 14 gauge concrete T-nails. Ensure the nails are glue-collated and within the length range of 3/4" to 2-1/2" (18-64 mm).

5.2 Loading Nails
- Disconnect Air Supply: Before loading, always disconnect the nail gun from the air compressor.
- Open Magazine: Locate the magazine release latch and open the magazine. The smooth side-latch design allows for quick opening.
- Insert Nails: Place a strip of compatible 14 GA T-nails into the magazine with the nail points facing forward.
- Close Magazine: Push the magazine closed until it latches securely.

5.3 Connecting to Air Compressor
- Ensure the air compressor is off and its tank is drained.
- Connect the air hose to the air inlet on the nail gun.
- Set the air compressor pressure regulator to the desired operating pressure (85-120 PSI).
- Turn on the air compressor.
6. Operating Instructions
6.1 General Operation
- With the air supply connected and nails loaded, position the muzzle of the nail gun firmly against the workpiece. The safety switch lock will disengage when pressed against the surface.
- Squeeze the trigger to drive a nail.
- Release the trigger and lift the tool from the workpiece.
6.2 Extended Muzzle Feature
The ST64L features a 4-inch slim extended muzzle, allowing access to tight spaces and deeper installations that standard nail guns cannot reach. This is particularly useful for tasks like cable raceway installation or furring strip installation in confined areas.

6.3 Safety Switch Lock
The integrated safety switch lock mechanism prevents accidental firing. The tool will only operate when the muzzle is pressed firmly against the work surface, enabling the trigger. When not pressed against a surface, the tool is disabled, enhancing user safety.

6.4 Visual Nail Window
The magazine features a transparent pusher and a visual window, allowing you to easily monitor the remaining nail supply and prevent dry firing.
6.5 Operational Video
7. Maintenance
Regular maintenance ensures the longevity and optimal performance of your nail gun.
- Disconnect Air Supply: Always disconnect the air supply before performing any maintenance.
- Lubrication: Apply a few drops of pneumatic tool oil into the air inlet before each use or after extended periods of non-use.
- Cleaning: Keep the tool clean and free of debris. Wipe down the exterior with a clean cloth. Periodically clean the magazine and muzzle area to prevent nail jams.
- Inspect for Wear: Regularly check for worn or damaged parts, especially the firing pin and seals. Replace any damaged components immediately.
- Storage: Store the nail gun in a dry, secure location away from moisture and extreme temperatures.
8. Troubleshooting
This section addresses common issues you might encounter with your meite ST64L Concrete Nail Gun.
| Problem | Possible Cause | Solution |
|---|---|---|
| Nail gun does not fire | Air supply disconnected; Low air pressure; Safety switch not engaged; No nails in magazine; Jammed nail. | Connect air supply; Adjust air pressure to 85-120 PSI; Press muzzle firmly against workpiece; Load nails; Clear any jammed nails (disconnect air first). |
| Nails do not drive fully | Low air pressure; Incorrect nail length for material; Worn driver blade. | Increase air pressure; Ensure nail length is appropriate for material thickness and density; Inspect and replace driver blade if worn. |
| Nail jams frequently | Incorrect nail type/size; Damaged nails; Dirty magazine; Worn driver blade. | Use correct 14 GA T-nails; Inspect nails for damage before loading; Clean magazine; Inspect and replace driver blade if worn. |
| Air leaks | Loose fittings; Damaged O-rings or seals. | Tighten all air fittings; Inspect and replace damaged O-rings or seals. |
9. Applications
The meite ST64L Concrete Nail Gun is suitable for various wood-to-concrete fastening applications, including but not limited to:
- Furring strips installation
- Siding installation
- Wireway installation
- Metal furring installation
- Decking
- Fencing
- Subflooring

10. Warranty and Support
For warranty information or technical support, please contact meite USA, the seller of this product. Refer to your purchase documentation for specific contact details. Keep your proof of purchase for any warranty claims.