
ELECTOP B0DSP9BKTG
ELECTOP Car Anti-Theft Vibration Alarm System
Model: B0DSP9BKTG
User Manual
1. Introduction
Thank you for choosing the ELECTOP Car Anti-Theft Vibration Alarm System. This system is designed to enhance your vehicle's security by detecting vibrations and deterring potential thieves with a loud alarm and flashing lights. It includes a main vibration alarm unit with a remote control and a simulated dummy alarm light for additional visual deterrence. Please read this manual thoroughly before installation and use to ensure proper operation and maximum security.
2. Safety Information
- Do not attempt to disassemble or modify the device. This may void the warranty and cause malfunction.
- Keep the device away from extreme temperatures, direct sunlight, and moisture.
- Ensure the device is securely mounted to prevent it from falling during vehicle movement.
- The alarm emits a loud sound. Avoid prolonged exposure to prevent hearing discomfort.
- Dispose of batteries according to local regulations.
3. Package Contents
Please verify that all items are present in your package:
- 1 x Car Anti-Theft Vibration Alarm Unit
- 1 x Wireless Remote Control
- 2 x Car Solar Power Simulated Dummy Alarm Lights
- 1 x USB Charging Cable (for dummy alarm)
- 1 x User Manual (this document)

Image: Overview of the ELECTOP Car Anti-Theft Vibration Alarm System, showing the main alarm unit, remote control, and two simulated dummy alarm lights.
4. Product Overview
4.1 Main Vibration Alarm Unit
The main alarm unit features a 108dB siren, LED warning lights, and a 3D acceleration sensor for vibration detection. It is designed for magnetic mounting.

Image: The main vibration alarm unit with its accompanying wireless remote control.
4.2 Wireless Remote Control
The remote control allows for wireless arming, disarming, and vehicle search functions from up to 66 feet away.
4.3 Simulated Dummy Alarm Light
These lights simulate a car alarm system, flashing to deter potential intruders. They feature solar charging capabilities and a built-in light sensor for automatic operation.

Image: Two units of the simulated dummy alarm lights, designed for visual deterrence.
5. Setup and Installation
5.1 Main Vibration Alarm Unit Installation
The main alarm unit utilizes magnetic mounting for quick and easy installation without screws or wiring. Choose a flat, stable surface within your vehicle.
- Identify a suitable location: Common locations include the dashboard, car door panel, rear window ledge, or near the rearview mirror. Ensure the location does not obstruct driving visibility or airbag deployment.
- Clean the surface: Wipe the chosen surface clean and dry to ensure optimal magnetic adhesion.
- Attach the alarm: Simply place the alarm unit onto the cleaned surface. The magnetic base will secure it in place.

Image: Examples of magnetic installation locations for the main alarm unit, including above the dashboard, on a car door, on the rear window ledge, and near the rearview mirror.
5.2 Simulated Dummy Alarm Light Setup
The dummy alarm lights are solar-powered and can also be charged via USB. They are designed to be placed in visible locations to deter theft.
- Initial Charge: Before first use, it is recommended to fully charge the dummy alarm lights using the provided USB cable. Connect the cable to the USB charging port on the unit and a standard USB power source.
- Placement: Place the dummy alarm light on the dashboard or another prominent location where it can receive sunlight for solar charging and be easily seen from outside the vehicle.
- Automatic Operation: The built-in light sensor will automatically activate the flashing light at night and turn it off during the day.

Image: A simulated dummy alarm light placed on a car dashboard, highlighting its long-lasting, heat-resistant, light sensor, and ABS material features.
5.3 Volume Adjustment (Main Alarm Unit)
The main alarm unit features 3 adjustable volume levels to suit your preference and environment.
- Locate the volume adjustment button/switch on the main alarm unit (refer to product diagram if available).
- Press or toggle the control to cycle through the 96dB, 102dB, and 108dB settings.
- Select the desired volume level.

Image: The main alarm unit mounted in a car, illustrating the three adjustable volume levels: 96dB, 102dB, and 108dB.
6. Operating Instructions
6.1 Arming the Alarm
To arm the main vibration alarm unit:
- Press the Lock button () on the wireless remote control.
- The alarm unit will emit a confirmation sound, and its LED lights will begin patrolling (flashing) to indicate it is armed.
6.2 Disarming the Alarm
To disarm the main vibration alarm unit:
- Press the Unlock button () on the wireless remote control.
- The alarm unit will emit a confirmation sound, and the LED lights will stop flashing, indicating it is disarmed.
6.3 Vehicle Search Function
To locate your vehicle in a parking lot:
- Press the Bell/Search button () on the wireless remote control.
- The alarm unit will emit a distinct sound, helping you quickly find your vehicle.
6.4 Alarm Trigger Response
The alarm system uses a 3D acceleration sensor and AI algorithms to detect vibrations:
- Light Vibration: For minor disturbances, the alarm will emit a high warning sound and the LED lights will blink.
- Severe Vibration: For more significant impacts or attempts to pry open doors/windows, the alarm will immediately sound one of 6 automotive-grade alarm tones and the LED indicator lights will burst flash with strong red light.

Image: Illustration showing the different responses of the alarm unit to light vibration (high warning sound, LED blinking) versus severe vibration (6 alarm tones, LED flashing).
6.5 Simulated Dummy Alarm Light Operation
The dummy alarm lights operate automatically based on ambient light:
- During the Day: The built-in light sensor detects sufficient light, and the dummy alarm light will remain off to conserve power.
- At Night: As ambient light decreases, the light sensor will activate the blue LED, causing it to auto-flash, simulating a security system.
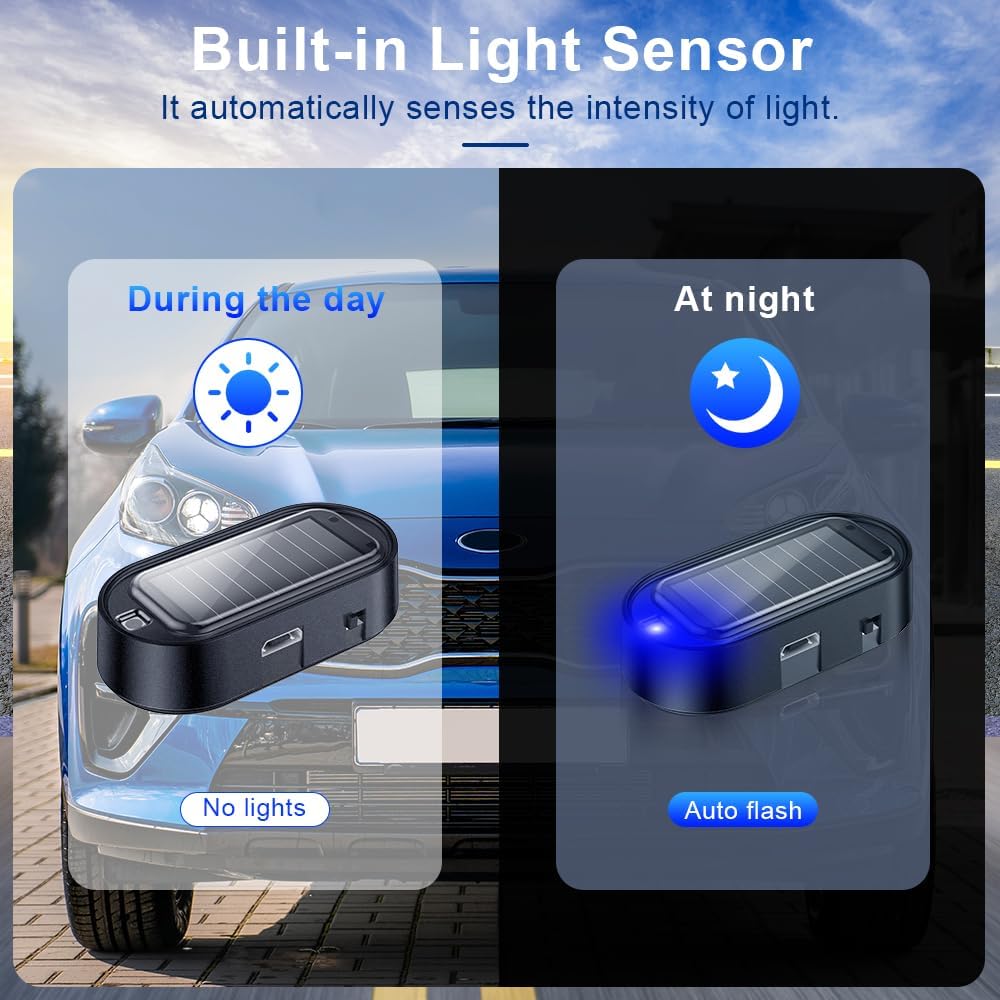
Image: Depiction of the dummy alarm light's operation, showing it off during the day and auto-flashing at night due to its built-in light sensor.
7. Maintenance
- Cleaning: Use a soft, dry cloth to wipe the alarm units and remote control. Do not use abrasive cleaners or solvents.
- Dummy Alarm Charging: While primarily solar-powered, if the dummy alarm light's flashing becomes weak or stops, charge it via the USB port using the provided cable.
- Battery Replacement (Main Alarm Unit): The main alarm unit uses internal batteries. If the alarm's performance degrades or it fails to respond, the internal battery may need replacement. Contact customer support for guidance.
- Remote Control Battery: The remote control uses a replaceable button cell battery. If the remote's range decreases or it stops responding, replace the battery (typically a CR2032 or similar). Refer to the remote's back for battery type.
8. Troubleshooting
| Problem | Possible Cause | Solution |
|---|---|---|
| Main alarm not arming/disarming. | Remote control battery low/dead; out of range; interference. | Replace remote battery; move closer to the alarm unit; try again in a different location. |
| Alarm not triggering on vibration. | Sensitivity setting too low; unit not armed; unit not securely mounted. | Ensure unit is armed; check mounting stability; contact support if sensitivity is not adjustable by user. |
| Dummy alarm light not flashing at night. | Insufficient charge (solar/USB); light sensor obstructed; too much ambient light. | Charge via USB; ensure solar panel is clean and exposed to light; move to a darker location. |
| Alarm sound is too quiet/loud. | Volume setting is incorrect. | Adjust the volume using the controls on the main alarm unit. |
9. Specifications
- Product Name: Car Anti-Theft Vibration Alarm System
- Brand: ELECTOP
- Model: B0DSP9BKTG
- Alarm Loudness: Up to 108dB (3-step adjustable)
- Sensor Type: 3D Acceleration Sensor with AI Algorithms
- Remote Control Range: Up to 66 feet (20 meters)
- Operating Temperature: -40°C to +70°C (-40°F to +158°F)
- Material: High quality UV-resistant PC material (Main Alarm), ABS Material (Dummy Alarm)
- Dummy Alarm Charging: Solar Power / USB Charging
- Dummy Alarm Features: Built-in Light Sensor for automatic day/night operation
- Installation: Magnetic Mounting (Main Alarm), Adhesive/Placement (Dummy Alarm)
10. Warranty and Support
ELECTOP products are designed for reliability and performance. For specific warranty details, please refer to the warranty card included with your purchase or visit the official ELECTOP website. If you encounter any issues or have questions regarding your Car Anti-Theft Vibration Alarm System, please contact our customer support team:
- Email: [Insert Customer Support Email Here, if available]
- Website: Visit the ELECTOP Store on Amazon
- Phone: [Insert Customer Support Phone Number Here, if available]
Please have your product model number (B0DSP9BKTG) and purchase date ready when contacting support.
Ask a question about this manual
Ask about setup, troubleshooting, compatibility, parts, safety, or missing instructions. Manuals+ will review the question and use this page’s manual context to help answer it.