
1. Introduction
This manual provides essential information for the proper installation, operation, and maintenance of your new Generic Carburetor, model 1942-13-600. This carburetor is designed to deliver the correct air-fuel mixture to your engine, ensuring optimal performance and fuel efficiency. Please read this manual thoroughly before attempting any installation or maintenance procedures.
2. Safety Information
Working with automotive fuel systems requires caution. Always observe the following safety guidelines:
- Ensure the engine is cool and the vehicle's battery is disconnected before starting any work.
- Work in a well-ventilated area to avoid inhaling fuel vapors.
- Keep open flames, sparks, and other ignition sources away from the work area.
- Wear appropriate personal protective equipment, including safety glasses and gloves.
- Fuel is highly flammable. Handle with extreme care and clean up any spills immediately.
- If you are unsure about any procedure, consult a qualified automotive technician.
3. Package Contents
Verify that all components are present upon unpacking:
- 1 x Carburetor (Model 1942-13-600)
4. Specifications
| Feature | Specification |
|---|---|
| Manufacturer OEM Part Number | 1942-13-600 |
| No. of Cylinders | 4 |
| Displacement Compatibility | 1.1-3.6L |
| Base Plate Measurement | 44x80MM |
| Barrel Measurement | Main φ28, Second φ32 |
| Material | Aluminium/Zinc |
| Product Dimensions (D x W x H) | 9"D x 5"W x 5"H |
| Fuel Type | Gasoline |
| Vehicle Service Type | Car |
| Exterior Finish | Silver |
5. Setup (Installation)
Proper installation is crucial for the carburetor's performance and longevity. It is highly recommended that installation be performed by a qualified mechanic.
General Installation Steps:
- Preparation: Ensure the engine is off and cool. Disconnect the battery. Relieve fuel system pressure.
- Remove Old Carburetor: Carefully disconnect all fuel lines, vacuum lines, electrical connections, and throttle linkages from the old carburetor. Remove the mounting nuts/bolts and lift the old carburetor off the intake manifold.
- Clean Mounting Surface: Thoroughly clean the intake manifold's mounting surface, removing any old gasket material or debris. Ensure it is flat and smooth.
- Install New Gasket: Place a new carburetor base gasket onto the intake manifold.
- Position New Carburetor: Carefully lower the new carburetor onto the gasket, aligning it with the mounting studs/holes.
- Secure Carburetor: Install the mounting nuts/bolts and tighten them evenly in a crisscross pattern to the manufacturer's specified torque. Do not overtighten.
- Reconnect Components: Reconnect all fuel lines, vacuum lines, electrical connections, and throttle linkages. Ensure all connections are secure and free of leaks.
- Initial Adjustments: Perform initial adjustments for idle speed and mixture as per vehicle-specific service manual recommendations.
- Final Checks: Reconnect the battery. Start the engine and check for fuel leaks, proper idle, and smooth acceleration.

Figure 1: Front view of the carburetor, showing the base plate and main body. This view is typical during initial placement on the intake manifold.
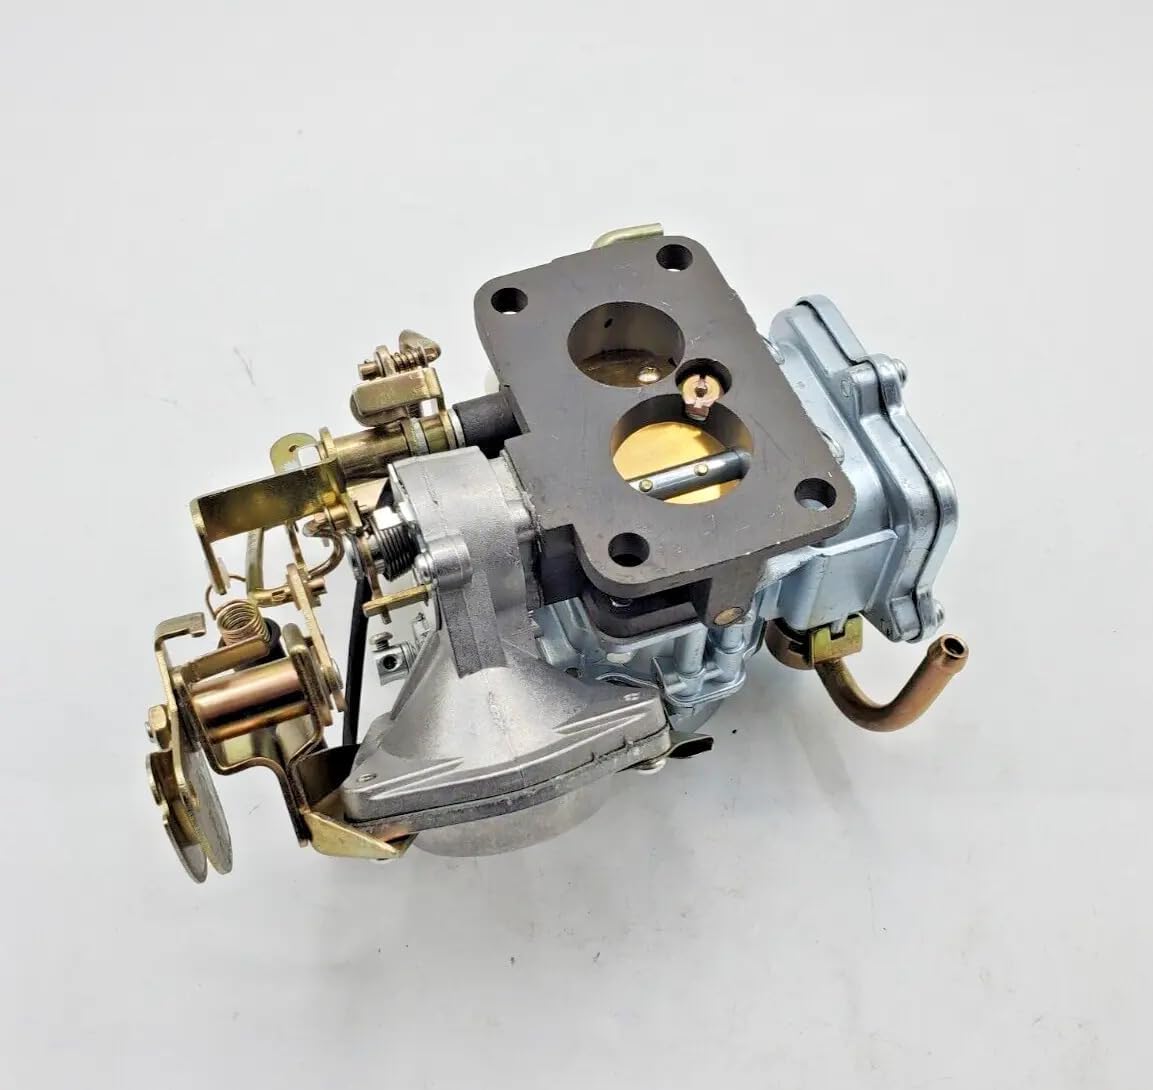
Figure 2: Angled view of the carburetor, highlighting the various linkages and side components that need to be connected during installation.
6. Operating Instructions
Once installed and properly adjusted, the carburetor operates automatically to mix air and fuel for the engine. No direct user operation is typically required beyond starting the vehicle.
- Cold Start: For cold starts, the choke mechanism (if manual) should be engaged to enrich the fuel mixture. Once the engine warms up, the choke should be disengaged.
- Warm Start: For warm starts, the choke is generally not required.
- Idle: The carburetor maintains a stable idle speed once the engine reaches operating temperature.

Figure 3: Top view of the carburetor, showing the air horn and the primary and secondary barrels where air and fuel are mixed.
7. Maintenance
Regular maintenance helps ensure the longevity and efficient operation of your carburetor.
- Air Filter Inspection: Regularly check and replace the engine's air filter as per your vehicle's service schedule. A clogged air filter can negatively impact carburetor performance.
- Fuel Filter Replacement: Ensure the fuel filter is replaced at recommended intervals to prevent contaminants from reaching the carburetor.
- Linkage Lubrication: Periodically inspect and lightly lubricate the throttle and choke linkages to ensure smooth operation.
- Visual Inspection: Routinely inspect the carburetor for any signs of fuel leaks, loose connections, or damaged components. Address any issues promptly.
- Cleaning: If performance issues arise due to deposits, a professional carburetor cleaning may be necessary. Avoid disassembling the carburetor unless you have the proper tools and expertise.

Figure 4: Side view of the carburetor, showing the float bowl and a visible fuel level indicator. This area should be checked for leaks during maintenance.
8. Troubleshooting
If you experience issues with your vehicle's fuel system after carburetor installation, consider the following common problems and potential solutions:
- Engine Cranks but Won't Start:
- Check fuel supply to the carburetor.
- Verify choke operation.
- Inspect for vacuum leaks.
- Rough Idle or Stalling:
- Check for vacuum leaks around the carburetor base or vacuum lines.
- Adjust idle speed and mixture screws.
- Ensure the air filter is clean.
- Poor Acceleration or Hesitation:
- Check accelerator pump operation.
- Inspect for fuel delivery issues (clogged fuel filter, weak fuel pump).
- Fuel Leaks:
- Inspect all fuel line connections for tightness.
- Check carburetor gaskets for proper sealing.
- Verify float level is correct (if adjustable).
For persistent issues, professional diagnosis and repair are recommended.
9. Warranty Information
This Generic Carburetor comes with a 30-day manufacturer's warranty from the date of purchase. This warranty covers defects in materials and workmanship under normal use. It does not cover damage resulting from improper installation, misuse, neglect, accident, or unauthorized modification.
Please retain your proof of purchase for any warranty claims.
10. Support
If you have questions regarding the installation, operation, or troubleshooting of your Generic Carburetor, please refer to your vehicle's specific service manual or consult a professional automotive technician.
For product-related inquiries or warranty claims, please contact the seller or manufacturer through the platform where the purchase was made.


