
1. Safety Information
Please read all safety instructions carefully before operating the appliance and keep this manual for future reference. Failure to follow these instructions may result in electric shock, fire, or injury.
- Ensure the power supply voltage matches the rating label on the unit.
- Do not operate the unit with wet hands or near water.
- Keep the unit away from flammable materials and heat sources.
- Ensure proper ventilation and do not block air inlets or outlets.
- Before use, allow the unit to stand upright for at least 2 hours to stabilize the refrigerant.
- Always unplug the unit before cleaning or maintenance.
2. Package Contents
Verify that all items are included in the package:
- Main Unit
- Remote Control
- Window Panel Kit
- Instruction Manual
- Fixing Screws
- Drain Hose
- Exhaust Duct

3. Product Overview
The COWSAR Portable Air Conditioner (Model OL-KY26-A011D2) is a versatile appliance designed to provide comfort in various indoor environments. It combines powerful cooling with convenient features for ease of use.
Key Features:
- Powerful 2.6kW Cooling: Delivers strong cooling performance for rooms up to 8.3 tatami mats (approx. 13.7 m²), with a temperature range of 16°C to 32°C.
- 3-in-1 Functionality: Offers Cooling, Dehumidifying, and Fan modes to suit different environmental needs.
- High Dehumidification Capacity: Removes approximately 24 liters of moisture per day, ideal for humid conditions.
- No Installation Required: Easy setup without the need for permanent wall modifications.
- Portable Design: Equipped with 360° rotating casters for effortless movement between rooms.
- User-Friendly Controls: Features a clear control panel and a remote control for convenient operation.
- Sleep Mode: Operates at a quiet 50dB to ensure a peaceful sleeping environment.
- 24-Hour Timer: Allows for scheduled automatic start and stop times, enhancing energy efficiency.
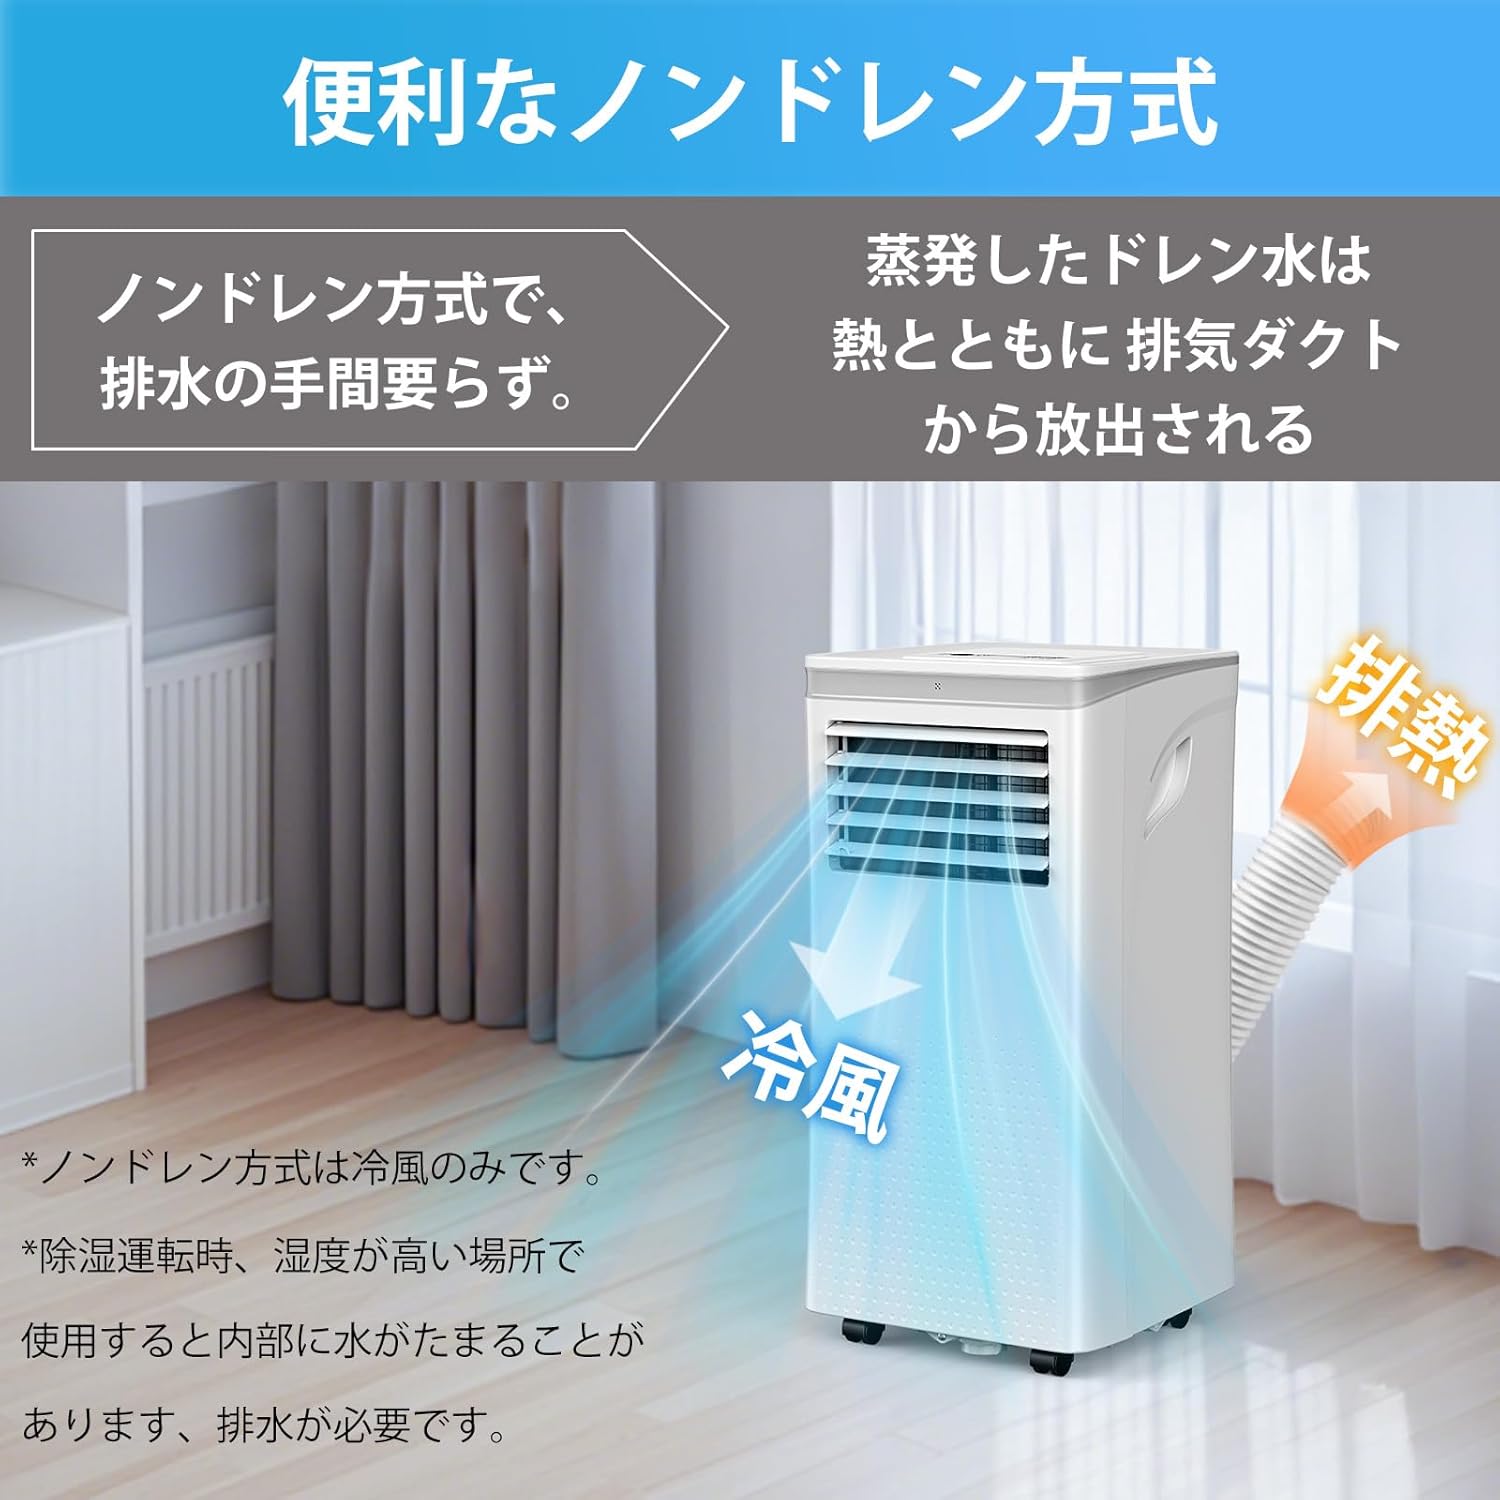
- Non-Drainage Cooling: During cooling, most condensed water is evaporated and discharged with the exhaust air.

4. Setup
Follow these steps to set up your portable air conditioner:
4.1 Exhaust Duct Installation
The exhaust duct is essential for expelling hot air during cooling operation. Proper installation ensures efficient performance.
- Assemble the window panel kit by attaching the fixing screws.
- Connect one end of the exhaust duct to the exhaust port on the back of the main unit.
- Extend the exhaust duct and connect the other end to the window panel adapter.
- Install the window panel kit into a compatible window opening (adjustable for widths between 65-125cm), ensuring a secure fit to prevent air leakage.

For a visual guide on exhaust duct installation, please watch the video below:
4.2 Placement
Place the unit on a flat, stable surface. Ensure there is at least 30cm of clear space around the unit for proper airflow.

5. Operating Instructions
Your COWSAR Portable Air Conditioner can be operated using the control panel on the unit or the included remote control.
5.1 Control Panel and Remote Control

5.2 Basic Operation
- Power On/Off: Press the Power button to turn the unit on or off.
- Mode Selection: Press the Mode button to cycle through Cooling, Dehumidifying, and Fan modes.
- Temperature Adjustment: In Cooling mode, use the Up/Down arrows to set the desired temperature (16°C to 32°C).
- Fan Speed: Press the Speed button to select between 2 fan speed settings (low/high).
- Timer Function: Press the Timer button to set the desired operating duration (up to 24 hours) for automatic shut-off or start.
- Sleep Mode: Activate Sleep Mode for quieter operation (approx. 50dB) and optimized temperature control during sleep.
6. Maintenance
Regular maintenance ensures optimal performance and longevity of your air conditioner.
6.1 Filter Cleaning
The air filter should be cleaned regularly (every two weeks or more often depending on usage) to maintain air quality and cooling efficiency.
- Turn off the unit and unplug it from the power outlet.
- Remove the air filter from the back of the unit.
- Wash the filter under running water with a mild detergent.
- Allow the filter to dry completely before reinserting it into the unit.
For a visual guide on filter cleaning, please watch the video below:
6.2 Drainage
While the unit features non-drainage cooling, water may accumulate in the internal tank during dehumidification mode or in very high humidity conditions. When the tank is full, the unit will stop operating and display an error code.
- Turn off the unit and unplug it.
- Locate the drain port at the bottom rear of the unit.
- Place a suitable container under the drain port.
- Remove the drain plug to allow water to flow out.
- For continuous drainage during dehumidification, attach the included drain hose to the drain port.

7. Troubleshooting
If you encounter issues with your unit, refer to the following common problems and solutions:
| Problem | Possible Cause | Solution |
|---|---|---|
| Unit does not turn on | No power, power cord not plugged in, circuit breaker tripped | Check power connection, reset circuit breaker |
| Insufficient cooling | Air filter dirty, room too large, windows/doors open, exhaust duct not properly installed | Clean air filter, ensure room is sealed, check exhaust duct connection |
| Water leakage | Drain plug loose, drain hose clogged, internal water tank full (dehumidification mode) | Secure drain plug, clear drain hose, empty internal water tank |
| Unusual noise | Unit not on a flat surface, internal components loose | Place on a flat surface, contact customer support if noise persists |
If the problem persists after trying these solutions, please contact customer support.
8. Specifications
| Feature | Specification |
|---|---|
| Brand | COWSAR |
| Model Number | OL-KY26-A011D2 |
| Cooling Capacity | 2.6 kW |
| Applicable Area | Up to 8.3 Tatami Mats (approx. 13.7 m²) |
| Dimensions (D x W x H) | 33 x 33 x 70 cm |
| Weight | 22.5 kg |
| Operating Noise | 54 dB |
| Refrigerant | R-410A |
| Voltage | 100 V |
| Power Consumption | 870 W |
| Annual Power Consumption | 520 kWh/year |
| Control Method | Touch, Remote Control |
| Included Accessories | Main unit, remote control, window panel, instruction manual, fixing screws, drain hose, exhaust duct |
9. Warranty and Support
Your COWSAR Portable Air Conditioner comes with a 1-year manufacturer's warranty from the date of purchase. This warranty covers defects in materials and workmanship under normal use.
For warranty claims, technical support, or any other inquiries, please contact our customer service. Please have your purchase receipt and model number (OL-KY26-A011D2) ready when contacting support.
Customer support is available through the seller on Amazon. Refer to your Amazon order history for seller contact details.


