
CLEANmaxx Pro Spotcleaner
CLEANmaxx Pro Spotcleaner 3-in-1 Upholstery and Carpet Cleaner Instruction Manual
Model: Pro Spotcleaner
1. Introduction
Thank you for choosing the CLEANmaxx Pro Spotcleaner 3-in-1 Upholstery and Carpet Cleaner. This device is designed for effective wet cleaning of various textile surfaces, including carpets, upholstery, mattresses, and car seats. Please read this instruction manual carefully before initial use to ensure safe and optimal operation.

Image 1.1: The CLEANmaxx Pro Spotcleaner 3-in-1, showing its main unit, flexible hose, and cleaning nozzle. The device is black with transparent tanks for water and cleaning solution.
2. Important Safety Instructions
Always observe the following safety precautions to reduce the risk of fire, electric shock, or injury:
- Read all instructions before using the appliance.
- Do not immerse the appliance in water or other liquids.
- Do not use the appliance outdoors or on wet surfaces.
- Keep hair, loose clothing, fingers, and all parts of the body away from openings and moving parts.
- Use only as described in this manual. Use only manufacturer's recommended attachments.
- Do not use with a damaged cord or plug. If the appliance is not working as it should, has been dropped, damaged, left outdoors, or dropped into water, return it to a service center.
- Do not pull or carry by cord, use cord as a handle, close a door on cord, or pull cord around sharp edges or corners. Keep cord away from heated surfaces.
- Unplug from outlet when not in use and before cleaning.
- Do not allow to be used as a toy. Close attention is necessary when used by or near children.
- Use extra care when cleaning on stairs.
- Do not use to pick up flammable or combustible liquids, such as gasoline, or use in areas where they may be present.
- Do not pick up anything that is burning or smoking, such as cigarettes, matches, or hot ashes.
- Always turn off this appliance before connecting or disconnecting the hose.
- Store the appliance indoors in a cool, dry place.
3. Package Contents
Please check the package contents upon unpacking. Ensure all items are present and undamaged.
- CLEANmaxx Pro Spotcleaner Main Unit
- Flexible Hose (1.2 m)
- 2-in-1 Crevice Tool (with brush and brushless side)
- Combination Nozzle with Brush Attachment
- Interchangeable Rubber Tip (for pet hair/lint)
- Instruction Manual
4. Assembly
The CLEANmaxx Pro Spotcleaner requires minimal assembly before first use.
- Attach the Flexible Hose: Connect the flexible hose securely to the designated port on the main unit. Ensure it clicks into place.
- Select and Attach Nozzle: Choose the appropriate cleaning nozzle for your task.
- For general cleaning and larger areas, attach the Combination Nozzle.
- For tight spaces and stubborn stains, use the 2-in-1 Crevice Tool.
- Optional Rubber Tip: If dealing with pet hair or lint, attach the interchangeable rubber tip to the nozzle.

Image 4.1: Close-up view of the 2-in-1 crevice tool and the combination nozzle, highlighting their distinct features for different cleaning tasks. The crevice tool has a brush and a brushless side, while the combination nozzle is designed for broader application.
5. Setup for Operation
Before starting the cleaning process, prepare the device by filling the water tanks.
- Fill the Fresh Water Tank: Locate the fresh water tank (1.5 L capacity). Open the cap and fill it with clean water. You may add a suitable, non-foaming cleaning solution specifically designed for carpet and upholstery cleaners, following the solution manufacturer's instructions for dilution. Do not overfill past the MAX line.
- Empty the Dirty Water Tank: Ensure the dirty water tank (0.85 L capacity) is empty before starting. This tank collects the soiled water during cleaning.
- Secure Tanks: Close the caps securely and ensure both tanks are properly seated in the main unit.
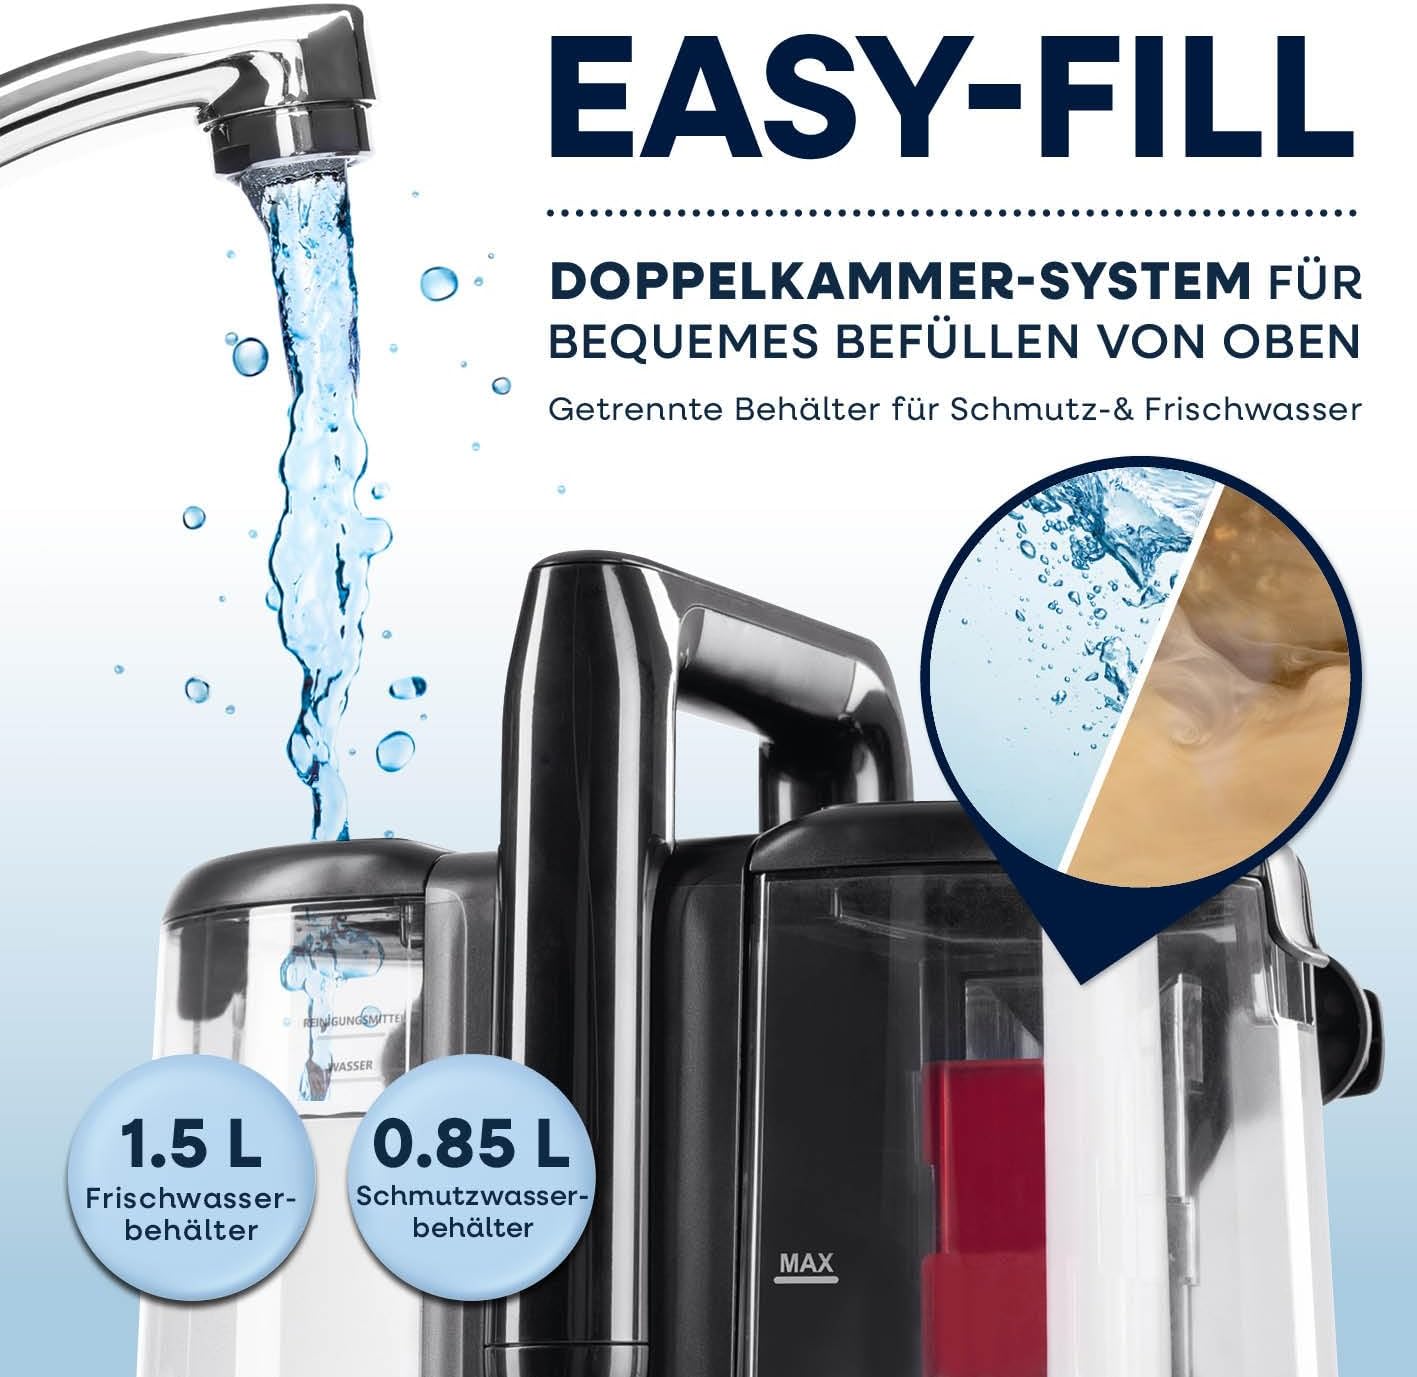
Image 5.1: Illustration of the "Easy-Fill" dual tank system. Water is shown being poured into the fresh water tank (1.5 L capacity), while the dirty water tank (0.85 L capacity) is also visible, emphasizing the separation of clean and dirty water.
6. Operating Instructions
The CLEANmaxx Pro Spotcleaner operates with a 3-in-1 function: spraying, brushing, and vacuuming.
6.1 General Operation
- Plug In: Connect the power cord (4 m length) to a suitable electrical outlet.
- Power On: Turn on the device using the power switch. The device has a suction power of 11 kPa and a motor power of 400 W.
- Pre-test: Before cleaning a large area, test the cleaning solution on an inconspicuous spot of the material to ensure colorfastness and prevent damage.
- Spray: Press the trigger on the nozzle handle to spray cleaning solution onto the stained area.
- Brush: Gently scrub the stained area with the brush attachment on the nozzle to loosen dirt.
- Vacuum: Release the spray trigger and move the nozzle over the wet area to vacuum up the dirty solution. Repeat as necessary until the stain is removed and the area is as dry as possible.
- Turn Off: Once cleaning is complete, turn off the device and unplug it from the power outlet.
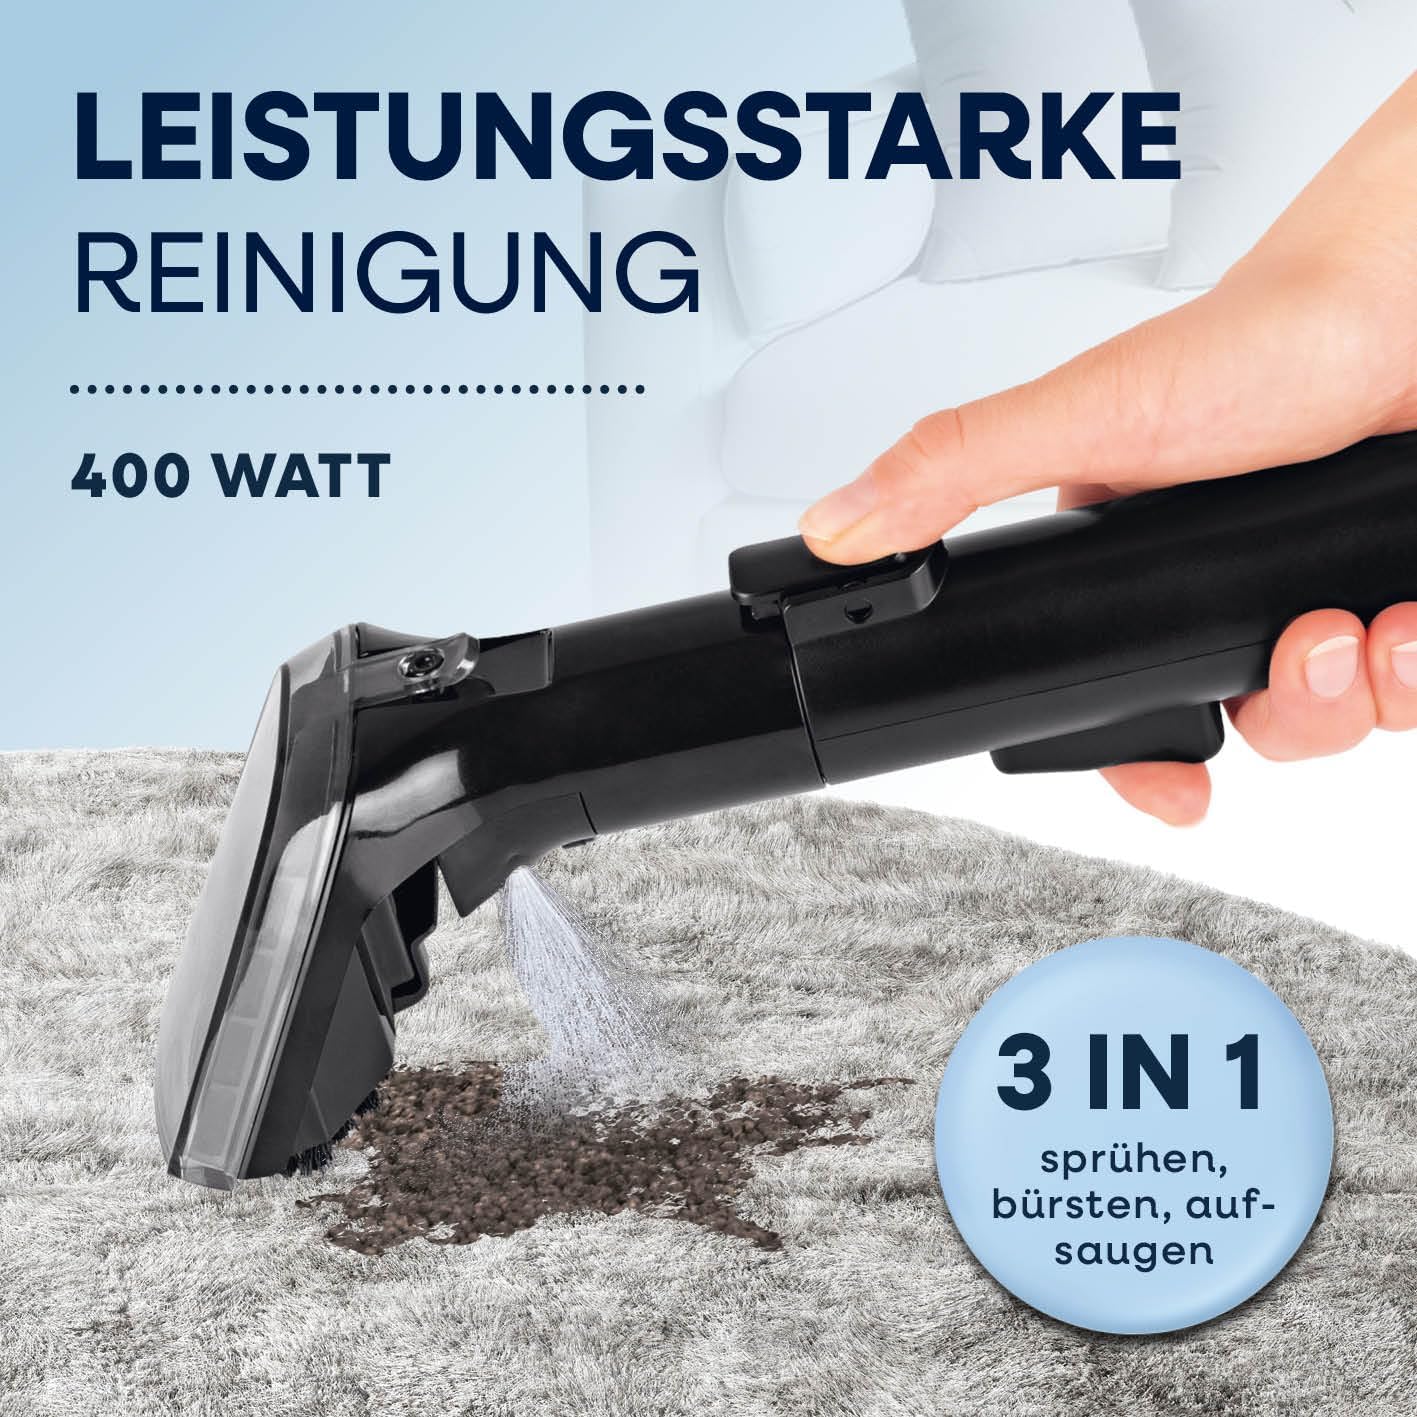
Image 6.1: A hand demonstrating the 3-in-1 cleaning process (spraying, brushing, vacuuming) on a carpet using the CLEANmaxx Pro Spotcleaner nozzle. The image highlights the 400 Watt power of the device.
6.2 Using Different Nozzles
- Combination Nozzle: Ideal for larger areas like carpets, rugs, and broad upholstery. The integrated brush helps agitate dirt effectively.
- 2-in-1 Crevice Tool:
- Brushless Side: Use for lighter stains or delicate fabrics where aggressive scrubbing is not required.
- Brush Side: Designed for stubborn stains and hard-to-reach areas, such as crevices in car seats or between sofa cushions.
- Interchangeable Rubber Tip: Attach this to your chosen nozzle when cleaning surfaces with pet hair or lint, as it helps to gather and remove them more effectively.

Image 6.2: A collage illustrating various applications for the CLEANmaxx Pro Spotcleaner, including mattresses, carpets, pet accessories, cushions, car seats, stairs, bean bags, sofas, and camper interiors, demonstrating its versatility for home use.

Image 6.3: A child drawing on a carpet while a dog is nearby, symbolizing that the CLEANmaxx Pro Spotcleaner is suitable for households with children and pets, effectively cleaning up common messes.
7. Maintenance and Storage
Regular maintenance ensures the longevity and optimal performance of your CLEANmaxx Pro Spotcleaner.
- Empty and Clean Dirty Water Tank: After each use, remove the dirty water tank and empty its contents. Rinse the tank thoroughly with clean water to prevent odor and residue buildup.
- Rinse Fresh Water Tank: Empty any remaining solution from the fresh water tank and rinse it with clean water.
- Clean Nozzles and Hose: Detach the nozzles and hose. Rinse them under running water to remove any dirt or debris. The nozzle also has a self-cleaning function; refer to the device for specific instructions on activating this.
- Wipe Down Unit: Wipe the exterior of the main unit with a damp cloth. Do not use abrasive cleaners or immerse the unit in water.
- Dry All Parts: Ensure all tanks, nozzles, and the hose are completely dry before reassembling or storing to prevent mold or mildew growth.
- Storage: Store the CLEANmaxx Pro Spotcleaner in a cool, dry place, away from direct sunlight and extreme temperatures. The compact design allows for easy storage.

Image 7.1: The CLEANmaxx Pro Spotcleaner shown in a compact storage configuration, highlighting its dimensions (33.5 cm width, 33 cm height) and emphasizing its flexible, space-saving, and lightweight design for easy storage.
8. Troubleshooting
If you encounter issues with your CLEANmaxx Pro Spotcleaner, refer to the following table for common problems and solutions.
| Problem | Possible Cause | Solution |
|---|---|---|
| Device does not turn on. | Not plugged in; power switch off; no power at outlet. | Ensure power cord is securely plugged in. Turn power switch to ON. Check outlet with another appliance. |
| No spray from nozzle. | Fresh water tank empty; spray nozzle clogged; trigger not pressed. | Refill fresh water tank. Clean spray nozzle. Ensure trigger is fully pressed. |
| Poor suction. | Dirty water tank full; hose/nozzle clogged; tank not properly sealed. | Empty dirty water tank. Clear any blockages in hose or nozzle. Ensure tanks are securely seated and sealed. |
| Water leaking. | Tanks not properly seated; caps not closed securely; damaged seal. | Ensure tanks are correctly installed and caps are tightly closed. Inspect seals for damage; contact support if damaged. |
| Loud noise during operation. | Normal operation sound; potential blockage or motor issue. | Some noise is normal for wet vacuums. Check for blockages in the hose or nozzle. If noise is excessive or unusual, discontinue use and contact support. |
9. Technical Specifications
- Brand: CLEANmaxx
- Model Number: Pro Spotcleaner
- Power: 400 Watts
- Suction Power: 11 kPa
- Fresh Water Tank Capacity: 1.5 Liters
- Dirty Water Tank Capacity: 0.85 Liters
- Product Dimensions (L x W x H): 33.5 x 29.5 x 33 cm
- Weight: 4.53 Kilograms
- Cable Length: 4 meters
- Hose Length: 1.2 meters
- Color: Black
- Features: 3-in-1 (Spray, Brush, Vacuum), Dual Tank System, 2-in-1 Crevice Tool, Combination Nozzle, Interchangeable Rubber Tip

Image 9.1: An image detailing key specifications of the CLEANmaxx Pro Spotcleaner, including its 11 kPa suction power, 4-meter cable length, and the inclusion of 2 nozzles, alongside a visual of a coffee spill being cleaned.
10. Warranty and Support
Information regarding spare parts availability is not provided. For warranty claims or technical support, please refer to your purchase documentation or contact the retailer where the product was purchased. Keep your proof of purchase for any warranty-related inquiries.
Ask a question about this manual
Ask about setup, troubleshooting, compatibility, parts, safety, or missing instructions. Manuals+ will review the question and use this page’s manual context to help answer it.