
Introduction
This manual provides comprehensive instructions for the safe and effective use of your Preciva CP84150 Ferrule Crimping Tool Kit. Please read this manual thoroughly before operating the tool to ensure proper function and longevity.
Kit Contents
Your Preciva CP84150 Ferrule Crimping Tool Kit includes the following items:
- 1 x Hexagonal Ratcheting Ferrule Crimping Tool (AWG 28-5)
- 1500 x Insulated Wire Ferrule Connectors (various sizes)
- 1 x Double-layer Portable Storage Case

Image: The complete Preciva Ferrule Crimping Tool Kit, showcasing the crimping tool, various ferrule connectors, and the storage case.

Image: The double-layer portable storage case, designed for organized storage of the crimping tool and ferrule connectors.
Setup
Before first use, ensure all components are present and undamaged. The crimping tool is pre-calibrated for optimal performance. No assembly is required for the tool itself.
Organizing Ferrules
The included 1500 ferrule connectors are sorted by size and color within the double-layer storage case. Familiarize yourself with the different sizes and their corresponding AWG/mm² ratings to select the correct ferrule for your wire.

Image: A detailed view of the 1500 ferrule connectors, showing various sizes and quantities included in the kit.
Operating Instructions
The Preciva CP84150 crimping tool is designed for hexagonal precision crimping of insulated wire ferrules from AWG 28 to AWG 5 (0.08-16mm²).
Crimping Process (3 Steps)
- Step 1: Prepare the Wire and Ferrule
Strip the insulation from the end of your wire to the appropriate length, ensuring the bare wire fits fully into the metal tube of the ferrule. Insert the stripped wire core into the selected ferrule terminal. - Step 2: Position and Crimp
Open the crimping tool jaws and insert the ferrule with the wire into the appropriate crimping slot. Ensure the ferrule is seated correctly. Squeeze the handles firmly until the ratchet mechanism releases, indicating a complete crimp. - Step 3: Verify Crimp
Release the handles and remove the crimped wire. Inspect the crimp for a secure, hexagonal shape. The crimp should be tight and hold the wire firmly without slippage.
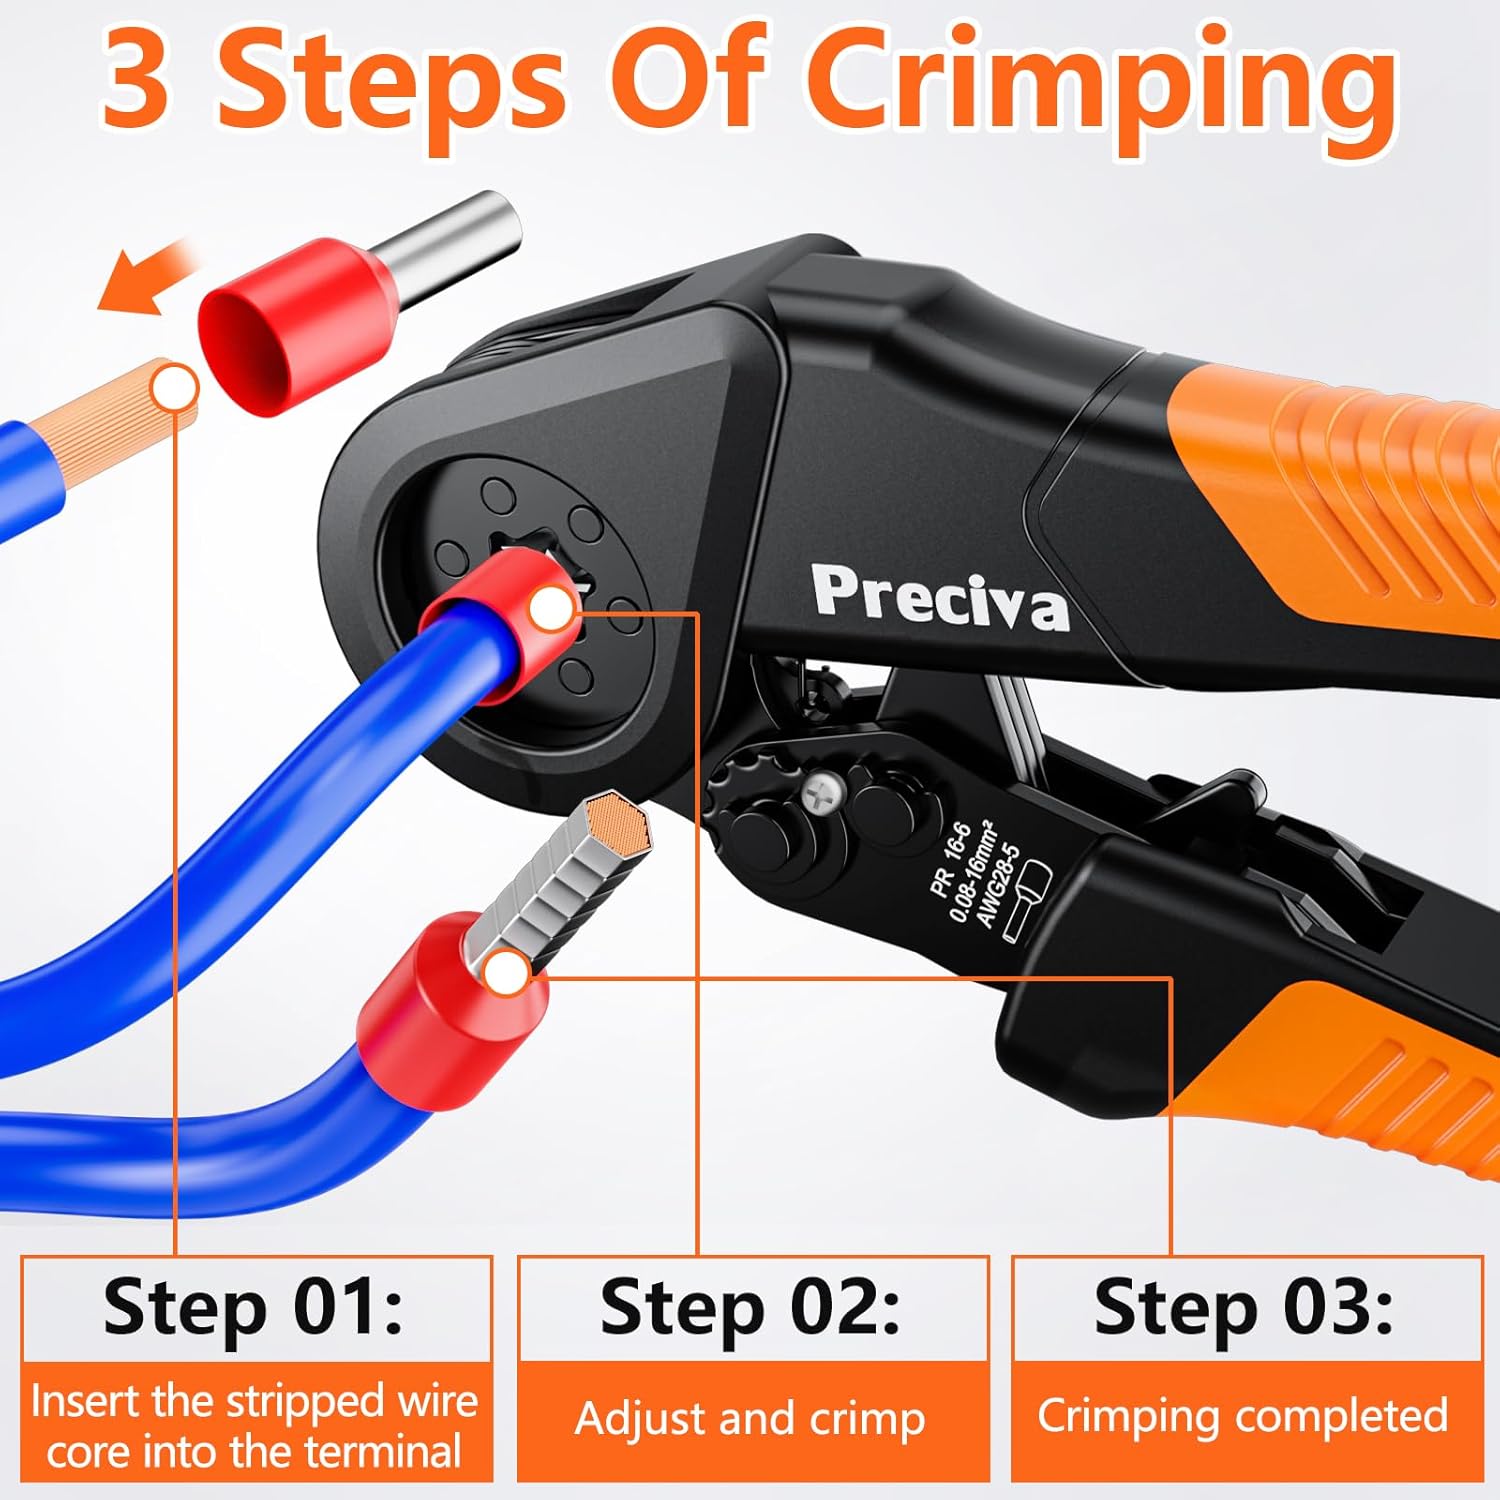
Image: Visual representation of the three-step crimping process: inserting wire, crimping, and completed crimp.

Image: Close-up of the crimping tool demonstrating a hexagonal crimp on a wire ferrule.
Pressure Adjustment
The crimping tool features an adjustable ratchet mechanism. If the crimping action feels too heavy or too light, you can adjust the pressure using the '+' or '-' dial on the tool. This allows for precise crimping across the entire AWG 28-5 range.
Ergonomic Design
The tool incorporates a bow-shaped handle and a flexible shaft design to reduce hand pressure during operation, making crimping more efficient and less fatiguing.

Image: Diagram illustrating the structural optimization of the crimping tool, highlighting the fixed point limit and flexible axis design for reduced pressure.

Image: Close-up of the tool's ergonomic handle, emphasizing its comfortable grip and textured surface for enhanced friction.
Maintenance
Regular maintenance ensures the longevity and reliable performance of your crimping tool.
- Cleaning: After each use, wipe down the tool with a clean, dry cloth to remove any dust, dirt, or debris. Avoid using harsh chemicals or solvents.
- Lubrication: Periodically apply a small amount of light machine oil to the pivot points and moving parts of the tool to ensure smooth operation.
- Storage: Store the crimping tool and ferrules in the provided portable storage case in a dry environment to protect them from moisture and damage.
Troubleshooting
- Crimping feels too heavy or too light: Adjust the pressure setting on the ratchet mechanism using the '+' or '-' dial until the desired crimping force is achieved.
- Tool jaws get stuck: The tool is designed with limit points to prevent the jaws from closing excessively and getting stuck. If this occurs, ensure no foreign objects are obstructing the jaws and check for proper alignment.
- Poor crimp quality: Ensure you are using the correct size ferrule for your wire gauge. Verify that the wire is stripped to the correct length and fully inserted into the ferrule before crimping.
Specifications
| Feature | Detail |
|---|---|
| Model Number | CP84150 |
| Crimping Range | AWG 28-5 (0.08-16mm²) |
| Crimping Type | Hexagonal |
| Tool Material | Alloy Steel |
| Handle Material | Alloy Steel |
| Grip Type | Ergonomic |
| Item Weight | 2.31 pounds |
| Package Dimensions | 10.59 x 8.46 x 2.32 inches |
| Included Components | Ferrule Crimping Tool, 1500PCS Wire Connectors |
Ferrule Connector Quantities
| Model | Size (mm²) | AWG | Quantity |
|---|---|---|---|
| E0508 | 0.5mm² | 22AWG | 200 pcs |
| E7508 | 0.75mm² | 20AWG | 200 pcs |
| E1008 | 1.0mm² | 18AWG | 200 pcs |
| E1508 | 1.5mm² | 16AWG | 250 pcs |
| E2508 | 2.5mm² | 14AWG | 250 pcs |
| E4009 | 4.0mm² | 12AWG | 160 pcs |
| E6012 | 6.0mm² | 10AWG | 150 pcs |
| E10-12 | 10.0mm² | 7AWG | 50 pcs |
| E16-12 | 16.0mm² | 5AWG | 40 pcs |
Warranty and Support
Specific warranty information for the Preciva CP84150 Ferrule Crimping Tool Kit is not provided in this manual. For details regarding warranty coverage, technical support, or replacement parts, please refer to the product packaging or contact Preciva customer service directly through their official website or the retailer where the product was purchased.