
MALIIGAZA STEP-09-16S-WW-1.2M-HB200W-SET
MALIIGAZA Intelligent Motion Sensor LED Stair Light Kit User Manual
Model: STEP-09-16S-WW-1.2M-HB200W-SET
Brand: MALIIGAZA
1. Introduction
Thank you for choosing the MALIIGAZA Intelligent Motion Sensor LED Stair Light Kit. This manual provides detailed instructions for the safe and efficient installation, operation, and maintenance of your new stair lighting system. Please read this manual thoroughly before beginning installation and retain it for future reference.
Safety Information
- Electrical Safety: This system operates on 24 Volts DC. DO NOT connect the LED strips or controller directly to AC household power. Always use the provided 24V transformer. Incorrect wiring can cause damage to the product and pose a safety hazard.
- Installation Environment: This product is designed for indoor use only and is not water resistant. Avoid installation in damp or wet environments.
- Professional Installation: If you are unsure about any part of the installation process, consult a qualified electrician.
- Product Modification: Do not attempt to modify the components of this kit. Unauthorized modifications will void the warranty and may lead to malfunction or safety risks.
2. Package Contents
Please verify that all items listed below are included in your package. If any items are missing or damaged, please contact customer support.
- 1x LED Controller
- 1x Remote Control
- 1x Main Line (6.4m / 21ft for 16-step kit)
- 16x COB LED Strip Lights (1.2m / 3.95ft each, Warm White 3000K)
- 2x PIR Motion Sensors
- 1x Daylight Sensor
- 1x Sensor Extension Cable (5m / 16.4ft)
- 1x 2-Pin Wire
- 1x Power Supply + Plug
- Clips and Screws for fixing Main Line
- Instruction Manual
Note: Due to a product upgrade, the small screwdriver mentioned in some older manuals is no longer included.

This image displays the complete set of components included in the MALIIGAZA 16-Stair LED Light Kit. It features the main controller, a remote control, the main wiring harness, individual COB LED strip lights, two PIR motion sensors, a daylight sensor, an extension cable, a 2-pin wire, and the necessary power supply with a plug. Clips and screws for mounting are also included.
3. Specifications
| Feature | Detail |
|---|---|
| Brand | MALIIGAZA |
| Model Name | Step Light Kit |
| Item Model Number | STEP-09-16S-WW-1.2M-HB200W-SET |
| Light Source Type | COB LED |
| Number of Light Sources | 16 |
| Light Color | Warm White |
| Color Temperature | 3000 Kelvin |
| Brightness | 2000 Lumens (Max Output) |
| Voltage | 24 Volts DC |
| Wattage | 200 Watts |
| Special Features | Main Line Design, Motion Sensor, Daylight Sensor, Remote Controlled, Step-by-Step Control, Dimmable, Cuttable LED Strips |
| Material | Metal, Plastic |
| Indoor/Outdoor Usage | Indoor |
| Water Resistance Level | Not Water Resistant |
4. Installation Guide
Careful planning and execution are key to a successful installation. Please read all steps before beginning.
4.1. Planning and Preparation
- Stair Spacing: The distance between the two connection points of the main cable is 40cm (15.75 inches). Please measure your stair spacing to ensure compatibility. For stairs with significantly larger or smaller spacing, modifications or additional components may be required.
- Tools Needed: You will need a screwdriver (preferably a + screwdriver) and an electric drill for installation.
- Installation Method: Decide between installing the main line under the stair tread or on the side wall.
4.2. Controller and Main Line Installation
Secure the main controller unit to a stable, discreet location, such as under the first or last step, or on the side wall near the power source.

This diagram illustrates the complete wiring setup for the MALIIGAZA stair light kit. It shows how the LED controller connects to the power supply, the PIR motion sensors, the daylight sensor, and the main line which distributes power and signal to each individual LED strip.
Route and fix the main cable along your chosen path. Ensure the arrows on the cable points TOWARDS the direction of travel UP the stairs. Incorrect orientation will prevent the system from working.
If the main line is too short for a corner or requires extension, it must be cut and extended. Extension cables are sold separately and are NOT included in this kit. Contact MALIIGAZA for required parts.
Video 1: Installation Methods for MALIIGAZA Intelligent Motion Sensor LED Stair Light Kit. This video demonstrates two installation methods: under the stair tread and on the side wall, showing how to secure the controller, route the main cable, and install LED strips and sensors.
4.3. LED Strip Installation
The COB LED strips are highly bright, provide even illumination, and are flexible. They can be cut at marked points (approximately 1.97 inches/cut) to fit your stair width. They come with strong yellow adhesive tape for easy application.
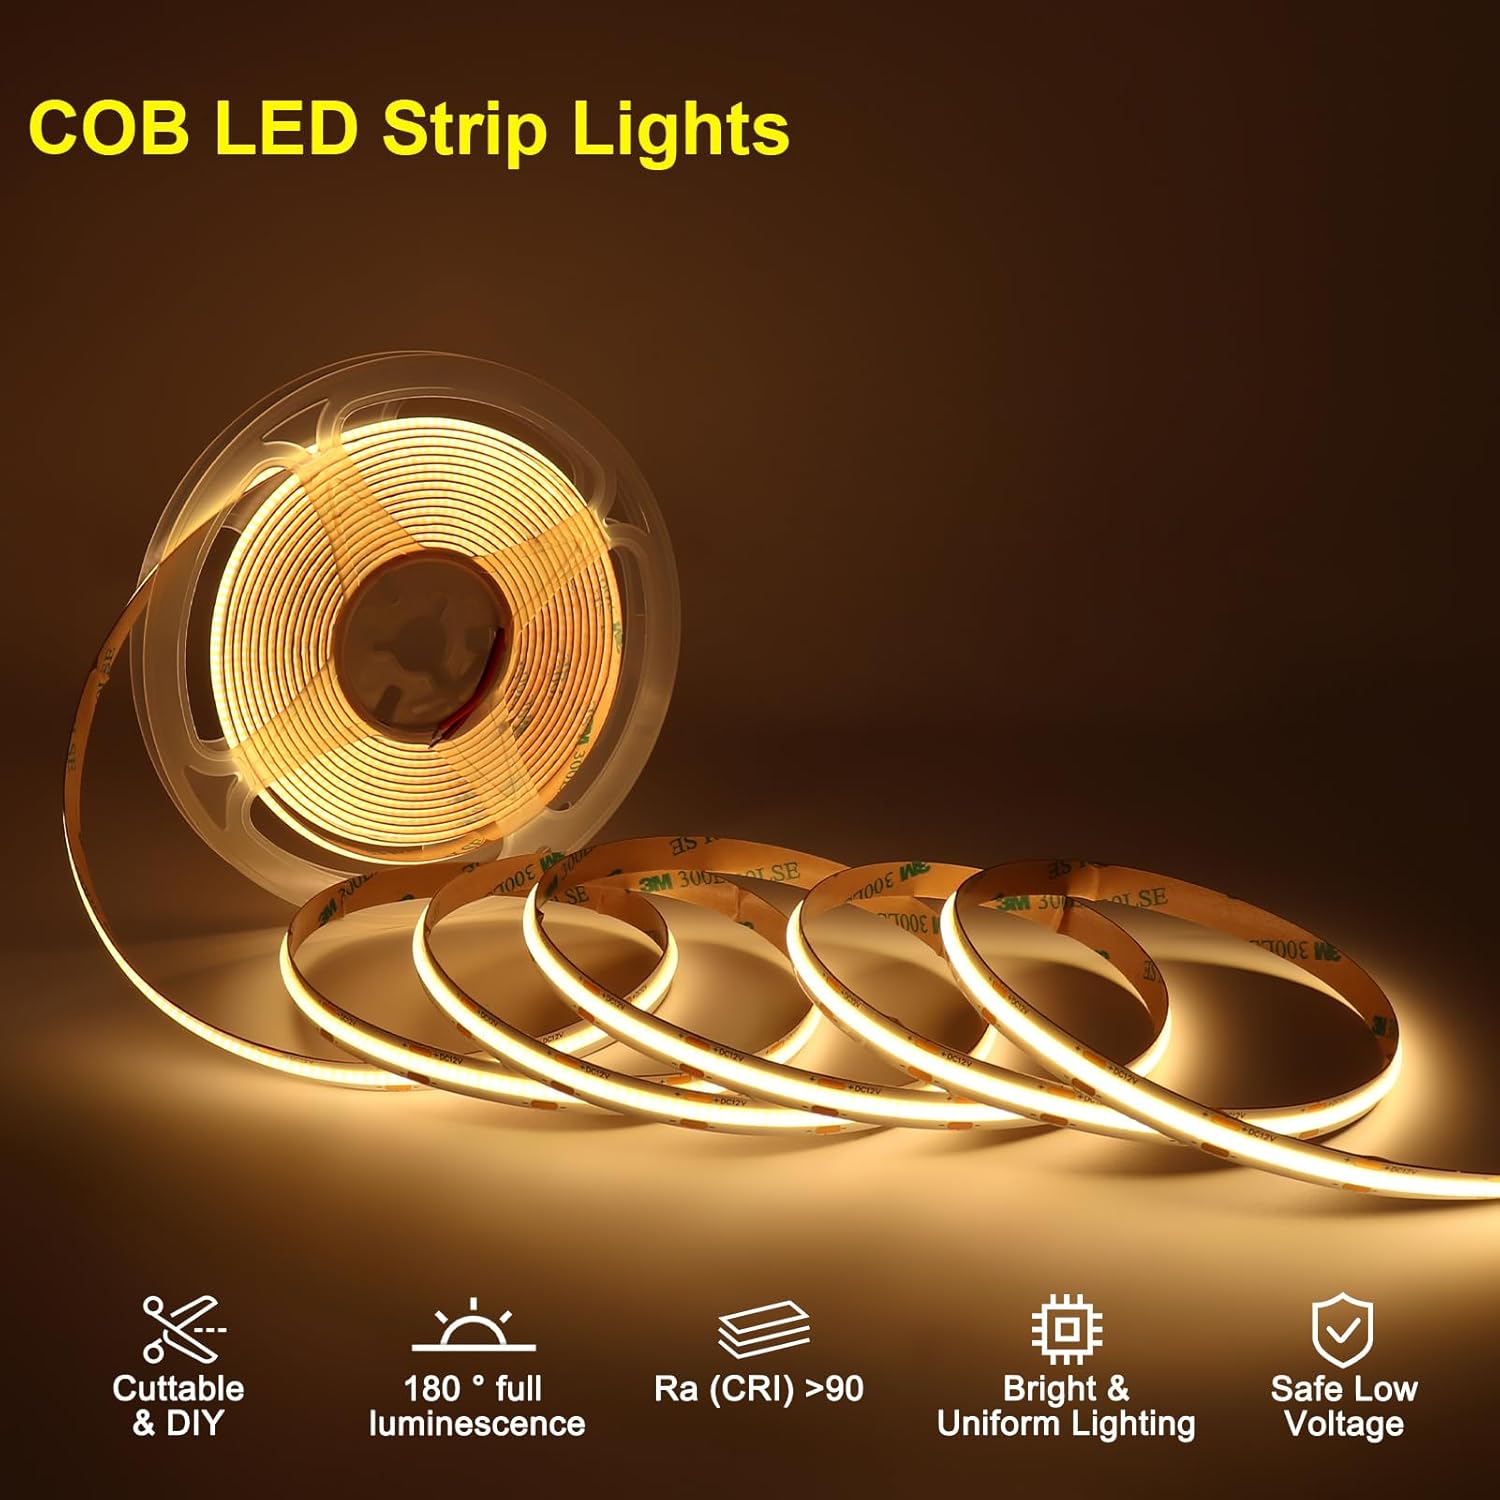
This image shows a flexible COB LED strip light, emphasizing its continuous, dot-free illumination. The strip is designed to be cuttable at designated points, allowing for customization to fit various stair dimensions. Its adhesive backing simplifies installation.
After cutting to the desired length, peel off the adhesive backing film and firmly press the strip onto a clean, dry surface under the stair tread. Connect the LED strip to the main line by inserting the BLACK wire into V- and the RED wire into V+ on the main line connector.
4.4. Sensor Installation
The kit includes two PIR motion sensors and one daylight sensor. The PIR sensors detect movement, while the daylight sensor helps conserve energy by preventing activation in bright conditions.

This image illustrates the PIR motion sensor in operation, showing how the stair lights illuminate sequentially as a person ascends. The text indicates that lights turn on upon detecting movement and turn off when motion disappears, providing both convenience and energy efficiency.
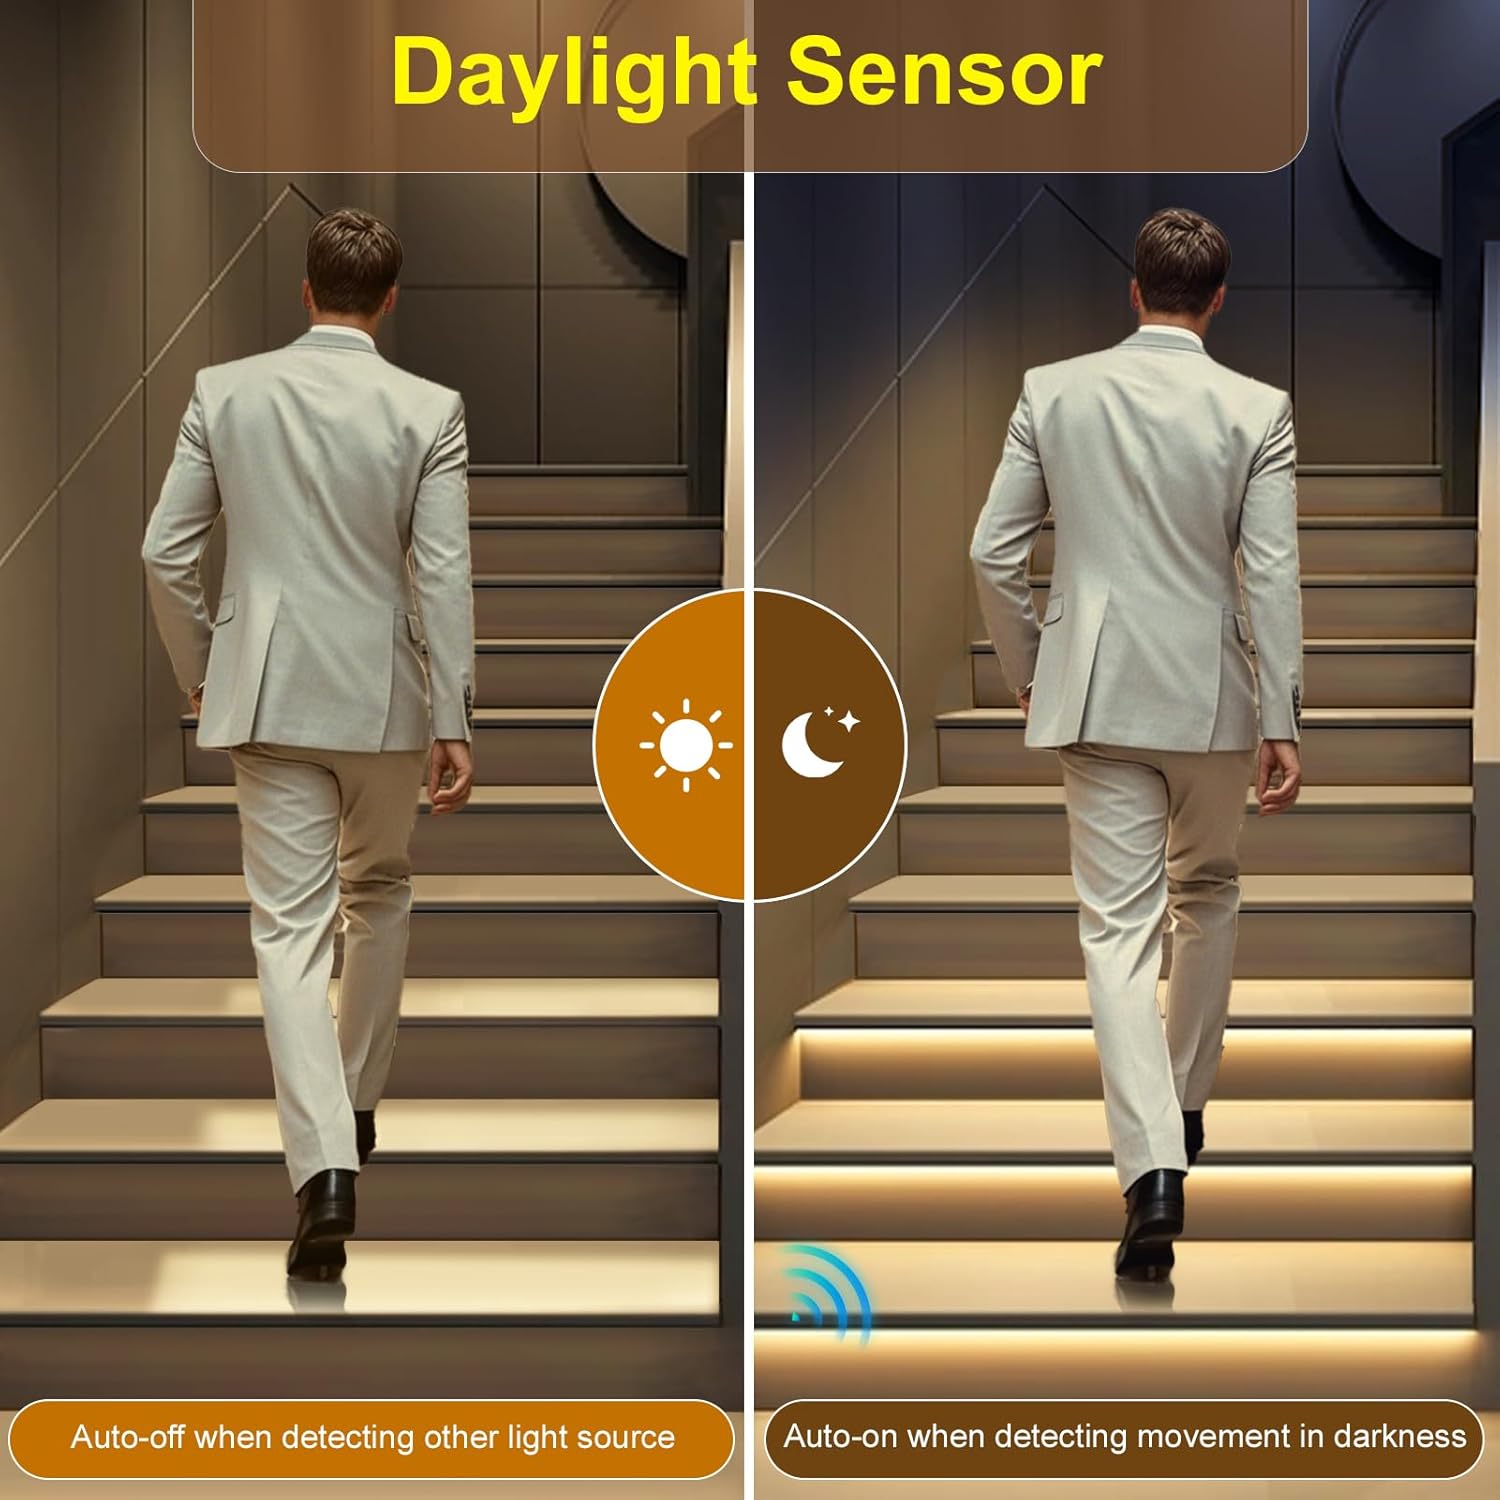
This split image visually explains the daylight sensor's role. On the left, stairs are shown in bright conditions where the lights are off, indicating the sensor has detected sufficient ambient light. On the right, the same stairs are illuminated in darkness, demonstrating the automatic activation of lights when motion is detected in low-light conditions, thus saving energy.
- PIR Sensors: Install one PIR sensor at the bottom of the stairs and one at the top. They can be surface-mounted using screws (small holes needed) or recessed-mounted into a hole (15mm diameter). Mounting clips and brackets are provided.
- Daylight Sensor: The daylight sensor does not need to be placed visibly near the steps, but it should be able to detect light and dusk.
4.5. Power Connection
Connect the main cable to the controller, and then connect the controller to the power supply. Finally, plug the power supply into a standard AC wall outlet. Ensure all connections are secure.
Video 2: MALIIGAZA Stair Light Kit Open Box Instruction. This video provides a detailed unboxing and initial connection guide, showing how to connect the power supply to the controller and the main line to the controller, ensuring proper setup before full installation.
5. Operation
Your MALIIGAZA stair light kit offers intelligent motion sensing and dynamic control for enhanced convenience and energy saving.
5.1. Remote Control Functions
The included remote control allows you to adjust various settings of your stair light system.

This image displays the MALIIGAZA 16-Stair Kit's main components, including the LED controller and its remote control. The remote features buttons for adjusting delay, speed, and the number of active lights, providing convenient control over the lighting effects.
5.2. Controller Button Functions
The controller itself has buttons for fine-tuning settings:

This diagram provides a clear guide to the MALIIGAZA stair light controller's interface. It labels and explains the functions of each button, including 'Brightness' (HH01-HH99), 'Time delay' (LL01-LL99), 'Speed' (EE01-EE99), and 'Setting' (FF01-FF12 for modes). It also shows how to enter and save settings.
5.3. Daylight Sensor Settings
The daylight sensor can be configured to prevent the lights from activating when there is sufficient ambient light, saving energy.

This image illustrates the functionality of the daylight sensor. It shows an ON/OFF switch and various Lux settings (5, 15, 30, 50, 100, 150 Lux). When the daylight sensor is ON and set to a specific Lux level, the lights will only activate when motion is detected and the ambient light falls below that set Lux level. When OFF, the PIR sensors work both day and night.
Video 3: MALIIGAZA STEP-09 Stair Light Lighting Show. This video showcases the dynamic lighting effects of the stair light kit, demonstrating the step-by-step illumination as someone walks up the stairs, highlighting its intelligent motion sensing capabilities.
Video 4: MALIIGAZA Stair Light Real Effect. This video provides a real-world demonstration of the stair light kit's performance, illustrating how the lights respond to motion and create a visually appealing and functional lighting solution for stairs.
6. Maintenance
To ensure the longevity and optimal performance of your MALIIGAZA LED Stair Light Kit, follow these simple maintenance guidelines:
- Cleaning: Gently wipe the LED strips, sensors, and controller with a soft, dry cloth. Avoid using abrasive cleaners or solvents that could damage the components.
- Inspection: Periodically check all wiring connections to ensure they are secure. Ensure LED strips are firmly adhered and sensors are unobstructed.
- Power Cycle: If you experience any minor issues, try disconnecting the power supply for a few minutes and then reconnecting it to reset the system.
7. Troubleshooting
Here are solutions to common questions and issues you might encounter:
Q: The lights are not turning on or are not responding to motion.
- A: Check all wiring connections, especially the main cable to the controller and the power supply.
- A: Ensure the arrows on the main cable connectors are pointing TOWARDS the direction of travel UP the stairs. Incorrect orientation will prevent the system from working.
- A: Verify that the power supply is correctly plugged into a working AC outlet.
- A: Check the daylight sensor settings. If the daylight sensor is ON and the environment is bright, the lights may not activate. Try turning the daylight sensor OFF for testing.
- A: Ensure PIR motion sensors are not obstructed and are correctly installed at the top and bottom of the stairs.
Q: The lights are not illuminating step-by-step or are not turning off.
- A: This kit features ICs inside each main cable connector for dynamic control. Ensure all main cable connections are secure and correctly oriented.
- A: The system is designed for motion-activated, energy-saving operation. Lights will typically turn off after a set time (e.g., 200 seconds or 3.3 minutes) if no further motion is detected.
- A: Check the controller settings for 'Time delay' and 'Speed' to ensure they are configured as desired.
Q: Can the LED light strips be shortened or lengthened?
- A: Yes, the LED strips can be cut at marked cut points, spaced every 50mm (1.97 inches).
- A: To lengthen individual LED strips, you would need to purchase additional compatible COB LED strips and specific connection head/joining accessories from MALIIGAZA.
Q: How many stairs can one kit control? Can I install it for more than 20 stairs?
- A: Standard kits control 16 or 20 steps. The main controller can support up to 40 steps. To install for more than 20 stairs, you will need to purchase additional main cables, LED strips, and possibly sensors/extensions separately. Contact MALIIGAZA support for guidance on larger projects.
8. Warranty and Support
For warranty information, technical support, or to purchase additional components, please contact MALIIGAZA customer service through the retailer where you purchased the product or visit the official MALIIGAZA website.
Please have your product model number (STEP-09-16S-WW-1.2M-HB200W-SET) and purchase details ready when contacting support.
Ask a question about this manual
Ask about setup, troubleshooting, compatibility, parts, safety, or missing instructions. Manuals+ will review the question and use this page’s manual context to help answer it.