
1. Introduction
This manual provides instructions for the assembly, operation, and maintenance of your VECELO Full Size Platform Bed Frame with Adjustable Upholstered Headboard. Please read this manual thoroughly before assembly and retain it for future reference.

Image: Fully assembled VECELO Full Size Platform Bed Frame with an upholstered headboard in a bedroom setting.
2. Safety Information
Observe the following safety precautions during assembly and use:
- Ensure all parts are present and undamaged before beginning assembly.
- Assemble the bed frame on a soft, clean surface (e.g., carpet) to prevent scratches to the product or floor.
- Do not overtighten screws during assembly to avoid damaging components. Hand-tighten until snug, then use tools for final tightening.
- Keep small parts and packaging materials away from children and pets during assembly.
- Regularly check all connections (bolts, screws) to ensure they remain tight. Retighten as necessary.
- Do not exceed the maximum weight capacity of 700 lbs for this full-size bed frame.
- Do not stand or jump on the bed frame.
3. Package Contents
Before beginning assembly, verify that all the following components are included in your package. If any parts are missing or damaged, contact customer support.
- Upholstered Headboard
- Side Rails (Left and Right)
- Footboard
- Center Support Beam
- Wooden Slats (Quantity: 12)
- Support Legs (for frame and center beam)
- Hardware Pack (Includes bolts, washers, nuts, and Allen wrench)
- Installation Manual (this document)

Image: Diagram illustrating the overall dimensions of the full-size bed frame (76.6"L x 56.7"W x 47"H), its weight capacity (up to 700 lbs), and an estimated quick assembly time of 30 minutes.
4. Setup Instructions
Follow these steps for proper assembly of your VECELO Full Size Platform Bed Frame. It is recommended to have two people for assembly.
- Unpack and Identify Parts: Carefully remove all components from the packaging. Lay them out on a clean, soft surface and compare them against the "Package Contents" list to ensure everything is present.
- Attach Side Rails to Headboard and Footboard: Connect the side rails to the headboard and footboard using the provided bolts and washers. Insert bolts through the pre-drilled holes. Do not fully tighten the bolts until all main frame components are connected.
- Install Center Support Beam: Attach the center support beam to the headboard and footboard, ensuring it is properly aligned in the middle of the frame. Secure it with the designated hardware.
- Attach Support Legs: Screw the support legs into the designated threaded points on the frame and the center support beam. Ensure they are tightened securely and are level.
- Install Wooden Slats: Place the wooden slats across the side rails. The slats are designed to fit into specific slots or be secured with screws. Ensure even spacing and secure attachment for optimal mattress support.
- Adjust Headboard Height: The headboard offers four height options. Adjust it to your desired height by aligning the headboard brackets with the appropriate holes on the frame and securing them with bolts. (Refer to Section 5 for detailed adjustment steps).
- Final Tightening: Once all components are in place and aligned, go back and securely tighten all bolts and screws using the provided Allen wrench. Do not overtighten.

Image: Close-up view of the sturdy wooden slat system and reinforced metal frame, illustrating how the slats are supported by the frame without requiring a box spring.
5. Operation
5.1. Adjusting Headboard Height
The upholstered headboard can be adjusted to four different height settings, ranging from 41 to 47 inches, to accommodate various mattress thicknesses and personal preference. To adjust the headboard height:
- Identify the bolts securing the headboard to the bed frame.
- Loosen these bolts using the provided Allen wrench. You may need to remove them completely.
- Carefully lift or lower the headboard to the desired height. Ensure the headboard brackets align with the appropriate set of holes on the bed frame.
- Reinsert the bolts through the aligned holes and securely tighten them. Ensure both sides of the headboard are adjusted to the same height.

Image: Illustration demonstrating the adjustable height feature of the upholstered headboard, showing the range from 41 to 47 inches and how to position it for different mattress thicknesses.
5.2. Noise-Free Design
The bed frame incorporates foam padding along the frame's interior to minimize friction between metal parts and prevent squeaking. This design ensures a quiet and restful sleeping environment. No special operation is required for this feature; it functions automatically.
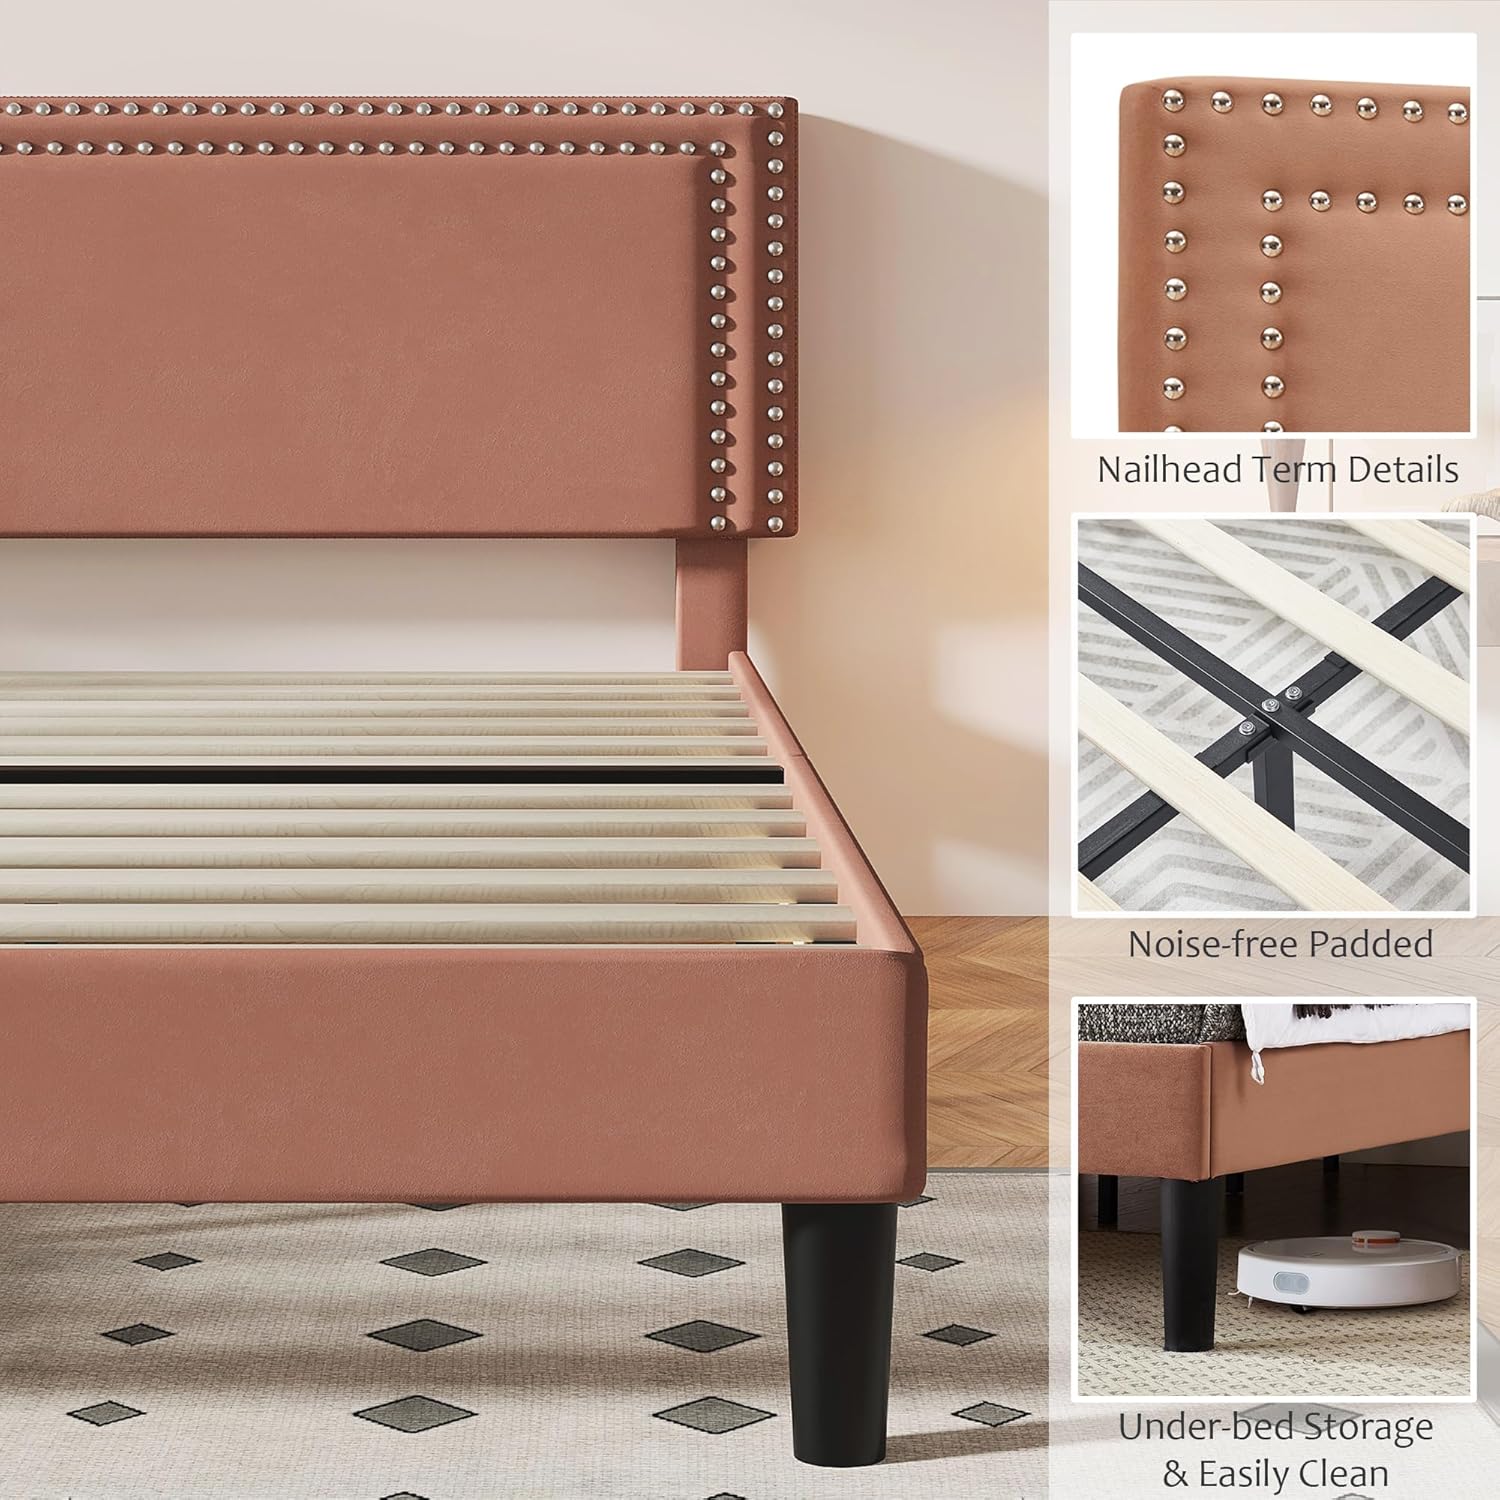
Image: Detailed view showing the decorative nailhead trim on the headboard, the noise-free padded areas of the frame, and the available under-bed storage space, highlighting the practical design elements.
6. Maintenance
Proper maintenance will extend the life and appearance of your bed frame:
- Cleaning the Upholstery: For the upholstered headboard and frame, gently wipe with a damp cloth. For spills, blot immediately with a clean, dry cloth. Avoid using harsh chemicals, abrasive cleaners, or excessive moisture, as these can damage the velvet fabric.
- Hardware Check: Periodically (every 3-6 months), inspect all bolts, screws, and connections to ensure they are tight. Retighten if necessary to maintain the bed frame's stability and prevent any potential noise.
- Slat Inspection: Inspect the wooden slats for any signs of damage, cracks, or excessive wear. Replace any broken or severely damaged slats immediately to ensure proper mattress support and prevent mattress sagging.
- General Care: Avoid dragging the bed frame when moving it; always lift it to prevent damage to the legs or frame structure.
7. Troubleshooting
Refer to the table below for common issues and their solutions:
| Problem | Possible Cause | Solution |
|---|---|---|
| Bed frame squeaks | Loose bolts or friction between metal parts. | Tighten all bolts and screws securely. Ensure all foam padding is correctly positioned to reduce metal-on-metal contact. |
| Headboard is wobbly | Headboard attachment bolts are loose or not fully secured. | Ensure headboard bolts are fully tightened and aligned correctly in the desired height setting. |
| Wooden slats fall out or sag | Slats not properly installed, unevenly spaced, or damaged. | Re-install slats, ensuring they are securely seated in their designated positions and evenly spaced. Replace any damaged slats. |
| Bed frame feels unstable | Not all bolts are tightened, or support legs are uneven/loose. | Check and tighten all bolts throughout the entire frame. Ensure all support legs are making firm, even contact with the floor. Adjust leg levelers if present. |
8. Specifications
- Model: Platform Bed Frame
- Size: Full
- Material: Metal, Velvet, Wood
- Product Dimensions (L x W x H): 76.6" x 56.7" x 47"
- Adjustable Headboard Height: 41" - 47"
- Maximum Weight Capacity: 700 lbs
- Special Features: Adjustable Headboard, No Box Spring Needed, Squeak Resistant, Noise-Free Design
- Included Components: Headboard, Side Rails, Footboard, Center Support Beam, Wooden Slats, Support Legs, Hardware
- Care Instructions: Wipe with Damp Cloth
9. Warranty and Support
For specific warranty information regarding your VECELO Full Size Platform Bed Frame, please refer to the documentation included with your purchase or visit the official VECELO website. It is recommended to retain your purchase receipt as proof of purchase for any warranty claims.
For technical support, missing parts, or any other inquiries, please contact VECELO customer service through their official contact channels, which can typically be found on their website or in your purchase documentation.


