
1. Introduction and Compatibility
This manual provides detailed instructions for the installation, operation, and maintenance of your Surakey Android 13 Car Stereo Radio. Please read this manual thoroughly before installation and use to ensure proper function and safety.
Important Compatibility Note: This car stereo is designed for Dodge Ram 1500 and 3500 models from 2013 to 2019. Before purchasing or installing, it is crucial to verify compatibility with your specific vehicle's year and model. We recommend carefully measuring your dashboard and comparing it with the product dimensions. If uncertain, please provide a complete image of the plugs on the back of your center console and the on-board main unit to your supplier for confirmation and to determine if any additional wiring harnesses or adapters are required.

Figure 1.1: Dashboard compatibility examples. Ensure your vehicle's dashboard matches the compatible design for proper fitment.
2. Product Overview and Included Components
The Surakey Android 13 Car Stereo Radio features a 9.7-inch touch screen, offering advanced navigation, entertainment, and connectivity options for your vehicle.
2.1 Key Features:
- 9.7-inch HD 2.5D Tempered Glass Mirror Touch Screen
- Android 13 Operating System
- Wireless & Wired Apple CarPlay and Android Auto
- Built-in GPS Navigation
- Integrated Wi-Fi Connectivity
- Bluetooth with A2DP, Hands-Free Calling, and Phone Book
- FM/RDS Radio Tuner
- DSP Function for High-Fidelity Audio
- Support for AHD Backup Camera Input
- Steering Wheel Control Compatibility
- Double USB Interface
- Multi-language Support (up to 40 national languages)
2.2 Package Contents:
Please check that all the following components are included in your package:
- Surakey Android Car Stereo Unit
- Power Cable
- RCA Input/Output Cables
- USB Cables (x2)
- Camera Input Cable
- Radio Adapter Cable
- GPS Antenna
- Instruction Manual
- External Microphone ('Wheat head')
- Canbus Box
- Car Compass

Figure 2.1: Product dimensions and included accessories.
3. Setup and Installation
Professional installation is highly recommended for this product. Incorrect wiring or installation can damage the unit or your vehicle's electrical system. Always disconnect the vehicle's battery before beginning installation.
3.1 Pre-Installation Check:
- Ensure the vehicle's ignition is off and the battery is disconnected.
- Confirm dashboard compatibility and dimensions.
- Identify all existing wiring harnesses in your vehicle.
3.2 Wiring Connections:
Refer to the wiring diagram provided in the included instruction manual for specific connections. General connections include:
- Power Cable: Connect to vehicle's power, ground, and accessory wires.
- RCA Input/Output: For external amplifiers, subwoofers, or video output.
- USB Cables: Connect to the unit for media playback, phone charging, and CarPlay/Android Auto (wired).
- Camera Input: Connect your AHD backup camera here.
- Radio Adapter Cable: Connect to the vehicle's antenna.
- GPS Antenna: Mount in a location with a clear view of the sky for optimal signal reception.
- External Microphone: Plug in for improved hands-free call quality.
- Canbus Box: Connect as per vehicle-specific instructions for steering wheel controls and other vehicle data integration.

Figure 3.1: Rear view of the car stereo unit with wiring connections.
3.3 Post-Installation:
- Reconnect the vehicle's battery.
- Turn on the ignition and power on the stereo.
- Perform initial setup and test all functions (radio, Bluetooth, GPS, etc.).
4. Operating Instructions
This section details the primary functions and how to operate your Surakey Android 13 Car Stereo.
4.1 Power On/Off and Basic Interface:
- Press the power button to turn the unit on or off.
- The 9.7-inch capacitive touch screen allows for easy navigation through the Android interface.
4.2 Apple CarPlay & Android Auto:
The unit supports both wireless and wired Apple CarPlay (for iOS devices) and Android Auto (for Android devices).
- For Apple CarPlay: Connect your iPhone via Bluetooth for wireless connection or via USB for wired connection. Use the ZLINK APP on the stereo. This integrates your iOS device for navigation, calls, messages, and music.
- For Android Auto: Connect your Android phone via Bluetooth for wireless connection or via USB for wired connection. Ensure the Android Auto APP is installed on your phone. This integrates your Android device for navigation, calls, messages, and music.

Figure 4.1: Apple CarPlay connection example.
4.3 GPS Navigation:
The unit comes with built-in offline maps. For online navigation, connect to Wi-Fi to use Google Maps or other navigation applications downloaded from the Play Store.
4.4 Wi-Fi Connectivity:
Connect the stereo to a Wi-Fi hotspot (e.g., from your smartphone) to access online features, download apps, and use online maps.
4.5 Bluetooth Functionality:
Pair your smartphone via Bluetooth for hands-free calling, Bluetooth music streaming (A2DP), and automatic phonebook loading.
4.6 FM/RDS Radio:
Access the FM radio tuner. The RDS function displays station information where available. You can save up to 18 preset stations.
4.7 Steering Wheel Controls:
If properly connected via the Canbus box, you can control various functions of the stereo directly from your vehicle's steering wheel controls for convenience and safety.
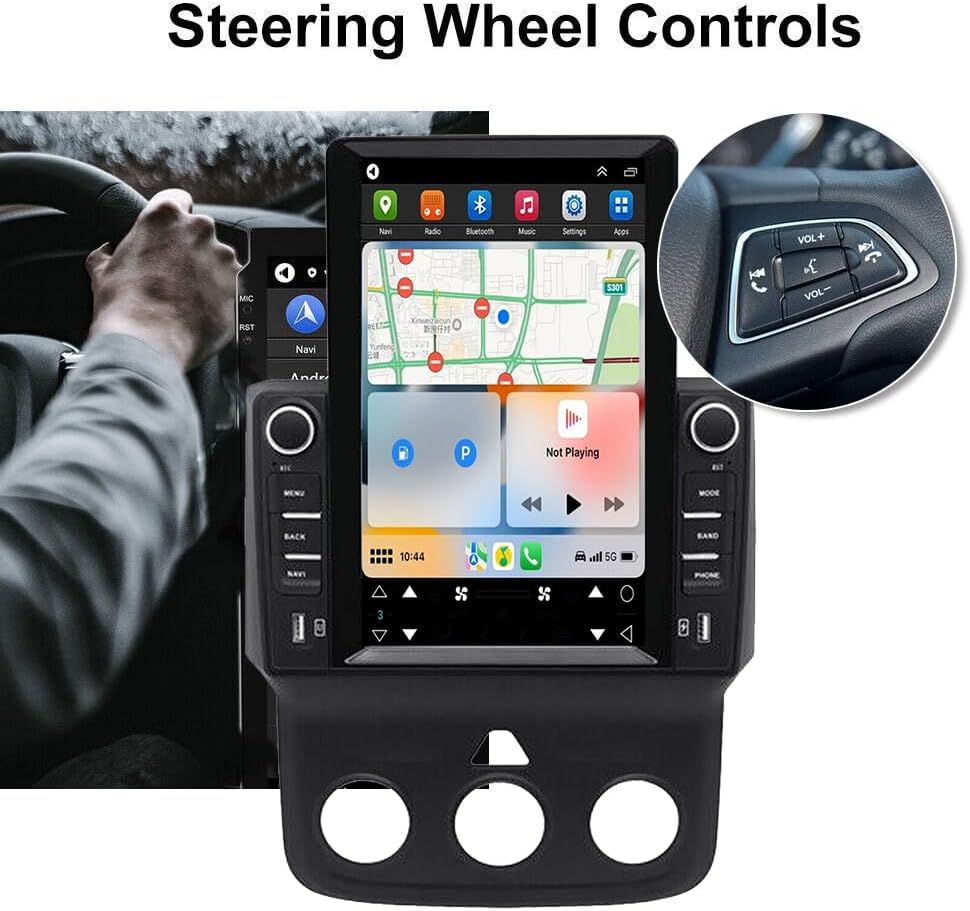
Figure 4.2: Steering wheel control integration.
4.8 DSP Function:
The Digital Sound Processor (DSP) ensures high-fidelity audio reproduction, closely matching the original sound quality.
4.9 Rear Camera Input:
Connect an AHD backup camera to the CVBS input. The display will automatically switch to the camera view when reversing.
4.10 File Manager & Apps:
The built-in file manager allows you to browse, download, install, and delete Android applications. You can access the Google Play Store (with Wi-Fi connected) to expand the stereo's functionality.
4.11 Time Setting:
The date and time can be set automatically via network or GPS, or adjusted manually through the system settings.
5. Maintenance
Proper maintenance ensures the longevity and optimal performance of your car stereo.
- Cleaning the Screen: Use a soft, lint-free cloth to gently wipe the touch screen. For stubborn smudges, slightly dampen the cloth with water or a screen-safe cleaner. Avoid harsh chemicals or abrasive materials.
- Software Updates: Periodically check for system software updates to ensure optimal performance and access to new features. Updates can usually be found in the system settings menu.
- Temperature: Avoid exposing the unit to extreme temperatures for extended periods. The operating temperature range is -20℃ to 75℃.
- Connections: Ensure all cables are securely connected. Loose connections can lead to intermittent issues.
6. Troubleshooting
This section addresses common issues you might encounter. If you experience problems not listed here, please contact customer support.
- No Power:
- Check all power connections and fuses.
- Ensure the vehicle's battery is charged.
- No Sound:
- Verify speaker connections.
- Check volume levels and mute settings.
- Ensure the correct audio source is selected.
- GPS Signal Loss:
- Ensure the GPS antenna is properly installed and has a clear view of the sky.
- Check antenna cable connection.
- Bluetooth Connection Issues:
- Ensure Bluetooth is enabled on both the stereo and your phone.
- Delete previous pairings and try pairing again.
- Restart both devices.
- CarPlay/Android Auto Not Connecting:
- For wired connection, try a different USB cable.
- For wireless, ensure Bluetooth and Wi-Fi are enabled on your phone.
- Verify the correct app (ZLINK for CarPlay, Android Auto app for Android Auto) is running.
- Unit Freezes or Responds Slowly:
- Perform a soft reset (refer to the specific reset procedure in the included manual, or hold the power button for 10 seconds).
- Close unnecessary background applications.
Factory Settings Keyword: If prompted for a factory setting keyword, try 8888 or 3368.
7. Specifications
| Feature | Specification |
|---|---|
| System | Android 13 |
| Chipset | 8227L-DEMO |
| Screen Size | 9.7 inches |
| Screen Resolution | 1024x768 |
| Memory (RAM+ROM) | 2GB RAM + 32GB ROM |
| Radio Chip | MT6625 |
| Power Output | 4x45W |
| Work Temperature | -20℃ to 75℃ |
| Power Amplifier Chip | TDA7388 |
| Radio Band | FM/RDS |
| Video Output | Supported |
| Reversing Input | CVBS |
| External Microphone | Supported |
| Split Screen | Supported |
| Maps | Built-in offline maps (internet required for data download) |
| Wi-Fi | Supported |
| USB Interface | Double USB |
| Audio Formats | APE/FLAC/WAV/MP3/WMA etc. |
| Video Formats | MKV/RMVB/AVI/MP4/MDV etc. |
| Picture Formats | PNG/JPEG/JPG/GIF/WBMP/BNP etc. |
| Factory Setting Keyword | 8888 or 3368 |
| Supported Languages | Chinese/English/French/Italian/Korean/Japanese/Arabic/Spanish/Portuguese/Russian/Turkish/Vietnamese/Hebrew/Polish/German (up to 40 national languages) |
| Vehicle Service Type | Truck |
| Connectivity Technology | USB |
| Map Type | North America |
| Audio Output Mode | Stereo |
| Touch Screen Type | Capacitive |
| Display Type | Touch Screen |
| Human-Interface Input | Touchscreen |
| Control Method | Touch |
| Supported Satellite Navigation System | GPS |
| Item Weight | 1875 Grams |
| Model Number | JIAQI-QA1572X-WYQ-2412 |
8. Warranty and Support
For warranty information and technical support, please refer to the specific warranty card included with your product or contact your retailer. Keep your purchase receipt as proof of purchase.