
Important Safety Instructions
Please read and understand all instructions before assembly and use. Keep this manual for future reference.
- Do not load more than 700 lbs (317 kg) onto the bed frame. Exceeding this weight limit may cause damage to the frame and potential injury.
- Unplug the charging station from the power outlet when not in use or during cleaning.
- Ensure all electrical components are handled with care. Do not expose the charging station or LED lights to water or excessive moisture.
- Keep small parts and packaging materials away from children to prevent choking hazards.
- Assemble the bed frame on a soft, clean surface to prevent scratching.
- Periodically check all bolts and connections to ensure they remain tight. Retighten as necessary.
Package Contents
Verify that all components listed below are present before beginning assembly. If any parts are missing or damaged, please contact HOMBCK customer support.
| Part | Description | Quantity |
|---|---|---|
| A | Headboard (with LED lights and charging station) | 1 |
| B | Side Rails | 2 |
| C | Footboard | 1 |
| D | Center Support Beam | 1 |
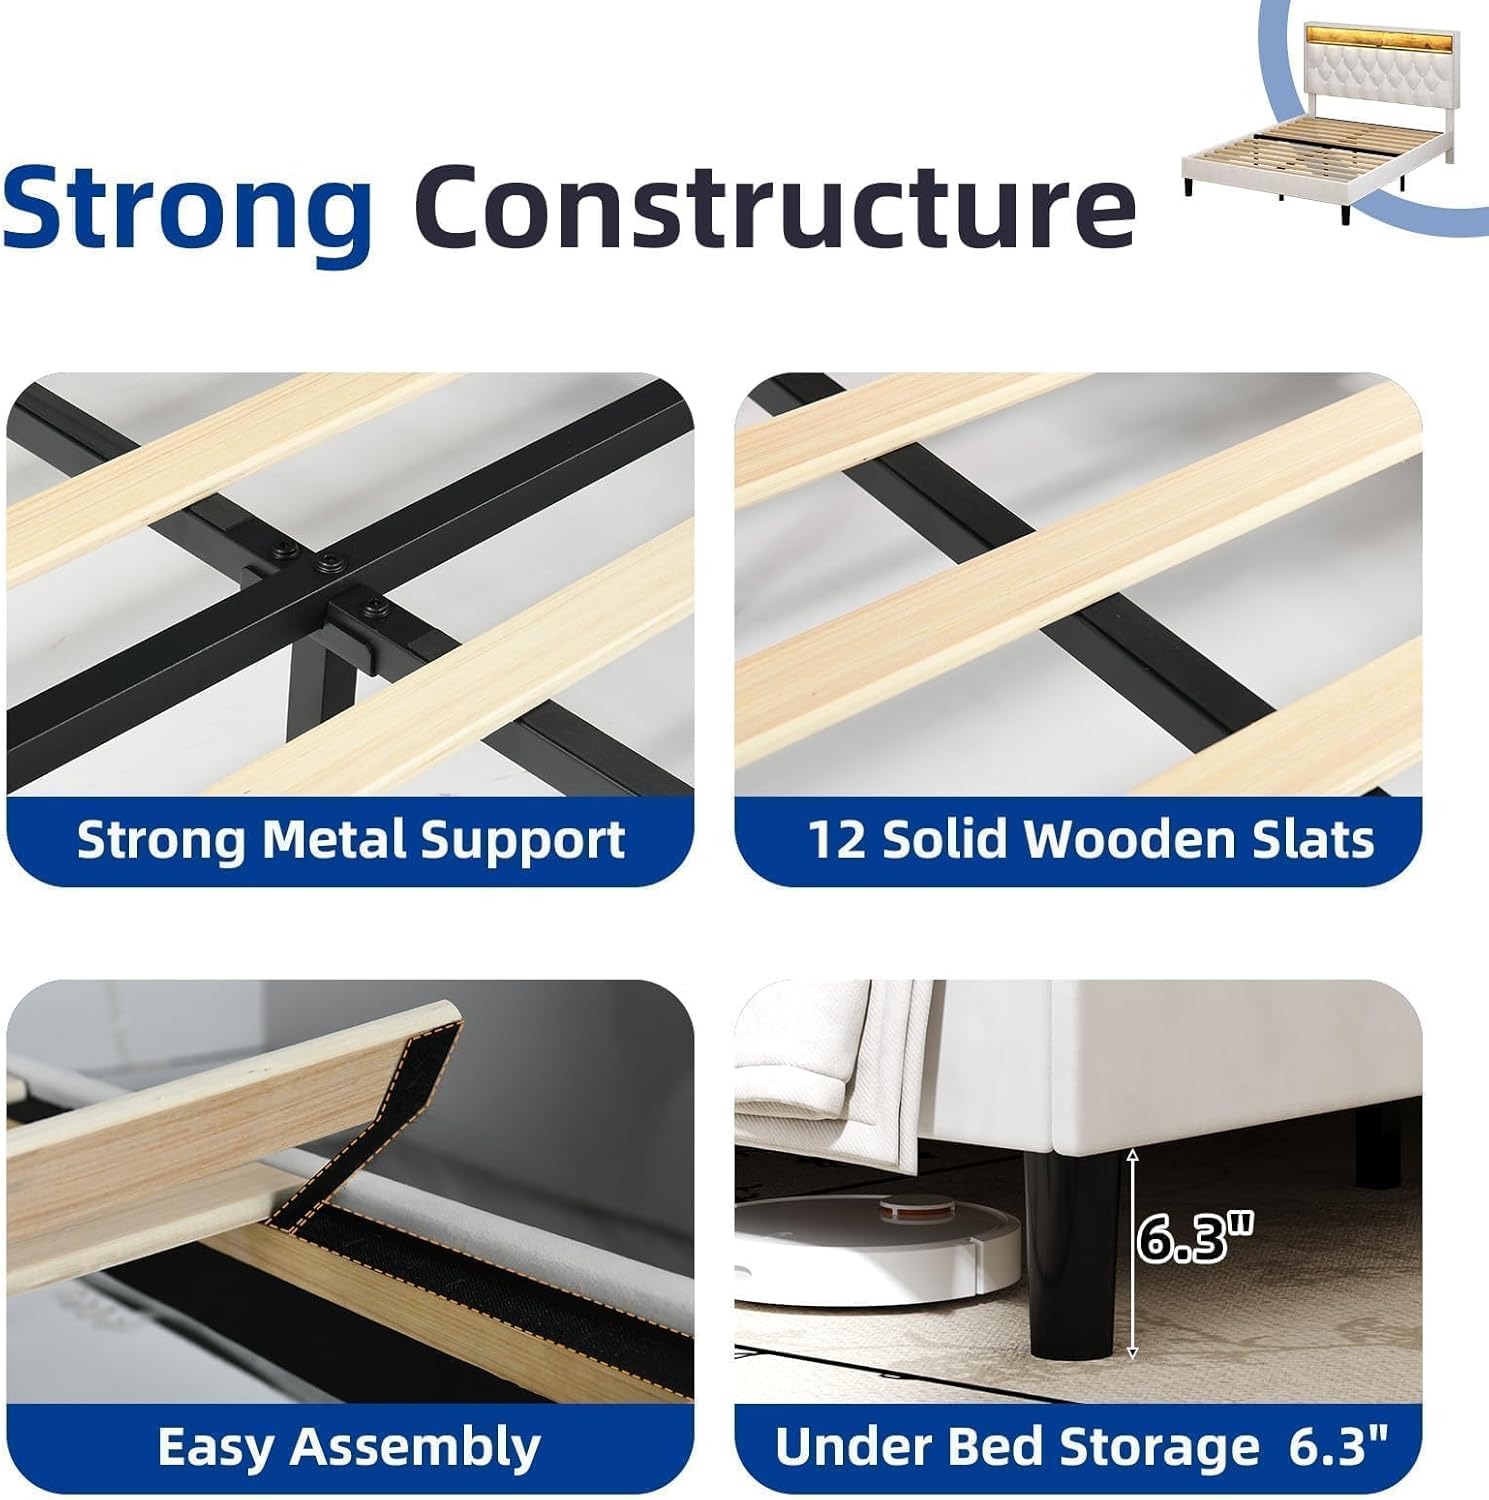
| E | Wooden Slats | 12 |
| F | Support Legs | 4-6 (depending on design) |
| G | Hardware Pack (bolts, washers, Allen key) | 1 |
Assembly Instructions
Follow these steps carefully to assemble your HOMBCK bed frame. It is recommended to have two people for assembly.
- Unpack and Identify Parts: Carefully remove all components from the packaging. Lay them out on a clean, soft surface and compare them with the 'Package Contents' list.
- Attach Side Rails to Headboard: Connect the side rails (B) to the headboard (A) using the provided bolts and Allen key from the hardware pack (G). Ensure the connections are secure but do not fully tighten yet.
- Attach Side Rails to Footboard: Connect the other end of the side rails (B) to the footboard (C). Again, secure with bolts but do not fully tighten.
- Install Center Support Beam: Place the center support beam (D) into the designated slots or brackets on the headboard and footboard. Secure it with the appropriate hardware.
- Attach Support Legs: Screw the support legs (F) into the pre-drilled holes on the frame, particularly along the center support beam and footboard.
- Install Wooden Slats: Lay the wooden slats (E) across the bed frame. Many slats come with a hook-and-loop fastener (Velcro) for easy and secure placement. Ensure they are evenly spaced and firmly attached.
- Final Tightening: Once all parts are in place, go back and fully tighten all bolts and connections. Do not overtighten.

Operating Instructions
LED Lights Operation
The integrated LED lights offer various customization options to enhance your bedroom ambiance.
- Power On/Off: Locate the power button or remote control for the LED lights, typically found on the headboard or connected cable.
- Color Selection: Use the remote control or a dedicated app (if applicable) to select from a wide range of colors (e.g., 60,000 colors).
- Modes: Switch between dynamic lighting modes (e.g., fading, flashing) and static color modes. Some models may include 'Mic Mode' (lights react to sound) and 'Music Mode' (lights sync with music).
- Brightness and Speed: Adjust the brightness level and the speed of dynamic lighting effects using the controls.
- Timing Function: Set a timer for the lights to automatically turn off.

Charging Station Usage
The headboard includes a convenient charging station for your electronic devices.
- Connect to Power: Ensure the bed frame's power cord is securely plugged into a functional wall outlet.
- Charging Ports: The charging station typically features 1 USB port and 1 Type-C port. Connect your device's charging cable to the appropriate port.
- Storage Shelves: Utilize the 2-tier storage shelves on the headboard to place your devices while they charge, or for storing small items like books, glasses, or remote controls.

Maintenance and Care
Proper care will help maintain the appearance and longevity of your bed frame.
- Cleaning the Frame: For general cleaning, wipe the bed frame with a dry, soft cloth. Avoid abrasive cleaners or harsh chemicals that may damage the velvet fabric or finish.
- Velvet Upholstery Care: For spills or stains on the velvet, gently blot with a clean, damp cloth. Do not rub vigorously. For stubborn stains, consult a professional upholstery cleaner.
- Dusting: Regularly dust the headboard and frame to prevent dust buildup. A soft brush attachment on a vacuum cleaner can be used for the velvet.
- Electrical Components: Ensure the charging station and LED lights are kept dry. If any electrical component appears damaged, discontinue use and contact customer support.

Troubleshooting
If you encounter any issues with your bed frame, refer to the following common problems and solutions.
- LED Lights Not Working:
- Check if the power cord for the bed frame is securely plugged into a working outlet.
- Ensure the LED light controller is properly connected.
- Try replacing the remote control battery if applicable.
- If using an app, ensure your device is correctly paired and the app is updated. - Charging Station Not Functioning:
- Verify the bed frame's main power cord is plugged in.
- Test with a different device and charging cable to rule out device-specific issues.
- Ensure the USB/Type-C cable is fully inserted into the port. - Bed Frame Feels Unstable or Squeaks:
- Recheck all bolts and connections, tightening any that are loose. Do not overtighten.
- Ensure all wooden slats are properly seated and evenly distributed.
- Verify that all support legs are firmly attached and making contact with the floor. - Headboard Adjustment Issues:
- Ensure no obstructions are preventing the headboard from moving freely.
- Check the adjustment mechanism for any loose parts or damage.
If the problem persists after attempting these solutions, please contact HOMBCK customer support for further assistance.
Specifications
| Feature | Detail |
|---|---|
| Model Number | 001 |
| Size | Queen |
| Material | Velvet |
| Product Dimensions (L x W x H) | 79.9" x 60.2" x 43.3" |
| Item Weight | 65 Pounds |
| Maximum Weight Recommendation | 700 Pounds |
| Under-bed Clearance | 6.3 Inches |
| Special Features | Adjustable Headboard, LED Lights, Charging Station (1 USB, 1 Type-C), 2-Tier Storage |
| Included Components | Headboard, Frame, Slats, Hardware |
| Assembly Required | Yes |
Warranty and Support
For warranty information or to obtain support for your HOMBCK bed frame, please refer to the documentation included with your purchase or visit the official HOMBCK website. You may also contact HOMBCK customer service directly for assistance with parts, assembly, or operational questions.
Contact Information: Please refer to your purchase receipt or the HOMBCK brand store for the most current customer support contact details.