
1. Introduction
This manual provides detailed instructions for the installation, operation, and maintenance of your darkFlash DH360D V1.2 All-in-one Liquid CPU Cooler. Please read this manual thoroughly before installation to ensure proper setup and optimal performance.

Image 1.1: Overview of the darkFlash DH360D V1.2 Liquid CPU Cooler.
2. Safety Information
- Ensure all power is disconnected from your computer before installation.
- Handle components with care to avoid damage.
- Keep out of reach of children.
- Do not attempt to open or modify the cooler components.
- Refer to your motherboard and CPU manuals for additional compatibility and installation guidelines.
3. Package Contents
Verify that all components are present in the package:
- 1x darkFlash DH360D V1.2 AIO Liquid CPU Cooler (360mm radiator with integrated pump and display)
- 3x 120mm PWM ARGB Fans
- Mounting Hardware for Intel Sockets (LGA1150/1151/1155/1156/1200/2011/2066/1700/1851)
- Mounting Hardware for AMD Sockets (AM4/AM5)
- Thermal Paste
- Fan Screws
- User Manual (this document)

Image 3.1: Cooler dimensions and typical packaging contents.
4. Specifications
| Feature | Specification |
|---|---|
| Model Number | DH360D |
| Radiator Dimensions | 15.43"L x 4.72"W x 2.05"H (392mm x 120mm x 52mm) |
| Pump Motor | 3-phase 9-pole motor |
| Cold Plate Material | Copper, Micro Skived Fins |
| Tubing Material | LR+EPDM Dual-Material |
| Fan Speed | Up to 2000 RPM ±10% |
| Noise Level | ≤30dBA |
| Power Connector | 4-Pin (PWM) |
| Voltage | 12 Volts |
| Wattage | 300 watts |
| Compatible Sockets | Intel: LGA1150/1151/1155/1156/1200/2011/2066/1700/1851 AMD: AM4/AM5 |

Image 4.1: Detail of the copper split-flow cooling plate for efficient heat transfer.

Image 4.2: Internal components of the pump, including the 3-phase 9-pole motor and fluid impeller.
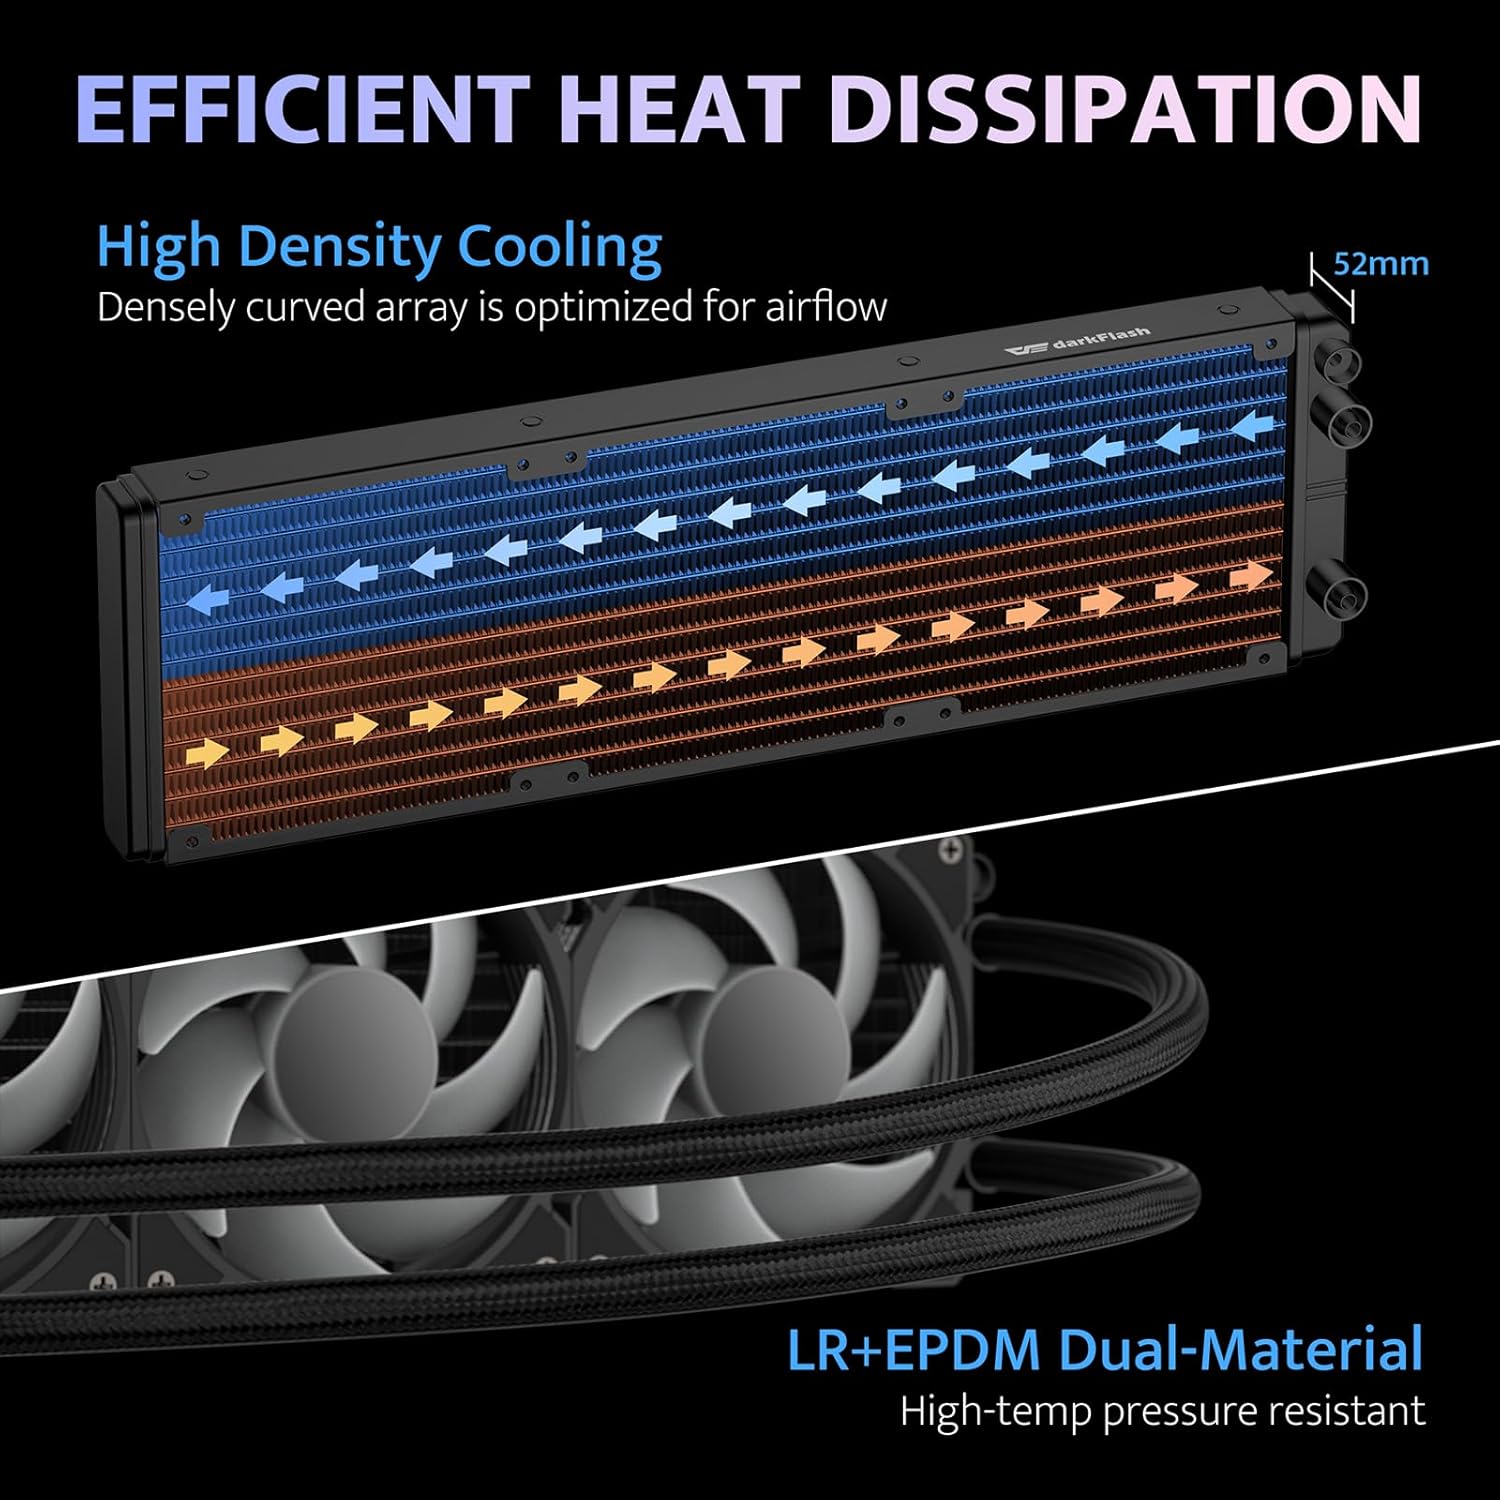
Image 4.3: Radiator design optimized for high-density cooling and efficient heat transfer.
5. Setup and Installation
5.1 Preparation
- Gather all necessary tools: screwdriver, thermal paste (if not pre-applied or using your own).
- Ensure your computer is powered off and unplugged.
- Remove your existing CPU cooler. Clean any old thermal paste from the CPU IHS (Integrated Heat Spreader).
5.2 Radiator and Fan Installation
- Determine the mounting location for the 360mm radiator in your PC case (typically top or front).
- Attach the three 120mm PWM ARGB fans to the radiator using the provided fan screws. Ensure the fan airflow direction is appropriate for your case's cooling strategy (intake or exhaust).
- Mount the radiator assembly into your PC case using the appropriate screws.

Image 5.1: Fans mounted on the radiator, highlighting their design for efficient airflow.
5.3 CPU Block Installation
- Select the correct mounting brackets for your CPU socket (Intel or AMD).
- Attach the chosen brackets to the pump block.
- Apply a thin, even layer of thermal paste to the CPU IHS.
- Carefully place the pump block onto the CPU, aligning the mounting holes.
- Secure the pump block with the appropriate screws, tightening them in a cross pattern until snug. Do not overtighten.

Image 5.2: Cooler compatibility with various Intel and AMD CPU sockets.
5.4 Cable Connections
- Connect the pump's 3-pin or 4-pin power cable to the CPU_FAN or AIO_PUMP header on your motherboard.
- Connect the fan PWM cables to the CPU_FAN or other available fan headers on your motherboard. If using a fan hub, connect them to the hub.
- Connect the ARGB cables from the fans and pump to an ARGB header (5V 3-pin) on your motherboard or an ARGB controller. Ensure correct polarity.
- Connect the USB cable from the pump block to an available internal USB 2.0 header on your motherboard for display functionality.

Image 5.3: Key features of the DH360D cooler, including connectivity options.
6. Operating Instructions
6.1 Initial Power On
After installation, power on your computer. The fans and pump should start operating. The display on the pump block will activate.
6.2 CPU Monitoring Display
The integrated display on the pump block provides real-time monitoring of CPU temperature (TMP) and CPU utilization (CPU%). It also shows fan RPM and RAM usage. This display is segmented and provides essential system information at a glance.

Image 6.1: Segmented display showing real-time system metrics.
Note: The display is segmented and cannot be customized with images or GIFs.
6.3 ARGB Lighting Control
The ARGB lighting of the fans and pump can be controlled via your motherboard's ARGB software (e.g., ASUS Aura Sync, Gigabyte RGB Fusion, MSI Mystic Light Sync, ASRock Polychrome RGB) if connected to a compatible ARGB header. Refer to your motherboard manual for software installation and usage.

Image 6.2: Example of ARGB lighting synchronization within a PC system.
7. Maintenance
- Dust Cleaning: Periodically clean the radiator fins and fan blades to prevent dust buildup, which can impede cooling performance. Use compressed air or a soft brush.
- Tubing Inspection: Regularly check the tubing for any signs of leaks, kinks, or damage.
- Thermal Paste: While not frequently required, if you remove the CPU block, reapply thermal paste before reinstallation.
8. Troubleshooting
- No Power/Fans Not Spinning:
- Check all power connections to the pump and fans.
- Ensure the pump is connected to the CPU_FAN or AIO_PUMP header.
- Verify fan cables are securely connected to motherboard headers or a fan hub.
- High CPU Temperatures:
- Confirm the pump is running (you may feel a slight vibration or hear a low hum).
- Check if the pump block is securely mounted to the CPU with adequate thermal paste.
- Ensure fans are spinning and oriented correctly for airflow.
- Clean any dust from the radiator fins.
- Display Not Working/No Readings:
- Verify the internal USB 2.0 cable from the pump block is securely connected to the motherboard.
- Check your motherboard BIOS/UEFI settings for USB port configuration.
- Ensure the pump is receiving power.
- ARGB Lighting Not Working/Incorrect Colors:
- Check ARGB cable connections to the motherboard or controller, ensuring correct 5V 3-pin header usage.
- Verify that your motherboard's ARGB software is installed and configured correctly.
- Do not connect 5V ARGB to a 12V RGB header, as this can cause damage.
9. Warranty and Support
The darkFlash DH360D V1.2 Liquid CPU Cooler comes with a 3-year assurance from the date of purchase. This warranty covers manufacturing defects and malfunctions under normal use.
The warranty does not cover:
- Damage caused by improper installation or misuse.
- Unauthorized modifications or repairs.
- Damage from accidents, natural disasters, or power surges.
For technical support, warranty claims, or further assistance, please contact darkFlash customer service through their official website or the retailer where the product was purchased. Please have your proof of purchase and product model number ready.
For more information, visit the official darkFlash website: www.darkflash.com


