1. Introduction
This manual provides instructions for the safe and efficient operation, maintenance, and troubleshooting of your COWAY Airmega 450 Air Purifier. Please read this manual thoroughly before using the appliance and retain it for future reference.
The Airmega 450 is designed to improve indoor air quality by filtering various airborne particles and odors. Key features include HyperVortex air technology, a 3-in-1 custom filter system, real-time air quality monitoring, and multiple smart operating modes.
2. Safety Information
Observe the following safety precautions to reduce the risk of electric shock, fire, or injury.
- Do not operate the appliance with a damaged power cord or plug.
- Do not place the appliance near heat sources or in direct sunlight.
- Ensure the appliance is placed on a stable, level surface.
- Keep the air intake and outlet clear of obstructions.
- Unplug the appliance before cleaning or performing any maintenance.
- Do not allow children to operate or play with the appliance.
- Do not use the appliance in wet or damp environments.
3. Package Contents
Verify that all items are present in the package:
- COWAY Airmega 450 Air Purifier Unit
- 3-in-1 Filter Set (pre-installed or separately packaged)
- User Manual
4. Product Overview
The COWAY Airmega 450 features a cylindrical design with a top-mounted control panel and 360-degree air intake. The unit utilizes HyperVortex air technology for efficient air circulation.
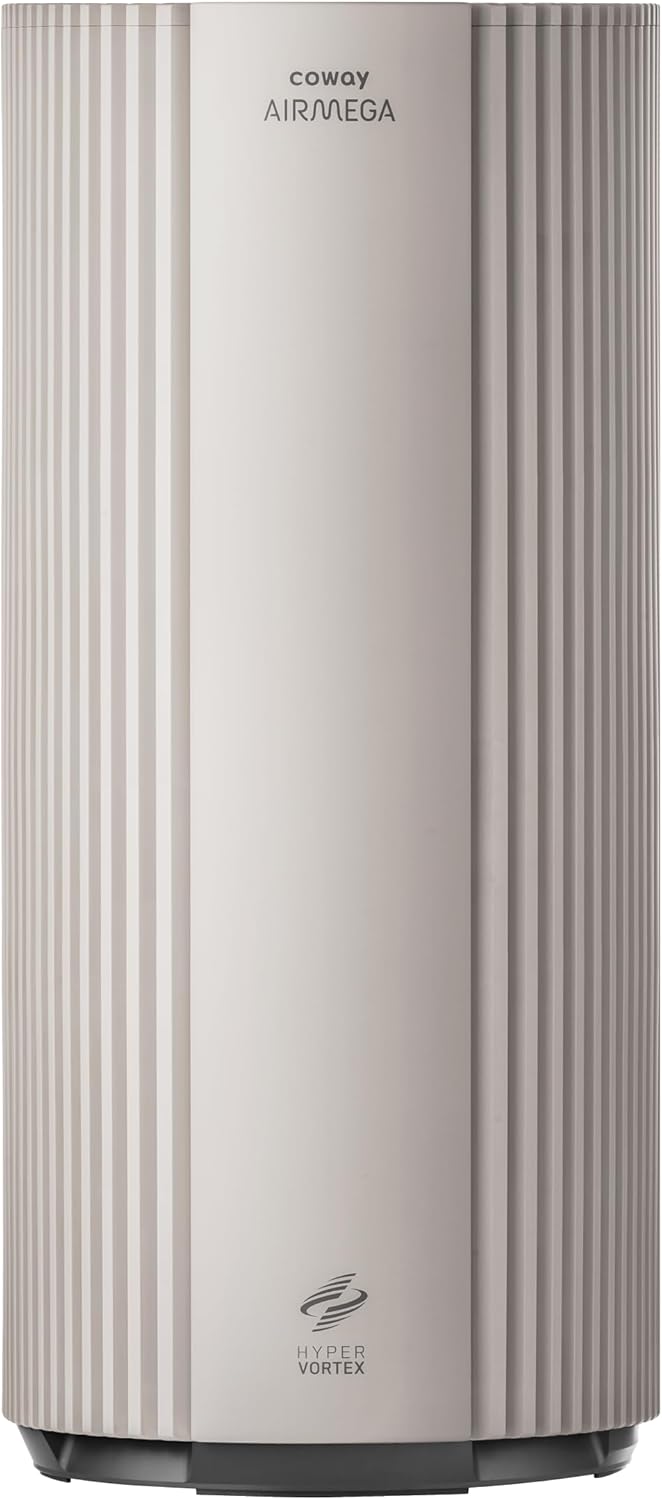
Figure 4.1: Front view of the COWAY Airmega 450 Air Purifier.

Figure 4.2: Overview of Airmega 450 key features.
4.1. HyperVortex Air Technology
The HyperVortex system integrates an Eagle Vane, Vortex Generator Fan, and Dimple Duct to optimize airflow, enhance filtration, and minimize air loss. This design contributes to rapid air purification and quiet operation.
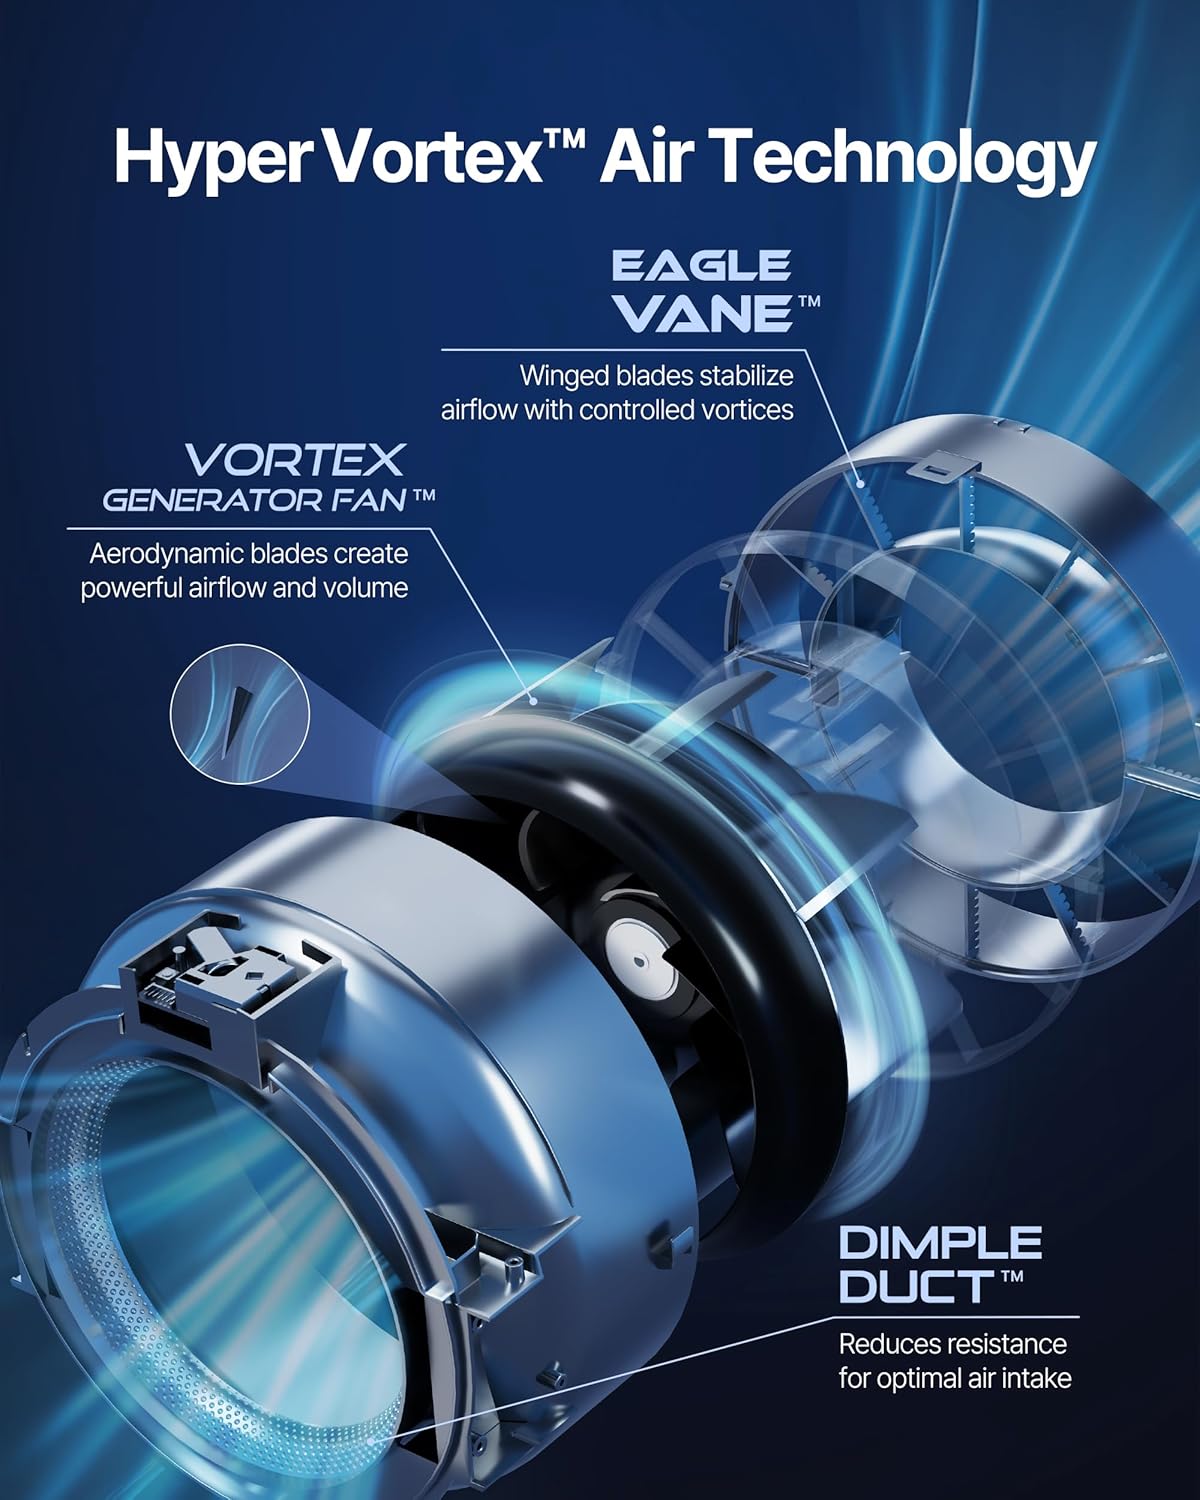
Figure 4.3: HyperVortex Air Technology components.
4.2. 3-in-1 Custom Filter System
The Airmega 450 uses a multi-stage filtration system to capture various pollutants. The standard filter included is the Fresh Starter+ filter. Other custom filters (Allergen+ and Intense Smoke+) can be purchased separately to address specific air quality concerns.

Figure 4.4: Available 3-in-1 Custom Filters.
4.3. Control Panel
The intuitive control panel is located on the top of the unit, providing access to all functions and displaying air quality information.

Figure 4.5: Intuitive Control Panel.
5. Setup
5.1. Unpacking
- Carefully remove the air purifier from its packaging.
- Remove all protective materials and plastic bags.
5.2. Filter Installation
The 3-in-1 filter may come pre-installed but wrapped in plastic for protection. Ensure the plastic wrapping is removed before use.
- Open the filter cover. Refer to the diagram below for guidance.
- If the filter is wrapped, remove the plastic packaging from the 3-in-1 filter.
- Insert the filter into the unit, ensuring it is seated correctly.
- Close the filter cover securely.

Figure 5.1: Filter Replacement Steps.
5.3. Placement
Place the air purifier on a firm, level surface. For optimal performance, ensure there is adequate space around the unit for air circulation (at least 6-12 inches from walls or furniture).
5.4. Power Connection
Plug the power cord into a standard electrical outlet.
6. Operating Instructions
6.1. Power On/Off
Press the Power button on the control panel to turn the unit on or off.
6.2. Smart Modes
The Airmega 450 offers four smart modes to adapt to your environment:
- Auto Mode: Automatically adjusts fan speed based on real-time air quality readings.
- Sleep Mode: Operates quietly with minimal fan speed and dimmed lights for undisturbed rest.
- Turbo Mode: Activates maximum fan speed for rapid air purification.
- Eco Mode: Optimizes energy consumption by operating at the lowest airflow and increasing only when air quality requires it.
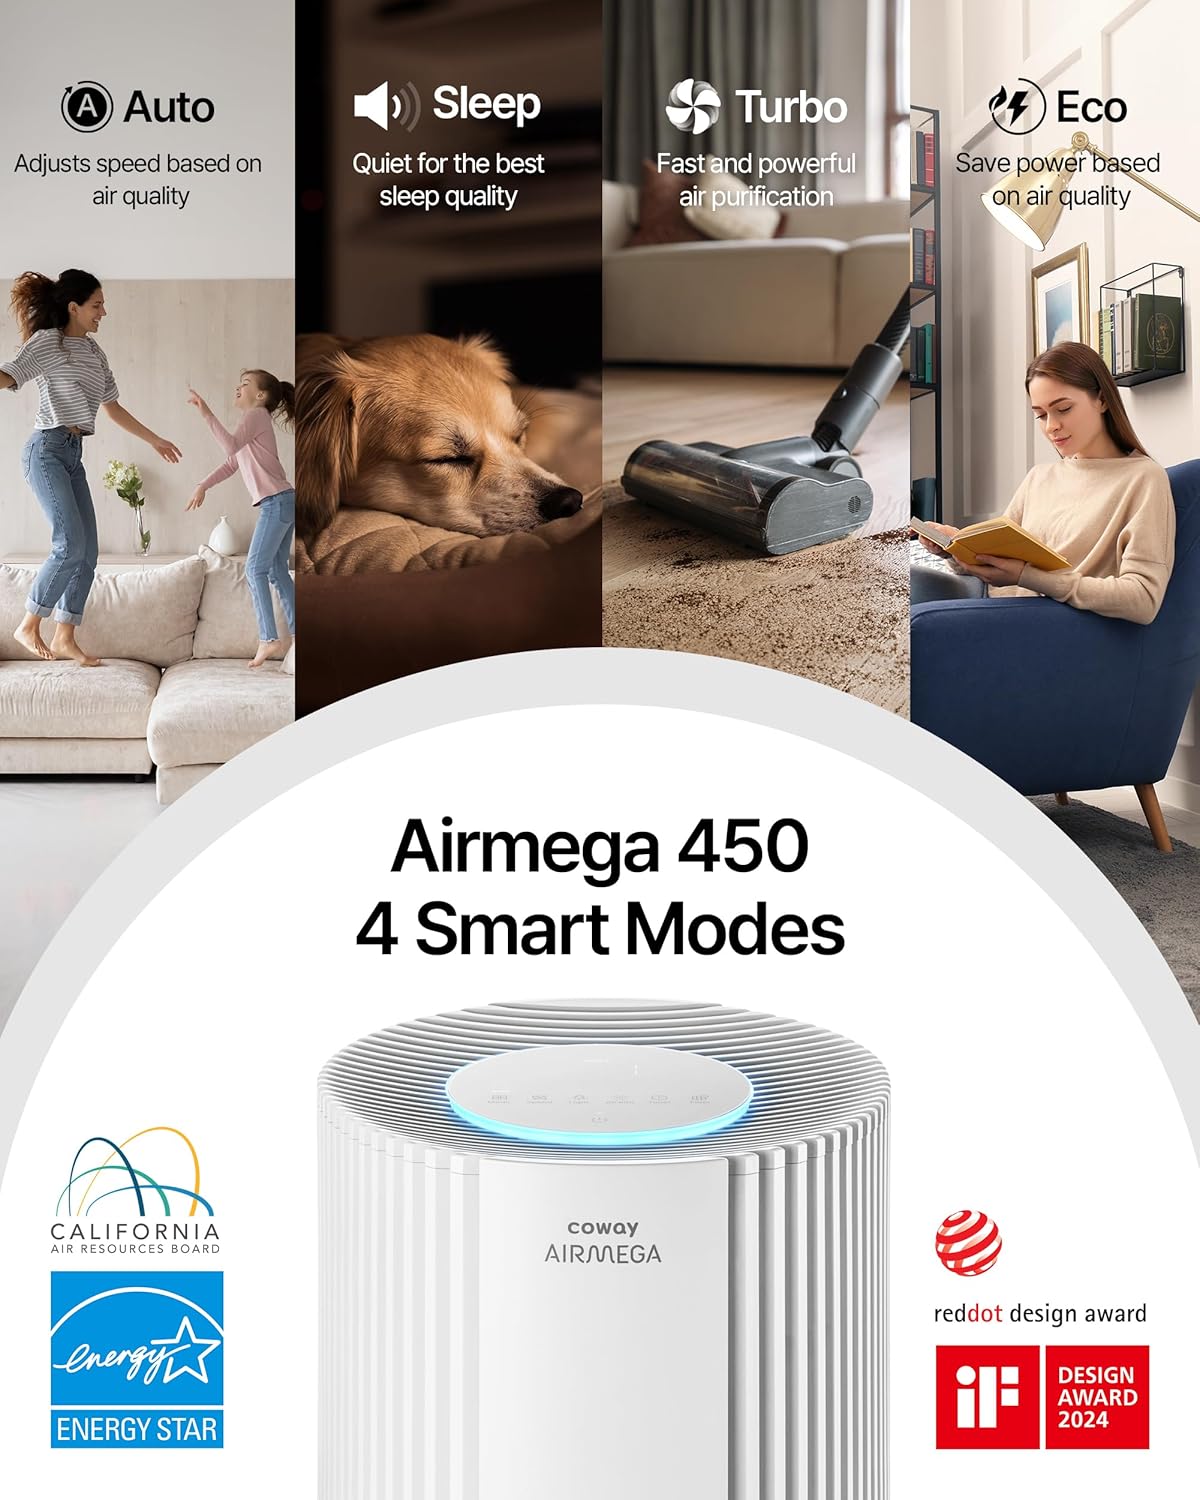
Figure 6.1: Airmega 450 Smart Modes.
6.3. Real-time Air Quality Indicator (AQI)
The unit continuously monitors air quality and displays it via a color-coded LED ring on the control panel. The colors indicate different levels of air quality (e.g., blue for good, red for poor).
6.4. Additional Features
- Timer: Set the unit to operate for a specified duration (up to 24 hours).
- Night Light: The LED ring can function as a night light.
- Button Mute: Silence button press sounds.
- Control Panel Lock: Prevents accidental changes to settings.
- Hidden Wheels: For easy relocation of the unit.

Figure 6.2: Convenience Features.
7. Maintenance
7.1. Pre-filter Cleaning
The pre-filter captures larger particles and should be cleaned regularly (e.g., every 2-4 weeks) to maintain efficiency.
- Unplug the air purifier.
- Open the filter cover and remove the pre-filter.
- Use a vacuum cleaner or soft brush to remove dust and debris from the pre-filter.
- Reinstall the clean pre-filter and close the cover.
7.2. 3-in-1 Filter Replacement
The 3-in-1 filter has a limited lifespan and requires replacement when indicated by the filter replacement indicator light on the control panel. The typical lifespan is approximately 12 months, but this can vary based on usage and air quality.
- Unplug the air purifier.
- Open the filter cover.
- Remove the old 3-in-1 filter.
- Unpack the new genuine COWAY 3-in-1 filter.
- Insert the new filter into the unit, ensuring proper orientation.
- Close the filter cover.
- Plug in the air purifier.
- Press and hold the Filter Reset button for 3 seconds to reset the filter life indicator.

Figure 7.1: 3-Stage Filtration System.
Using genuine COWAY replacement filters is recommended to ensure optimal performance and maintain warranty validity.

Figure 7.2: Importance of Genuine Filters.
8. Troubleshooting
If you encounter issues with your Airmega 450, refer to the table below for common problems and solutions.
| Problem | Possible Cause | Solution |
|---|---|---|
| Unit does not power on. | Power cord not securely plugged in. No power from outlet. | Check power cord connection. Test outlet with another device. |
| Poor air purification performance. | Filters are dirty or clogged. Filter plastic wrapping not removed. Air intake/outlet blocked. | Clean the pre-filter. Replace the 3-in-1 filter. Ensure all filter packaging is removed. Clear obstructions. |
| Unusual noise from the unit. | Filter not installed correctly. Foreign object inside. Unit not on a level surface. | Reinstall filter. Check for foreign objects (unplug first). Place on a stable surface. |
| Air quality indicator always shows poor. | Sensor is dirty. High levels of pollutants in the environment. | Clean the air quality sensor (refer to maintenance section for sensor cleaning, if applicable). Continue operation in Turbo mode if necessary. |
If the problem persists after attempting these solutions, please contact customer support.
9. Specifications
| Feature | Detail |
|---|---|
| Model Number | AP-2524B |
| Product Dimensions (D x W x H) | 13.4"D x 13.4"W x 29.6"H |
| Item Weight | 24.9 pounds |
| Floor Area Coverage | Up to 3,285 Square Feet (based on 1 air change per hour) |
| Noise Level | 20 dB (minimum) |
| Wattage | 72 watts |
| Filter Type | 3-in-1 Custom Filter (Pre-filter, True HEPA, Activated Carbon) |
| Particle Retention Size | 0.01 Micrometer |
| Controller Type | Touch |
| Special Features | Filter Life Indicator, Real Time Air Quality Indicator, Smart Mode |
| Certifications | CARB Certified, ETL Certified, Energy Star Certified |
10. Warranty Information
The COWAY Airmega 450 Air Purifier is backed by a 3-year Manufacturer's Limited Warranty. This warranty covers defects in materials and workmanship under normal use.
For detailed terms and conditions, including coverage specifics and how to make a claim, please refer to the warranty card included with your product or visit the official Coway website.
11. Customer Support
If you have questions, require technical assistance, or need to report an issue that cannot be resolved using the troubleshooting guide, please contact Coway customer support.
Contact information can typically be found on the Coway official website or on the product packaging.


