
1. Introduction
Thank you for choosing the TRIUMPHKEY 3x9x2.6M Outdoor Canopy Tent. This manual provides essential information for the safe and efficient assembly, operation, and maintenance of your canopy tent. Please read these instructions carefully before setup and retain them for future reference.
2. Safety Instructions
- Weather Conditions: Do not use the canopy tent in severe weather conditions such as strong winds, heavy rain, snow, or thunderstorms. Disassemble and store the tent to prevent damage and ensure safety.
- Fire Hazard: Keep all flame and heat sources away from the canopy fabric. The fabric is not fireproof.
- Assembly: Always assemble the tent with at least two people. Ensure all connections are secure and the tent is properly anchored to the ground.
- Sharp Objects: Avoid contact with sharp objects that could puncture or tear the canopy fabric or sidewalls.
- Overhead Obstructions: Ensure there are no overhead obstructions (e.g., tree branches, power lines) that could interfere with the tent during setup or use.
- Children: Keep children away from the assembly area to prevent injuries.
3. Package Contents
Before beginning assembly, verify that all components are present and undamaged. If any parts are missing or damaged, please contact customer support.
- Steel Frame Poles
- Connectors
- Canopy Fabric (Roof)
- Removable Sidewalls (7 pieces, 6 with transparent windows)
- Fixed Ropes
- Ground Stakes
- Connecting Buckles
- Instruction Manual

Image 3.1: Key components of the TRIUMPHKEY canopy tent, illustrating the support frame, connectors, fixed rope, connecting buckle, and zipper for sidewalls.
4. Setup Instructions
Assembly typically requires 2-3 people and takes approximately 15 minutes. No additional tools are required.
- Unpack and Sort: Carefully unpack all components and lay them out. Identify all frame poles, connectors, canopy fabric, and sidewalls.
- Assemble the Frame: Connect the steel frame poles using the provided connectors. Ensure each connection is secure.
- Attach the Canopy: Drape the canopy fabric over the assembled frame. Ensure it is centered and aligned correctly.
- Extend and Secure: Fully extend the frame and press down in the center to lock it into place. Adjust the height as desired. Secure the canopy fabric to the frame using the integrated fasteners.
- Install Sidewalls: Attach the removable sidewalls to the frame using the connecting buckles and zippers. You can choose to install all sidewalls for full enclosure or remove them for increased ventilation and open space.
- Anchor the Tent: Use the fixed ropes and ground stakes to firmly anchor the tent to the ground, especially in outdoor environments, to enhance stability.

Image 4.1: Visual representation of the canopy tent's easy and quick assembly, emphasizing its user-friendly design.
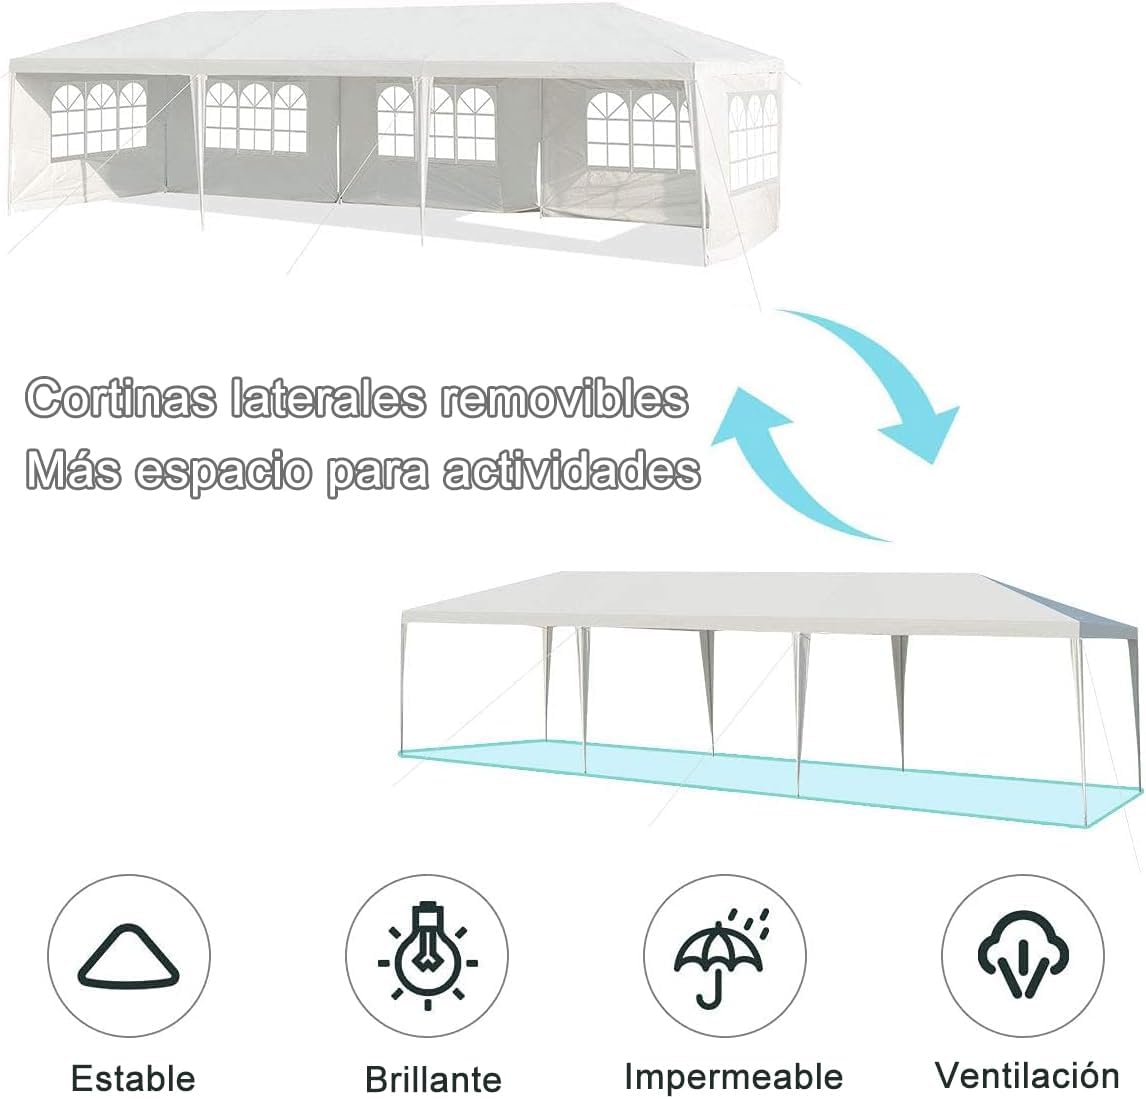
Image 4.2: The canopy tent with removable sidewalls, demonstrating its adaptability for various activities and highlighting key features such as stability, light transmission, waterproofing, and ventilation.
5. Operating Instructions
Your TRIUMPHKEY canopy tent is designed for versatility in various outdoor settings.
- Event Shelter: Utilize the spacious 3x9 meter area for gatherings, parties, weddings, or as a temporary shelter for outdoor dining.
- Sun Protection: The high-quality Oxford fabric with a thick silver coating provides effective UV protection, blocking harmful sun rays.
- Water Resistance: The canopy features heat-sealed technology to prevent water infiltration, and its design helps prevent rainwater from pooling on the top.
- Flexible Sidewalls: The 7 removable sidewalls allow you to adapt the tent to different weather conditions. Install them to block cold air, direct sunlight, or rain, or remove them for optimal ventilation and an open-air feel.
- Portability: The tent is designed for easy transport and can fit into most car trunks, making it suitable for various outdoor activities and events.

Image 5.1: The TRIUMPHKEY canopy tent configured for an outdoor event, showcasing its spacious interior and decorative potential.

Image 5.2: Examples of the canopy tent's versatility for different outdoor events, including barbecues, parties, and weddings.
6. Maintenance and Care
- Cleaning: Clean the canopy fabric and sidewalls with mild soap and water. Do not use harsh detergents or abrasive cleaners, as these can damage the material and its protective coatings. Rinse thoroughly and allow to air dry completely before storage.
- Drying: Ensure all components, especially the fabric, are completely dry before folding and storing. Storing damp fabric can lead to mildew and degradation.
- Storage: Store the tent in a cool, dry place, away from direct sunlight and extreme temperatures. Keep it in its original packaging or a suitable storage bag to protect it from dust and damage.
- Frame Inspection: Periodically inspect the steel frame poles and connectors for any signs of rust, bending, or damage. Replace any compromised parts to maintain structural integrity.
7. Troubleshooting
- Tent Instability: Ensure all frame connections are fully engaged and locked. Verify that the tent is properly anchored with all ropes and stakes. In windy conditions, additional anchoring may be necessary.
- Water Pooling on Roof: Check that the canopy fabric is taut and evenly distributed over the frame. Ensure the frame is fully extended and at its maximum height to allow for proper water runoff.
- Difficulty with Sidewall Zippers: Ensure the zippers are clean and free of debris. Apply a silicone-based lubricant if they are stiff. Avoid forcing zippers.
- Missing or Damaged Parts: Refer to the package contents list. If parts are missing or damaged upon arrival, contact customer support immediately for assistance.
8. Specifications
| Feature | Detail |
|---|---|
| Brand | TRIUMPHKEY |
| Model | 3x9x2.6M |
| Color | White |
| Dimensions (L x W x H) | 9 meters x 3 meters x 2.6 meters |
| Frame Material | Alloy Steel |
| Canopy/Sidewall Material | Steel Tube + PE Fabric (Oxford fabric with silver coating) |
| UV Protection | Yes |
| Water Resistance Level | Water Resistant |
| Number of Sidewalls | 7 (6 with transparent windows) |
| Package Dimensions | 115 x 31 x 24.5 cm |
| Package Weight | 21.68 kg |

Image 8.1: Detailed dimensions of the TRIUMPHKEY canopy tent.
9. Warranty and Support
For any questions, concerns, or issues regarding your TRIUMPHKEY 3x9x2.6M Outdoor Canopy Tent, please refer to the retailer's return policy or contact the manufacturer directly. Keep your purchase receipt as proof of purchase for any warranty claims.