1. Introduction
Thank you for choosing the ieGeek 4G LTE Solar Outdoor Security Camera. This camera is designed for outdoor surveillance in locations without access to Wi-Fi or stable power sources, utilizing 4G LTE communication and solar power. It features high-resolution imaging, PTZ (Pan-Tilt-Zoom) functionality, PIR motion detection, and night color recording capabilities. This manual provides essential information for setting up, operating, maintaining, and troubleshooting your camera to ensure optimal performance.
2. Product Overview
2.1 Package Contents
- Camera Body x 1
- 5W Solar Panel x 1
- Camera Mounting Bracket x 1
- Solar Panel Mounting Bracket x 1
- Screws and Anchors x 7 sets
- Power Cable x 1
- User Manual (Japanese) x 1
- Pin Set x 1
- SIM Card x 1
- 64GB Micro SD Card x 1
- Drilling Position Stickers x 2
2.2 Camera Components
The image below illustrates the main components included with your ieGeek 4G LTE Solar Outdoor Security Camera, including the camera unit, solar panel, and essential accessories.

Figure 2.2.1: Main product image showing the ieGeek 4G LTE Solar Outdoor Security Camera, its 5W solar panel, and a smartphone displaying live feed.

Figure 2.2.2: Detailed view of the camera's components, including the camera body, solar panel, mounting hardware, and included SIM and SD cards.
3. Setup
3.1 SIM Card and SD Card Installation
- Locate the SIM card slot and Micro SD card slot on the camera body.
- Insert the provided SIM card into the SIM card slot, ensuring correct orientation.
- Insert the provided 64GB Micro SD card into the Micro SD card slot.
- Close the protective cover securely to ensure weather resistance.
3.2 Mounting the Camera and Solar Panel
The camera and solar panel can be mounted on a wall or ceiling. Choose a location that receives ample sunlight for the solar panel and provides the desired surveillance view for the camera.
- Use the drilling position stickers to mark the screw holes on your chosen mounting surface.
- Drill holes and insert the anchors.
- Attach the camera mounting bracket and solar panel mounting bracket using the provided screws.
- Secure the camera and solar panel to their respective brackets.
- Connect the solar panel cable to the camera's charging port.

Figure 3.2.1: Illustration of the camera and solar panel installation process on an outdoor wall, showing the connection cable.
3.3 App Download and Initial Setup
Download the dedicated ieGeek app to your smartphone or tablet for remote control and monitoring. Follow the in-app instructions for initial camera pairing and configuration.
- Scan the QR code in the manual or search for the ieGeek app in your device's app store.
- Create an account and log in.
- Follow the on-screen prompts to add your camera. This typically involves scanning a QR code on the camera or entering its serial number.
- Once connected, you can access live view and configure settings.
4. Operating Instructions
4.1 Live View and PTZ Control
Access the live feed from your camera via the ieGeek app. Use the PTZ (Pan-Tilt-Zoom) controls within the app to adjust the camera's viewing angle remotely. The camera offers 360° horizontal rotation and vertical movement.

Figure 4.1.1: Demonstrates the 360-degree pan and 90-degree tilt capabilities of the camera, controlled via a smartphone app.
4.2 Motion Detection and Alerts
The camera is equipped with a PIR (Passive Infrared) sensor for accurate human and animal motion detection. When motion is detected, the camera will automatically record and send instant alerts to your smartphone.

Figure 4.2.1: Shows the camera's PIR motion detection in action, capturing a cat on a car, and illustrating the night color recording feature.
You can customize detection areas, sensitivity, and alarm schedules within the app to minimize false alarms.
4.3 Night Vision and Alarm Functions
The camera features both infrared and white LED lights, enabling clear night vision and full-color recording even in low-light conditions. It also includes sound and light alarm functions to deter intruders.
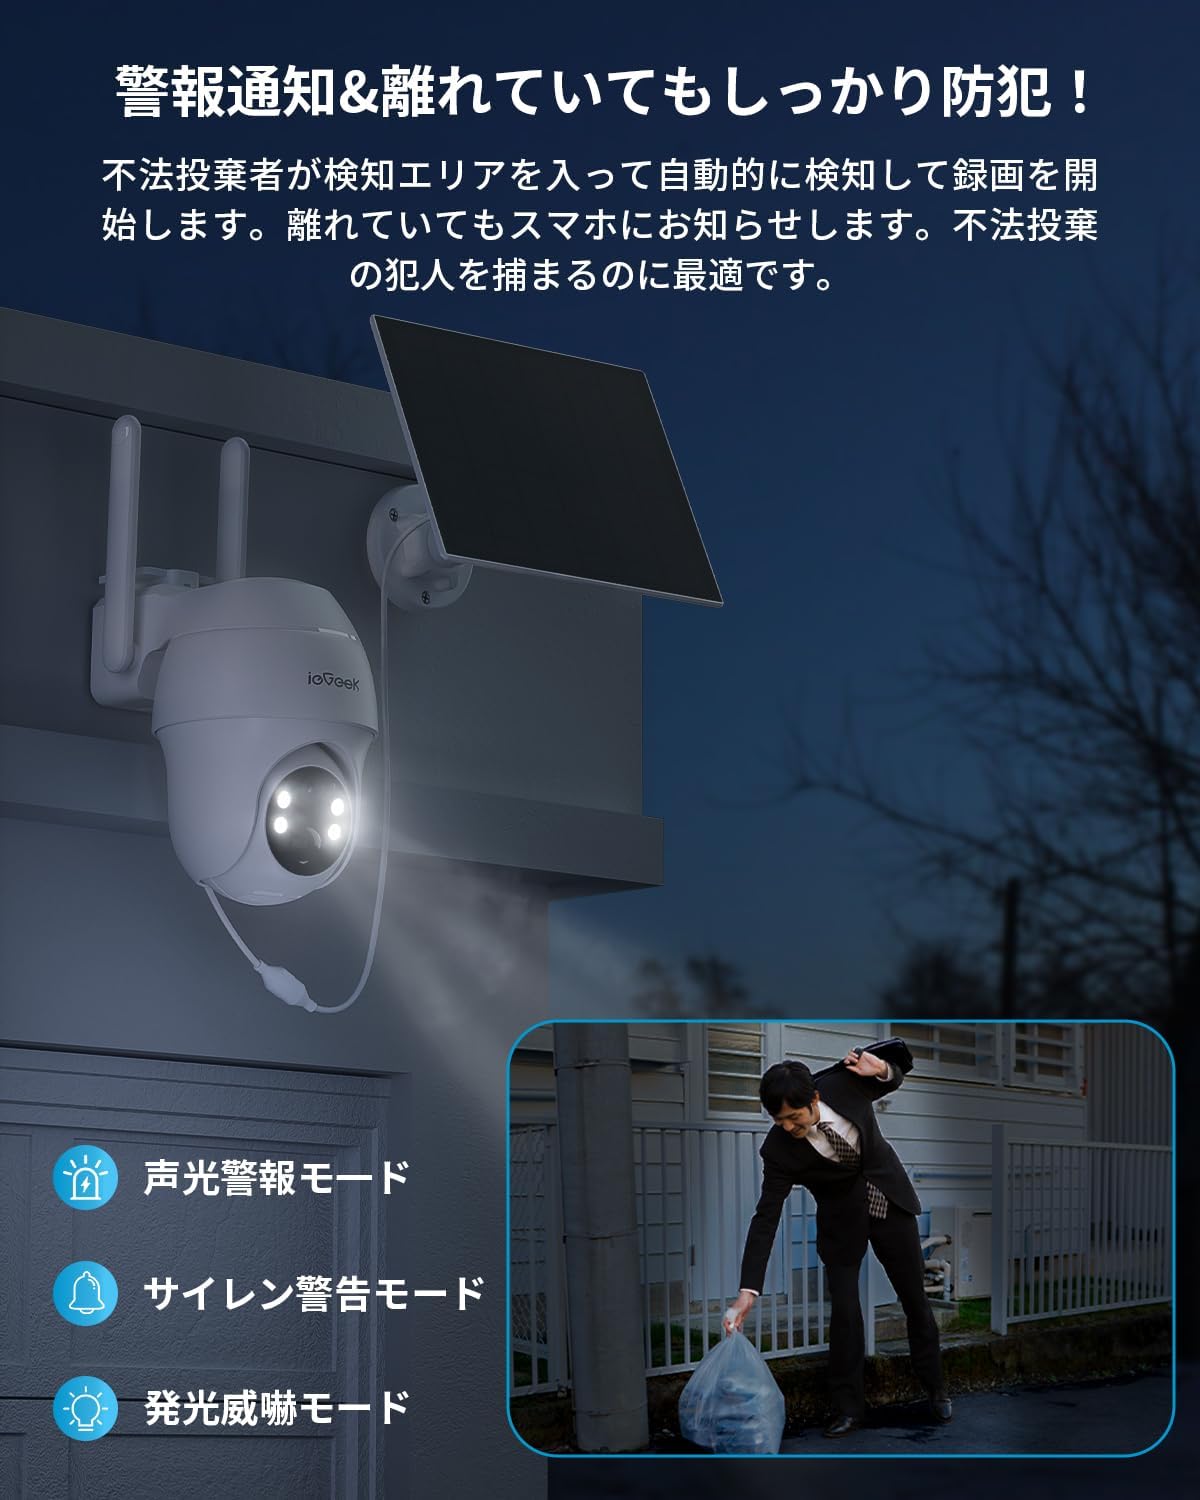
Figure 4.3.1: Depicts the camera's alarm modes, including sound alarm, siren alarm, and flashing light deterrence, useful for preventing illegal dumping.
4.4 Two-Way Audio Communication
With a built-in microphone and speaker, the camera supports two-way audio, allowing you to communicate with people on the camera's end via the app. This is useful for interacting with visitors or deterring unwanted individuals.

Figure 4.4.1: Illustrates the two-way audio communication feature, showing a person speaking through the camera to someone at the location.
5. Maintenance
5.1 Solar Panel Cleaning
To ensure efficient charging, regularly clean the surface of the solar panel. Dust, dirt, and debris can reduce its charging efficiency. Use a soft, damp cloth to gently wipe the panel.
5.2 Battery Management
The camera is equipped with a 15000mAh battery. The solar panel is designed to keep the battery charged under normal sunlight conditions. Monitor the battery level via the app. If the battery level is consistently low, ensure the solar panel is clean and positioned to receive maximum sunlight.
5.3 SD Card Management
The included 64GB Micro SD card stores recorded footage. The camera supports loop recording, meaning older footage will be overwritten when the card is full. Regularly back up important recordings to prevent data loss. You can view and download recordings directly from the app.
5.4 Weather Resistance
The camera has an IP66 waterproof rating, designed to withstand various weather conditions including rain, snow, and extreme temperatures (-20°C to 50°C). While robust, avoid direct high-pressure water jets on the camera.
6. Troubleshooting
- Camera not connecting to 4G LTE: Ensure the SIM card is correctly inserted and activated. Check if the area has 4G LTE coverage. Restart the camera.
- No recording or alerts: Check motion detection settings in the app. Ensure the SD card is properly inserted and not full. Format the SD card if necessary.
- Poor image quality: Clean the camera lens. Ensure there are no obstructions in the camera's view. Check the app for resolution settings.
- Battery not charging: Ensure the solar panel is clean and receiving direct sunlight. Check the connection cable between the solar panel and the camera.
- Two-way audio not working: Check microphone and speaker permissions in your phone's app settings. Ensure volume levels are adequate.
If you encounter persistent issues, please refer to the support section for contact information.
7. Specifications
| Model Number | S11 |
| Color | White |
| Wireless Communication Technology | SIM Card Compatible (4G LTE) |
| Field of View | 95 degrees |
| Night Vision Range | 15 meters |
| Frame Rate | 25 fps |
| Product Dimensions (LxWxH) | 16 x 15 x 9 cm |
| Water Resistance Level | IP66 (Waterproof) |
| Product Weight | 1.2 kg |
| Recommended Use | Outdoor Security, Wildlife Monitoring |
| Power Source | Solar Powered |
| Mounting Type | Wall Mount |
| Video Capture Resolution | 1440p (3MP) |
8. Warranty and Support
ieGeek offers a 24-month warranty period for this product, with an additional 12-month extended protection plan available. We are committed to 100% high quality and reliability.
Should you encounter any issues or require assistance, please do not hesitate to contact our official support team via email. We are ready to provide new product exchanges or refunds if necessary.
For support, please visit the ieGeek store on Amazon or refer to the contact information provided in your product packaging.