
1. Important Safety Instructions
Please read all instructions carefully before using the Ajgvq Mini Cotton Candy Machine. Failure to follow these instructions may result in electric shock, fire, or serious injury.
- Electrical Safety: Ensure the machine is connected to a grounded outlet. Do not immerse the power cord, plug, or machine base in water or other liquids. Unplug the machine when not in use and before cleaning.
- Hot Surfaces: The heating element and spinner head become very hot during operation. Avoid direct contact with these parts. Allow the machine to cool completely before handling or cleaning.
- Child Supervision: This appliance is not intended for use by children without adult supervision. Keep children and pets away from the machine during operation.
- Proper Use: Use only granulated sugar, flossing sugar, or hard candies as specified. Do not use other substances, as they may damage the machine or pose a safety risk.
- Stable Placement: Always operate the machine on a stable, flat, heat-resistant surface. Ensure the non-slip feet are securely placed.
- Ventilation: Do not block the ventilation openings on the bottom of the machine.
- Maintenance: Do not attempt to repair the machine yourself. Contact customer support for assistance.
2. Package Contents
Verify that all items are present in the package:
- 1 x Ajgvq Mini Cotton Candy Machine
- 1 x Sugar Scoop
- 1 x User Manual
3. Product Specifications
| Feature | Specification |
|---|---|
| Model Number | SM-500A |
| Dimensions (Package) | 12 x 11.7 x 10 inches |
| Item Weight | 3.39 pounds |
| Power | 500W |
| Motor Speed | 3000 R/M |

Figure 3.1: Product dimensions and packaging details.

Figure 3.2: Motor specifications and quiet operation feature.
4. Product Overview
The Ajgvq Mini Cotton Candy Machine features a user-friendly design for easy assembly, operation, and cleaning. Key components are designed for safety and efficiency.

Figure 4.1: Exploded view of the cotton candy machine components.
Components:
- Top Splashproof Bowl: Transparent cover to contain sugar floss.
- Sugar Silo/Rotating Head: Where sugar is placed and spun into floss.
- Food Grade Material Bowl: The main collection bowl for cotton candy.
- Quartz Heating Tube: Heats the sugar to create floss.
- Handle: For easy portability.
- Suction Cup Base: Provides stability during operation.
- Power Switch: On/Off control.

Figure 4.2: Power Switch.
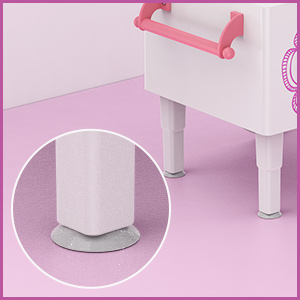
Figure 4.3: Non-slip base for stability.
5. Setup
Follow these steps to set up your cotton candy machine:
- Unpack: Carefully remove all components from the packaging.
- Placement: Place the main unit on a stable, flat, heat-resistant surface. Ensure the suction cup feet are firmly attached to the surface.
- Assemble Bowl: Place the food-grade material bowl onto the main unit, ensuring it is seated correctly.
- Insert Rotating Head: Place the sugar silo/rotating head into the center of the heating element.
- Attach Splashproof Cover: Secure the top splashproof bowl over the main bowl.
- Power Connection: Plug the power cord into a standard electrical outlet.
6. Operating Instructions
Creating delicious cotton candy is simple with these steps:
- Turn On: Flip the power switch to the 'ON' position.
- Preheat: Allow the machine to preheat for 3-5 minutes. This ensures the heating element reaches the optimal temperature for sugar melting.
- Turn Off: Briefly turn the machine OFF before adding sugar.
- Add Sugar: Using the provided sugar scoop, pour one scoop of granulated sugar, flossing sugar, or crushed hard candies directly into the center sugar silo/rotating head. Do not overfill.
- Restart: Turn the machine back ON.
- Collect Cotton Candy: After 30-60 seconds, sugar floss will begin to appear. Use a cotton candy stick (not included) to collect the floss by rotating it around the rim of the bowl.
- Enjoy: Continue collecting until all the sugar is spun. Turn off the machine when finished.

Figure 6.1: Step-by-step guide to making cotton candy.

Figure 6.2: Quick heating and preheating instructions.
Sugar Types:
This machine is compatible with various sugar types:
- Flossing Sugars
- Hard Candies (crushed)
- Granulated Sugar
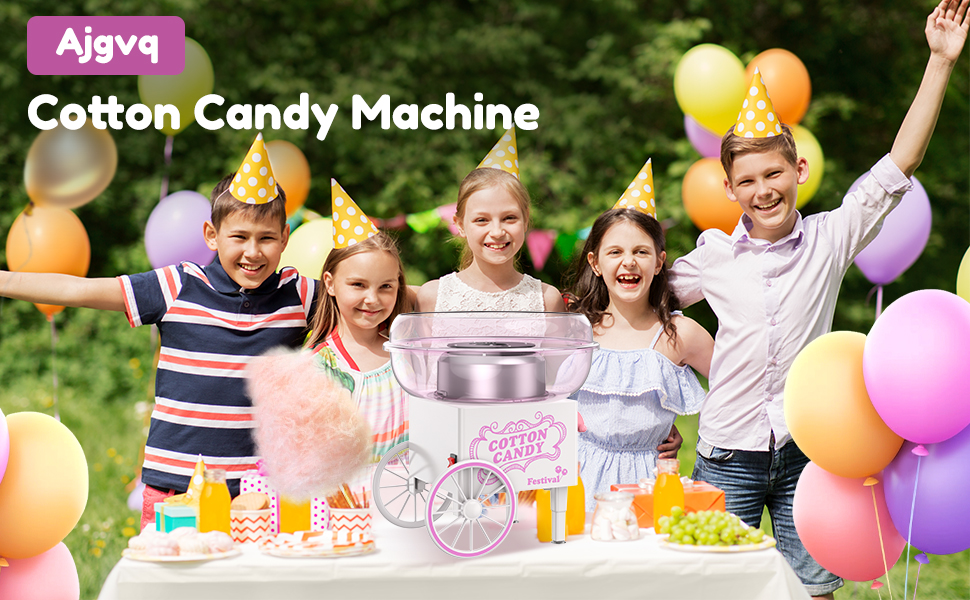
Figure 6.3: Acceptable sugar types for use.
7. Cleaning and Maintenance
Regular cleaning ensures optimal performance and longevity of your machine. Always ensure the machine is unplugged and completely cool before cleaning.
- Disassemble: Remove the top splashproof bowl, the main collection bowl, and the sugar silo/rotating head from the main unit.
- Wash Detachable Parts: The bowls and rotating head are detachable and can be rinsed with warm water and mild soap. Ensure all sugar residue is removed.
- Wipe Main Unit: Use a damp cloth to wipe down the exterior of the main unit. Do not immerse the main unit in water.
- Dry Thoroughly: Ensure all parts are completely dry before reassembling or storing the machine.
- Storage: Store the machine in a cool, dry place.
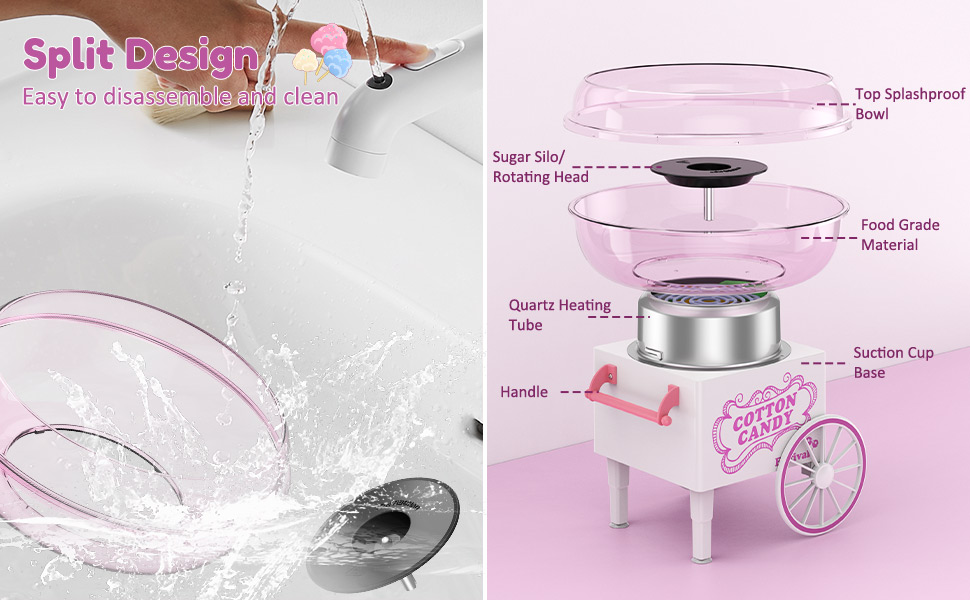
Figure 7.1: Cleaning the detachable components.
8. Troubleshooting
If you encounter issues with your cotton candy machine, refer to the following common problems and solutions:
- Machine Not Turning On:
- Ensure the power cord is securely plugged into a working outlet.
- Check if the power switch is in the 'ON' position.
- No Cotton Candy Produced / Sugar Not Spinning:
- Ensure the machine has preheated for the recommended 3-5 minutes. Insufficient preheating will prevent sugar from melting properly.
- Verify that sugar is placed directly into the center sugar silo/rotating head, not on the heating element itself.
- Do not overfill the sugar silo. Use only one scoop at a time.
- Ensure the sugar silo/rotating head is clean and free of old, hardened sugar residue.
- Cotton Candy is Hard or Granular:
- This usually indicates insufficient preheating. Allow the machine to preheat longer.
- Ensure the sugar used is suitable (granulated, flossing, or crushed hard candies).
- Excessive Noise:
- Ensure the machine is on a stable, flat surface.
- Check that all detachable parts are correctly assembled and secured.
9. Warranty and Customer Support
Your Ajgvq Mini Cotton Candy Machine is designed for reliability and performance. If you have any questions, concerns, or require assistance, please do not hesitate to contact our customer service team.
For support, please refer to the contact information provided with your purchase or visit the official Ajgvq store on Amazon:
We are committed to providing high-quality products and humanized services to ensure your sweet happiness and memories.