
1. Product Overview
The kuayvan 4-Channel Dash Cam is an advanced vehicle recording system designed to provide comprehensive surveillance of your surroundings. Featuring four independent lenses, it captures a 360° view around your vehicle, including front, rear, left, and right perspectives. This dash cam integrates cutting-edge technologies such as 5G WiFi connectivity, enhanced night vision, a G-Sensor for incident detection, and a 24/7 parking mode, ensuring reliable and detailed video evidence for various driving and parking scenarios.
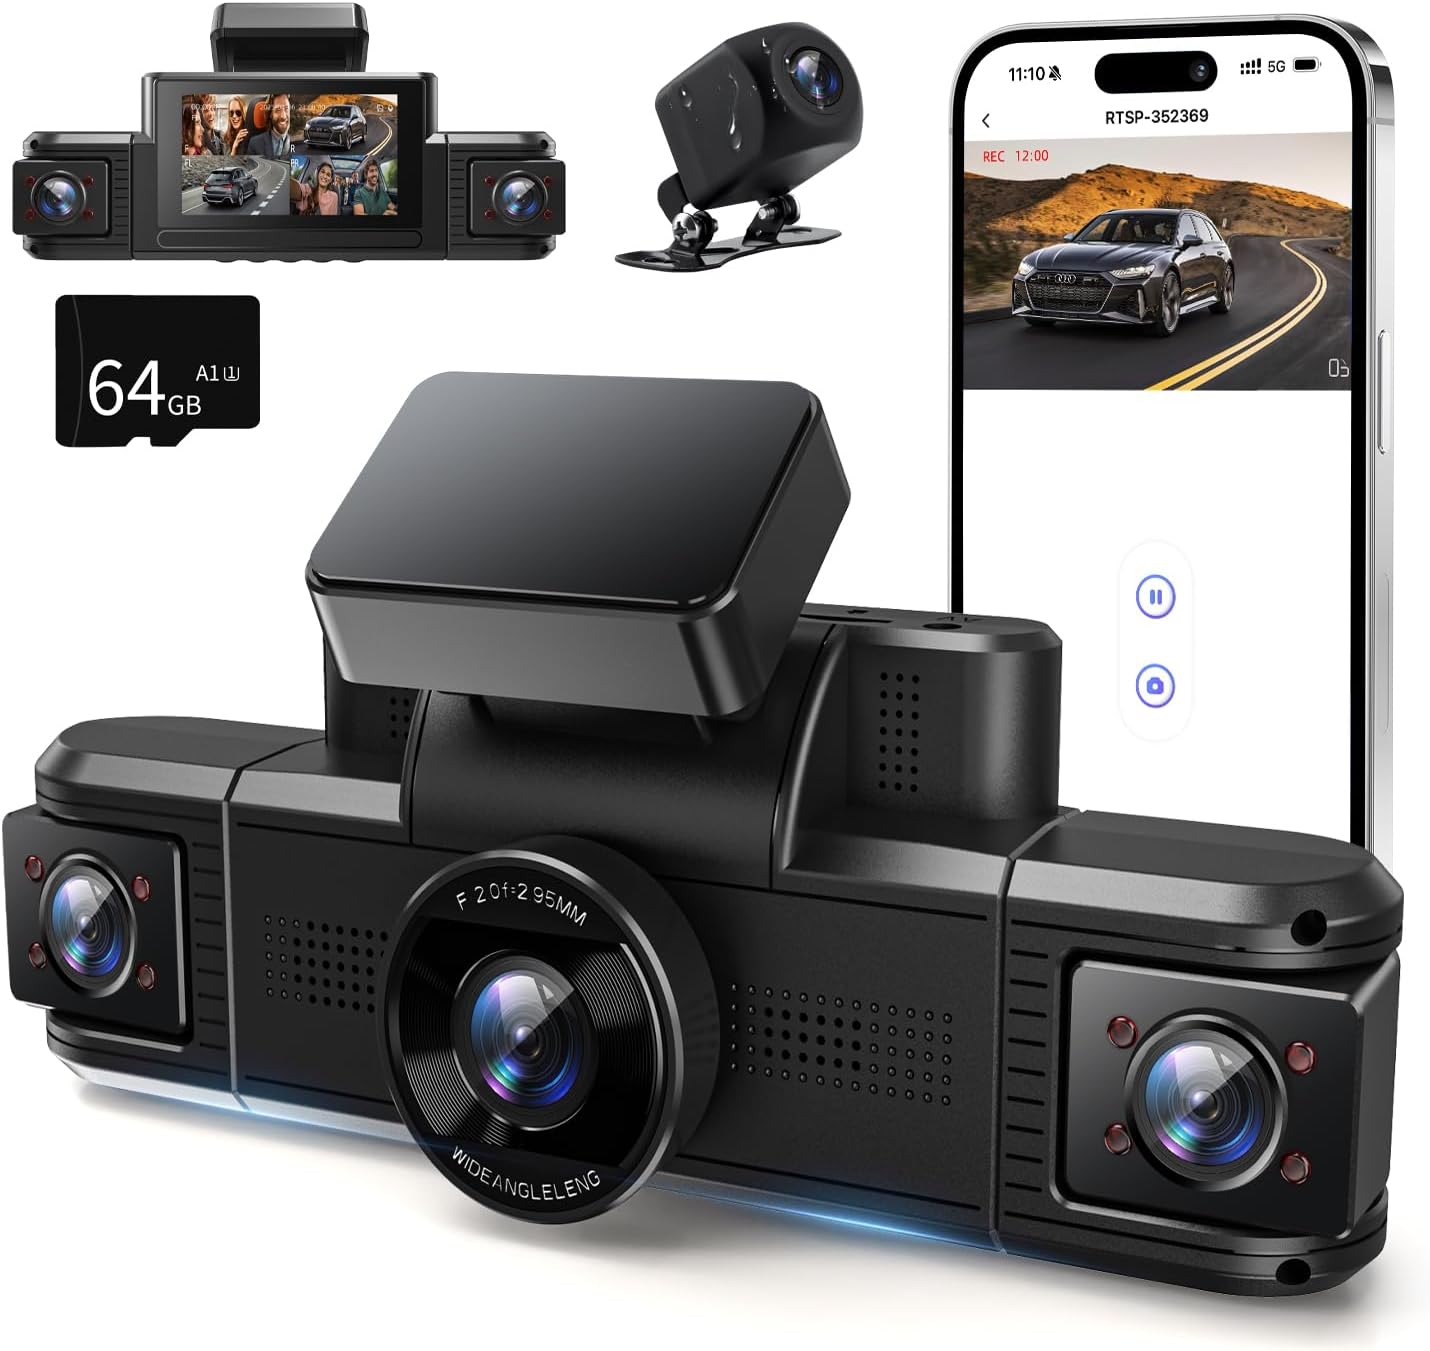
Image: The kuayvan 4-Channel Dash Cam, showcasing its main unit, external rear camera, and included 64GB SD card.
2. Setup and Installation
Proper installation ensures optimal performance and coverage. Follow these steps for a secure setup:
- Mounting the Dash Cam: Clean the desired area on your windshield, typically behind the rearview mirror. Peel off the adhesive backing from the sticky mount and firmly press the dash cam onto the windshield. Ensure the main lens has an unobstructed view of the road ahead.
- Connecting the Rear Camera: Connect the rear camera cable to the main dash cam unit. Route the cable neatly along the vehicle's interior trim, such as the roof cover crack, to the rear of the vehicle. Mount the rear camera on the rear windshield or license plate area, ensuring a clear view.
- Power Connection: Insert the power cable into the dash cam and plug the other end into your vehicle's 12V power outlet (cigarette lighter socket). The power adapter includes an additional USB port for charging other devices.
- SD Card Insertion: Insert the provided 64GB SD card into the designated slot on the dash cam. The device supports up to 128GB SD cards.
- Initial Power On: Start your vehicle. The dash cam should power on automatically and begin recording.

Image: Illustration of the quad camera setup, providing front, left, right, and rear views for comprehensive coverage.
Note: No official seller videos are available for embedding in this manual.
3. Operating Instructions
3.1 Recording Modes
The kuayvan Dash Cam offers flexible recording options:
- FHD 1080Px4: Records all four channels (front, rear, left, right) simultaneously in Full HD 1080P resolution.
- 2K+1080Px2+720P: Records the front camera in 2K resolution, the two side cameras in 1080P, and the rear camera in 720P.
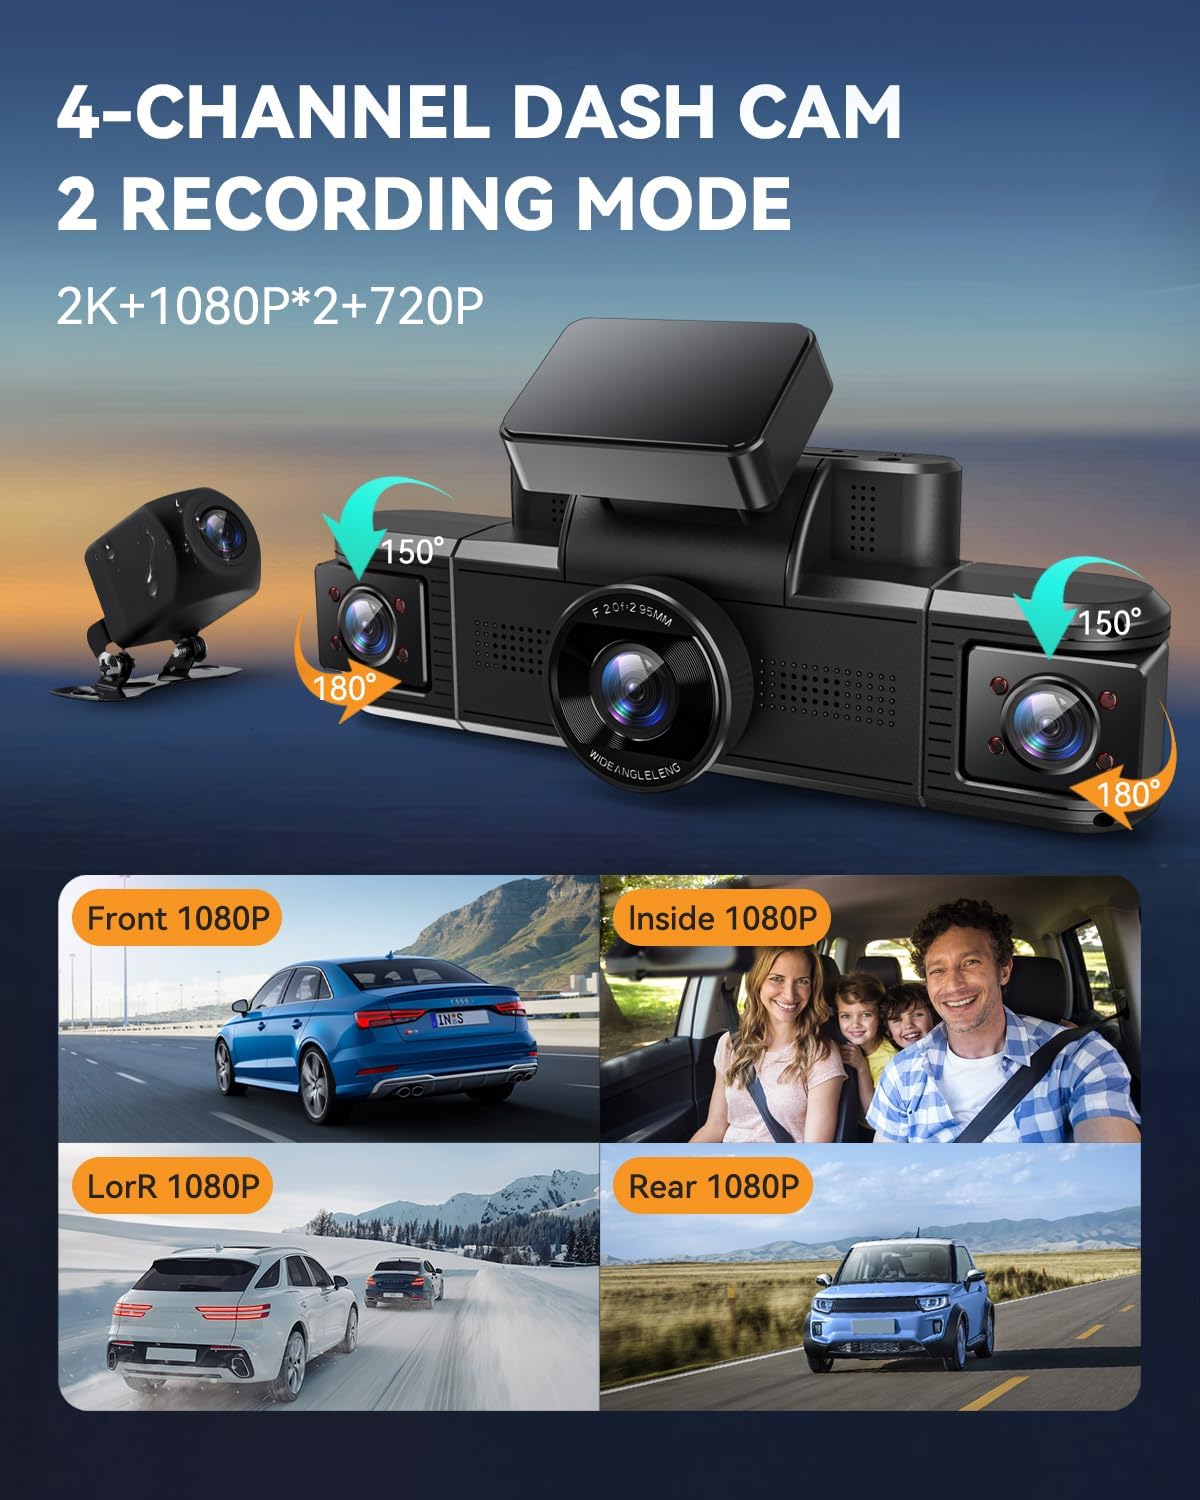
Image: Visual representation of the dash cam's 4-channel recording capabilities and available resolution modes.
3.2 Loop Recording
The dash cam features automatic loop recording. When the memory card is full, the oldest unlocked footage is automatically overwritten to make space for new recordings. This ensures continuous video coverage without manual intervention.
3.3 G-Sensor (Emergency Lock)
The built-in G-Sensor detects sudden collisions or impacts. Upon detection, it automatically locks and saves the relevant footage, preventing it from being overwritten by loop recording. This crucial feature helps secure video evidence in case of an accident.
3.4 Super Night Vision & WDR
Equipped with a large F/2.0 aperture and 8 infrared lights, combined with Wide Dynamic Range (WDR) technology, the dash cam delivers clear and undistorted footage even in low-light conditions or areas with high contrast. The advanced image processing automatically adjusts the balance for optimal visibility.
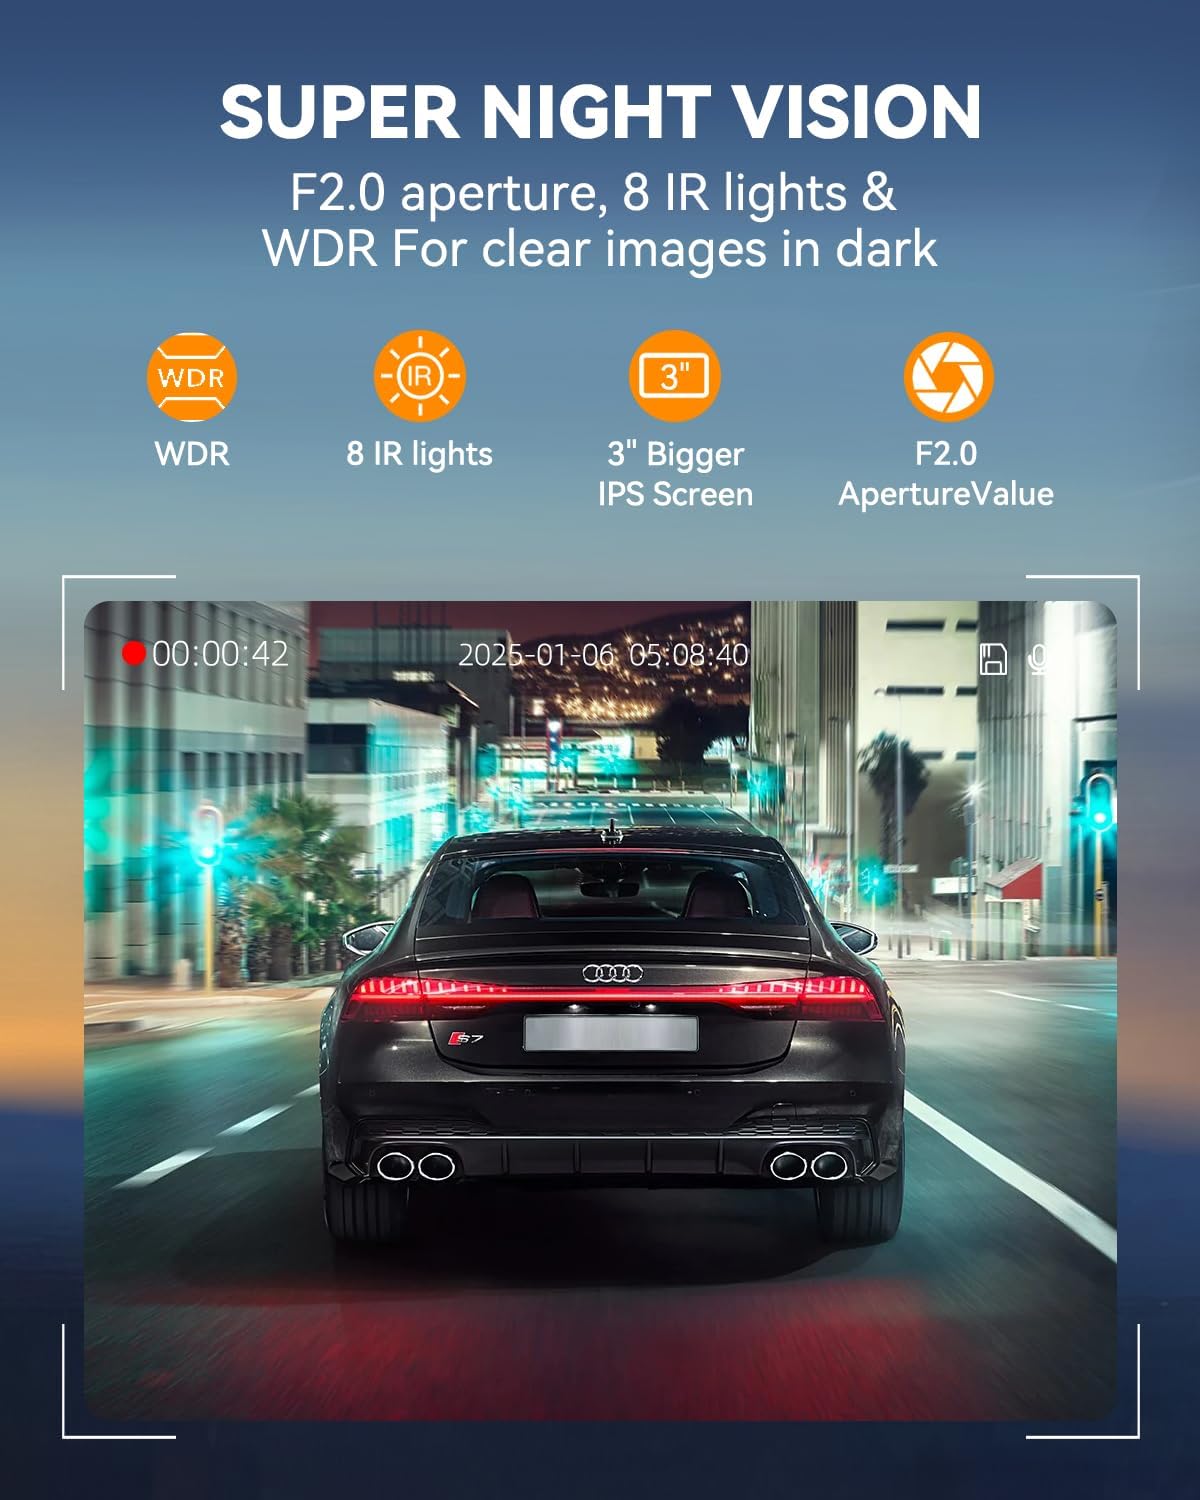
Image: Icons and descriptions highlighting the Super Night Vision capabilities, including F2.0 aperture, 8 IR lights, and WDR.
3.5 Built-in 5GHz WiFi & App Control
The dash cam features built-in 5GHz WiFi for faster data transmission (also supports 2.4GHz). Pair it with the free companion app (available for Android and iOS) to seamlessly control the device, preview live video, download recorded footage, and share clips directly from your smartphone.

Image: The dash cam connected via 5G WiFi to a smartphone, illustrating easy access and operation through the app.
3.6 24 Hours Parking Mode
When your vehicle is parked, the dash cam automatically switches to parking mode for continuous monitoring. This feature utilizes delayed recording to compress videos, saving power and storage space. The G-Sensor will activate and lock footage if any sudden collision or impact is detected while parked. Note: This feature requires the separate purchase and installation of an ACC hardwire kit.

Image: A composite image detailing the Loop Recording function, G-Sensor activation, and the 24-hour Parking Monitor feature.
4. Maintenance
To ensure the longevity and optimal performance of your kuayvan Dash Cam, consider the following maintenance tips:
- Clean Lenses: Regularly clean the camera lenses with a soft, lint-free cloth to ensure clear recording quality. Avoid abrasive materials that could scratch the lenses.
- SD Card Management: Periodically format the SD card (e.g., once a month) using the dash cam's menu settings. This helps maintain card health and prevents data corruption. Back up any important footage before formatting.
- Temperature Control: Avoid exposing the dash cam to extreme temperatures for prolonged periods. If parked in direct sunlight during hot weather, consider removing the dash cam or using a sunshade.
- Firmware Updates: Check the manufacturer's website periodically for any available firmware updates. Keeping the firmware updated can improve performance and add new features.
5. Troubleshooting
If you encounter issues with your kuayvan Dash Cam, refer to the following common problems and solutions:
| Problem | Possible Cause | Solution |
|---|---|---|
| Dash cam does not power on. | No power supply; loose connection. | Check the power cable connection to the dash cam and the vehicle's 12V outlet. Ensure the vehicle's ignition is on. |
| Recording stops or footage is missing. | SD card full; corrupted SD card; incorrect SD card. | Format the SD card. Ensure you are using a high-quality SD card (Class 10 or higher). Replace the SD card if issues persist. |
| G-Sensor not triggering/locking footage. | G-Sensor sensitivity setting is too low. | Adjust the G-Sensor sensitivity in the dash cam's settings menu. Increase sensitivity for more frequent triggers. |
| Poor night vision quality. | Dirty lens; insufficient ambient light. | Clean the camera lenses. Ensure no obstructions are blocking the infrared lights. |
| WiFi connection issues. | Incorrect password; too far from device; app issues. | Ensure correct WiFi password. Stay within close proximity to the dash cam. Restart the app and the dash cam. |
| Parking mode not working. | ACC hardwire kit not installed or faulty. | Verify the ACC hardwire kit is correctly installed and functioning. This feature requires the hardwire kit. |
6. Specifications
| Feature | Detail |
|---|---|
| Brand | kuayvan |
| Model Name | RM |
| Product Dimensions | 6 x 5 x 3 inches |
| Item Weight | 1.32 pounds |
| Color | Black |
| Orientation | Front and Rear and Inside |
| Connectivity Technology | Wi-Fi (5GHz & 2.4GHz) |
| Video Capture Resolution | Up to 2K (Front), 1080P (Side), 720P (Rear) |
| Included Components | Dash Cam, Power Cable, Sticky Mount, Rear Camera Cable, Rear Camera, Install Crowbar, 64GB SD Card, User Manual |
| Control Method | App |
| Screen Size | 3 Inches |
7. Warranty and Support
For warranty information and detailed support, please refer to the documentation included with your product or contact kuayvan customer service directly. You may also visit the official kuayvan website for the most up-to-date support resources and contact details.
For further assistance, please contact customer support via their official channels.