
1. Introduction
Thank you for choosing the Emtop ECSR0406 4V Cordless Screwdriver. This manual provides essential information for the safe and efficient operation, maintenance, and troubleshooting of your new tool. Please read this manual thoroughly before first use and keep it for future reference.
2. Safety Instructions
Always observe basic safety precautions to reduce the risk of fire, electric shock, and personal injury when operating power tools.
- Work Area Safety: Keep your work area clean and well-lit. Cluttered or dark areas invite accidents. Do not operate power tools in explosive atmospheres, such as in the presence of flammable liquids, gases, or dust.
- Electrical Safety: Avoid body contact with earthed or grounded surfaces such as pipes, radiators, ranges, and refrigerators. Do not expose power tools to rain or wet conditions.
- Personal Safety: Always wear eye protection. Use personal protective equipment such as dust masks, non-skid safety shoes, hard hats, or hearing protection when appropriate. Stay alert, watch what you are doing, and use common sense when operating a power tool.
- Tool Use and Care: Do not force the power tool. Use the correct power tool for your application. Disconnect the plug from the power source and/or the battery pack from the power tool before making any adjustments, changing accessories, or storing power tools.
- Battery Pack Use and Care: Recharge only with the charger specified by the manufacturer. Do not use battery packs or tools that are damaged or modified.
3. Package Contents
Carefully unpack all items and ensure you have received the following components. If any items are missing or damaged, please contact your retailer.
- Emtop ECSR0406 4V Cordless Screwdriver
- 40 Pcs 25mm Cr-V Screwdriver Bits
- 1 Pcs 50mm Cr-V Screwdriver Bit
- 1 Pcs Bit Holder/Connector
- Plastic Storage Box
Note: A USB Type-C charging cable is required but sold separately.

Image 1: Emtop ECSR0406 4V Cordless Screwdriver with its comprehensive set of 40x 25mm Cr-V bits, 1x 50mm Cr-V bit, and a bit holder, all neatly organized within a durable red plastic storage box. The screwdriver itself is blue and red, featuring a 4V Li-ion battery indicator.
4. Specifications
| Model | ECSR0406 |
| Voltage | 4V |
| Battery Type | Lithium-Ion |
| Hex Shank Size | 1/4 inch |
| No-load Speed | 260 rpm |
| Max Torque | 5 N.m (Newton Meters) |
| Charging | USB Type-C (cable sold separately) |
| Features | Integrated work light, Charge level indicator |
| Product Dimensions (L x W x H) | 21L x 11W x 6H Centimeters |
| Item Weight | 0.5 Kilograms |
5. Setup
5.1 Charging the Battery
- Ensure the screwdriver is turned off before charging.
- Connect a standard USB Type-C charging cable (not included) to the charging port on the screwdriver.
- Connect the other end of the USB cable to a suitable USB power adapter (e.g., phone charger, computer USB port).
- The charge level indicator lights will illuminate to show the charging status. All lights will be solid when fully charged.
- Disconnect the charger once the battery is fully charged.
5.2 Installing Screwdriver Bits
- Select the appropriate 1/4 inch hex shank screwdriver bit for your task.
- Firmly push the bit into the hex chuck at the front of the screwdriver until it clicks into place.
- To remove a bit, pull it straight out from the chuck.
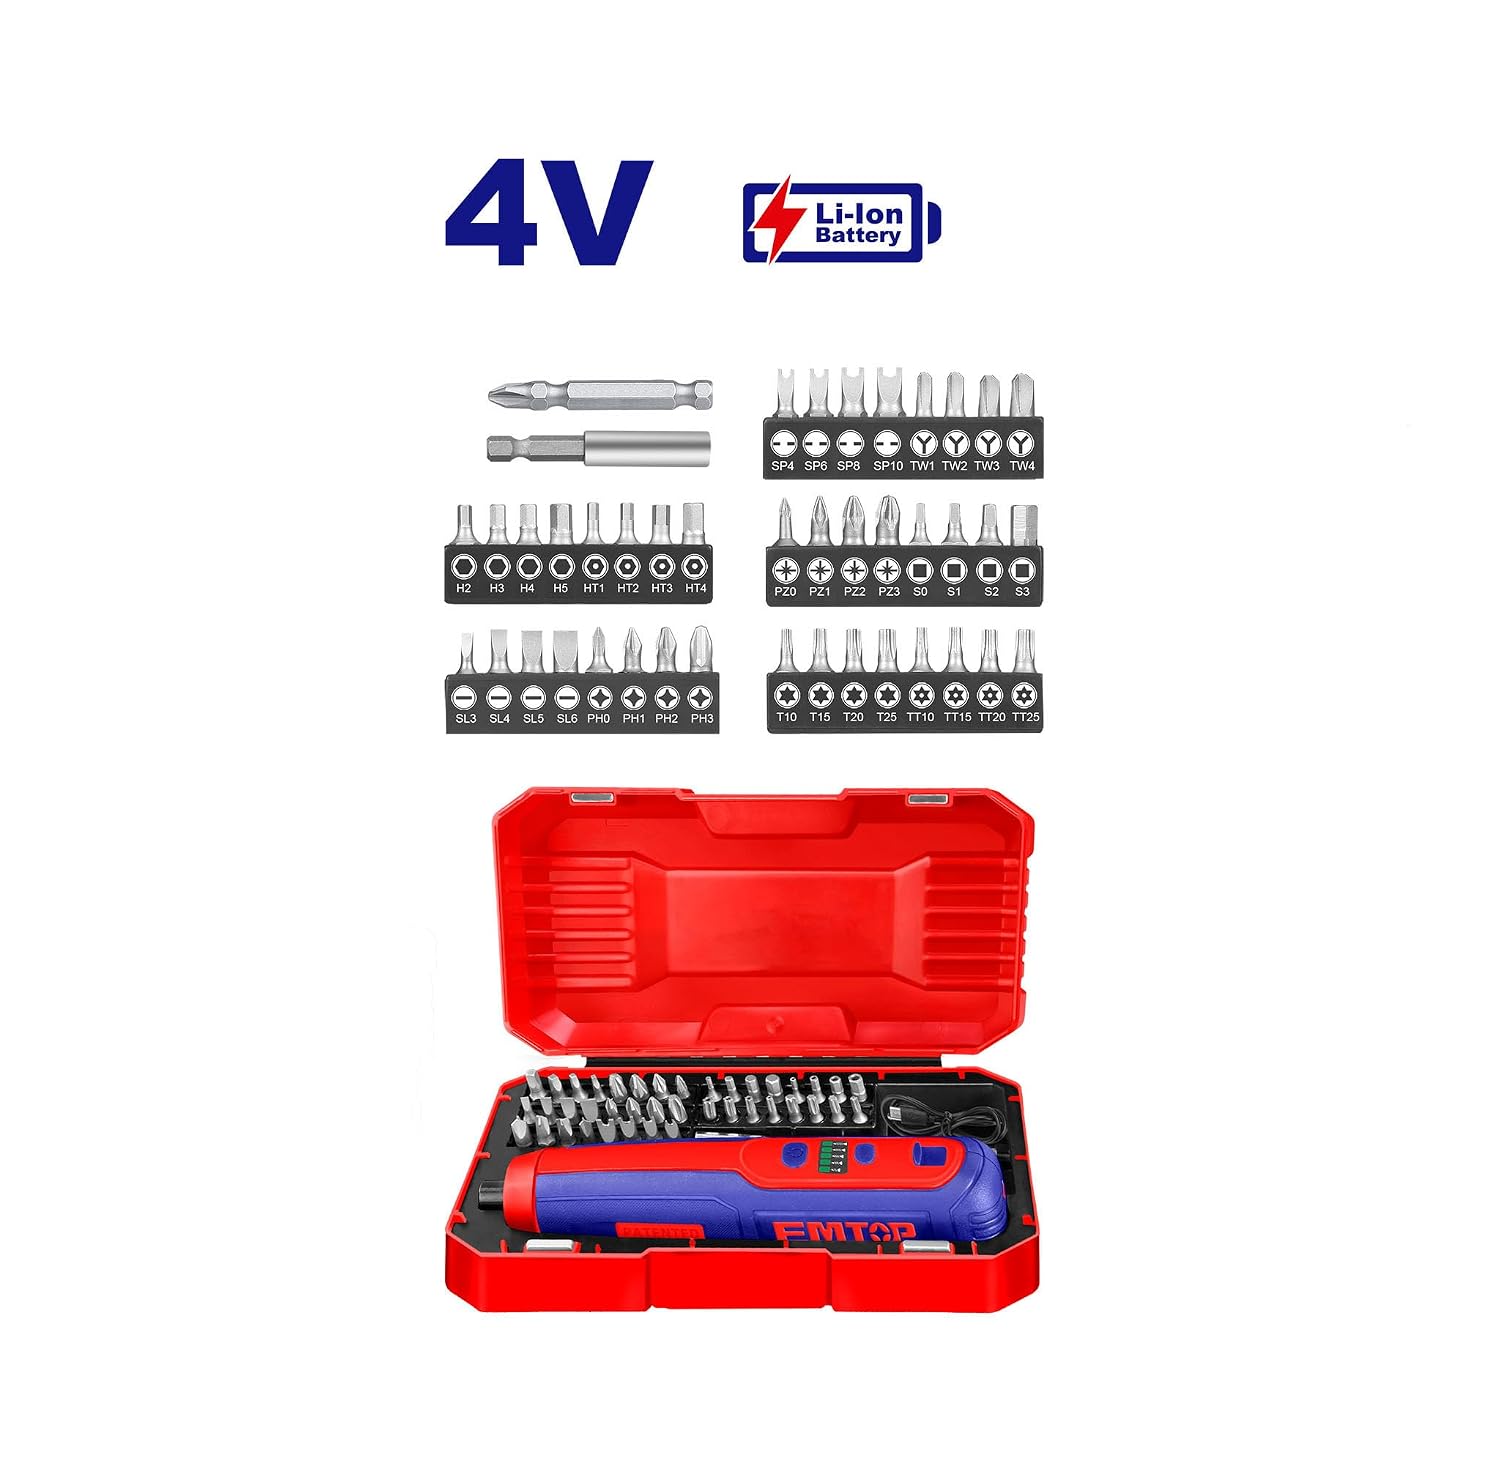
Image 2: A detailed view of the Emtop ECSR0406 4V Cordless Screwdriver, highlighting its 1/4-inch hex shank for quick bit changes. Various Cr-V screwdriver bits are displayed, demonstrating the versatility of the included set for different screw types.
6. Operating Instructions
6.1 Powering On/Off and Direction Control
- The screwdriver features a forward/reverse switch, typically located near the trigger.
- To drive screws (forward), push the switch to the 'F' or forward position.
- To remove screws (reverse), push the switch to the 'R' or reverse position.
- To turn the screwdriver on, press the trigger. Release the trigger to turn it off.
6.2 Integrated Work Light
The screwdriver is equipped with an integrated work light that automatically illuminates when the trigger is pressed. This provides improved visibility in dimly lit work areas.
6.3 Charge Level Indicator
The charge level indicator lights provide a visual representation of the remaining battery power. Monitor these lights during operation to know when recharging is necessary.
7. Maintenance
7.1 Cleaning
- Keep the ventilation slots of the tool clean to prevent overheating.
- Wipe the tool's exterior with a soft, damp cloth. Do not use harsh chemicals or abrasive cleaners.
- Ensure no liquids enter the tool's interior.
7.2 Battery Care
- For optimal battery life, avoid completely discharging the battery before recharging.
- Store the battery in a cool, dry place away from direct sunlight and extreme temperatures.
- If storing for extended periods, charge the battery to approximately 50% capacity every few months.
7.3 Storage
When not in use, store the screwdriver and its accessories in the provided plastic box in a dry, secure location out of reach of children.
8. Troubleshooting
| Problem | Possible Cause | Solution |
|---|---|---|
| Screwdriver does not turn on. | Battery is discharged. | Charge the battery fully. |
| Forward/Reverse switch is in the center (locked) position. | Move the switch to the forward or reverse position. | |
| Battery not charging. | USB cable or power adapter is faulty. | Try a different USB Type-C cable and/or power adapter. Ensure connections are secure. |
| Reduced power or short operating time. | Battery is not fully charged or is aging. | Fully charge the battery. If the issue persists after multiple charges, the battery may need replacement (contact support). |
9. Warranty and Support
For warranty information and customer support, please refer to the documentation provided at the time of purchase or contact your retailer. Keep your proof of purchase for any warranty claims.