
1. Introduction
The Ortur AL1 5W Laser Engraver is a compact and versatile tool designed for precision engraving and cutting on various materials. This manual provides essential information for safe and effective use of your device, covering assembly, operation, maintenance, and troubleshooting.
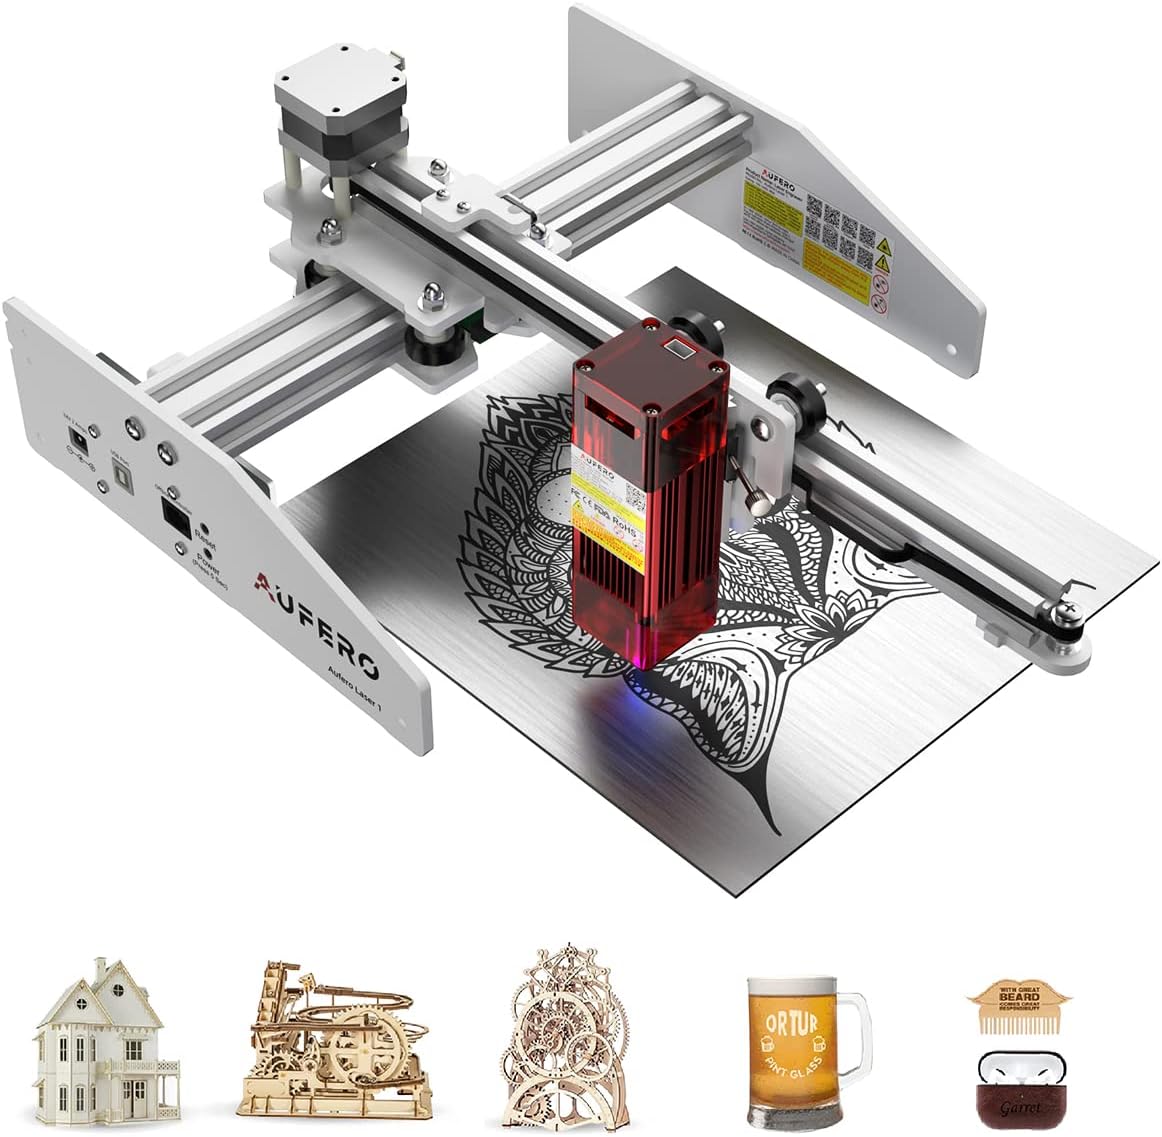
Figure 1: Ortur AL1 5W Laser Engraver
Key Features:
- Dedicated LU2-4-SF 5.5W Laser Module: Features a 450nm blue laser with a 30mm focal length and a 0.12x0.15mm spot size. Designed for precision, offering over 8000 hours of lifespan. Capable of cutting pine boards up to 5mm in a single pass.
- Pre-assembled Lightweight Design: Constructed from aluminum profile and acrylic, weighing only 1.565g. Shipped fully assembled for immediate use, eliminating complex setup.
- 180x180mm Working Area: Provides a fixed working area suitable for small to medium-sized projects. Equipped with a Nema17 stepping motor for stable engraving speeds up to 3000mm/min.
- Multi-OS & Software Compatibility: Connects via USB and is compatible with Windows (XP/7/8/10) and MAC operating systems. Supports popular engraving software such as LightBurn and LaserGRBL.
- Versatile Material Compatibility: Engraves and cuts various materials including wood, coated metal, acrylic, leather, and rubber. Ideal for DIY crafts, educational projects, and custom creations.
2. Safety Guidelines
Operating a laser engraver requires strict adherence to safety protocols to prevent injury and damage. Always prioritize safety.
General Safety Precautions:
- Eye Protection: Always wear certified laser safety glasses when the laser is active. Never look directly at the laser beam.
- Ventilation: Operate the engraver in a well-ventilated area to dissipate smoke and fumes produced during engraving or cutting.
- Fire Safety: Keep a fire extinguisher nearby. Do not leave the machine unattended during operation, especially when working with flammable materials.
- Material Compatibility: Ensure the material you are engraving or cutting is safe for laser processing. Avoid materials that produce toxic fumes or are highly reflective.
- Children and Pets: Keep children and pets away from the operating area.
Integrated Safety Features:
- Anti-Dumping Device: A built-in horizontal gyro sensor detects if the laser module tilts by 20° or more, automatically stopping operation for safety.
- Active Position Protection: Detects vibration and tilt, pausing operation to prevent unintended engraving.
- Laser Beam Safety Guard: Features a USB watchdog detection function to monitor laser activity.
- Exposure Time Detection and Limit: 97% laser light filtering ensures a safer working environment by limiting laser exposure.
- Motherboard Program Monitoring: Incorporates a voltage and current safety control system for stable and secure operation.

Figure 2: Laser Engraving and Cutting with Eye Protection

Figure 3: Anti-Dumping Device with Horizontal Gyro Sensor
3. Components Overview
Familiarize yourself with the main components of your Ortur AL1 5W Laser Engraver.

Figure 4: Ortur AL1 5W Laser Engraver with dimensions and key components
Main Parts:
- Laser Module (LU2-4-SF): The core component responsible for emitting the laser beam for engraving and cutting.
- Frame: The structural body of the engraver, made from aluminum profiles and acrylic, providing stability and guiding the laser module.
- Control Board: Houses the electronics that manage the laser's movement and power.
- Stepping Motors (Nema17): Drive the laser module along the X and Y axes for precise positioning.
- USB Port: For connecting the engraver to a computer.
- Power Port: For connecting the power adapter.
- Power Button: To turn the device on or off.
- Reset Button: To restart the engraver.
4. Setup Instructions
The Ortur AL1 5W Laser Engraver comes pre-assembled, simplifying the setup process. Follow these steps to get started.
Step-by-Step Setup:
- Unpack the Device: Carefully remove the engraver and all accessories from its packaging.
- Place on a Stable Surface: Position the engraver on a flat, stable, and heat-resistant surface in a well-ventilated area.
- Connect Power: Plug the power adapter into the power port on the engraver, then connect it to a suitable power outlet (100V AC).
- Connect to Computer: Use the provided USB cable to connect the engraver to your computer.
- Install Software: Download and install the necessary software (LightBurn or LaserGRBL) from the official Ortur website or the provided resources. Ensure drivers are correctly installed.
- Power On: Press the power button to turn on the engraver.

Figure 5: Ready to use out of the box
5. Operating Instructions
Once the engraver is set up, you can begin your engraving or cutting projects. Always wear safety glasses during operation.
Basic Operation Steps:
- Prepare Material: Place the material to be engraved or cut within the 180x180mm working area. Ensure it is flat and securely positioned.
- Adjust Focus: The LU2-4-SF module has a fixed focal length of 30mm. Adjust the height of the laser module or the material to achieve the correct focus. Refer to the laser module's specific instructions for precise focusing.
- Load Design in Software: Open LightBurn or LaserGRBL on your computer. Import or create your design.
- Configure Settings: Adjust laser power, speed, and pass count according to the material type and desired effect. Start with lower power and higher speed for initial tests.
- Start Engraving/Cutting: Initiate the process from the software. Monitor the operation closely.
- Post-Processing: Once complete, turn off the laser and remove the engraved or cut material. Clean any debris.
Supported Materials:
The AL1 5W is compatible with a variety of materials, including:
- Wood (pine board, plywood)
- Coated Metal
- Acrylic
- Leather
- Rubber
- Craft Paper
- Stone
- Ceramics (glazed)
- Fruits

Figure 6: Engravable Materials

Figure 7: High Precision Engraving
6. Maintenance
Regular maintenance ensures optimal performance and extends the lifespan of your laser engraver.
Maintenance Tips:
- Clean the Laser Lens: Periodically clean the laser lens with a soft, lint-free cloth and lens cleaning solution to maintain beam quality.
- Clear Debris: After each use, remove any dust, ash, or material scraps from the working area and around the laser module.
- Inspect Moving Parts: Check the belts and rails for any wear or obstructions. Ensure smooth movement of the laser module.
- Software Updates: Keep your engraving software and drivers updated to the latest versions for best compatibility and features.
7. Troubleshooting
This section addresses common issues you might encounter and their potential solutions.
| Problem | Possible Cause | Solution |
|---|---|---|
| Engraver not connecting to computer | Loose USB cable, incorrect drivers, software not recognizing device. | Ensure USB cable is securely connected. Reinstall or update USB drivers. Restart software and engraver. Try a different USB port or cable. |
| Laser not firing or weak output | Incorrect power settings, dirty laser lens, laser module malfunction. | Check laser power settings in software. Clean the laser lens. Ensure the laser module is properly seated. If issue persists, contact support. |
| Engraving is not precise or distorted | Material not flat, incorrect focus, loose belts, vibration. | Ensure material is flat and secured. Adjust laser focus. Check and tighten belts if necessary. Minimize external vibrations. |
| Excessive smoke or odor | Insufficient ventilation, incorrect material, high power settings. | Ensure adequate ventilation. Verify material is suitable for laser processing. Adjust power settings to avoid burning. |
| Laser module movement is jerky or restricted | Obstruction on rails, loose roller bearings (as per user review), cable interference. | Inspect rails for debris. Check roller bearings for proper tension and smooth movement. Ensure cables are not obstructing movement. |
8. Specifications
| Feature | Detail |
|---|---|
| Brand | Ortur |
| Model | AL1 5W |
| Laser Module | LU2-4-SF (5.5W Optical Power, 450nm Blue Laser) |
| Spot Size | 0.12 x 0.15 mm |
| Focal Length | 30 mm |
| Working Area | 180 x 180 mm |
| Engraving Speed | Up to 3000 mm/min |
| Body Weight | 1.565 kg |
| Package Dimensions | 48.2 x 39.2 x 18.6 cm |
| Total Package Weight | 3.04 kg |
| Power Input | 100V AC |
| Total Power Consumption | 30W |
| Software Compatibility | LightBurn, LaserGRBL |
| Operating System Compatibility | Windows XP/7/8/10, macOS |
9. Warranty and Support
For warranty information and technical support, please refer to the official Ortur website or contact the seller directly. Keep your purchase receipt for warranty claims.
An official user guide in PDF format is available for download: Download User Guide (PDF)
For additional resources and community support, visit the Ortur official website: Ortur Official Website

