
1. Introduction
This manual provides detailed instructions for the assembly, setup, operation, and maintenance of your Modway Nyx Arched Display Cabinet. Please read this manual thoroughly before assembly and use to ensure proper functionality and safety.
The Modway Nyx Arched Display Cabinet is designed to offer both aesthetic appeal and practical storage. It features a distinctive arched silhouette, tempered glass doors with brass ring handles, and soft-close hinges. The interior includes two adjustable shelves and one fixed shelf, complemented by two full-glide drawers for concealed storage. This cabinet is suitable for various settings, including dining rooms, living rooms, or home offices, and is equipped with non-marking floor glides to protect surfaces.

Image 1.1: Front view of the Modway Nyx Arched Display Cabinet. This image shows the overall design, including the arched top, glass doors, and two lower drawers.
2. Safety Information
WARNING: Failure to follow these safety instructions may result in injury or damage to the product.
- Do not exceed the specified weight capacities for shelves and drawers.
- Follow all assembly instructions carefully to ensure safe and stable installation.
- Secure the cabinet to the wall or floor using appropriate anti-tip hardware (not explicitly mentioned if included, but good practice for tall furniture) to prevent tipping, especially in households with children or pets.
- Always use appropriate safety gear, such as gloves and eye protection, during assembly.
- Keep small parts and packaging materials away from children to prevent choking hazards.
- Ensure the cabinet is placed on a level and stable surface.
- Avoid placing hot items directly on the cabinet surface without protection.
Weight Capacities:
- Adjustable Shelves: 77 lbs (35 kg) per shelf
- Fixed Shelf: 121 lbs (55 kg)
- Drawers: 22 lbs (10 kg) per drawer
3. Package Contents
Before beginning assembly, verify that all parts and hardware are present and undamaged. Refer to the included assembly guide for a complete list of components. If any parts are missing or damaged, contact Modway customer support.
Typical components include:
- Cabinet frame panels (top, bottom, sides, back)
- Glass doors with hinges and handles
- Adjustable shelves (2)
- Fixed shelf (1)
- Drawer components (fronts, sides, backs, bottoms)
- Drawer glides
- Hardware pack (screws, dowels, cam locks, anti-tip kit, etc.)
- Non-marking floor glides
4. Assembly Instructions
Assembly is required for the Modway Nyx Arched Display Cabinet. It is recommended that two adults perform the assembly. Clear a spacious area for assembly and keep all tools and parts organized.
Tools Required (not included):
- Phillips head screwdriver
- Hammer (for dowels)
- Allen wrench (often included with hardware)
General Assembly Steps (refer to the detailed diagram in your package for specific steps):
- Unpack and Identify: Carefully unpack all components and lay them out on a soft, clean surface to prevent scratches. Identify each part using the provided parts list.
- Assemble Base: Attach the side panels to the bottom panel, ensuring proper alignment. Secure with cam locks and dowels as instructed.
- Install Drawer Glides: Attach the drawer glides to the cabinet side panels according to the markings.
- Assemble Drawers: Construct the two drawers by attaching the sides, back, and bottom to the drawer front. Install the corresponding drawer glides.
- Insert Drawers: Carefully slide the assembled drawers into their respective positions in the cabinet.
- Attach Back Panel: Secure the back panel to the cabinet frame.
- Install Shelves: Place the fixed shelf into its designated position. Install the adjustable shelf supports at your desired height for the two adjustable shelves, then place the shelves.
- Attach Doors: Mount the tempered glass doors to the cabinet using the provided hinges. Adjust hinges as necessary for proper door alignment and soft-close functionality.
- Install Handles: Attach the brass ring handles to the doors and drawers.
- Attach Floor Glides: Install the non-marking floor glides to the bottom of the cabinet legs.
- Secure Cabinet: For safety, it is highly recommended to secure the cabinet to a wall using the anti-tip hardware provided (if included) or purchased separately.

Image 4.1: Diagram showing the dimensions of the Modway Nyx Arched Display Cabinet (74" H x 33.5" W x 16.8" D). This image is useful for planning placement during assembly.

Image 4.2: Visual representation of key features including spacious adjustable shelves, rounded arched top with wood grain laminate, full-glide drawers, and tempered glass doors with brass ring pull handles.
5. Setup
Once assembled, position the cabinet in your desired location. Ensure the floor is level and stable. The non-marking floor glides will help protect your flooring.
- Placement: Choose a location that is away from direct sunlight and excessive moisture to prevent damage to the wood finish.
- Leveling: If the floor is uneven, use shims under the non-marking glides to ensure the cabinet is level and stable.
- Anti-Tip Securing: If you have not already, secure the cabinet to the wall using the anti-tip hardware. This is a critical safety step, especially for tall furniture.

Image 5.1: The Modway Nyx Arched Display Cabinet positioned in a living room, demonstrating its aesthetic integration into a home environment.
6. Operation
The Modway Nyx Arched Display Cabinet is designed for displaying and storing various items.
- Glass Doors: The tempered glass doors open and close smoothly with soft-close hinges, protecting your displayed items from dust. Use the brass ring handles to open and close the doors.
- Adjustable Shelves: The two adjustable shelves can be repositioned to accommodate items of different heights. To adjust, remove items, lift the shelf, reposition the shelf supports to the desired height, and then place the shelf back. Ensure shelves are securely seated before placing items.
- Fixed Shelf: The fixed shelf provides stable storage for heavier items.
- Drawers: The two full-glide drawers offer concealed storage. Pull the brass ring handles to open and push to close. The full-glide mechanism ensures smooth operation.
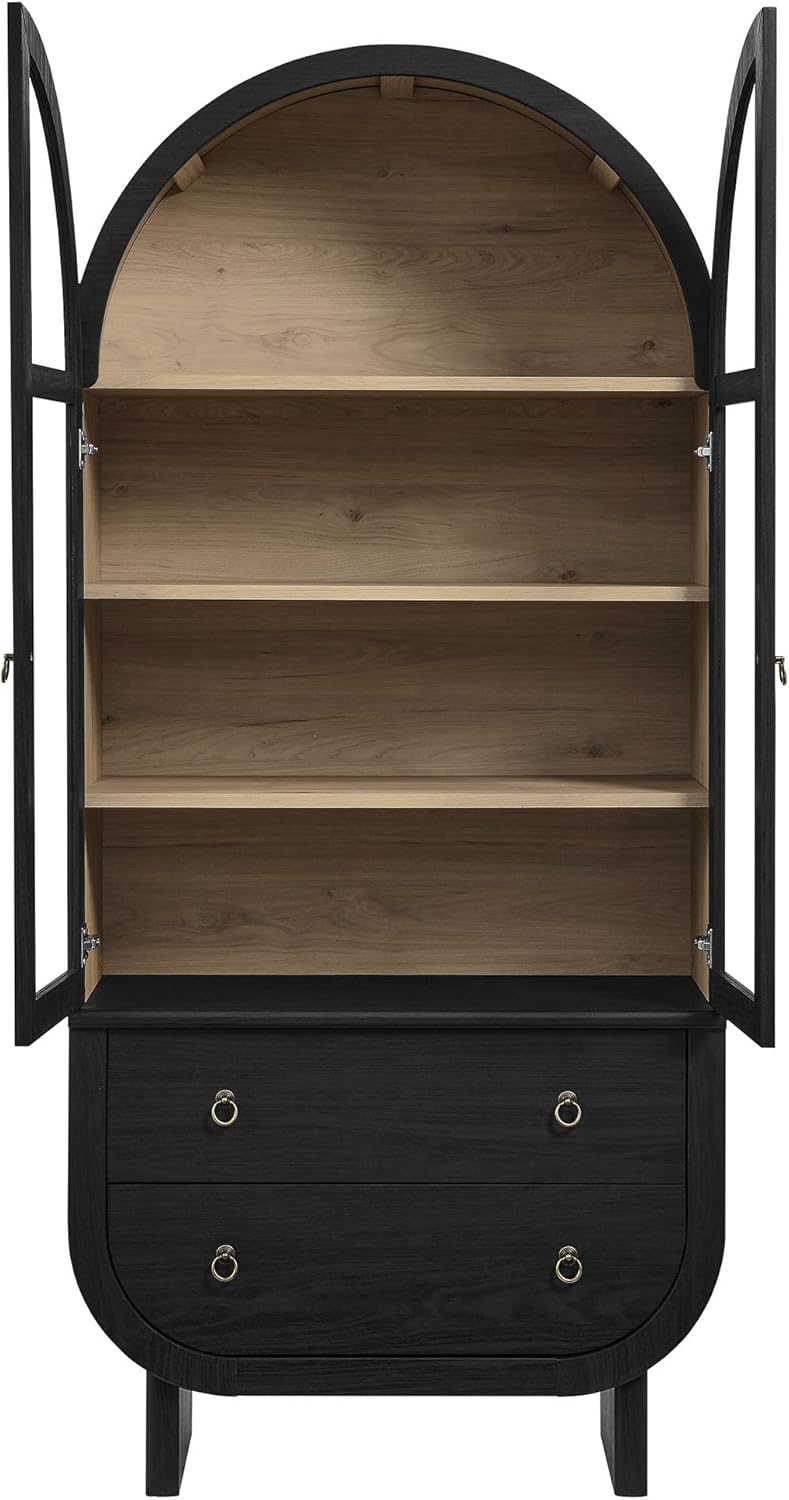
Image 6.1: The cabinet with its glass doors fully open, revealing the interior layout with two adjustable shelves and one fixed shelf.

Image 6.2: A close-up view of one of the full-glide drawers pulled open, demonstrating its storage capacity and smooth operation.
7. Maintenance
Proper care will ensure the longevity and appearance of your display cabinet.
- Cleaning:
- For wood surfaces, wipe with a soft, damp cloth. Avoid abrasive cleaners or harsh chemicals.
- For glass surfaces, use a standard glass cleaner and a lint-free cloth.
- Dust regularly with a dry, soft cloth.
- Spills: Wipe spills immediately with a clean, dry cloth to prevent staining or damage to the finish.
- Hardware: Periodically check all screws and fasteners to ensure they are tight. Retighten if necessary.
- Avoid Extreme Conditions: Do not expose the cabinet to extreme temperature changes, high humidity, or direct sunlight for prolonged periods, as this can cause warping, fading, or cracking.
8. Troubleshooting
If you encounter any issues with your Modway Nyx Arched Display Cabinet, refer to the following common problems and solutions:
| Problem | Possible Cause | Solution |
|---|---|---|
| Cabinet is wobbly or unstable. | Uneven floor; loose fasteners; improper assembly. | Ensure cabinet is on a level surface. Use shims if necessary. Check and tighten all assembly fasteners. Review assembly instructions. |
| Doors do not close properly or are misaligned. | Hinges are loose or require adjustment. | Tighten hinge screws. Adjust hinge settings (usually via screws on the hinge itself) to align doors. |
| Drawers stick or do not slide smoothly. | Drawer glides are misaligned or dirty; drawer is overloaded. | Check that drawer glides are properly installed and aligned. Clean glides if necessary. Ensure drawers are not exceeding weight capacity. |
| Scratches or minor damage to finish. | Accidental impact; abrasive cleaning. | For minor scratches, use a wood repair marker or touch-up kit matching the finish. Avoid abrasive materials for cleaning. |
9. Specifications
- Brand: Modway
- Model Name: Nyx
- Model Number: EEI-7216-BLK-LOA
- Color: Black
- Material: Wood, Tempered Glass
- Overall Dimensions (Assembled): 33.5" W x 16.8" D x 74" H (85.1 cm W x 42.7 cm D x 188 cm H)
- Item Weight: Approximately 154.1 lbs (70 kg)
- Number of Shelves: 3 (2 adjustable, 1 fixed)
- Number of Drawers: 2
- Shelf Weight Capacity (Adjustable): 77 lbs (35 kg) each
- Shelf Weight Capacity (Fixed): 121 lbs (55 kg)
- Drawer Weight Capacity: 22 lbs (10 kg) each
- Special Features: Soft-Close Hinges, Non-marking Floor Glides, Brass Ring Handles
- Assembly Required: Yes
- UPC: 889654180159
10. Warranty and Support
For warranty information and customer support, please refer to the product description on the retailer's website or the official Modway store page. You may also contact Modway customer service directly for assistance with parts, assembly, or product inquiries.
Modway Customer Service: Please visit the official Modway website or your point of purchase for contact details.