
1. Introduction
Thank you for choosing the AVAPOW A37A or AP6 Car Battery Jump Starter. This device is designed to provide a reliable and safe solution for starting vehicles with dead batteries, and the AP6 model also includes an integrated air compressor for tire inflation. This manual provides essential information for the safe and effective use, maintenance, and troubleshooting of your jump starter. Please read it thoroughly before operation and retain it for future reference.
2. Safety Information
Always observe the following safety precautions to prevent injury or damage to the device or vehicle:
- Read all instructions before use.
- Do not operate the jump starter if it is damaged or has been dropped.
- Ensure the clamps are connected to the correct battery terminals (red to positive, black to negative). Reverse polarity can cause damage.
- Do not allow the red and black clamps to touch each other, as this can cause sparks or short circuits.
- Keep the jump starter away from children.
- Do not expose the device to rain or extreme temperatures.
- Do not attempt to jump start a frozen battery.
- Wear eye protection and gloves when operating the device.
- Ensure the vehicle is in park (automatic) or neutral (manual) with the parking brake engaged before attempting to jump start.
- Disconnect the clamps from the vehicle battery within 30 seconds after the vehicle starts.
3. Package Contents
Verify that all items are present in your package:
- AVAPOW A37A or AP6 Jump Starter Unit
- Smart Jumper Clamps
- USB-C Charging Cable
- User Manual
- Storage Bag
- For AP6 model: Air Hose with Nozzle Adapters

Image 3.1: Contents of the AVAPOW A37A and AP6 packages, including the jump starter units, smart jumper clamps, charging cables, and for the AP6, an air hose with adapters.
4. Product Overview
Familiarize yourself with the components of your AVAPOW jump starter.
4.1 AVAPOW A37A Jump Starter

Image 4.1: The AVAPOW A37A jump starter unit, highlighting its charging ports and digital display indicating battery level and charging status.
4.2 AVAPOW AP6 Jump Starter with Air Compressor
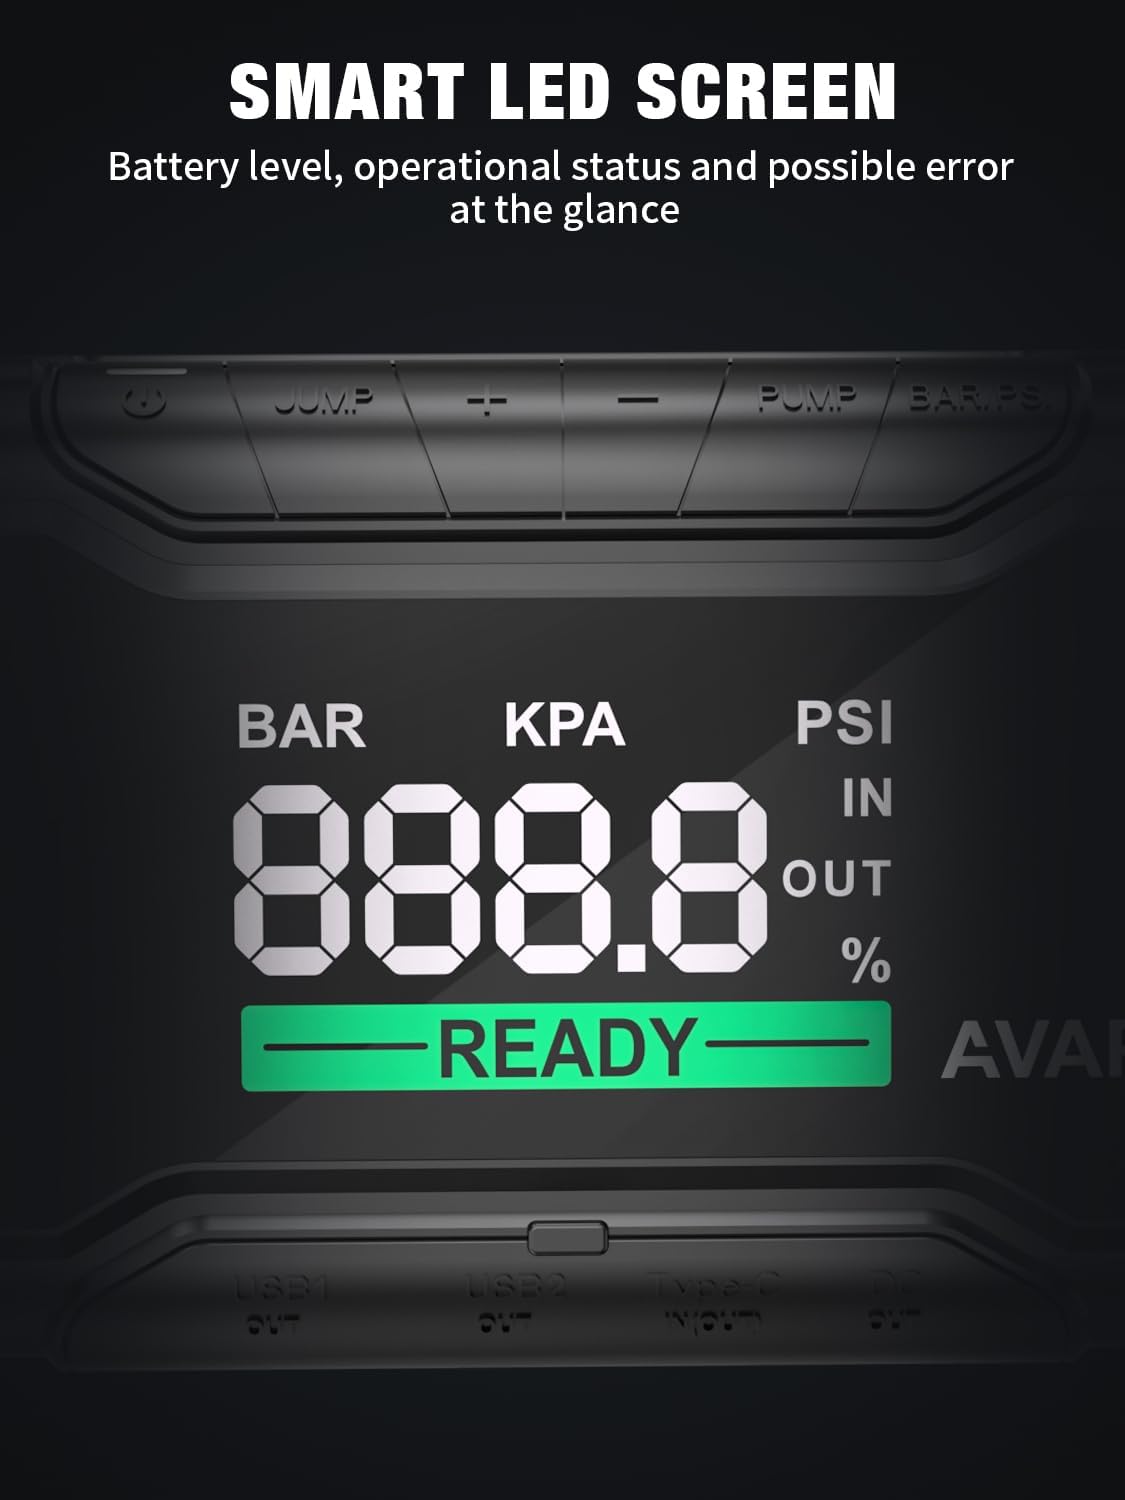
Image 4.2: The AVAPOW AP6 jump starter, featuring a large LCD screen that displays operational status, battery level, and potential errors.
Both models feature a robust design, multiple output ports, and an emergency light. The AP6 model additionally includes an integrated air compressor and a handle for portability.

Image 4.3: The AVAPOW AP6 jump starter being carried by its integrated handle, demonstrating its portable design.
5. Setup
5.1 Charging the Jump Starter
Before initial use, fully charge the jump starter. It is recommended to charge the device every 3-6 months to maintain battery health, even when not in use.
- Connect the provided USB-C charging cable to the USB-C IN/OUT port on the jump starter.
- Connect the other end of the USB-C cable to a 60W USB-C wall charger (not included).
- The LCD screen will display the charging progress. A full charge typically takes about 1.5 hours from 0% to 100% with a 60W charger.

Image 5.1: The AVAPOW AP6 jump starter connected to a USB-C charger, illustrating the fast charging capability.
6. Operating Instructions
6.1 Jump Starting a Vehicle
Ensure the jump starter is at least 50% charged before attempting to jump start a vehicle.
- Turn off the vehicle's ignition and all accessories.
- Connect the red (+) clamp to the positive (+) terminal of the vehicle's battery.
- Connect the black (-) clamp to the negative (-) terminal of the vehicle's battery.
- Plug the smart jumper cable connector into the jump starter's port. The jump starter's screen should indicate 'READY'.
- Start the vehicle. If the vehicle does not start immediately, wait 30 seconds and try again. If it still doesn't start, press and hold the 'BOOST' button on the jump starter for 3 seconds, then try starting the vehicle.
- Once the vehicle starts, disconnect the smart jumper cable connector from the jump starter.
- Remove the black (-) clamp from the vehicle's battery, then remove the red (+) clamp.

Image 6.1: The AVAPOW jump starter connected to a car battery, demonstrating the proper setup for jump starting a vehicle.
6.2 Using the Air Compressor (AP6 Model Only)
The AP6 model includes a 150 PSI digital air compressor for inflating tires and other inflatables.
- Connect the air hose to the air compressor port on the AP6 unit.
- Attach the appropriate nozzle adapter to the air hose and secure it to the tire valve or inflatable.
- Turn on the AP6 unit. The LCD screen will display the current pressure.
- Use the '+' and '-' buttons to set the desired pressure.
- Press the 'PUMP' button to start inflation. The compressor will automatically stop once the preset pressure is reached.
- Disconnect the air hose and store it properly.

Image 6.2: The AVAPOW AP6 jump starter actively inflating a car tire, showing the digital display with pressure readings and auto-stop function.
6.3 Using as a Portable Power Bank
The jump starter can charge various electronic devices via its USB output ports.
- Connect your device's charging cable to one of the USB output ports (USB1 Out, USB2 Out, or USB-C In/Out).
- The jump starter will automatically begin charging your device.
- The USB-C port supports 60W Power Delivery for fast charging compatible laptops and devices.

Image 6.3: The AVAPOW AP6 jump starter functioning as a portable power bank, charging a tablet and a smartphone simultaneously via its multiple output ports.
6.4 Using the Emergency Light
The integrated LED light provides illumination for various situations.
- Press the light button once for constant flashlight mode.
- Press again for SOS signal mode.
- Press a third time for strobe light mode.
- Press a fourth time to turn off the light.

Image 6.4: The AVAPOW jump starter's emergency light, illustrating its three modes: flashlight, SOS, and strobe.
7. Maintenance
- Charging: Recharge the jump starter every 3-6 months, even if not used, to prolong battery life.
- Cleaning: Wipe the unit with a dry, soft cloth. Do not use harsh chemicals or abrasive cleaners.
- Storage: Store the device in a cool, dry place, away from direct sunlight and extreme temperatures. Ensure it is fully charged before long-term storage.
- Clamps: Inspect the jumper clamps for any damage or corrosion before each use.
8. Troubleshooting
Refer to the table below for common issues and their solutions.
| Problem | Possible Cause | Solution |
|---|---|---|
| Vehicle does not start | Low charge on jump starter; incorrect clamp connection; vehicle battery severely discharged. | Ensure jump starter is fully charged. Check clamp connections for correct polarity. Use 'BOOST' function if necessary. |
| Jump starter not charging | Faulty cable or charger; port damage. | Try a different USB-C cable and a compatible 60W wall charger. Contact customer support if issue persists. |
| Air compressor not working (AP6) | Hose not connected properly; low jump starter battery; incorrect pressure setting. | Ensure air hose is securely connected. Check jump starter battery level. Verify pressure setting. |
| LCD screen error message | Internal fault; extreme temperature. | Refer to the specific error code in the manual (if provided by manufacturer) or contact customer support. Ensure operating within recommended temperature range. |
9. Specifications
- Peak Current: 4000A
- Engine Compatibility (A37A): Up to 10.0L Gas / 10.0L Diesel
- Engine Compatibility (AP6): Up to 8.0L Gas / 8.0L Diesel
- Jump Starts per Charge (A37A): Up to 60
- Jump Starts per Charge (AP6): Up to 50
- USB-C Input/Output: 5V-3A, 9V-3A, 12V-3A, 15V-3A, 20V-3A (Max 60W PD)
- USB1 Output: 5V-3A, 9V-2A, 12V-1.5A
- USB2 Output: 5V-3A, 9V-2A, 12V-1.5A
- DC Output: 12-16.8V-10A
- Air Compressor (AP6 only): 150 PSI Digital Compressor with Auto Shut-off
- Emergency Light: 600 Lumens (Flashlight, SOS, Strobe)
- Standby Time: Approximately 24 months
10. Warranty and Support
AVAPOW products are designed for reliability and performance. For warranty information, technical support, or any questions regarding your AVAPOW jump starter, please refer to the warranty card included in your package or visit the official AVAPOW website. You may also contact AVAPOW customer service directly for assistance.


