
Introduction
The AnyTone AT-D168UV is a versatile dual-band VHF/UHF handheld radio, supporting both Analog and Digital Mobile Radio (DMR) capabilities. Designed for amateur radio enthusiasts, it offers 5W of power and comes equipped with two batteries and two antennas for extended use and flexibility. Its modern features include USB-C for both programming and charging, providing convenience for on-the-go operation.
This manual provides detailed instructions for setting up, operating, and maintaining your AT-D168UV radio to ensure optimal performance and longevity.
What's in the Box
Upon unboxing your AnyTone AT-D168UV, verify that all the following components are included:
- AnyTone AT-168UV Radio Unit
- 1800mAh Lithium Ion Battery
- 2600mAh Lithium Ion Battery
- Standard 5-inch Antenna
- 15-inch Whip Antenna
- Wall Adapter for Charging
- Charging/Programming Cable (USB-C)
- Charging Cradle
- Belt Clip
- BridgeCom University Training Access (Digital)

Figure 1: Contents of the AnyTone AT-D168UV package, including the radio, two batteries, two antennas, charging accessories, and a belt clip.
Setup Guide
1. Battery Installation
The AT-D168UV comes with two Lithium Ion batteries (1800mAh and 2600mAh). To install a battery:
- Align the battery with the battery compartment on the back of the radio.
- Slide the battery upwards until it clicks securely into place.
- To remove, press the battery release latch (usually at the bottom of the battery) and slide the battery downwards.

Figure 2: The two included batteries (1800mAh and 2600mAh) for the AT-D168UV radio.
2. Antenna Attachment
Select either the standard 5-inch antenna or the 15-inch whip antenna based on your operational needs. The 15-inch whip antenna generally provides better range.
- Screw the chosen antenna clockwise onto the antenna connector at the top of the radio until it is finger-tight. Do not overtighten.

Figure 3: The AT-D168UV radio shown with both the standard 5-inch and the longer 15-inch whip antennas.
3. Initial Charging
Before first use, fully charge the battery. The AT-D168UV supports USB-C direct charging and programming.
- Connect the USB-C charging cable to the radio's USB-C port and the other end to the wall adapter or a compatible USB power source.
- Alternatively, place the radio with the installed battery into the charging cradle and connect the wall adapter to the cradle.
- The charging indicator on the radio or cradle will show charging status. Charge until the indicator shows full.
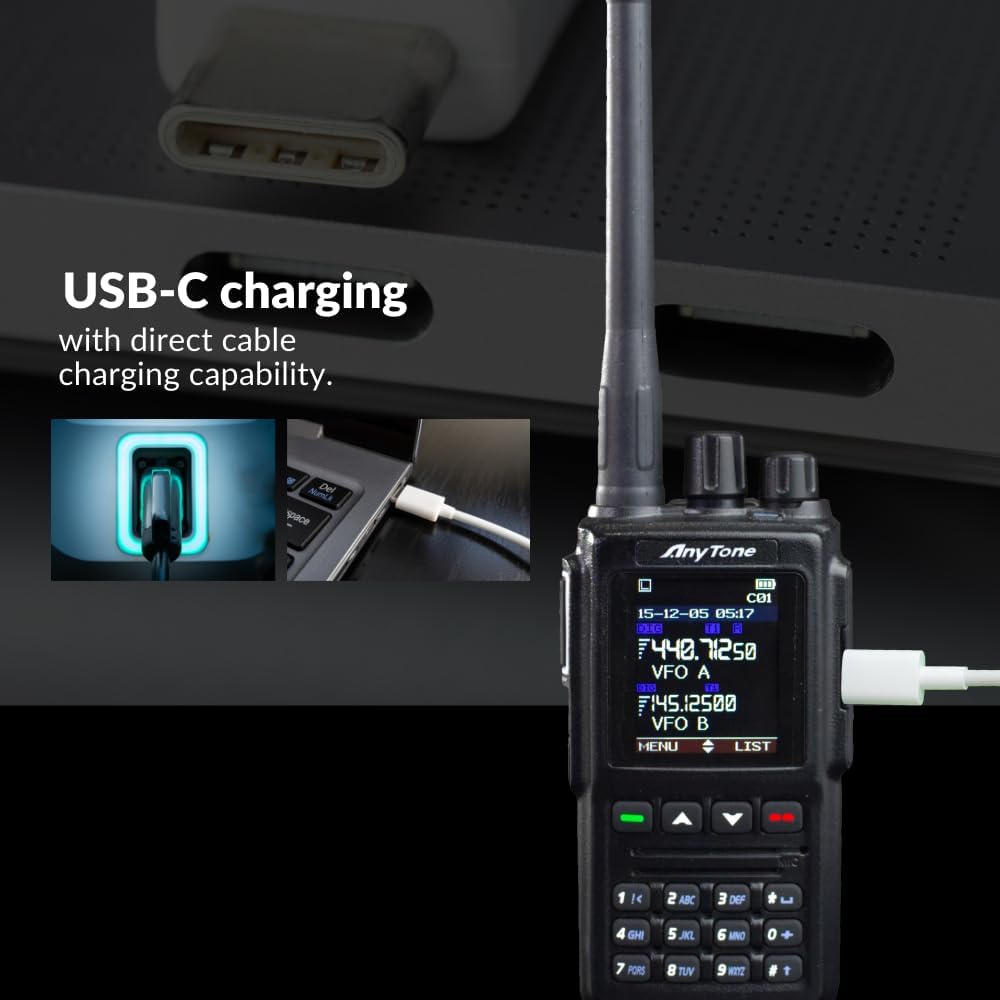
Figure 4: The AT-D168UV radio demonstrating its USB-C charging capability.
4. Software Programming & Firmware Updates
The radio can be programmed using free Windows® software. Firmware updates are also user-updatable.
- Connect the radio to your computer using the provided USB-C programming cable.
- Install the necessary drivers and programming software from the BridgeCom Systems website or included media.
- Follow the software instructions for programming channels, contacts, and other settings.

Figure 5: The AT-D168UV radio being programmed via a computer, highlighting its software programming and firmware update capabilities.
Unboxing and Initial Setup Video
Video 1: A detailed unboxing and initial setup guide for the AnyTone AT-D168UV Handheld radio, demonstrating component identification and basic assembly.
Operating Instructions
1. Power On/Off & Volume Control
To power on the radio, rotate the top-most knob clockwise. Continue rotating to adjust the volume. To power off, rotate counter-clockwise until it clicks.
2. Display and Front Panel Programming
The radio features a 1.77-inch TFT color LCD display that shows operating modes, caller ID, name, and signal strength. The front keypad allows for direct programming for both analog and DMR operations.

Figure 6: Close-up view of the AT-D168UV's 1.77-inch TFT color LCD display and its front panel programming keypad.
3. Dual Band & Modes
The AT-D168UV operates on both VHF (144-148 MHz) and UHF (420-450 MHz) bands. It supports both Analog and DMR (Digital Mobile Radio) modes, allowing seamless communication across different systems.

Figure 7: Visual representation of the AT-D168UV's supported frequency bands (VHF/UHF), bandwidth options, and four inherent power levels.
4. Contact, TalkGroup, Channel, and Zone Capacity
The radio offers extensive memory capabilities:
- 500K Contact List Capacity: Store up to 500,000 DMR users.
- 10K TalkGroup List Capacity: Configure up to 10,000 talkgroups for various DMR networks.
- 4K Channel Capacity: Program up to 4,000 channels to keep conversations flowing.
- 256 Zone Capacity: Organize channels into up to 256 zones, with each zone storing up to 256 channels.

Figure 8: The AT-D168UV's menu showing options related to its impressive contact, talkgroup, channel, and zone capacities.
5. Voice Recording & Encoding/Decoding
The radio supports up to 4 hours of analog or digital voice recording. It also includes advanced encoding and decoding features:
- Supports CTCSS/DCS for analog squelch control.
- Includes DTMF/2TONE/5TONE/QDC encode and decode features for advanced signaling.

Figure 9: The AT-D168UV's capabilities for voice recording and various encoding/decoding functions.
Product Review Video
Video 2: A comprehensive product review of the AnyTone AT-D168UV, showcasing its features, design, and performance in practical use.
Maintenance
Proper maintenance ensures the longevity and optimal performance of your AT-D168UV radio.
- Cleaning: Use a soft, damp cloth to clean the radio's exterior. Avoid harsh chemicals or abrasive cleaners.
- Battery Care: To maximize battery life, avoid overcharging or completely draining the battery. Store batteries in a cool, dry place when not in use.
- Firmware Updates: Regularly check the BridgeCom Systems website for new firmware updates. Keeping your radio's firmware up-to-date can improve performance and add new features.
- Antenna Care: Ensure the antenna is securely attached but not overtightened. Avoid bending or stressing the antenna.
Troubleshooting
If you encounter issues with your AnyTone AT-D168UV, try the following basic troubleshooting steps:
- Radio not powering on: Ensure the battery is correctly installed and fully charged.
- No audio: Check the volume level and ensure the squelch is not set too high. Verify the correct channel or talkgroup is selected.
- Cannot transmit/receive: Confirm the antenna is properly attached. Check frequency and mode settings. Ensure you are within range of other radios or repeaters.
- Programming issues: Verify the USB-C cable connection and ensure the correct drivers and software versions are installed on your computer.
For more complex issues or technical support, please refer to the BridgeCom Systems support resources or contact their customer service directly.
Specifications
| Feature | Specification |
|---|---|
| Item Weight | 1.54 pounds |
| Package Dimensions | 8.15 x 5.2 x 4.09 inches |
| Country of Origin | China |
| Item Model Number | AT-D168UV |
| Batteries | 2 Lithium Ion batteries required (included) |
| Manufacturer | AnyTone |
| Number of Channels | 4000 |
| Special Feature | Digital Display, Battery Saver Mode, Dual Band |
| Frequency Range | (Part 97) Supports 144–148 MHz (VHF), 420–450 MHz (UHF) |
| Tuner Technology | UHF/VHF |
| Voltage | 9 Volts (DC) |
| Water Resistance Level | Water Resistant |
| Compatible Devices | BridgeCom Systems devices, AnyTone devices, and other FRS two-way radios |
Warranty and Support
BridgeCom Systems provides dedicated customer support for the AnyTone AT-D168UV radio. For warranty information, technical assistance, or service, please visit the official BridgeCom Systems website or contact their support team directly.
Additionally, your purchase includes access to BridgeCom University Training, a valuable resource for learning more about your radio's capabilities and amateur radio operation.
BridgeCom Systems Contact: Visit the BridgeCom Systems Store on Amazon


