
SUVCON M02
SUVCON M02 4K Dash Cam User Manual
Model: M02
Introduction
Thank you for choosing the SUVCON M02 4K Dash Cam. This manual provides detailed instructions for the installation, operation, and maintenance of your dash cam. Please read this manual thoroughly before using the product to ensure proper functionality and safety.
Important Safety Information
- Do not operate the dash cam while driving. Adjust settings only when the vehicle is safely parked.
- Ensure the dash cam is securely mounted and does not obstruct the driver's view or airbag deployment.
- Use only the original power cable provided to prevent damage to the device or vehicle.
- Avoid exposing the dash cam to extreme temperatures, direct sunlight for prolonged periods, or excessive moisture.
- Do not attempt to disassemble or repair the dash cam yourself. Contact customer support for assistance.
- Format the memory card regularly to ensure optimal performance and prevent data corruption.
Package Contents
Please check the package for the following items:
- SUVCON M02 4K Dash Cam (Front Camera)
- Rear Camera (if included in your package)
- Car Charger with Power Cable
- Suction Cup Mount
- Cable Clips
- User Manual
- 32GB MicroSD Card (if included in your package)
Product Overview
Familiarize yourself with the components of your SUVCON M02 Dash Cam.
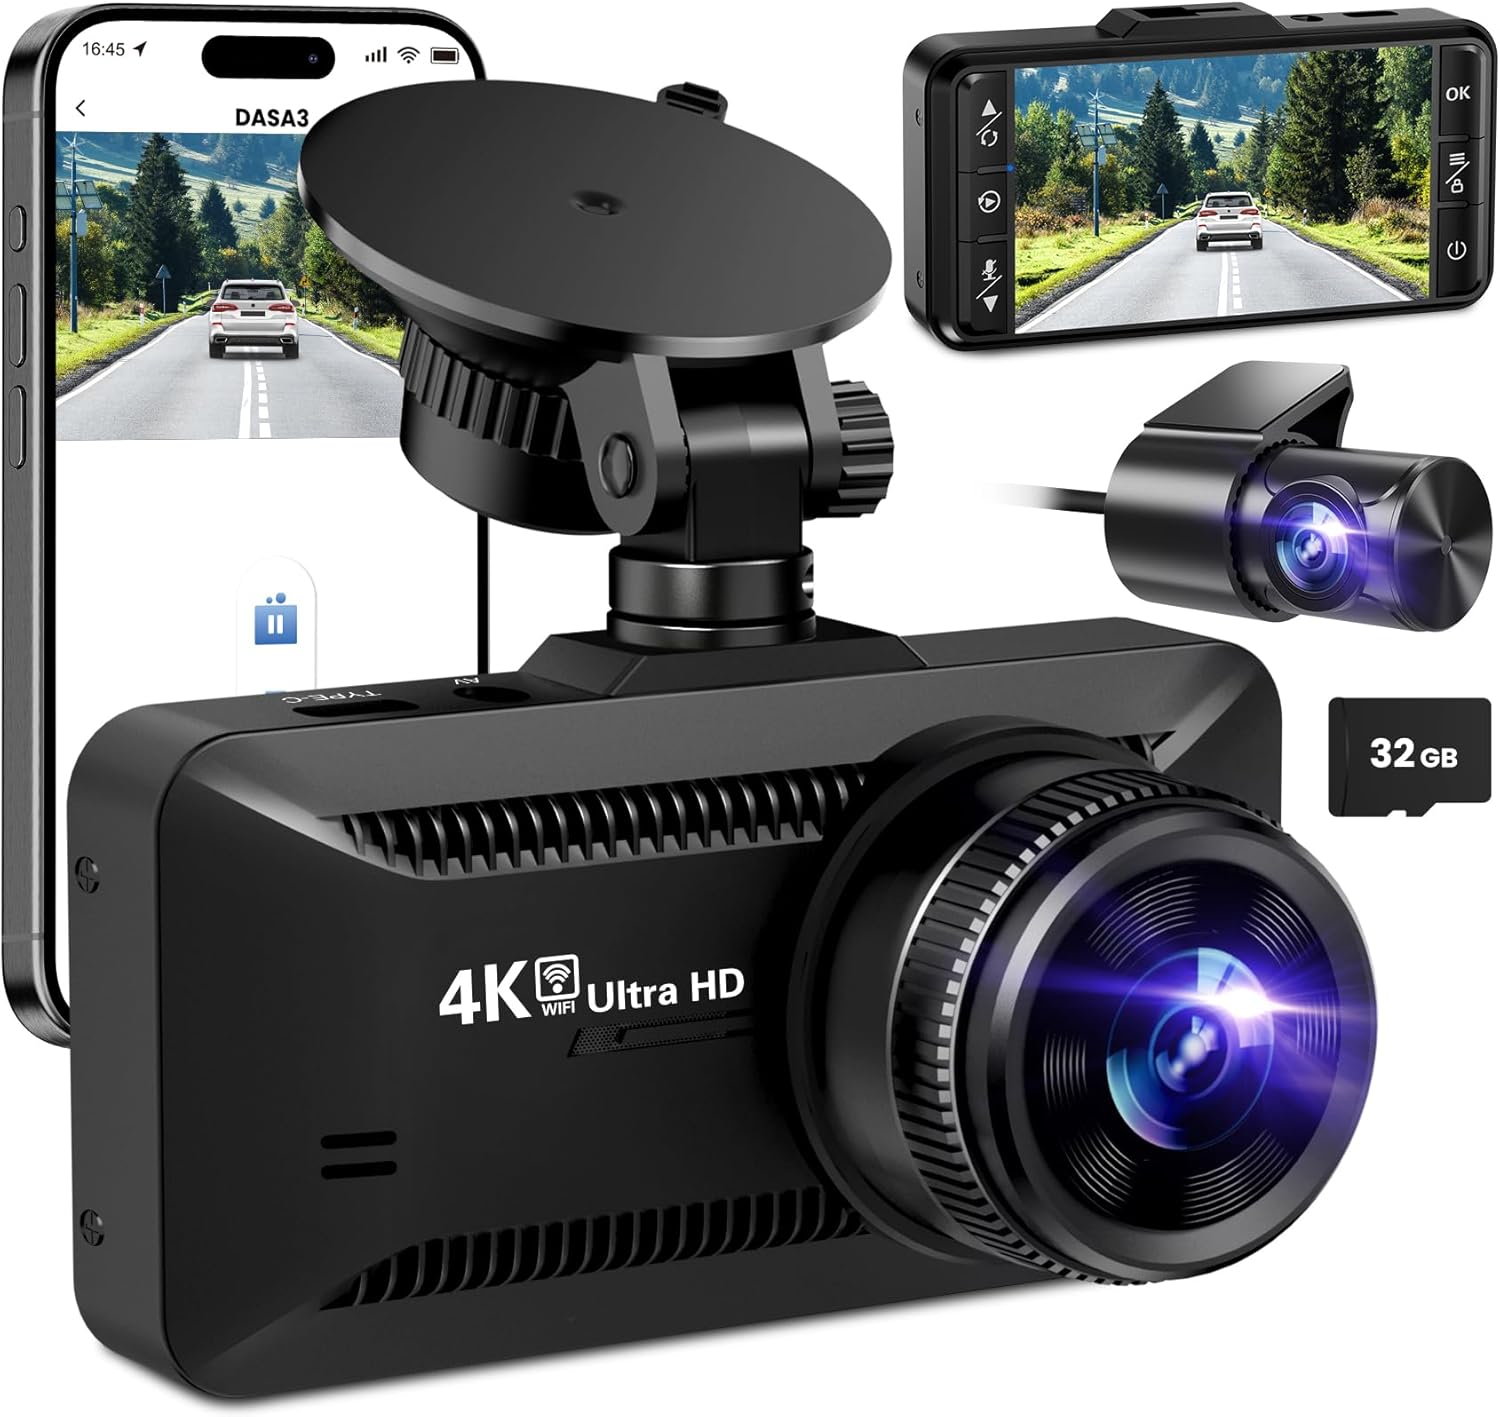
Image: The SUVCON M02 4K Dash Cam is shown with its main front camera unit, a separate rear camera, a smartphone displaying the dash cam's app interface, and a 32GB microSD card. The main unit features a prominent lens, a display screen on the back (not fully visible in this angle), and a suction cup mount. The rear camera is compact with its own lens. The smartphone screen shows a live view from the dash cam, indicating Wi-Fi connectivity.
Front Camera Unit
- Lens: Captures 4K video.
- Display Screen: For viewing live footage, playback, and menu navigation.
- Control Buttons: Power, Menu, Up, Down, OK.
- MicroSD Card Slot: For memory card insertion.
- USB Power Port (Type-C): For connecting the car charger.
- Rear Camera Port: For connecting the rear camera cable.
- Speaker/Microphone: For audio recording and playback.
Rear Camera Unit
- Lens: Captures rear view video.
- Cable: Connects to the main dash cam unit.
Setup and Installation
1. Inserting the MicroSD Card
- Ensure the dash cam is powered off.
- Locate the MicroSD card slot on the side of the dash cam.
- Insert the MicroSD card with the gold contacts facing the back of the dash cam until it clicks into place.
- To remove, gently push the card in until it clicks, then release.
Note: A Class 10 or higher MicroSD card (up to 128GB recommended) is required. Format the card in the dash cam's settings before first use.
2. Mounting the Dash Cam
- Clean the windshield area where you intend to mount the dash cam.
- Attach the suction cup mount to the dash cam.
- Press the suction cup firmly against the windshield, ideally behind the rearview mirror, and flip the lever to secure it.
- Adjust the angle of the dash cam lens to ensure it captures the road ahead clearly, avoiding obstruction from the hood or dashboard.
3. Connecting Power
- Connect the small end of the car charger cable to the USB Type-C port on the dash cam.
- Plug the larger end of the car charger into your vehicle's 12V power outlet (cigarette lighter socket).
- Route the power cable neatly along the edge of the windshield and dashboard using the provided cable clips to avoid obstructing your view.
4. Installing the Rear Camera (Optional)
- Connect the rear camera cable to the dedicated rear camera port on the main dash cam unit.
- Route the cable from the front unit to the rear of the vehicle, typically along the headliner and side panels.
- Mount the rear camera on the rear windshield using its adhesive or screws, ensuring a clear view of the road behind.
- Connect the red wire of the rear camera cable to the vehicle's reverse light positive wire if you wish to enable parking assist lines when reversing.
Operating Instructions
Power On/Off
- Automatic: The dash cam will automatically power on and begin recording when connected to power and the vehicle engine starts. It will power off automatically when the engine is turned off.
- Manual: Press and hold the Power button to manually turn the dash cam on or off.
Recording Modes
- Loop Recording: The dash cam records video in continuous loops (e.g., 1, 3, or 5 minutes). When the memory card is full, the oldest unlocked files will be overwritten.
- G-Sensor (Emergency Recording): The built-in G-sensor detects sudden impacts or collisions. When triggered, the current video segment is automatically locked and saved to prevent it from being overwritten by loop recording.
- Parking Monitor: With a hardwire kit (sold separately) or continuous power, the dash cam can monitor your vehicle while parked. If a vibration or impact is detected, it will automatically record a short video.
Menu Navigation
Use the control buttons on the dash cam to navigate the menu:
- Menu Button: Press to enter the settings menu. Press again to switch between video settings, system settings, and playback mode.
- Up/Down Buttons: Navigate through menu options.
- OK Button: Confirm selection or start/stop recording in recording mode.
Wi-Fi Connectivity and App Usage
The SUVCON M02 features Wi-Fi connectivity for easy access to recordings and settings via a smartphone app.
- Download the recommended app (e.g., "DASA3" or similar, check packaging for exact app name) from your smartphone's app store.
- On the dash cam, enable Wi-Fi from the system settings. The dash cam's Wi-Fi SSID and password will be displayed on the screen.
- On your smartphone, go to Wi-Fi settings and connect to the dash cam's Wi-Fi network using the provided password.
- Open the app. You can now view live footage, download recorded videos, change settings, and format the SD card directly from your phone.
Playback
- On Dash Cam: In recording mode, press the Menu button twice to enter playback mode. Use Up/Down buttons to select files and OK to play.
- Via App: Connect your smartphone via Wi-Fi and use the app's playback feature to view and download videos.
- On Computer: Remove the MicroSD card from the dash cam and insert it into a computer's card reader. Videos can be played using standard media players.
Maintenance
Cleaning the Dash Cam
- Use a soft, dry cloth to clean the dash cam body.
- For the lens, use a lens cleaning cloth and specialized lens cleaning solution to avoid scratches.
- Do not use abrasive cleaners or solvents.
MicroSD Card Formatting
It is recommended to format the MicroSD card every 2-4 weeks to maintain optimal recording performance and prevent data corruption. This can be done through the dash cam's menu settings or via the smartphone app.
Firmware Updates
Periodically check the SUVCON official website for available firmware updates. Firmware updates can improve performance, add new features, or fix bugs. Follow the instructions provided with the firmware file carefully.
Troubleshooting
| Problem | Possible Solution |
|---|---|
| Dash cam does not power on. |
|
| Dash cam stops recording or freezes. |
|
| Video footage is blurry or unclear. |
|
| Wi-Fi connection issues. |
|
Specifications
| Feature | Detail |
|---|---|
| Model | M02 |
| Brand | SUVCON |
| Video Capture Resolution | 4K (Front), 1080P (Rear, if applicable) |
| Special Features | G-Sensor, Loop Recording, Parking Monitor, Wi-Fi Connectivity |
| Connectivity Technology | Wi-Fi |
| Mounting Type | Dashboard Mount (Suction Cup) |
| Storage | MicroSD Card (Class 10 or higher, up to 128GB recommended) |
| Power Source | Car Charger (12V) |
| Product Dimensions | 2.54 x 2.54 x 2.54 cm (approximate, as per product data) |
Warranty and Customer Support
For warranty information, technical support, or any inquiries regarding your SUVCON M02 Dash Cam, please refer to the warranty card included in your package or visit the official SUVCON website. Please have your model number (M02) and purchase details ready when contacting support.
Website: www.suvcon.com (Example URL, please refer to actual product documentation)
Email: support@suvcon.com (Example Email, please refer to actual product documentation)
Related documentsM02


Ask a question about this manual
Ask about setup, troubleshooting, compatibility, parts, safety, or missing instructions. Manuals+ will review the question and use this page’s manual context to help answer it.