
1. Introduction
This manual provides essential information for the safe and effective installation, operation, and maintenance of the Allparts Equipment & Accessories Sit Controls H7268 Natural Gas Electronic Sym Pilot Assembly. The H7268 is a replacement pilot assembly specifically designed for various direct vent gas stoves, fireplaces, and inserts. Please read all instructions carefully before proceeding with installation or use.
2. Safety Information
WARNING: Improper installation, adjustment, alteration, service, or maintenance can cause property damage, injury, or death. Read the installation, operating, and maintenance instructions thoroughly before installing or servicing this equipment.
IMPORTANT: Installation and service must be performed by a qualified installer, service agency, or gas supplier. This pilot assembly is designed for use with Natural Gas (NG) direct vent systems only. Do not use with unvented hearth appliances.
- Always shut off the gas supply to the appliance before performing any service or maintenance.
- Ensure adequate ventilation during installation and operation.
- Check all gas connections for leaks using a non-corrosive leak detection solution after installation.
- Keep the area around the appliance clear and free from combustible materials, gasoline, and other flammable vapors and liquids.
3. Product Overview
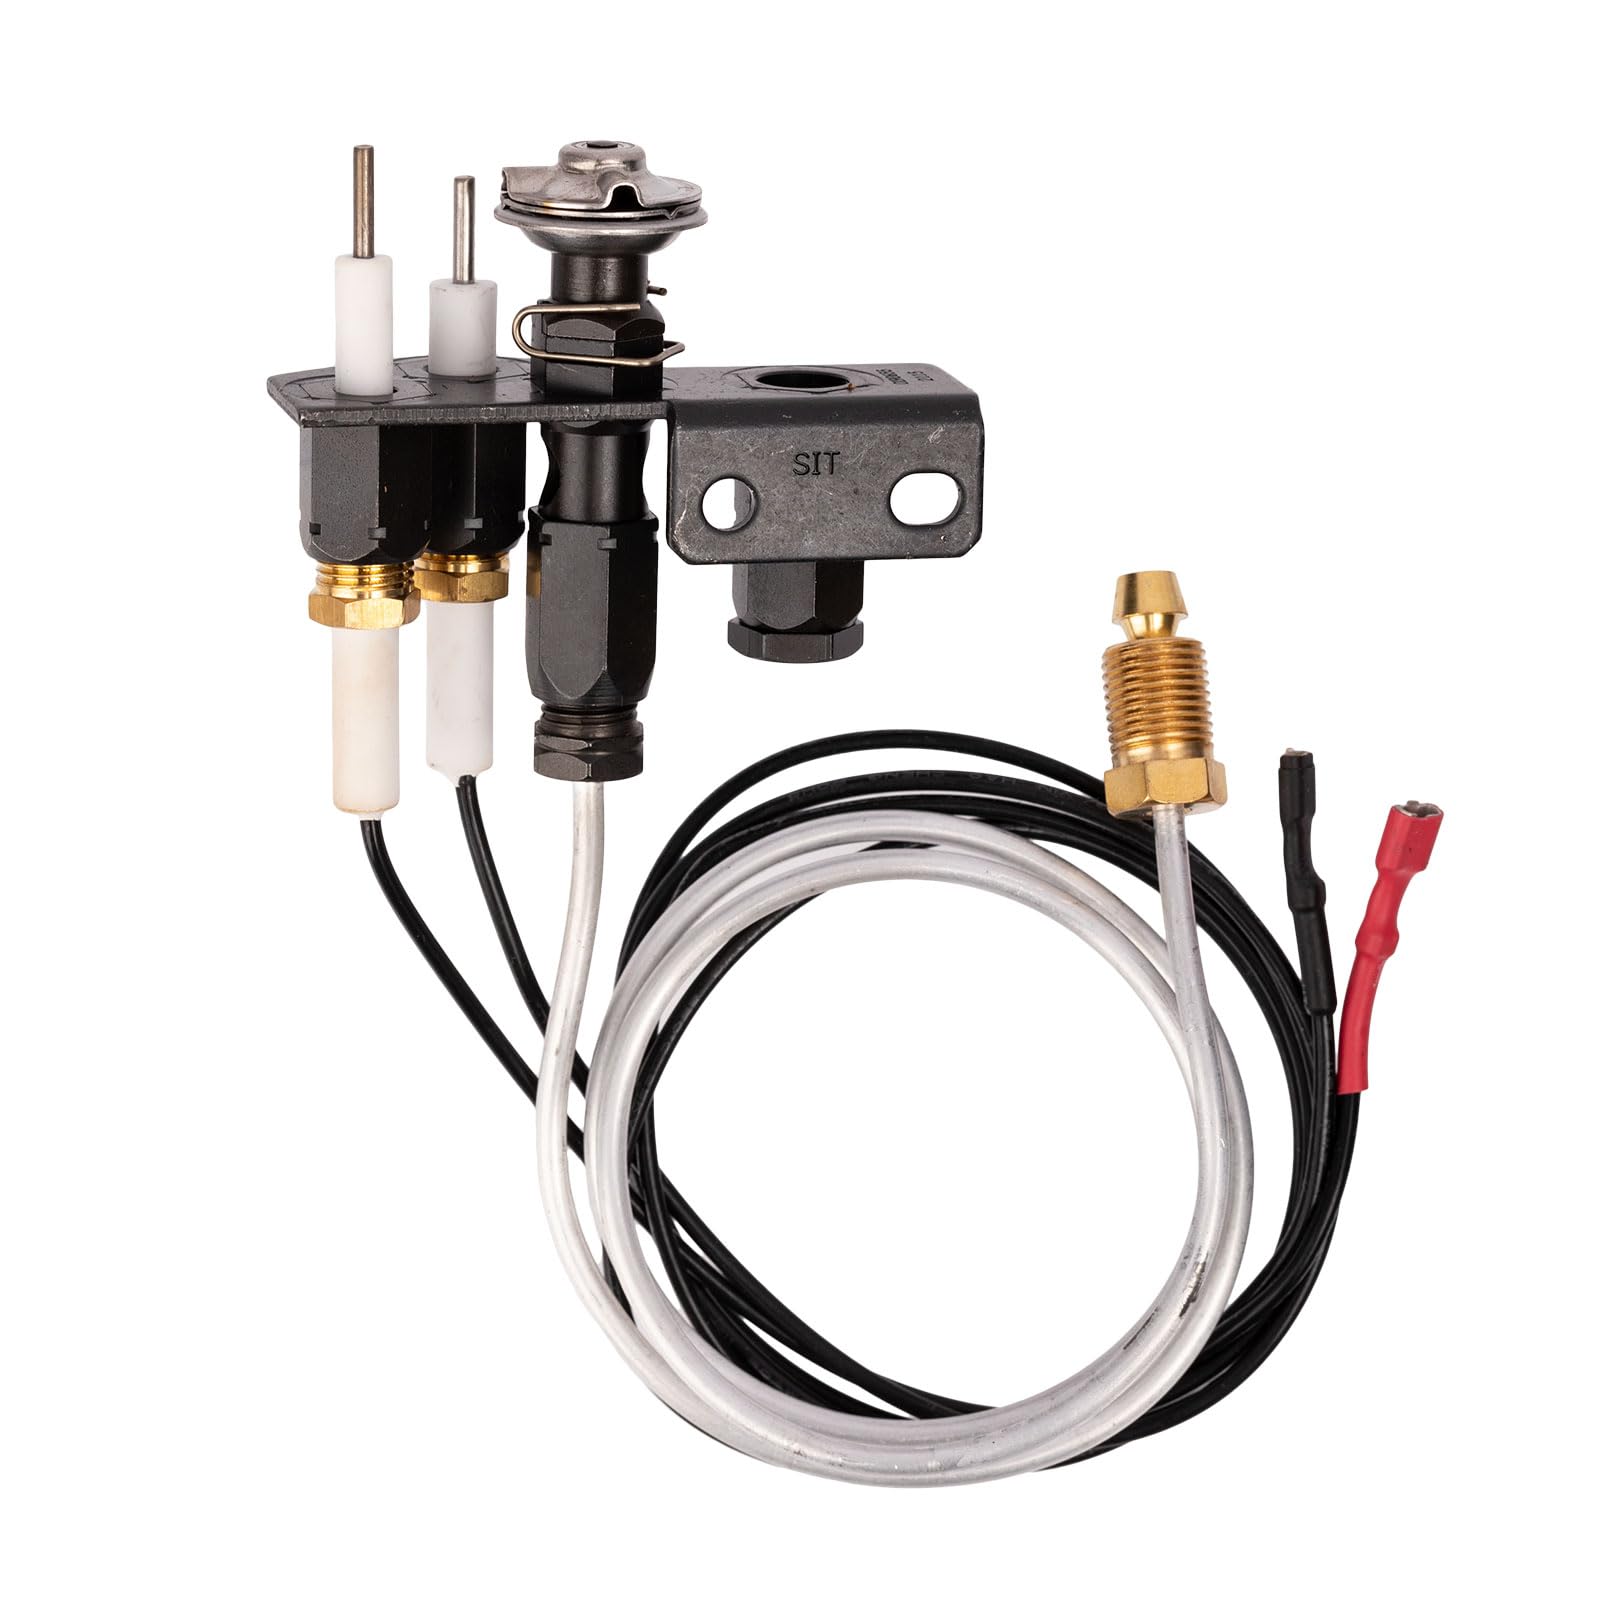
The H7268 Natural Gas Electronic Sym Pilot Assembly is a critical component for igniting and monitoring the flame in compatible direct vent gas appliances. It typically consists of a pilot burner, thermocouple/thermopile, igniter electrode, and associated tubing and wiring.


4. Compatibility
The H7268 pilot assembly is compatible with a range of direct vent gas stoves, fireplaces, and inserts. A partial list of compatible models includes:
- Merit Plus Gas Fireplaces: MPDP35IN, MPDP40IN, MPD35CNE, MPD40CNE, MPD35RNE, MPD40RNE, MPD45RNE, MPDR33RNE, MPDT33RNE
- Signature Gas Fireplaces: SYM-35N, SYM-40N, SYM-45N
- Superior Gas Fireplaces: SLBV35NE-2, SLBV40NE-2
- Astria Gas Log Sets: AllumedLX60TEN, Altair 40DEN, Altair 45DEN, AriesCD33TEN, AriesCD35TEN, AriesCD40TEN, AriesCD33REN, AriesCD35REN, AriesCD40REN, Aries33TEN, Aries35TEN, Aries40TEN, Aries33REN, Aries35REN, Aries40REN, Aries45DEN, ENVY35TEN, ENVY40TEN, ENVY45TEN, ENVYCD35TE, ENVYCD40TEN, ENVYCD45TEN, Gemini33TEN, Gemini33REN, Gemini35DEN, Gemini40DEN, Gemini45DEN, Rhapsody42TEN, Rhapsody54TEN, Scorpio35DEN, Scorpio40DEN, Scorpio45DEN, Scorpio35DEN-B, Scorpio40DEN-B, Scorpio45DEN-B, Scorpio CD35DEN, Scorpio CD40DEN, Scorpio CD45DEN, Scorpio CD35DEN-B, Scorpio CD40DEN-B, Scorpio CD45DEN-B, Sirius42TEN, Sirius54TEN
- Lennox Gas Fireplace: Montebello STTEN, Montebello STTYN
Always verify compatibility with your specific appliance model before installation.
5. Setup and Installation
WARNING: Installation must be performed by a qualified service technician. Failure to follow these instructions can result in fire, explosion, or carbon monoxide poisoning.
- Preparation: Ensure the gas supply to the appliance is turned off and the appliance has cooled completely. Disconnect electrical power if applicable.
- Access: Carefully remove any panels or components necessary to access the existing pilot assembly within your direct vent appliance.
- Removal of Old Assembly: Disconnect the gas line, igniter wire, and thermocouple/thermopile wires from the old pilot assembly. Unfasten the mounting screws and remove the old assembly.
- Installation of New Assembly: Position the new H7268 pilot assembly in the same location as the old one. Secure it with the appropriate mounting screws.
- Connections:
- Connect the gas supply line to the pilot assembly. Ensure a tight, leak-free connection.
- Connect the igniter wire to the appropriate terminal.
- Connect the thermocouple/thermopile wires to the gas valve or control module as per the appliance manufacturer's instructions.
- Leak Test: Turn on the gas supply and check all connections for leaks using a gas leak detection solution. Bubbles indicate a leak. Tighten connections as needed and re-test.
- Reassembly: Replace any panels or components removed during access.
6. Operating Instructions
The H7268 pilot assembly operates as part of your appliance's ignition system. Once installed correctly, its operation is typically automatic or initiated by the appliance's control system.
- Initial Startup: After installation, follow your appliance's specific instructions for initial startup. This usually involves turning on the gas supply and initiating the ignition sequence.
- Pilot Ignition: The electronic igniter will spark, igniting the pilot flame. The thermocouple/thermopile will sense this flame, signaling the gas valve to open and allow gas to flow to the main burner.
- Main Burner Operation: Once the pilot is established, the main burner will ignite, and the appliance will operate as designed.
- Shutdown: To turn off the appliance, follow the manufacturer's instructions. The pilot flame may remain lit or extinguish depending on the appliance's design.
7. Maintenance
Regular inspection and maintenance ensure the longevity and safe operation of your pilot assembly.
- Annual Inspection: It is recommended to have a qualified service technician inspect the pilot assembly and the entire gas appliance annually.
- Pilot Flame Check: Periodically observe the pilot flame. It should be steady, blue, and impinge directly on the thermocouple/thermopile tip. A weak, yellow, or wavering flame may indicate a problem.
- Cleaning: If the pilot burner or igniter electrode appears dirty or obstructed, gently clean it with a soft brush or compressed air. Ensure the gas supply is off before cleaning. Do not use abrasive materials.
- Wire Connections: Check all electrical and gas connections for tightness and signs of wear or corrosion.
8. Troubleshooting
If your appliance is not operating correctly, consult this troubleshooting guide. For complex issues, contact a qualified service technician.
| Problem | Possible Cause | Solution |
|---|---|---|
| Pilot will not light | No gas supply, faulty igniter, obstructed pilot orifice, loose wiring. | Check gas valve, inspect igniter for damage, clean pilot orifice, check all electrical connections. |
| Pilot lights but main burner does not ignite | Faulty thermocouple/thermopile, gas valve issue, low gas pressure. | Ensure pilot flame impinges on thermocouple/thermopile, check thermocouple/thermopile for proper voltage, consult a technician for gas valve or pressure issues. |
| Pilot flame is weak or yellow | Partially obstructed pilot orifice, low gas pressure, air in gas line. | Clean pilot orifice, bleed air from gas line (if safe to do so), consult a technician for gas pressure issues. |
| Pilot goes out frequently | Drafts, faulty thermocouple/thermopile, loose connections. | Check for drafts, ensure thermocouple/thermopile is properly positioned and functioning, tighten connections. |
9. Specifications
- Model Number: H7268
- Fuel Type: Natural Gas (NG)
- Application: Direct Vent Gas Stoves, Fireplaces, and Inserts
- Manufacturer: Innovative Hearth Products (OEM for Allparts Equipment & Accessories)
- Item Weight: 12.8 ounces
- Package Dimensions: 8 x 5 x 2 inches
10. Warranty and Support
Allparts Equipment & Accessories is committed to providing superior quality replacement components. This product undergoes rigorous quality checks to ensure peak performance and longevity.
For technical assistance, questions, or issues, Allparts Equipment & Accessories offers top-tier USA-based technical support. Please refer to your purchase documentation or the Allparts Equipment & Accessories website for specific warranty terms and contact information.
Contact Information: Refer to the official Allparts Equipment & Accessories website or your product packaging for the most current support details.
