
sunchers hy67
SUNCHERS 20V Max Hedge Trimmer Instruction Manual
Model: hy67
1. Introduction
This manual provides essential information for the safe and efficient operation, maintenance, and troubleshooting of your SUNCHERS 20V Max Hedge Trimmer. Please read it thoroughly before first use and keep it for future reference.

Figure 1: SUNCHERS 20V Max Hedge Trimmer and included accessories.
2. Package Contents
Upon opening the package, ensure all items listed below are present and in good condition:
- One (1) SUNCHERS 20V Max Hedge Trimmer
- One (1) Blade Sheath
- One (1) Charger
- Two (2) 1.5Ah Lithium-Ion Batteries
- One (1) User Manual (this document)
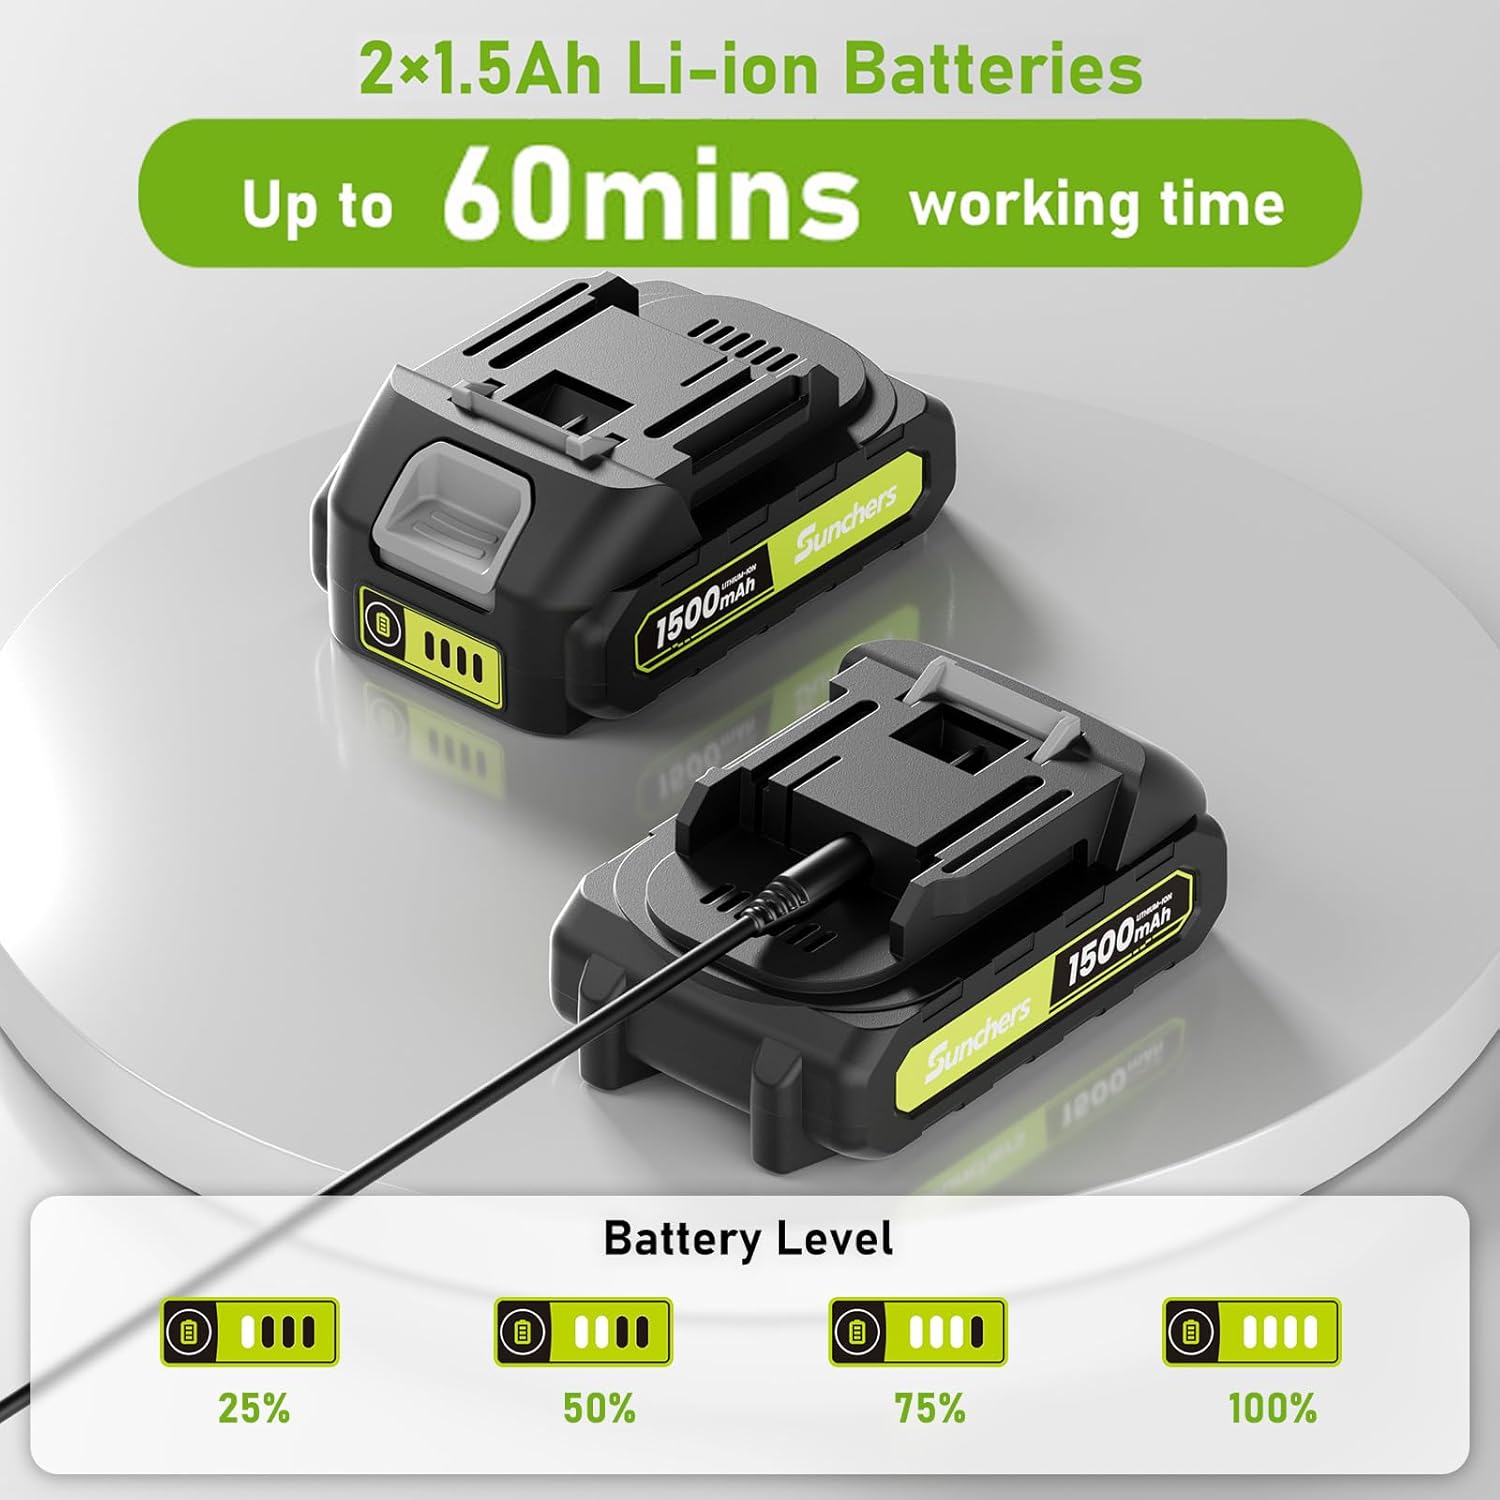
Figure 2: The two included 1.5Ah Lithium-Ion batteries, providing up to 60 minutes of working time.
3. Safety Information
Adhere to the following safety guidelines to prevent injury and ensure proper operation:
- Always wear appropriate personal protective equipment (PPE), including safety glasses and gloves, when operating the trimmer.
- Ensure the work area is clear of debris, obstacles, and bystanders.
- Keep hands and feet away from the blade during operation.
- The machine will enter a stable working state 3-5 seconds after starting.
- Continuously charging a fully charged battery will affect its lifespan; remove the battery once fully charged.
- If the battery cell temperature exceeds 50 degrees Celsius, charging cannot occur. Allow the battery to cool down before attempting to charge.
- The dual-switch design enhances safety by requiring both hands to activate the trimmer.

Figure 3: The dual switch mechanism ensures safe operation by requiring two-hand activation.
4. Setup
The SUNCHERS 20V Max Hedge Trimmer requires minimal assembly. Follow these steps to prepare your trimmer for use:
- Charge Batteries: Fully charge both 1.5Ah lithium-ion batteries using the provided charger. The power indicator light on the battery will show charging progress.
- Install Battery: Slide a fully charged battery into the battery slot at the rear of the trimmer until it clicks securely into place.
- Inspect Trimmer: Before each use, inspect the trimmer for any damage, loose parts, or dull blades. Ensure the blade sheath is removed.

Figure 4: The hedge trimmer comes pre-assembled, requiring only battery installation.
5. Operating Instructions
Operating your hedge trimmer is straightforward. Follow these steps for effective trimming:
- Grip: Hold the trimmer firmly with both hands, one on the front handle (which includes the front switch lever) and the other on the rear handle, ensuring your fingers are on the trigger switch.
- Start: To activate the trimmer, simultaneously press the front switch lever (all around the front handle) and the trigger switch. The dual-switch design ensures safety.
- Trimming: Guide the 22-inch dual-action blade along the hedges or shrubs. The trimmer operates at up to 2800 SPM (Strokes Per Minute) and can cut branches up to 3/4 inch thick.
- Movement: Use a smooth, sweeping motion for even cuts. The lightweight design (5.25 lbs) and ergonomic handle allow for precise control and reduced fatigue during extended use.
- Stop: Release either the front switch lever or the trigger switch to stop the trimmer.
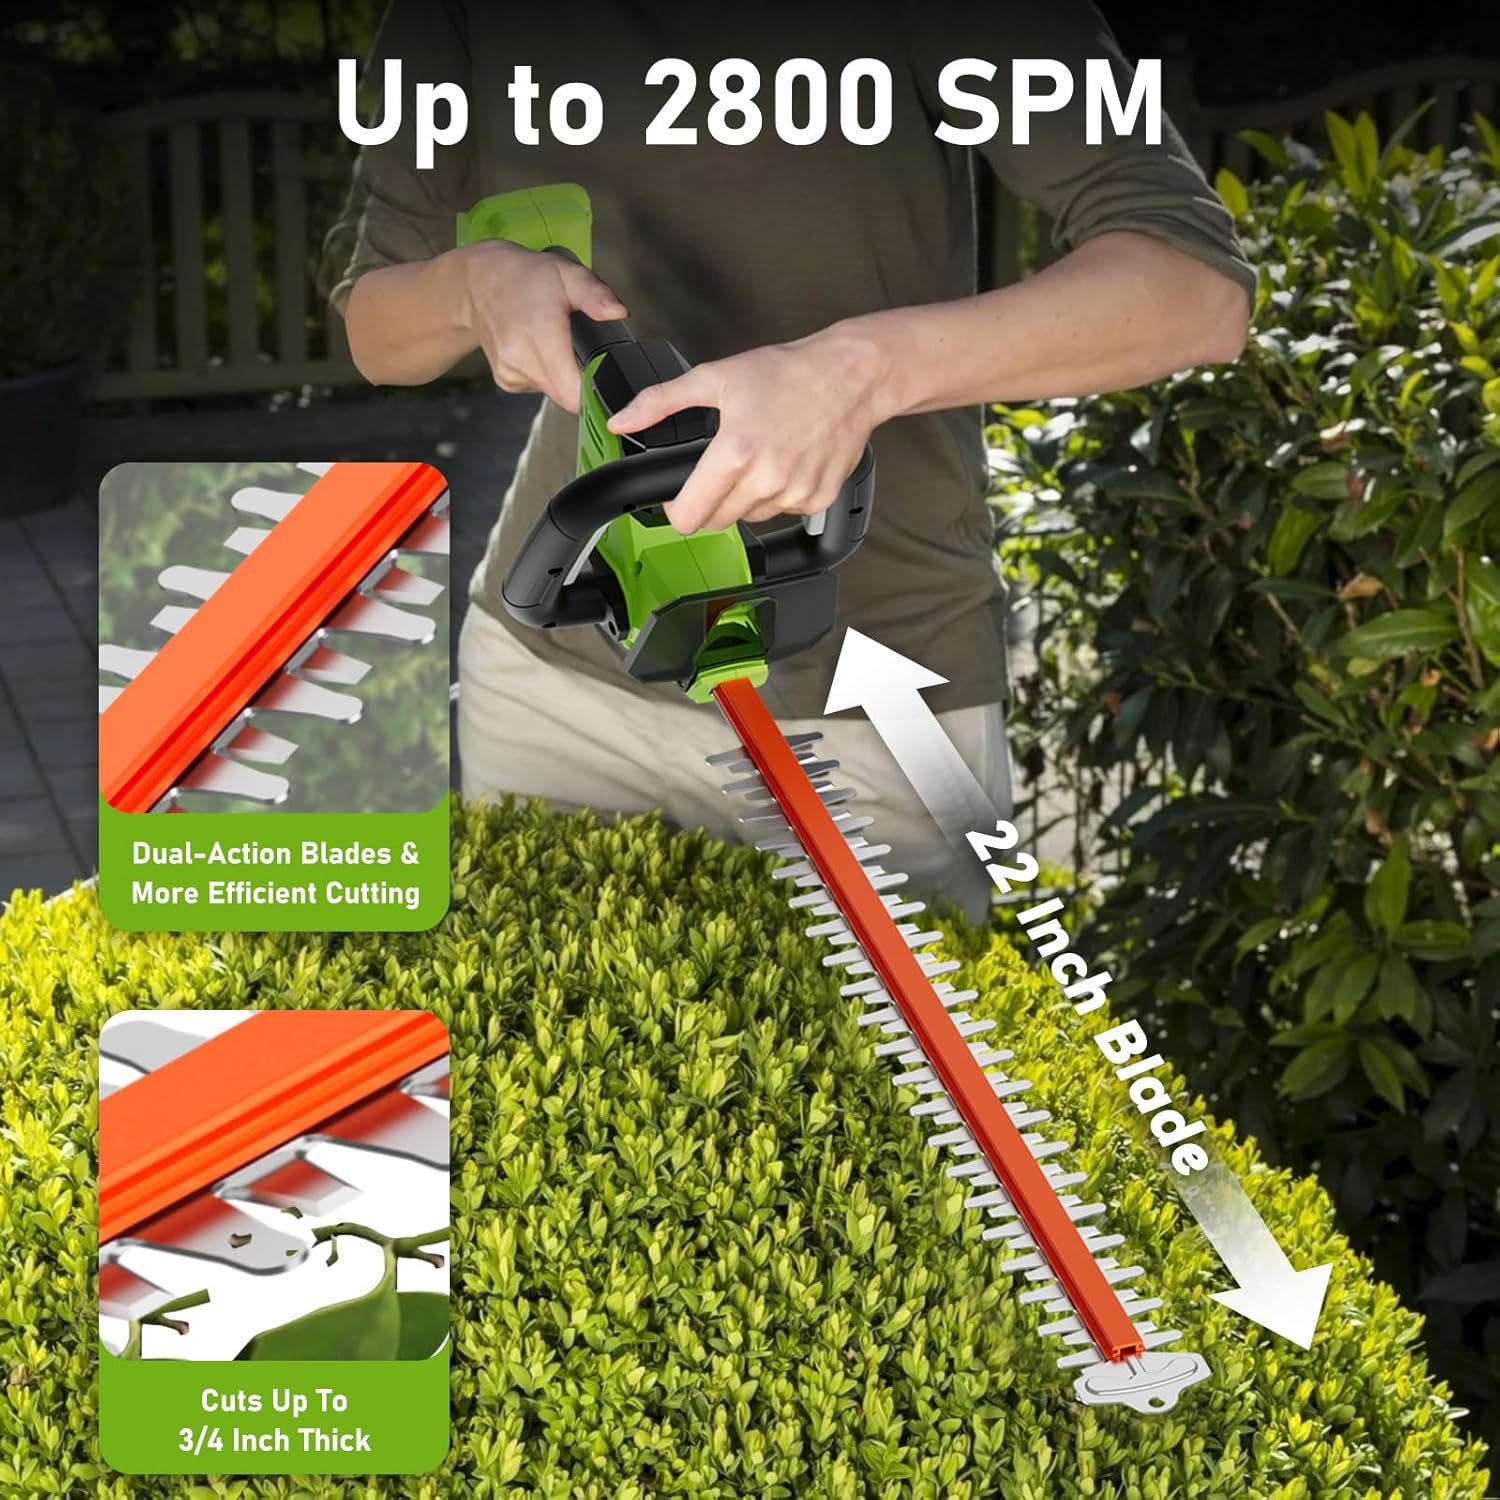
Figure 5: The 22-inch dual-action blade provides efficient cutting for branches up to 3/4 inch thick.

Figure 6: The ergonomic design makes the trimmer easy to operate for various users.
6. Maintenance
Regular maintenance ensures the longevity and optimal performance of your hedge trimmer:
- Blade Cleaning: After each use, clean the blades of any sap, leaves, or debris. Use a stiff brush and a mild cleaning solution if necessary.
- Blade Lubrication: Apply a light coat of machine oil or blade lubricant to the blades to prevent rust and ensure smooth operation. The blades have undergone anti-rust treatment for extended life.
- Blade Sheath: Always re-attach the blade sheath when the trimmer is not in use or during storage to protect the blades and prevent accidental injury.
- Battery Care: Store batteries in a cool, dry place. Avoid extreme temperatures. Do not store fully discharged batteries for extended periods.
- General Cleaning: Wipe down the body of the trimmer with a damp cloth to remove dirt and dust.
7. Troubleshooting
Refer to this section for common issues and their solutions:
| Problem | Possible Cause | Solution |
|---|---|---|
| Trimmer does not start. | Battery not installed correctly or discharged. Safety switches not engaged. | Ensure battery is fully inserted and charged. Confirm both front switch lever and trigger switch are pressed simultaneously. |
| Battery not charging. | Battery temperature too high. Charger not connected properly. | Allow battery to cool down if it exceeds 50°C. Ensure charger is securely plugged into both the battery and a power outlet. |
| Reduced cutting performance. | Dull or dirty blades. Overgrown branches exceeding cutting capacity. | Clean and lubricate blades. Sharpen blades if necessary. Avoid attempting to cut branches thicker than 3/4 inch. |
Tip: When the machine does not start or the battery does not charge, please contact customer support for assistance.
8. Specifications
| Feature | Detail |
|---|---|
| Brand | SUNCHERS |
| Model Number | hy67 |
| Power Source | Battery Powered (20V Max) |
| Blade Length | 22 Inches |
| Cutting Capacity | 3/4 Inch |
| Strokes Per Minute (SPM) | Up to 2800 |
| Battery Type | Lithium Ion (2 x 1.5Ah included) |
| Approx. Run Time (both batteries) | 60 minutes |
| Item Weight | 5.25 lbs (Trimmer only) / 9.83 lbs (with batteries) |
| Blade Material | High Carbon Steel |
| Product Dimensions (L x W x H) | 8.5"L x 7.28"W x 39.96"H |
9. Warranty and Support
For any issues, questions, or to purchase additional SUNCHERS batteries or chargers, please refer to the following:
- If you are not satisfied with our products or receive damaged products, please contact us at any time.
- Additional "SUNCHERS battery or charger" can be purchased on Amazon.
- This product is Verified by Transparency, with each item having a unique code verified before shipping.
For further assistance, please visit the official SUNCHERS store on Amazon: SUNCHERS Store
Ask a question about this manual
Ask about setup, troubleshooting, compatibility, parts, safety, or missing instructions. Manuals+ will review the question and use this page’s manual context to help answer it.