
KMMKGG 114 RGB TIMER
KMMKGG 114 RGB Timer User Manual
Model: 114 RGB TIMER
Introduction
This manual provides comprehensive instructions for the KMMKGG 114 RGB Timer. This digital magnetic timer features a 1.5-inch RGB LED display, offering both countdown and count-up functionalities. It is designed for various applications including cooking, studying, fitness, and classroom management. The timer is rechargeable and includes adjustable brightness, multiple volume levels, and a vibration mode.
Product Features
- Vibrant RGB LED Display: Features 5 digits for hours, minutes, and seconds with 10 color-changing options.
- Versatile Functionality: Supports both countdown and count-up modes.
- Rechargeable Battery: Built-in 1000mAh rechargeable battery for wireless operation.
- Adjustable Brightness: Three levels of display brightness (Energy Saving, Low Light, High Light).
- Multiple Alert Modes: Four volume levels (High, Low, Mute with Flashes, Vibrate).
- Magnetic Backing: Equipped with four magnets for easy attachment to metal surfaces.
- Integrated Stand: Fold-out stand for desktop use.
- Memory Function: Retains last-used settings.
- Compact and Portable Design: Suitable for various environments.

Figure 1: Overview of KMMKGG 114 RGB Timer features.
Package Contents
- KMMKGG 114 RGB Timer
- USB Type-C Charging Cable (Note: Charging head not included)
- User Manual (this document)
Component Identification
Familiarize yourself with the timer's components:

Figure 2: Front and Rear View of the KMMKGG 114 RGB Timer.
- Front Panel:
- HR Button: Sets hours.
- MIN Button: Sets minutes.
- SEC Button: Sets seconds.
- CLEAR Button: Clears the set time.
- ST/SP Button: Starts or stops the timer.
- Side Buttons:
- Brightness Switch: Adjusts display brightness.
- Volume Control: Cycles through volume levels and vibration mode.
- Rear Panel:
- 4 Magnets: For mounting on metal surfaces.
- Reset Button: Small button to reset the device (requires a pin).
- Hanging Hole: For wall mounting.
- Charge Port (USB Type-C): For recharging the internal battery.
- Fold-out Stand: For tabletop placement.
Setup
1. Charging the Timer
Before first use, fully charge the timer. Connect the provided USB Type-C cable to the timer's charge port and plug the other end into a USB power source (e.g., power bank, USB charger, laptop, car charger). The charging indicator light will illuminate during charging.
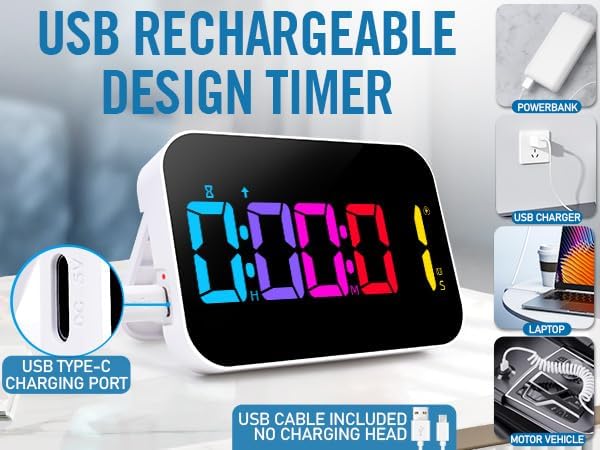
Figure 3: Charging the KMMKGG 114 RGB Timer.

Figure 4: Rear view showing the charging port and indicator.
2. Mounting Options
- Magnetic Attachment: Use the four strong magnets on the back to attach the timer to metal surfaces like refrigerators or whiteboards.
- Desktop Placement: Extend the fold-out stand on the back for stable placement on any flat surface.
- Wall Hanging: Utilize the hanging hole on the back to mount the timer on a hook or nail.
Operating Instructions
1. Setting the Time (Countdown Mode)
- Press the HR button to set hours.
- Press the MIN button to set minutes.
- Press the SEC button to set seconds.
- To clear the set time, press the CLEAR button.
- Press the ST/SP button to start the countdown.
- Press ST/SP again to pause the countdown. Press it once more to resume.
- When the countdown reaches zero, the alarm will sound or vibrate according to your settings, and the timer will automatically switch to count-up mode to show elapsed time.
2. Count-Up Mode
To use the count-up function:
- Ensure the timer display shows "00:00:00". If not, press the CLEAR button.
- Press the ST/SP button to start counting up from zero.
- Press ST/SP again to pause the count-up. Press it once more to resume.

Figure 5: Countdown and Count-Up Modes.
3. Adjusting Brightness
Press the Brightness Switch button on the side of the timer to cycle through three brightness levels:
- Energy Saving Mode: Screen turns off after 10 seconds of inactivity to conserve battery.
- Low Light: Reduced display brightness.
- High Light: Maximum display brightness.

Figure 6: Brightness Levels and Low Battery Indicator.
4. Adjusting Volume and Vibration
Press the Volume Control button on the side of the timer to cycle through four alert modes:
- High Volume (85-98dB): Suitable for noisy environments like cooking or sports.
- Low Volume (65-80dB): Ideal for classrooms or daily learning.
- Mute & Flashes (0dB): No sound, display flashes. Recommended for quiet areas like libraries or self-study rooms.
- Vibrate: Timer vibrates without sound. Useful for personal reminders during daily work.
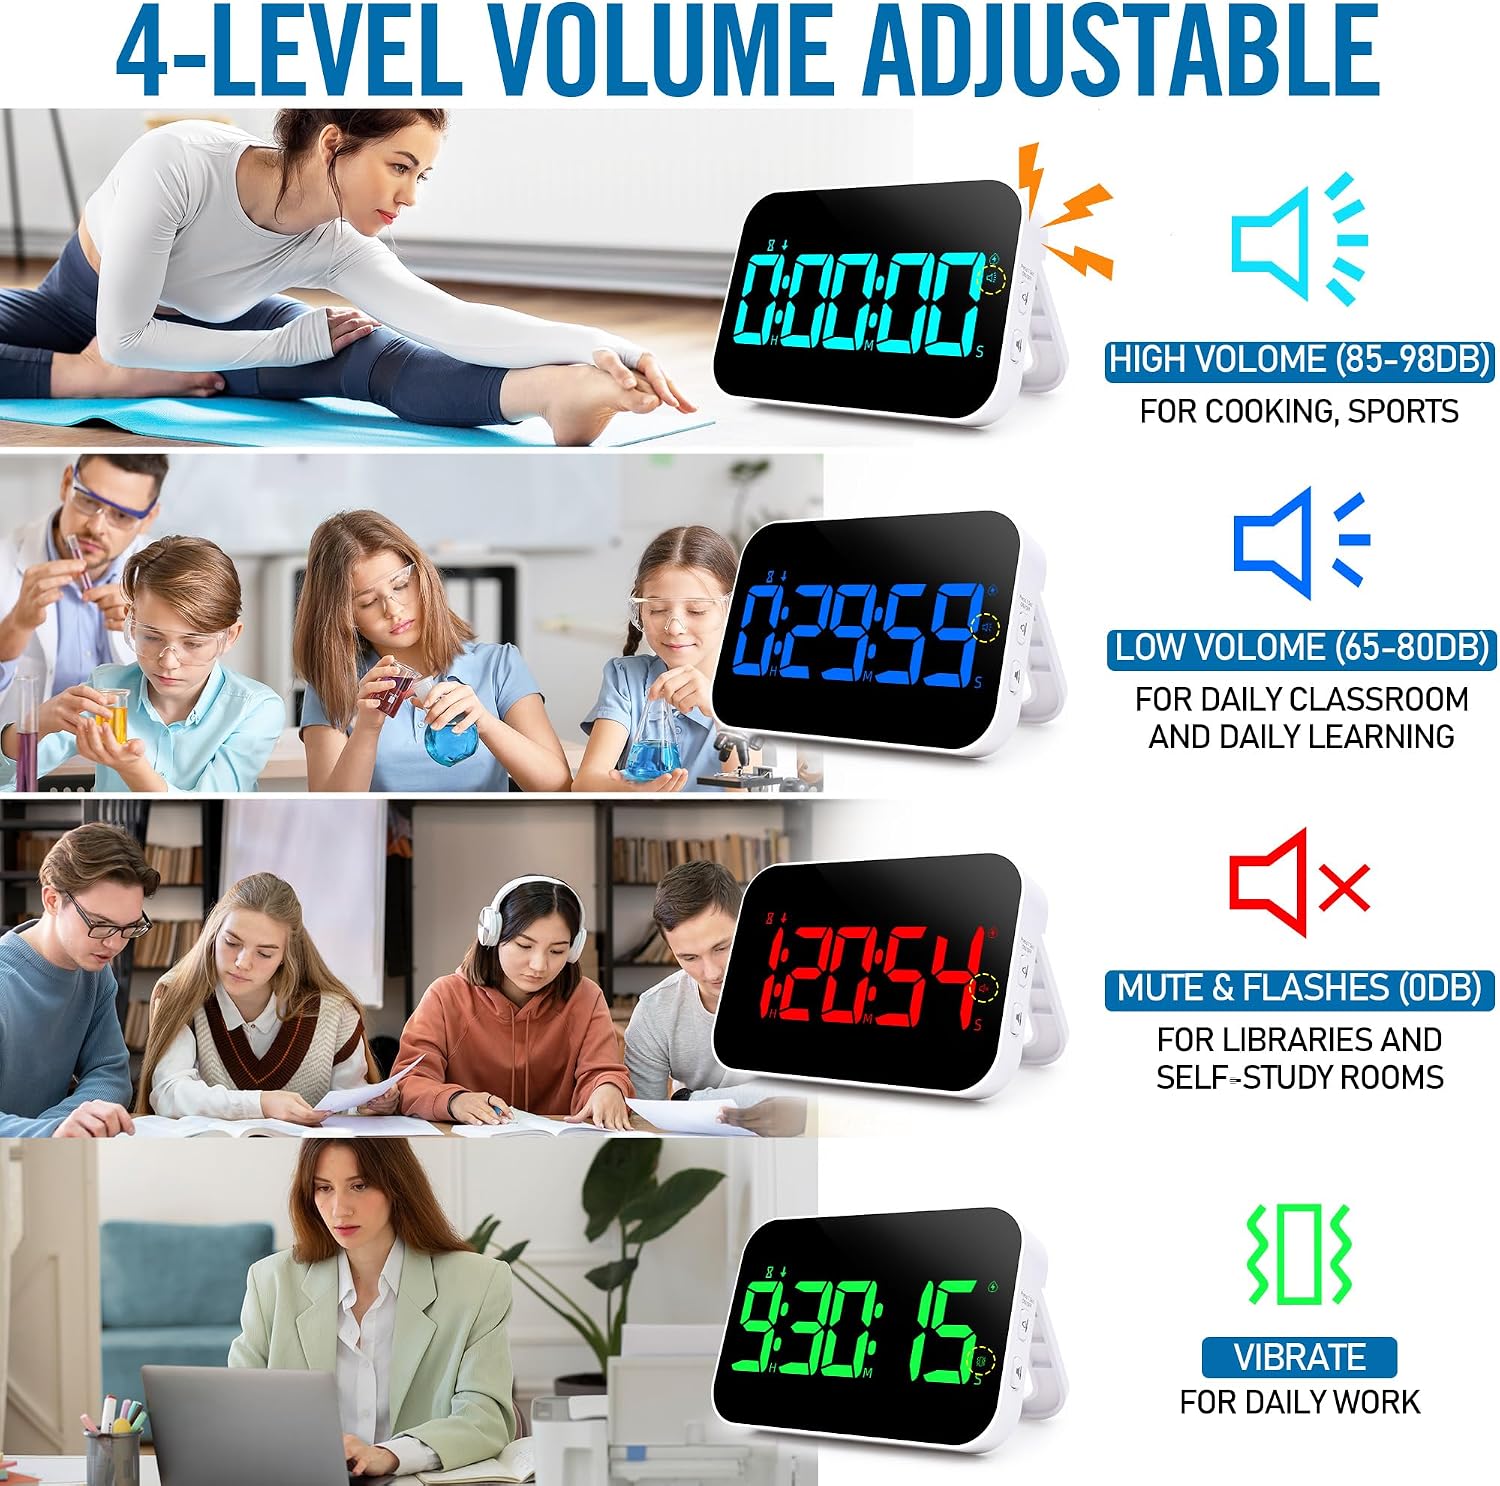
Figure 7: Volume and Vibration Modes.
5. Changing RGB Colors
The timer's display cycles through 10 different RGB colors automatically. There is no manual control to select a specific static color; the colors change dynamically.

Figure 8: Spectrum of RGB Colors on Display.
Maintenance
- Cleaning: Wipe the timer with a soft, dry cloth. Do not use abrasive cleaners or immerse in water.
- Battery Care: To prolong battery life, avoid fully discharging the timer frequently. Charge it regularly, especially if not used for extended periods.
- Storage: Store the timer in a cool, dry place away from direct sunlight and extreme temperatures.
Troubleshooting
| Problem | Possible Cause | Solution |
|---|---|---|
| Display does not turn on. | Battery is depleted. | Connect the timer to a power source using the USB-C cable and charge it. |
| Display turns off during countdown/count-up. | Timer is in Energy Saving Mode. | Press the Brightness Switch button to select Low Light or High Light mode to keep the display on. |
| Timer is not responding to button presses. | Temporary software glitch. | Locate the small Reset button on the back of the timer and press it gently with a pin. |
| Alarm is too quiet or too loud. | Volume setting is not optimal for the environment. | Press the Volume Control button on the side to cycle through the four available alert modes (High, Low, Mute & Flashes, Vibrate). |
| Digits are not displaying correctly (e.g., missing segments). | Physical damage or internal malfunction. | Attempt a reset. If the issue persists, contact customer support. |
Specifications
| Feature | Detail |
|---|---|
| Model Number | 114 RGB TIMER |
| Brand | KMMKGG |
| Display Type | RGB LED Digital Display (1.5" Number height) |
| Color Options | 10 RGB Color Changing |
| Counting Modes | Countdown, Count-Up |
| Power Source | Rechargeable (Built-in 1000mAh Battery) |
| Charging Port | USB Type-C |
| Brightness Levels | 3 (Energy Saving, Low Light, High Light) |
| Volume Levels | 4 (High, Low, Mute & Flashes, Vibrate) |
| Mounting Options | Magnetic, Fold-out Stand, Hanging Hole |
| Product Dimensions (D x W x H) | 1"D x 5"W x 3.7"H |
| Material | Electronic Components, Plastic |
Warranty and Support
For warranty information or technical support, please refer to the product packaging or contact KMMKGG customer service through the retailer where the product was purchased. Keep your purchase receipt for warranty claims.
Ask a question about this manual
Ask about setup, troubleshooting, compatibility, parts, safety, or missing instructions. Manuals+ will review the question and use this page’s manual context to help answer it.