Fanttik X9 Pro Portable Tire Inflator and E1 Ultra Mini Electric Screwdriver User Manual
Model: X9 Pro & E1 Ultra
Introduction
This manual provides detailed instructions for the safe and efficient operation, maintenance, and troubleshooting of your Fanttik X9 Pro Portable Tire Inflator and Fanttik E1 Ultra Mini Electric Screwdriver. Please read this manual thoroughly before using the products and retain it for future reference.

Image: The Fanttik X9 Pro Portable Tire Inflator (left) and the Fanttik E1 Ultra Mini Electric Screwdriver (right). The tire inflator features a digital display and control buttons, while the screwdriver is a sleek, cylindrical device.
Fanttik X9 Pro Portable Tire Inflator
1. Setup and Initial Use
Before first use, ensure the X9 Pro is fully charged. The device is battery-powered and can be charged via its USB-C port (cable not included). The integrated hose and accessory storage are designed for convenience.
- Charging: Connect a USB-C charging cable to the device. The display will indicate charging status.
- Accessory Storage: The X9 Pro features a dedicated storage slot for inflation accessories, located at the bottom of the unit.

Image: Close-up view of the Fanttik X9 Pro's integrated storage compartment, showing how inflation attachments are securely stored within the device's body. This design prevents loss of small parts.
2. Operating Instructions
- Power On/Off: The X9 Pro features a smart on/off design. Pull the inflation hose out of its storage slot to power on the device. Push the hose back into the slot to power off.
- Connect to Tire Valve: Securely attach the inflation hose to the tire valve stem. Ensure a tight connection to prevent air leakage.
- Set Desired Pressure: Use the '+' and '-' buttons on the control panel to adjust the target pressure. The digital display shows the current and target pressure.
- Start Inflation: Press the power button (center button) to begin inflation. The device will automatically stop once the preset pressure is reached.
- Inflation Performance: The X9 Pro can inflate a compact car tire from 30 PSI to 35 PSI in approximately 1 minute. It supports a maximum inflation pressure of 150 PSI.

Image: The Fanttik X9 Pro inflating a car tire, demonstrating its "Jet-Inflate" capability. The display shows 36 PSI, and text indicates a 1-minute inflation time for a compact car tire from 30 to 35 PSI.

Image: Illustration of the Fanttik X9 Pro's smart on/off mechanism. Pulling the yellow-tipped hose out turns the device on, while pushing it back in turns it off.
3. Maintenance
- Cleaning: Wipe the exterior of the inflator with a soft, damp cloth. Do not use harsh chemicals or abrasive cleaners.
- Storage: Store the device in a cool, dry place away from direct sunlight and extreme temperatures. Ensure the hose is properly stored to prevent damage and accidental activation.
- Battery Care: For optimal battery life, charge the device regularly, even if not in frequent use. Avoid fully depleting the battery for extended periods.
4. Troubleshooting
| Problem | Possible Cause | Solution |
|---|
| Device does not power on. | Low battery; hose not fully extended. | Charge the device; ensure the hose is fully pulled out to activate. |
| Inflator not inflating. | Hose not securely connected; target pressure already reached. | Check hose connection; verify target pressure setting. |
| Inaccurate pressure reading. | Improper connection to valve. | Ensure the hose is tightly screwed onto the tire valve. |
5. Specifications
- Model Name: X9 Pro
- Power Source: Battery Powered
- Maximum Inflation Pressure: 150 PSI
- Inflation Speed: Approximately 1 minute for 30-35 PSI (compact car tire)
- Recommended Uses: Tire Inflation (compact cars, motorcycles, SUVs, bicycles, balls)
- Special Feature: Quick Inflation, Integrated Accessory Storage, Smart On/Off

Image: The Fanttik X9 Pro demonstrating its battery capacity for various inflations. It shows approximate inflation counts for car tires (x17), motorcycle tires (x62), bike tires (x70), and balls (x83) on a single charge.
Fanttik E1 Ultra Mini Electric Screwdriver
1. Setup and Initial Use
The E1 Ultra is designed for precision repair tasks. It comes with a comprehensive set of bits and an integrated storage system.
- Bit Storage: The screwdriver features an internal rotating storage chamber (RevoStor™) for quick access to bits. Push to release the chamber.
- Bit Selection: The kit includes 50 high-quality S2 tool steel bits (hardness 60 HRC) across 12 different types, ensuring compatibility with various electronic devices.
- Additional Tools: A tweezer and a pry bar are included to assist with delicate disassembly.
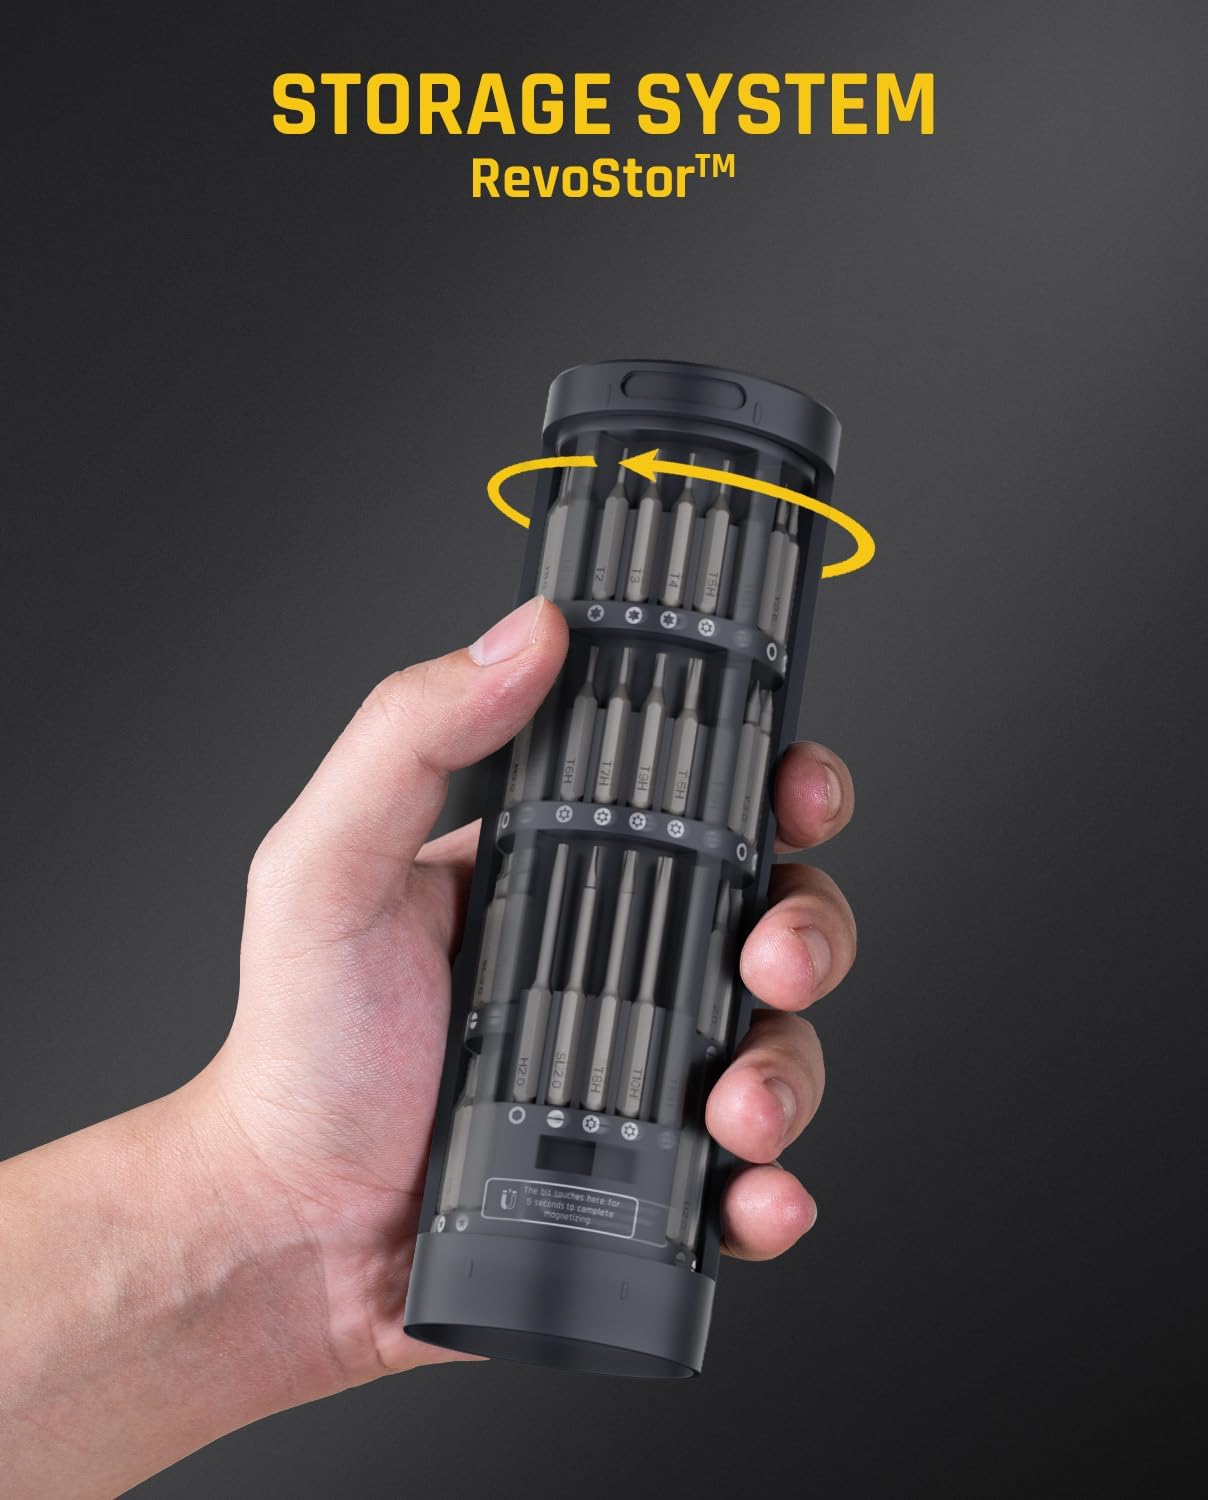
Image: A hand holding the Fanttik E1 Ultra screwdriver, demonstrating its RevoStor™ internal rotating storage system for precision bits. The chamber rotates to reveal different bit types.

Image: A detailed layout of the 50 S2 steel precision bits included with the Fanttik E1 Ultra, along with a tweezer and pry bar. Various bit types and sizes are displayed.
2. Operating Instructions
- Insert Bit: Select the appropriate bit and insert it firmly into the screwdriver's magnetic tip.
- Torque Control: The E1 Ultra offers precise torque control:
- Low Torque (L): 0.05 N·m
- High Torque (H): 0.2 N·m
- Manual Mode: Up to 3 N·m (for stubborn screws)
Adjust the rotary torque knob to select the desired electric torque setting (L or H). - Electric Mode: Use the "Screw In" or "Screw Out" buttons to operate the screwdriver electrically. The circular LED light illuminates the work area.
- Manual Mode: For very tight or rusty screws, manually loosen them before engaging electric mode to prevent damage. The screwdriver can be used manually without activating the motor.
- Applications: Suitable for precision repair of smartphones, laptops, cameras, drones, glasses, and other small electronic devices.
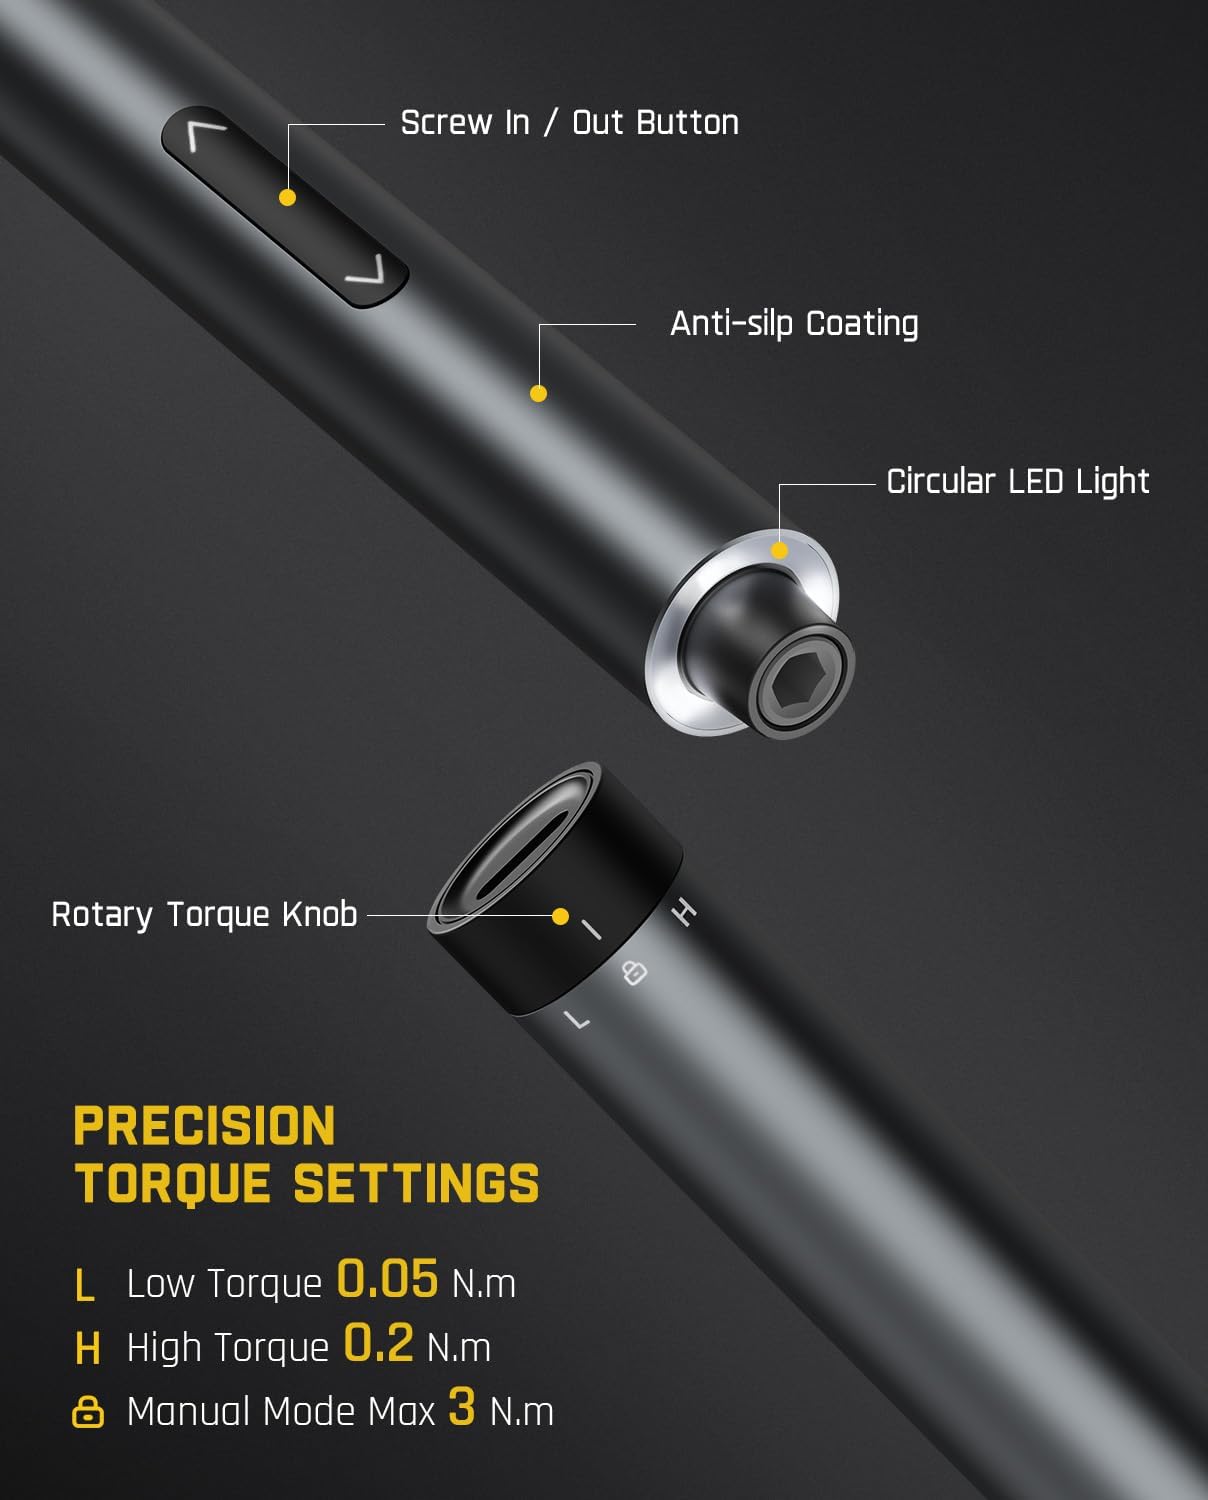
Image: A close-up of the Fanttik E1 Ultra screwdriver, highlighting its "Screw In / Out" buttons, anti-slip coating, circular LED light, and rotary torque knob with settings for Low Torque (0.05 N·m), High Torque (0.2 N·m), and Manual Mode (Max 3 N·m).
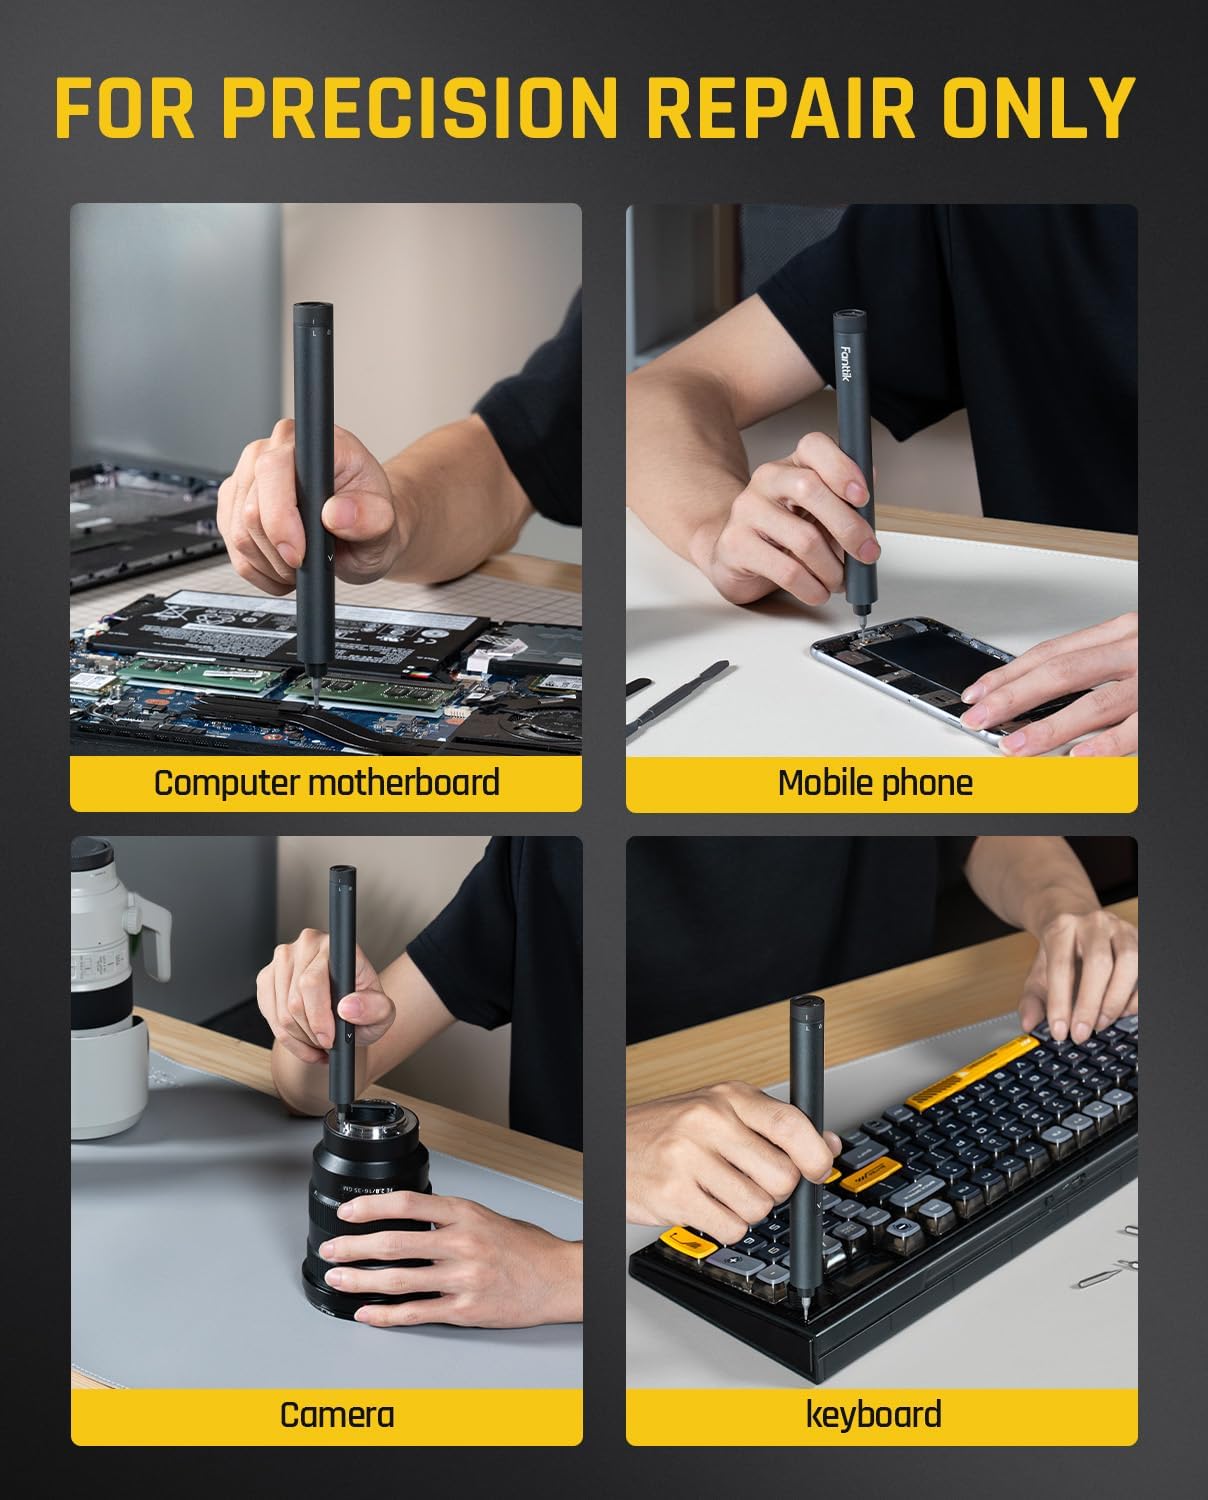
Image: Four panels showing the Fanttik E1 Ultra being used for precision repairs on a computer motherboard, a mobile phone, a camera lens, and a keyboard, illustrating its versatility.
3. Maintenance
- Cleaning: Keep the screwdriver and bits clean and free from dust and debris. Use a soft, dry cloth.
- Bit Care: Store bits properly in the RevoStor™ chamber to prevent loss and damage. Ensure bits are dry before storage.
- Charging: While not explicitly stated, electric screwdrivers typically require charging. Charge the device regularly to maintain battery health.
4. Troubleshooting
| Problem | Possible Cause | Solution |
|---|
| Screwdriver not turning. | Low battery; motor jammed; incorrect mode. | Charge the screwdriver; check for obstructions; ensure electric mode is selected. |
| Bit slipping from screw head. | Incorrect bit size; worn bit; screw too tight for electric mode. | Use the correct bit; replace worn bits; switch to manual mode for stubborn screws. |
| LED light not working. | Low battery; LED malfunction. | Charge the screwdriver. If issue persists, contact support. |
5. Specifications
- Model Name: E1 Ultra
- Motor: 200 RPM hollow cup motor
- Electric Torque: Low: 0.05 N·m, High: 0.2 N·m
- Manual Torque: Up to 3 N·m
- Bits: 50 pieces, S2 tool steel, 60 HRC hardness
- Included Components: 12 different types of precision repair bits, tweezer, pry bar
- Special Feature: Enhanced internal rotating storage chamber (RevoStor™), Circular LED Light
Warranty and Customer Support
Fanttik products are designed and manufactured to the highest quality standards. For information regarding warranty coverage, please refer to the warranty card included with your purchase or visit the official Fanttik website.
If you encounter any issues or have questions about your Fanttik X9 Pro or E1 Ultra, please contact our customer support team for assistance. Contact details can typically be found on the Fanttik website or your purchase documentation.


