
Introduction
This manual provides detailed instructions for the assembly, operation, and maintenance of your RALGEND Night Stand with Drawers. Please read all instructions carefully before beginning assembly and retain this manual for future reference.
The RALGEND Night Stand features a warm-toned finish, rattan-decorative drawer fronts, brass nickel handles, and tapered wooden legs. It includes a built-in charging station with 2 standard outlets and 2 USB ports, and offers ample storage with 4 drawers.

Image: The RALGEND Night Stand with Drawers, featuring a natural finish and rattan-like drawer fronts, positioned next to a bed in a bedroom setting.
Safety Information
- Weight Capacity: The top surface supports up to 110 lb (50 kg). Each drawer supports up to 22 lb (10 kg). Do not exceed these limits.
- Anti-Tip Device: An anti-tip package is included. It is highly recommended to install the anti-tip device to prevent the nightstand from tipping over, especially in households with children or pets.
- Placement: Place the nightstand on a flat, stable surface. Avoid placing it in areas with high humidity or direct sunlight to prevent material damage.
- Electrical Safety: Ensure the charging station's power cord is not pinched or damaged. Do not overload the outlets. Unplug the unit from the wall outlet when not in use or during electrical storms.
- Assembly: Follow all assembly instructions carefully. Do not use power tools unless specified, as overtightening screws can damage the particleboard/MDF material.
Package Contents
Before assembly, verify that all components listed below are present and undamaged. If any parts are missing or damaged, please contact customer support.
- 2 x Side Table (Main furniture components)
- 2 x Charging Station
- 2 x Hardware Kit (Screws, dowels, cam locks, etc.)
- 2 x Anti-Tip Package
- 2 x Instruction Manual (This document)
Note: The product is shipped in two separate packages, which may arrive at different times.

Image: Overview of the RALGEND Night Stand, highlighting its dimensions (27.6" W x 29.6" H x 15.7" D) and indicating that it ships in two packages. A single drawer is shown with a 22lb weight capacity, and the top surface is rated for 110lb.
Specifications
| Feature | Detail |
|---|---|
| Brand | RALGEND |
| Model Name | End Table |
| Model Number | 7401BZUP2NL |
| Product Dimensions (D x W x H) | 15.7"D x 27.6"W x 29.6"H |
| Item Weight | 114.4 pounds (for the set of 2) |
| Frame Material | Particleboard, MDF |
| Color | Natural |
| Number of Drawers | 4 per nightstand |
| Charging Station | 2 AC Outlets, 2 USB Ports, 4.9-foot power cord |
| Top Weight Capacity | 110 lb |
| Drawer Weight Capacity | 22 lb per drawer |
| Indoor/Outdoor Usage | Indoor |
Setup and Assembly Instructions
This nightstand requires assembly. It is recommended to assemble on a soft, clean surface to prevent scratches. Two people are recommended for assembly.
Tools Recommended:
- Phillips Head Screwdriver (not included)
- Hammer (for dowels, use gently if applicable)
- Included Allen Wrench (if applicable)
Assembly Steps:
- Unpack and Identify Parts: Carefully unpack all components and lay them out. Refer to the included parts list (not provided in JSON, so general instruction) to identify each piece.
- Assemble the Frame: Attach the side panels to the base and top panels using the provided screws and dowels. Ensure all connections are secure but do not overtighten.
- Install Drawer Slides: Insert the drawer slides into the pre-drilled holes on the inner side panels of the nightstand frame. Secure them using the included screws. Ensure they are level and facing the correct direction for smooth drawer operation.
- Assemble Drawers: Construct each of the four drawers. Attach the drawer sides to the front and back panels, then slide in the bottom panel. Secure the drawer slides to the assembled drawers.

Image: A close-up view of the nightstand with its four drawers open, showcasing their storage capacity for various items like books, towels, socks, and other personal belongings. The rattan-like drawer fronts are visible.
- Insert Drawers: Carefully slide the assembled drawers into the installed drawer slides on the nightstand frame. Test each drawer for smooth operation.
- Attach Legs: Secure the tapered wooden legs to the bottom of the nightstand using the provided screws.
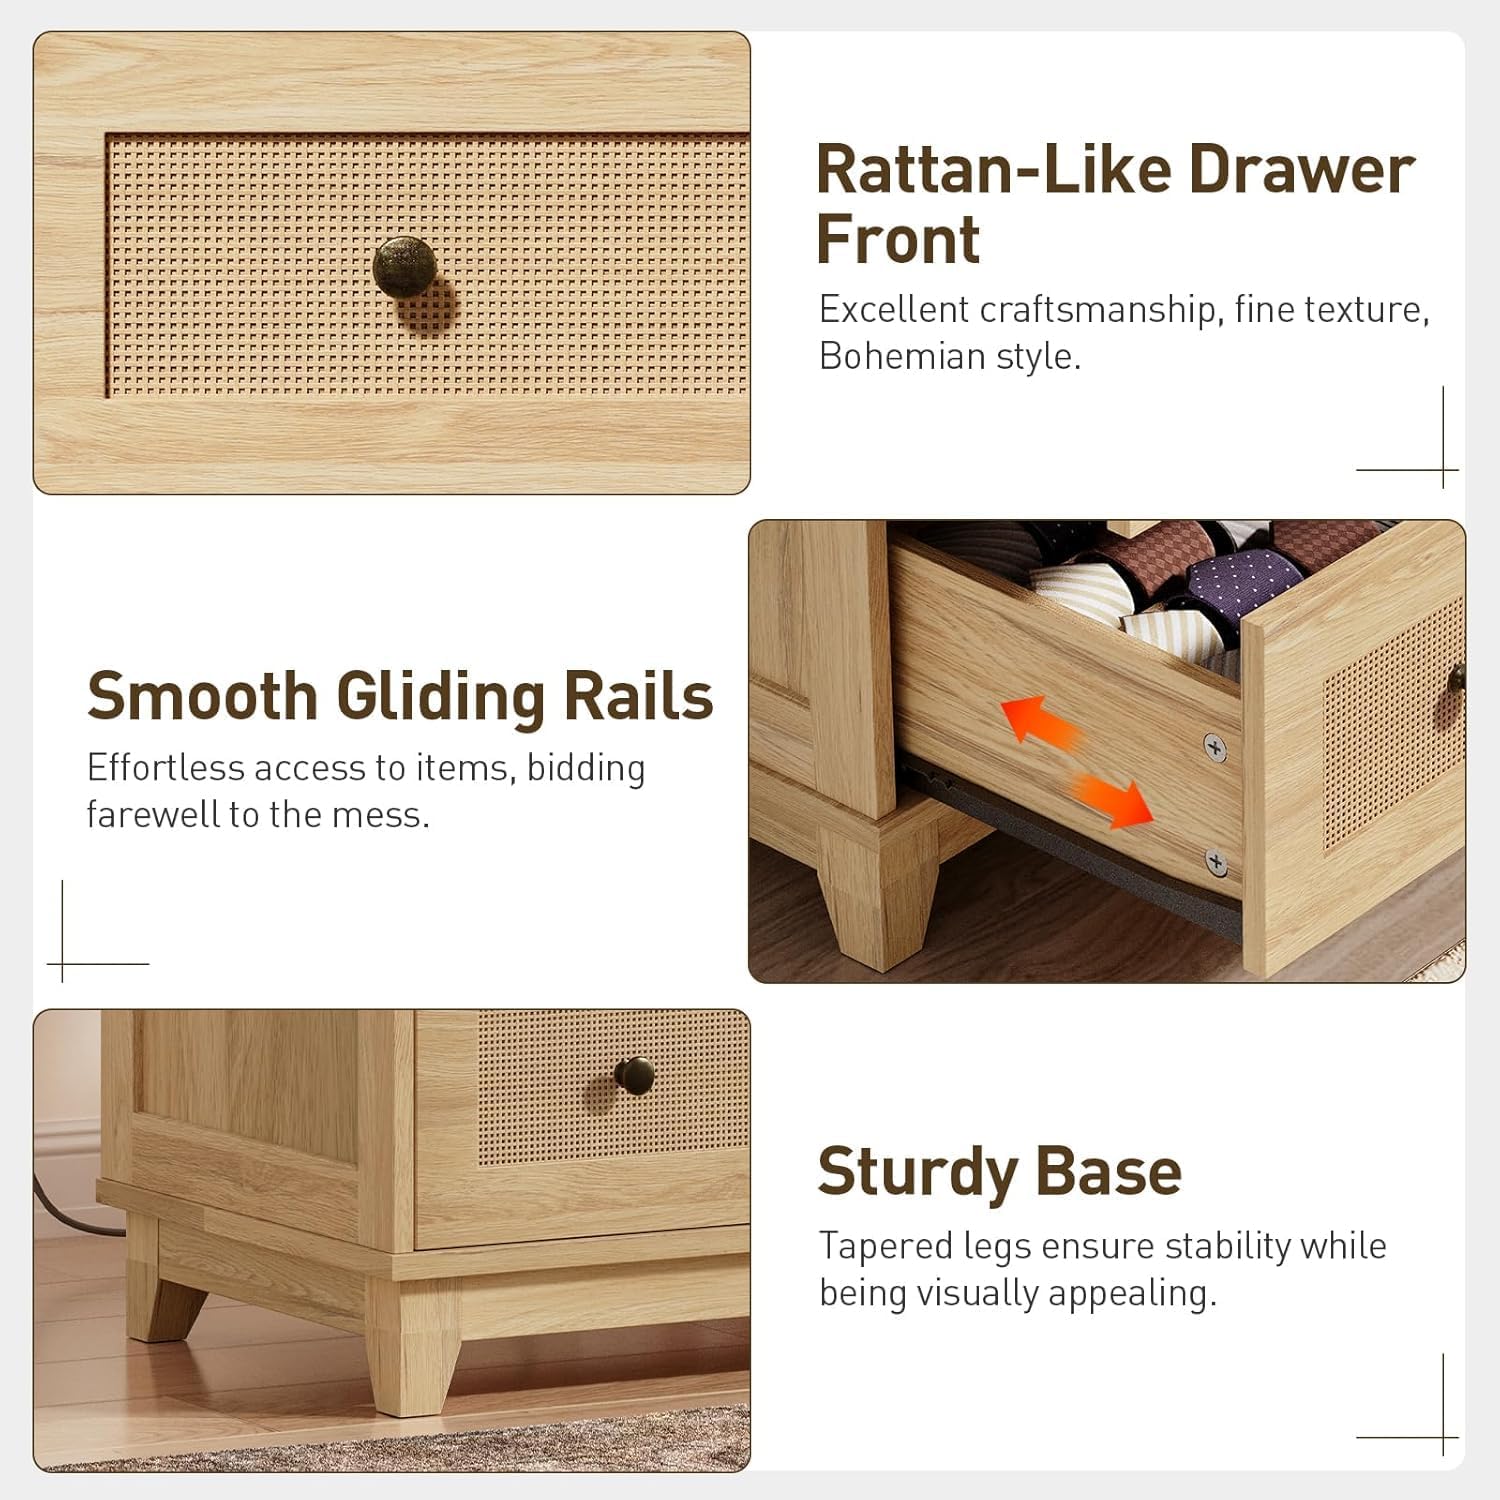
Image: A composite image detailing key features: a close-up of the rattan-like drawer front, an illustration of smooth gliding drawer rails, and a view of the sturdy, tapered wooden legs providing stable support.
- Install Charging Station: Connect the charging station to the designated area on the back or top of the nightstand. Ensure the power cord is routed safely and is accessible for plugging into a wall outlet.

Image: An aerial view of the nightstand's top surface, highlighting the integrated charging station. The station features two standard AC outlets and two USB ports, with a 4.9-foot power cord extending from the back. A smartphone is shown charging on the surface.
- Install Anti-Tip Device: Securely attach the anti-tip device to the back of the nightstand and to a wall stud, following the instructions provided with the anti-tip kit. This step is crucial for safety.

Image: A close-up illustration demonstrating the installation of the anti-tip device, showing how it secures the nightstand to the wall to prevent accidental tipping.
- Final Check: Once assembly is complete, ensure all screws are tightened and the nightstand is stable.
Operating Instructions
Using the Charging Station:
The RALGEND Night Stand is equipped with a convenient charging station to power your electronic devices.
- Connect to Power: Plug the 4.9-foot power cord from the charging station into a standard wall outlet.
- Charge Devices:
- For AC-powered devices, plug them into the 2 standard AC outlets (120V 12A).
- For USB-powered devices, connect them to the 2 USB ports (5V 2A).
- Safety Precautions:
- Do not exceed the maximum electrical load of the charging station.
- Avoid spilling liquids on the charging station.
- Unplug the nightstand from the wall outlet when not in use or during cleaning.
Video: An official product video demonstrating the features and usage of the RALGEND Night Stand, including a closer look at the charging station and drawer functionality.
Maintenance and Care
- Cleaning: Wipe surfaces with a soft, damp cloth. Avoid using harsh chemicals, abrasive cleaners, or polishes that may damage the finish.
- Spills: Immediately wipe up any spills to prevent moisture damage to the particleboard/MDF.
- Dusting: Regularly dust with a dry, soft cloth.
- Avoid Direct Sunlight: Prolonged exposure to direct sunlight can cause fading or discoloration.
- Avoid Excessive Moisture: Do not place hot items directly on the surface without protection. Avoid placing the nightstand in areas with high humidity.
- Check Connections: Periodically check all screws and connections to ensure they remain tight. Retighten if necessary.
Troubleshooting
| Problem | Possible Cause | Solution |
|---|---|---|
| Nightstand is wobbly or unstable. | Screws are loose; uneven floor; legs not properly installed. | Ensure all screws are tightened. Place on a level surface. Check leg installation. Install anti-tip device. |
| Drawers do not slide smoothly. | Drawer slides are misaligned; debris in tracks; screws loose. | Check that drawer slides are installed correctly and are level. Clean tracks of any debris. Ensure all screws on slides are tight. |
| Charging station not working. | Power cord not plugged in; wall outlet not active; device not compatible; charging station damaged. | Ensure the power cord is fully plugged into a working wall outlet. Test the wall outlet with another device. Verify your device is compatible with the charging station's output. If issues persist, contact customer support. |
| Damage during assembly (e.g., cracked wood). | Overtightening screws; excessive force. | Avoid using power tools unless specified. Apply gentle force. If significant damage occurs, contact customer support for replacement parts. |
Warranty and Support
For any questions, missing parts, or issues not covered in this manual, please contact RALGEND customer support. Please have your model number (7401BZUP2NL) and purchase information ready when contacting support.
While specific warranty details are not provided in this document, RALGEND is committed to customer satisfaction. Refer to your purchase receipt or the RALGEND official website for detailed warranty information.
You can visit the RALGEND store online at RALGEND Store.