
1. Safety Information
WARNING: Always prioritize safety when operating heavy machinery. Failure to follow safety instructions can result in serious injury or death.
- Always wear appropriate safety gear, including heavy-duty gloves and eye protection.
- Keep hands, feet, and clothing away from all rotating parts of the snow blower.
- Do not operate the snow blower in enclosed spaces to avoid carbon monoxide poisoning. Ensure adequate ventilation.
- Before performing any maintenance or adjustments, ensure the tractor engine is stopped and the PTO is disengaged.
- Follow all manufacturer's guidelines for maintenance, storage, and operation.
- Ensure the PTO driveline is measured and cut to the correct length as per the owner's manual. Incorrect length can cause damage to both the tractor and the implement.
2. Product Overview
The MechMaxx TSB60 3-Point PTO Snow Blower is a robust attachment designed for efficient snow removal. It features a wide cutting area, powerful auger and impeller for fast snow discharge, and a 360-degree rotating chute for precise snow direction control. This snow blower is compatible with CAT I & II 3-point hitches and includes a PTO shaft with a slip clutch for reliable operation.

Figure 2.1: The MechMaxx TSB60 60-inch 3-Point PTO Snow Blower, ready for attachment to a tractor.
3. Specifications
| Feature | Specification |
|---|---|
| Model Number | TSB60 |
| Brand | MechMaxx |
| Product Dimensions (L x W x H) | 40"D x 60"W x 27"H (101.6 x 152.4 x 68.6 cm) |
| Item Weight | 879 pounds (398.7 kg) |
| Power Source | PTO (Power Take-Off) |
| Tractor HP Range | 25-65 HP |
| Cutting Width | 60 inches (152.4 cm) |
| Cutting Height | 27 inches (68.6 cm) |
| Auger Diameter | 17.5 inches (44.45 cm) with 5/16" thickness |
| Impeller/Fan Diameter | 24 inches (60.96 cm) with 7" depth and 13/32" thickness |
| Chute Rotation | 360° (Mechanical, Optional Hydraulic available) |
| Hitch Type | CAT I & II 3-Point Hitch |
| PTO Shaft | Included, with slip clutch, 1-3/8" x 6 spline on both ends, length 31.5"-39" |
| Construction Material | High-strength steel, impact resistant |

Figure 3.1: Key dimensions of the MechMaxx TSB60 snow blower, highlighting the 60-inch cutting width and 27-inch cutting height.

Figure 3.2: Close-up view of the 17.5-inch diameter auger, designed for sustained thrust in heavy snow.

Figure 3.3: The 24-inch diameter impeller ensures fast and efficient snow discharge.
4. Setup & Assembly
Follow these steps to safely assemble and prepare your MechMaxx TSB60 snow blower for use. Always wear appropriate safety gear, including heavy leather gloves, during assembly.
4.1 Uncrating and Component Removal
Carefully remove the snow blower and all its components from the shipping crate. Ensure all packaging materials are cleared before proceeding.
Video 4.1: Watch this video for a detailed guide on uncrating and initial component removal for the MechMaxx 3 Point PTO Snow Blower.
4.2 Installing the Discharge Chute
Attach the discharge chute to the main body of the snow blower. Ensure all bolts are securely fastened and the chute rotates freely without binding.
Video 4.2: This segment of the assembly video demonstrates the correct installation of the discharge chute.
4.3 Installing the Gearbox
Install the gearbox, ensuring proper alignment with the chute ring gear. Adjust the clearance between the motor's teeth and the chute ring gear until it turns freely without binding. Secure all fasteners.
Video 4.3: Refer to this video for instructions on installing the gearbox and adjusting its clearance.
4.4 Installing the Turning Shaft
Install the turning shaft for the chute. Adjust the rod length so that the chute can be easily turned from the tractor seat, allowing for optimal snow direction control.
Video 4.4: This video section guides you through the installation and adjustment of the turning shaft.
4.5 Installing the Warning Sign
Securely install the warning sign onto the snow blower using the provided hardware. Ensure it is clearly visible for safety.
Video 4.5: Instructions for securely attaching the warning sign are shown in this video clip.
4.6 Adding Gearbox Oil
Before the first use, add approximately 1.22 quarts (1.15L) of gearbox oil. The recommended oil type is 85W-90. Locate the oil filler hole and carefully add the oil until the correct level is reached.

Figure 4.1: Location of the oil filler hole and warning to add gearbox oil before initial operation.
Video 4.6: This video demonstrates the process of adding gearbox oil to the snow blower.
4.7 Greasing Bearings and PTO Shaft
The chain, auger torque limiter, and all bearings are pre-greased at the factory. However, it is crucial to check them before the first use. Additionally, grease the two fittings on the PTO shaft. Refer to the product manual for specific greasing points and frequency.
Video 4.7: This video shows how to apply grease to the chute support bearings and other critical points.
4.8 Attaching to Tractor's 3-Point Hitch and PTO Shaft
Connect the snow blower to your tractor's CAT I or CAT II 3-point hitch. Ensure the PTO shaft is correctly attached and secured. The PTO shaft must be measured and cut to the appropriate length for your tractor to prevent damage.

Figure 4.2: Diagram illustrating the dimensions and compatibility for CAT I & II 3-Point Hitches.
Video 4.8: This video demonstrates the attachment of the snow blower to the tractor's 3-point hitch and the connection of the PTO shaft.
5. Operating Instructions
The MechMaxx TSB60 snow blower is designed for efficient snow clearing. Always ensure you are familiar with your tractor's controls and the snow blower's functions before operation.
5.1 General Operation
- Engage the PTO at a low RPM and gradually increase to the recommended operating speed.
- Drive the tractor slowly into the snow, allowing the auger to feed snow into the impeller.
- Avoid overloading the snow blower by taking smaller passes in very deep or heavy snow.
- Be aware of your surroundings and any obstacles that may be hidden under the snow.
Video 5.1: A demonstration of the MechMaxx 60-inch 3-Point Hitch Snow Blower in operation, clearing snow effectively.
5.2 Chute Directional Control
The snow blower features a mechanical chute rotator and deflector, allowing you to precisely control the direction and height of the discharged snow. Adjust these controls from the tractor seat to direct snow away from buildings, vehicles, or other areas.
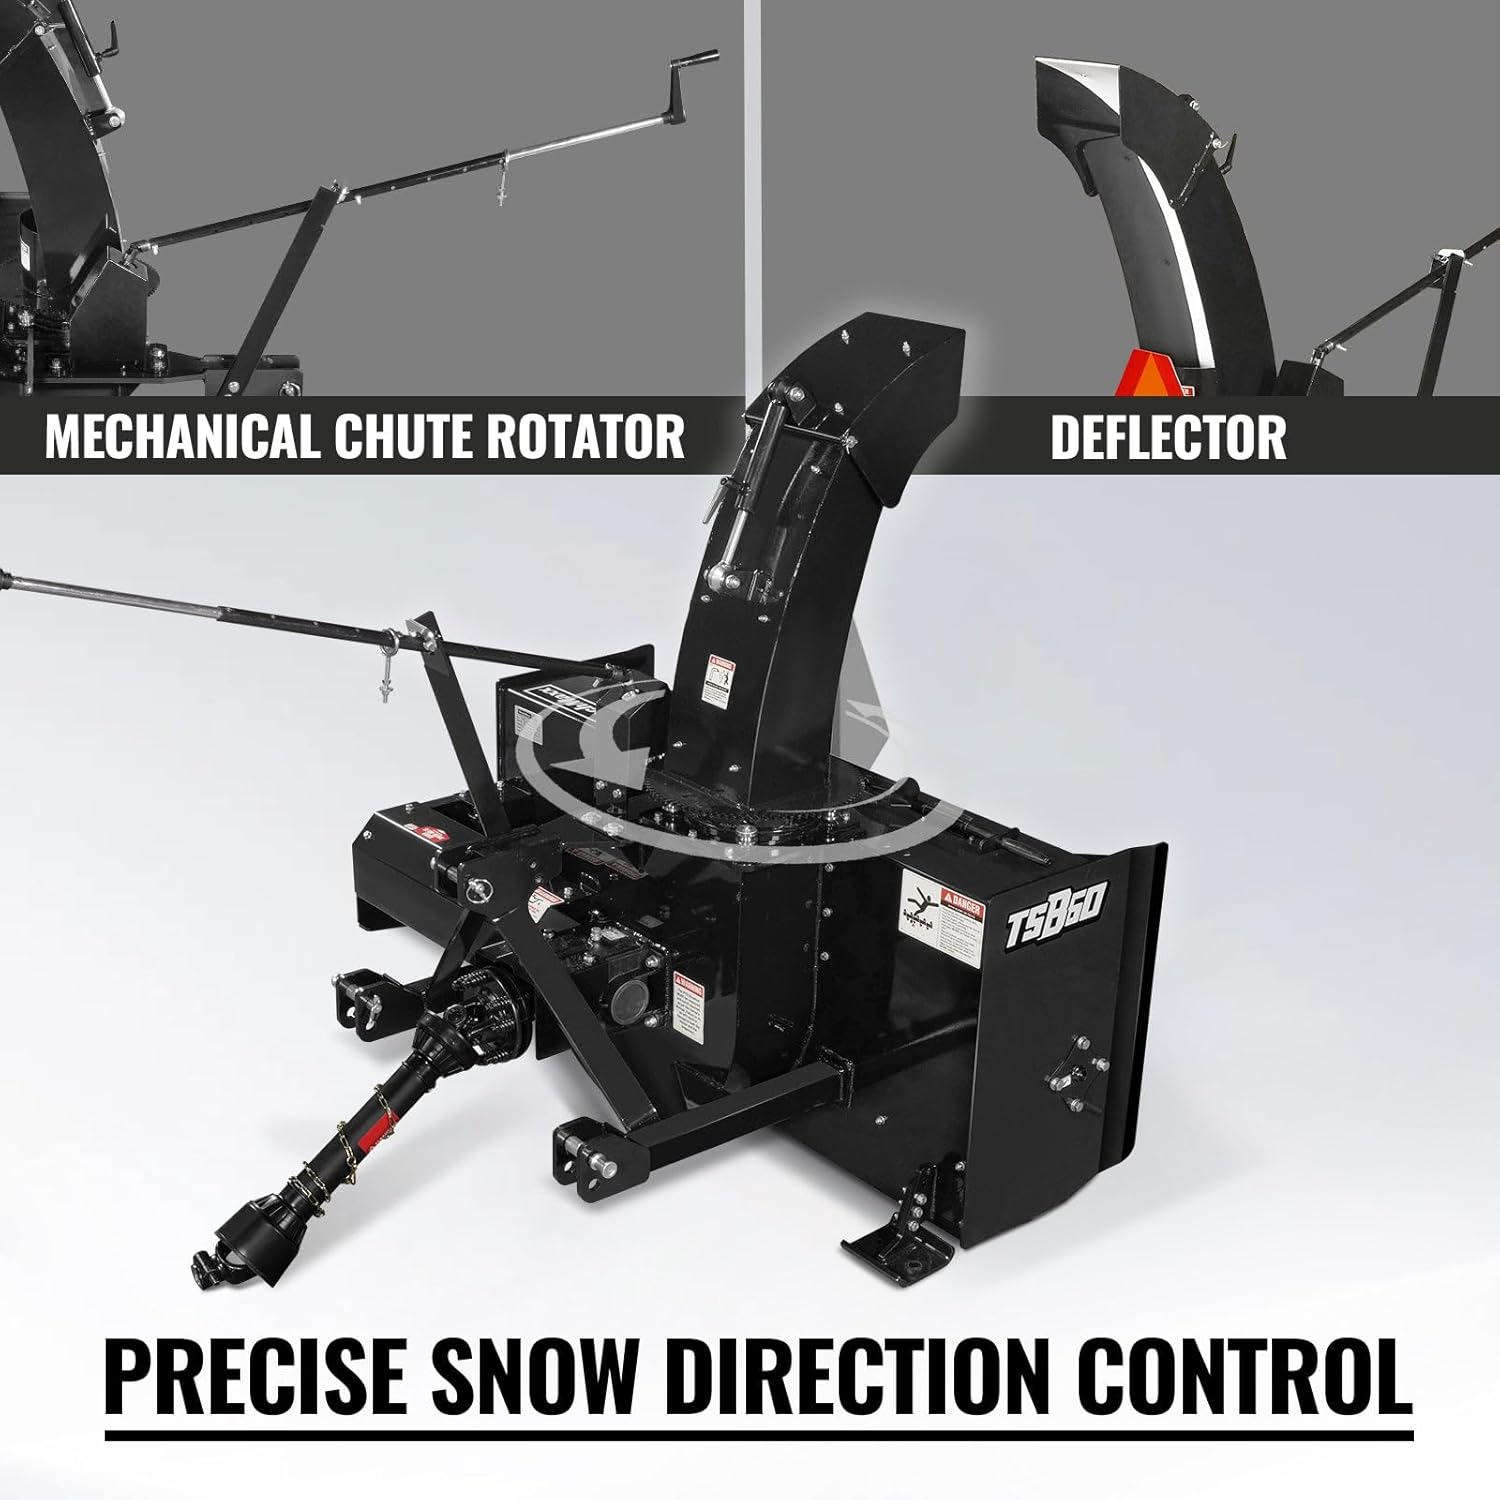
Figure 5.1: The mechanical chute rotator and deflector provide precise control over snow discharge.
Optional Hydraulic Chute Rotator & Deflector: If you have installed the optional hydraulic kit (SKU: 461033), you can control the chute rotation and deflector angle using your tractor's hydraulic levers for added convenience.
6. Maintenance
Regular maintenance is crucial for the longevity and optimal performance of your snow blower. Always ensure the tractor engine is off and the PTO is disengaged before performing any maintenance.
- Greasing: Regularly check and grease all moving parts, including the PTO shaft fittings and chute support bearings.
- Gearbox Oil: Check gearbox oil levels periodically and refill with 85W-90 oil as needed.
- PTO Shaft Length: Verify the PTO shaft length is correct for your tractor to prevent damage. Adjust if necessary.
- Inspections: Inspect the auger, impeller, and cutting blades for wear or damage. Replace worn parts promptly.
- Hydraulic System (if applicable): If equipped with a hydraulic chute kit, regularly inspect hydraulic hoses and connections for leaks or damage.
6.1 Replacing Hydraulics (Optional Hydraulic Chute Kit)
If your snow blower is equipped with the optional hydraulic chute rotator and deflector kit, refer to the following video for guidance on replacing hydraulic components if necessary.
Video 6.1: This video provides a step-by-step guide on how to replace the hydraulics on the MechMaxx Snow Blower's optional hydraulic chute kit.
7. Troubleshooting
This section provides basic troubleshooting tips for common issues. For more complex problems, contact MechMaxx customer support.
| Problem | Possible Cause | Solution |
|---|---|---|
| Snow blower not clearing effectively | Incorrect PTO RPM, dull cutting edges, clogged chute, too fast ground speed. | Ensure PTO is at recommended RPM. Sharpen or replace cutting edges. Clear any blockages in the chute (with engine off!). Reduce tractor speed. |
| Unusual noises during operation | Loose components, foreign object in auger/impeller, worn bearings, insufficient lubrication. | Stop operation immediately. Inspect for loose bolts. Check for foreign objects (with engine off!). Lubricate all grease points. Inspect bearings for wear. |
| Chute not rotating smoothly | Lack of lubrication on chute ring gear/bearings, bent turning shaft, gearbox issue. | Apply grease to chute support bearings and ring gear. Inspect turning shaft for damage. Check gearbox for proper clearance and function. |
| PTO shaft binding or vibrating | Incorrect PTO shaft length, worn universal joints, lack of lubrication. | Verify PTO shaft length is correct for your tractor. Grease universal joints. Inspect for worn components. |
8. Customer Support
For further assistance, parts, or warranty inquiries, please contact MechMaxx customer support. MechMaxx offers a 30-day easy returns policy and dedicated customer support.
You can visit the official MechMaxx store on Amazon for more information and contact options: MechMaxx Store

