
Avylet RC11
Avylet 8.1'' Wireless Apple Carplay Screen User Manual
Brand: Avylet | Model: RC11
1. Product Overview
The Avylet 8.1'' Wireless Apple Carplay Screen is a versatile and portable car stereo designed to modernize your vehicle's infotainment system. It offers seamless integration with Apple CarPlay and Android Auto, providing access to navigation, music, calls, and messaging directly from its high-definition touchscreen. This device is compatible with a wide range of vehicles and features multiple audio output options, a reversing camera, and over-the-air (OTA) update capabilities for continuous improvement.

Figure 1.1: Avylet 8.1'' Wireless Apple Carplay Screen and Accessories
Key Features:
- Seamless Wireless Connectivity: Supports Apple CarPlay and Android Auto for easy smartphone integration.
- Smart Voice Control: Utilize Siri or Google Assistant for hands-free operation of navigation, calls, and media.
- Live GPS Navigation: Syncs with popular navigation apps like Apple Maps, Google Maps, and Waze for clear, large-screen guidance.
- Rear Camera with Reversing Assistance: Includes an IP67 waterproof rear camera with a 19.7ft cable for simplified parking and reversing.
- OTA Upgrade Capability: Receive over-the-air firmware updates to ensure your system is always up-to-date with new features and performance enhancements.
- Multiple Audio Output Options: Play audio through the built-in speaker, Bluetooth, FM sync, or AUX cable.
- Compact 8.1-inch HD Touchscreen: Offers a clear 1600*600 resolution display with a touch interface, designed to not obstruct driver's view.
- Super Link & Mirror Link: Mirror your phone screen (AirPlay for iOS) to the device for a larger view and direct touch control.
- Easy Installation: Simple plug-and-play setup with no complex wiring, compatible with most vehicles (12-32V).
- Custom Boot Animation: Personalize your device's startup screen with custom images.
2. Setup and Installation
2.1 Package Contents:
- 8.1" Portable Car Screen
- AUX Audio Cable (5ft)
- Rear Camera Adhesives
- Installation Accessories
- Rear Camera (19.7ft)
- Spare Adhesive
- Adhesive Bracket
- Rear Camera Screws (x2)
- Wire Clips (x4)
- Type-C to Cigarette Lighter Power Cable (11.5ft)
- Suction Cup Bracket
- User Manual (in 6 languages)

Figure 2.1: Package Contents
2.2 Installation Steps:
The Avylet Carplay screen offers flexible installation options using either the suction cup bracket or the adhesive bracket. No complex wiring is required; simply plug the power cable into your vehicle's cigarette lighter socket (12-32V).

Figure 2.2: Bracket Types and Adjustability
Suction Cup Bracket Installation:
- Clean the surface of your dashboard or windshield where you intend to mount the device.
- Stick the adhesive pad (peel off film) to the cleaned surface and let it sit for 24 hours to ensure strong adhesion.
- Peel off the suction cup transparent film.
- Press firmly and lock the suction cup onto the adhesive pad.
- Wait 12-24 hours, then attach the screen to the bracket.

Figure 2.3: Suction Cup Bracket Quick Installation Guide
Adhesive Bracket Installation:
- Clean the surface of your dashboard.
- Stick the adhesive bracket to the dashboard (peel off red adhesive film) and let it sit for 24 hours.
- Press firmly and let sit for 24 hours.
- Align the snap with the screen slot and press down.
- Attach the screen.

Figure 2.4: Adhesive Bracket Quick Installation Guide
Rear Camera Installation:
The included rear camera simplifies parking. Connect the camera's red wire to the reverse light's positive lead for automatic display of the reverse image when backing up. This connection is for parking aid only and not for recording.

Figure 2.5: Rear Camera Installation Diagram
2.3 Connectivity:
The Avylet Carplay screen offers various wireless and wired connectivity options for your smartphone and car audio system.

Figure 2.6: Wireless Apple CarPlay, Android Auto, and Mirror Link
Wireless Apple CarPlay Connection:
- Switch the device to "CarPlay" mode.
- Turn on Bluetooth and Wi-Fi on your iPhone.
- Select the device named "T86xxxx" for connection and pair it.
- CarPlay connection successful.

Figure 2.7: Wireless Apple CarPlay Connection Guide
Wireless Android Auto Connection:
- Switch the device to "Android Auto" mode.
- Turn on Bluetooth and Wi-Fi on your Android phone.
- Select the device named "T86xxxx" for connection, pair it, and connect Android Auto.
- Connection successful.

Figure 2.8: Wireless Android Auto Connection Guide
Wireless AirPlay Connection (for iOS):
- Switch the device to "AirPlay" mode.
- Turn on Bluetooth and Wi-Fi on your iPhone. Connect to the Wi-Fi network "AIRPLAY-xxxxxx".
- Turn on screen mirroring on your iPhone.
- Connection successful.

Figure 2.9: Wireless AirPlay Connection Guide
Wireless Super Link Connection for iPhone:
- Switch the device to "Super Link (iPhone)" mode.
- Scan the QR code to download the "EveLink" app.
- Turn on Wi-Fi on your iPhone.
- Open the EveLink app and connect to the Wi-Fi network "EVELINK-xxxxxx".
- Turn on screen mirroring.
- Connection successful.

Figure 2.10: Wireless Super Link Connection for iPhone Guide
Wireless Super Link Connection for Android:
- Switch the device to "Super Link (Android)" mode.
- Scan the QR code to download the "EveLink" app.
- Turn on Wi-Fi on your Android phone.
- Open the EveLink app and connect to the Wi-Fi network "EVELINK-xxxxxx".
- Connection successful.

Figure 2.11: Wireless Super Link Connection for Android Guide
3. Operation Guide
3.1 Smart Voice Control & GPS Navigation:
Utilize Siri or Google Assistant for hands-free control of navigation, calls, messaging, and multimedia. The 8.1-inch HD display integrates with Apple CarPlay and Android Auto, syncing with Apple Maps, Google Maps, and Waze for a larger, clearer map view, enhancing convenience and safety while driving.

Figure 3.1: Voice Control and GPS Navigation Interface
3.2 Audio Output Options:
The system offers four flexible audio output options:
- Built-in Speaker: For personal listening directly from the device.
- Bluetooth to Car Speakers: Wirelessly connect to your car's speakers for enhanced volume and clarity.
- FM Sync: Transmit audio to your car speakers via FM radio frequency.
- AUX Cable: Connect directly to your car's AUX input for a richer, lossless audio experience.

Figure 3.2: Four Audio Output Options
3.3 Mirror Link and Super Link:
After connecting your phone to the CarPlay WiFi, you can utilize AirPlay (for iOS) and Super Link features. This allows you to mirror your phone screen to the 8.1-inch HD display for a larger, clearer view. Super Link touch control enables direct operation of content, turning off your phone screen, or multitasking with ease. Note: In iOS mode, control is limited to the phone itself when using AirPlay.

Figure 3.3: Portable Carplay with Mirror Link
3.4 Screen Saver:
To conserve your vehicle's battery power, the screen will automatically go black if there is no operation within a set time. You can configure the screen saver duration (OFF/10s/30s/1min) in the settings.

Figure 3.4: Screen Saver Options
3.5 Brightness Adjustment:
The screen brightness can be adjusted manually or set to automatically adjust based on the time of day, ensuring optimal visual enjoyment in various lighting conditions.

Figure 3.5: Brightness Adjustment Interface
3.6 Custom Boot Animation:
Personalize your device by setting a custom boot animation. You can send your favorite images (e.g., car brands, family photos, scenery, pets) to Avylet's official email, and they will create a custom animation for you. This allows you to make a statement every time you start your car.
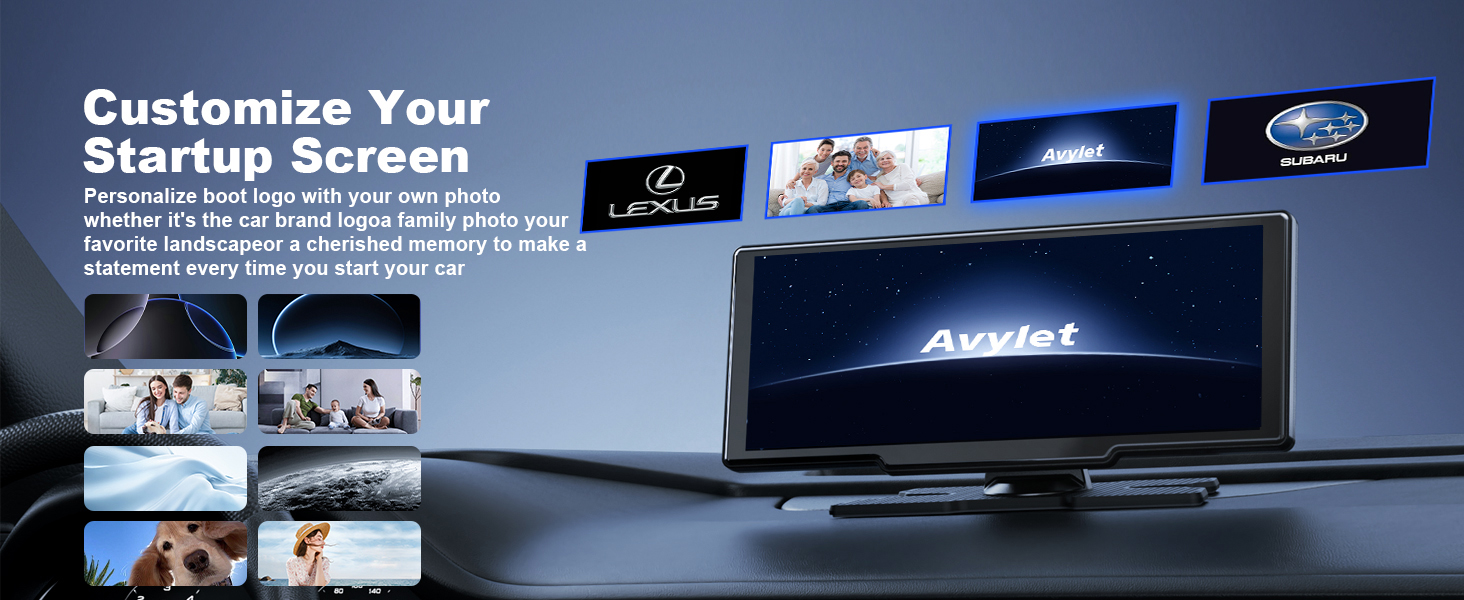
Figure 3.6: Custom Boot Animation Options
4. Maintenance
4.1 General Care:
- Keep the screen clean by wiping it gently with a soft, dry cloth. Avoid abrasive cleaners or solvents.
- Ensure all cables are securely connected and not pinched or damaged.
- For anti-theft purposes, the product can be easily removed from its mount when leaving the vehicle unattended.
4.2 OTA (Over-the-Air) Upgrade:
The Avylet Carplay screen supports OTA updates, allowing you to easily keep its firmware up-to-date. Regular updates provide new features, refine existing ones, and boost overall performance. To upgrade, simply enter super link mode and follow the on-screen instructions for a seamless system update.

Figure 4.1: OTA Upgrade Process
5. Troubleshooting
If you encounter any issues with your Avylet Carplay screen, please refer to the following common troubleshooting tips. For more detailed solutions, consult the comprehensive FAQ section within the full user manual provided in the package.
- Connection Issues: Ensure both the Avylet screen and your phone have Wi-Fi and Bluetooth enabled. Verify that you are connecting to the correct device name (e.g., "T86xxxx" or "EVELINK-xxxxxx"). Restarting both devices can often resolve temporary connection glitches.
- No Audio Output: Check your selected audio output option (built-in speaker, Bluetooth, FM, AUX). Ensure your car's audio system is set to the correct input source (e.g., AUX or the specific FM frequency).
- Rear Camera Display: Confirm the camera's red wire is correctly connected to the reverse light's positive lead. Ensure the camera cable is not damaged.
- Screen Responsiveness: If the touchscreen is unresponsive, try restarting the device. Ensure the screen is clean and free from debris.
- Power Issues: Verify the Type-C to Cigarette Lighter Power Cable is securely plugged into both the device and the vehicle's cigarette lighter socket. Check if the vehicle's power outlet is functioning correctly.
- Compatibility Note: Avylet Carplay is not compatible with Huawei phone models.
6. Specifications
| Item Weight | 10.9 ounces |
| Product Dimensions | 8.27 x 0.98 x 3.43 inches |
| Item Model Number | RC11 |
| Display Size | 8.1 Inches |
| Voice Command | Touchscreen |
| Connectivity Technology | Bluetooth 5.0 / AUX / Wi-Fi / FM |
| Map Type | Worldwide (via connected smartphone) |
| Audio Output Mode | Speaker, Bluetooth, FM, AUX |
| Mounting Type | Dashboard Mount, Panel Mount |
| Vehicle Service Type | Car, SUV, Truck |
7. Warranty and Support
Avylet offers a two-year warranty for this product. If any issues arise within this period, please contact the support team for prompt technical assistance or replacement service. Refer to the information provided on the product packaging for specific contact details.
For additional support or inquiries, please reach out to Avylet customer service. Contact information can typically be found on the product packaging or the official Avylet website.
Related documentsRC11

Ask a question about this manual
Ask about setup, troubleshooting, compatibility, parts, safety, or missing instructions. Manuals+ will review the question and use this page’s manual context to help answer it.