
1. Introduction
This manual provides comprehensive instructions for the Binardat 8 Port 10 Gigabit Managed Switch. This device is designed to provide high-speed 10GBASE-T and 10G SFP+ connectivity for small to medium-sized business (SMB) networks, offering advanced Layer 2 and Layer 3 management features for enhanced control and performance.
2. Package Contents
Verify that your package contains the following items:
- 1 x Binardat 10G Managed Switch
- 1 x Power Cable
- 1 x User Manual (this document)
3. Physical Overview
The Binardat 8 Port 10 Gigabit Managed Switch features a durable metal casing and is designed for efficient heat dissipation. It can be deployed as a desktop unit or wall-mounted.
3.1 Front Panel
The front panel includes 4 RJ45 Ethernet ports and 4 SFP+ slots, along with status indicators and a reset button.

Image: Front view of the Binardat 8 Port 10 Gigabit Managed Switch, highlighting the 4 RJ45 ports, 4 SFP+ ports, LED indicators, and reset button.
3.2 Rear Panel
The rear panel typically houses the power input and additional ventilation.

Image: Rear view of the Binardat 8 Port 10 Gigabit Managed Switch, illustrating the DC input port and ventilation for heat management.
3.3 Internal Components and Heat Dissipation
The switch features a robust internal design with dedicated heat sinks and a smart temperature-controlled fan to ensure optimal performance and longevity. The fan operates at varying speeds based on the device's temperature, ensuring efficient cooling while minimizing noise when not under heavy load.

Image: Internal view of the switch, revealing the heat sinks and the smart temperature-controlled fan designed for effective heat dissipation.
3.4 Wall Mounting
The switch can be conveniently wall-mounted using the integrated hanging holes.

Image: Diagram illustrating the dimensions and the process of wall-mounting the Binardat 8 Port 10 Gigabit Managed Switch.
3.5 Product Overview Video
Video: An overview of the 10G web managed SFP+ switch, demonstrating its features and connectivity options.
4. Setup
Follow these steps to set up your Binardat 8 Port 10 Gigabit Managed Switch:
- Power Connection: Connect the provided power cable to the DC input port on the rear panel of the switch and plug it into a power outlet.
- Initial Boot-up: Upon first power-on, the switch may take approximately 30 seconds to 1 minute to boot up. During this period, the internal fan may operate at a higher speed, resulting in increased noise. This is normal, and the fan speed will regulate shortly after boot-up.
- Network Connections: Connect your network devices (e.g., computers, servers, NAS, WiFi6 APs) to the RJ45 Ethernet ports or SFP+ slots using appropriate cables.
4.1 Power-On and Fan Operation
Video: A teardown and power-on demonstration of the SKS7300-4X4T switch, showing internal components and initial fan behavior during boot-up.
5. Operating Instructions
5.1 Web Management Interface Access
To access the switch's web management interface:
- Ensure your computer is connected to one of the switch's Ethernet ports.
- Open a web browser and enter the default IP address:
192.168.2.1(or192.168.10.12as shown in some video examples, refer to your specific model's documentation for the exact default IP). - Enter the default credentials: User ID:
admin, Password: (leave blank). - Click 'Login' to access the dashboard.

Image: Screenshot of the web management interface, showing the login screen and a view of the system information dashboard.
5.2 Saving Configuration Changes
After making any changes in the web interface, it is crucial to save the configuration to ensure your settings are retained after a reboot or power cycle. Navigate to Maintenance > Save Configuration, check the box, and click 'Apply'.
5.3 Port Configuration
The switch allows for flexible configuration of its RJ45 and SFP+ ports.
- RJ45 Ports (10Gbps Ethernet): These ports are auto-adaptive (10G/5G/2.5G/1G/100M). It is generally recommended to leave auto-negotiation enabled to avoid connectivity issues. Forcing speed manually is not advised for RJ45 ports.
- SFP+ Ports (10G SFP+): These ports support standard SFP modules (10G/2.5G/1G adaptive). When connecting to a 10G device, manual speed setting is typically not required. However, for 2.5G or 1G devices, you may need to manually set the correct speed for the specific SFP+ port.
- DAC/AOC Cables: If using Direct Attach Copper (DAC) or Active Optical Cables (AOC), navigate to Port Media Type Config and select the appropriate DAC length or matching DAC option for AOC cables.
5.4 Web Management and Port Configuration Video
Video: A detailed guide on navigating the web management interface, including logging in, saving configurations, and configuring port settings for both RJ45 and SFP+ ports.
6. Advanced Features
The Binardat Managed Switch supports a range of Layer 2 and Layer 3 features to optimize network performance and security:
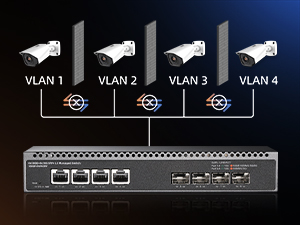
- VLAN Configuration: Supports VLANs for network segmentation, enhancing security and managing traffic flow.
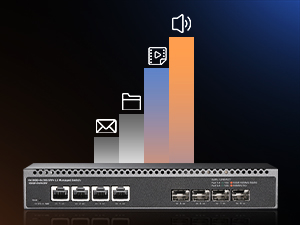
- Quality of Service (QoS): Prioritize critical network traffic (e.g., 8K video, VoIP) to ensure consistent performance.
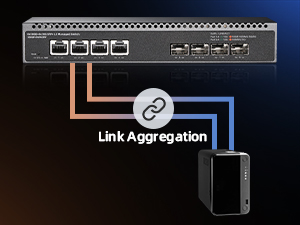
- Link Aggregation (LACP): Combine multiple physical links into a single logical link for increased bandwidth and redundancy.
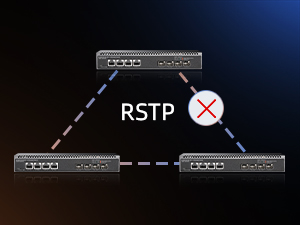
- Spanning Tree Protocols (STP/RSTP/MSTP): Prevent network loops and ensure network stability.
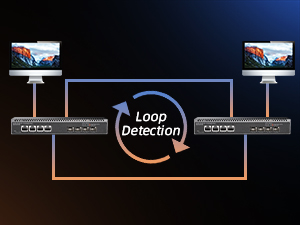
- Loop Detection: Automatically detect and mitigate network loops.
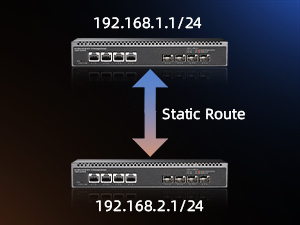
- Static Route: Configure static routes for efficient data forwarding between different network segments.
- DHCP Server: Assign IP addresses automatically to devices on the network.
- ACL (Access Control List): Implement security policies to filter network traffic.
- SNMP: Monitor and manage network devices remotely.
- Bandwidth Control: Manage bandwidth allocation for specific ports or users.
7. Maintenance and Troubleshooting
7.1 General Maintenance
- Keep the switch in a well-ventilated area to ensure proper airflow and heat dissipation.
- Regularly check for firmware updates on the manufacturer's website (if available) to ensure optimal performance and security.
- Clean the device periodically with a soft, dry cloth to prevent dust accumulation.
7.2 Troubleshooting Common Issues
- No Power: Ensure the power cable is securely connected to both the switch and the power outlet. Verify the power outlet is functional.
- No Link/Activity LED: Check the Ethernet or SFP+ cable connections. Ensure the connected device is powered on and functioning correctly. For SFP+ ports, verify the correct media type is configured in the web interface if using DAC/AOC cables or specific SFP modules.
- Connectivity Issues with RJ45 Ports: If experiencing intermittent connectivity, ensure auto-negotiation is enabled for the RJ45 ports. Manually forcing speed settings can sometimes cause issues.
- Fan Noise: The fan is temperature-controlled. Increased noise during boot-up or under heavy load is normal. If the fan remains excessively loud during idle operation or if the device feels unusually hot, ensure proper ventilation.
- Cannot Access Web Interface: Verify your computer's IP address is in the same subnet as the switch's default IP (e.g., 192.168.2.x or 192.168.10.x). Try resetting the switch to factory defaults if the default IP or login credentials have been forgotten.
7.3 Factory Reset
To reset the switch to its factory default settings, navigate to Maintenance > Reset > Factory Default in the web interface, check the box, and click 'Apply'. This will erase all custom configurations.
8. Specifications
| Feature | Specification |
|---|---|
| Model Number | 4x10G Eth + 4x10G SFP Managed |
| Number of Ports | 8 (4x 10Gbps RJ45, 4x 10G SFP+) |
| Interface Type | RJ45, SFP+ |
| Data Transfer Rate | 160 Gigabits Per Second (Switching Capacity) |
| RJ45 Port Speed | Auto-adaptive 10G/5G/2.5G/1G/100M |
| SFP+ Port Speed | Supports 10G/2.5G/1G SFP modules |
| Management Type | L3/L2 Web Managed |
| Network Protocols | IEEE802.3ae, IEEE802.3bz, IEEE802.3ab, IEEE802.3x, IEEE802.3az |
| Upper Temperature Rating | 55 Degrees Celsius |
| Item Weight | 2.86 pounds |
| Package Dimensions | 12.32 x 8.03 x 3.27 inches |
| Color | Black |
| Compatible Devices | Desktop, Laptop, Server |
9. Safety Information
- Do not expose the device to water or excessive humidity.
- Do not attempt to open or repair the device yourself. Refer to qualified service personnel.
- Ensure the power adapter is correctly rated for your region's voltage.
- Keep the device away from heat sources and direct sunlight.
- Use only the power cable provided with the device.
10. Warranty and Support
For warranty information and technical support, please refer to the documentation provided with your purchase or visit the official Binardat website. Keep your proof of purchase for warranty claims.

